The IDrive web client helps you upload, view, search, and restore files directly from the web. Use your username and password to sign in at www.idrive.com. You can share data with friends, view backup status reports, manage your account subscription, etc.
View backed up files and folders
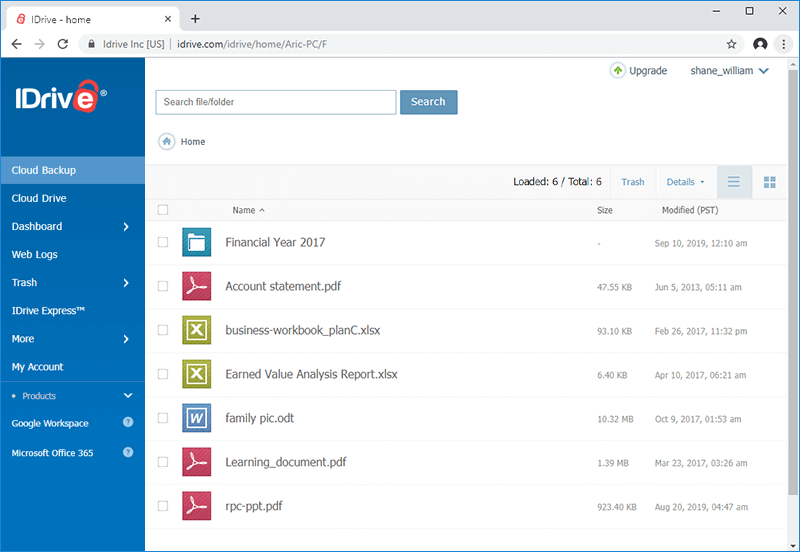
Once signed in, computers from where your data is backed up are displayed. Click on the computer/drive name to view all your backed up files and folders. The same folder structure, as on your local computer is maintained.
Restore your data
To restore,
Click on the file that you want to restore to your local computer.
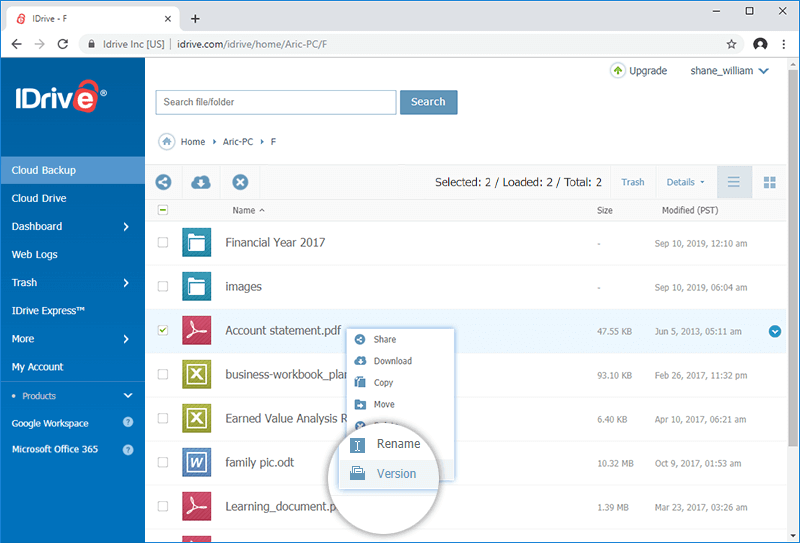
To restore any older version of a backed up file, click alongside the file that you wish to restore and select 'Version'.
Provide the 'Encryption Key' (required only once for a session). In case you had opted for the default key, you can directly restore files to your local computer.
Search backed up files and folders
In the 'Search' box, provide the name of the file or folder that you wish to find in your account.
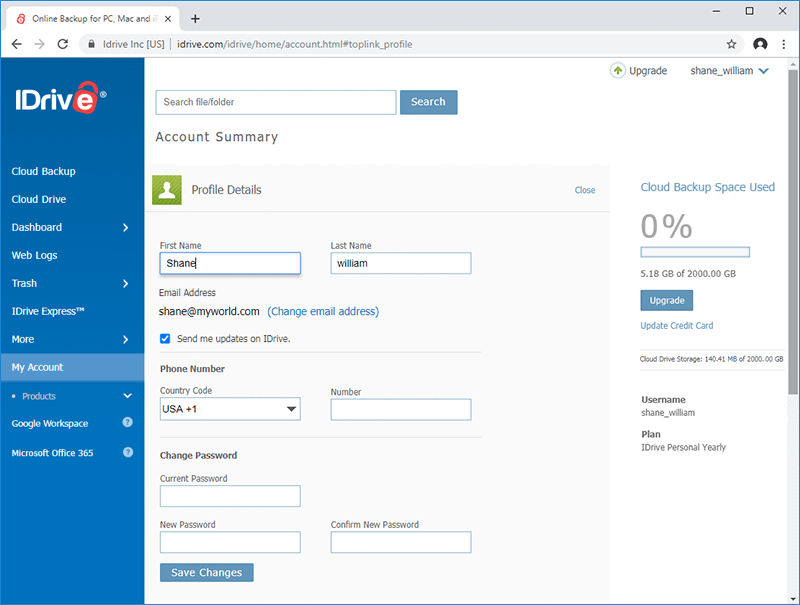
Sign in to your account via the web and click on your user-name, on the top right corner of the screen. Select 'Profile' to change your name, password and email address.
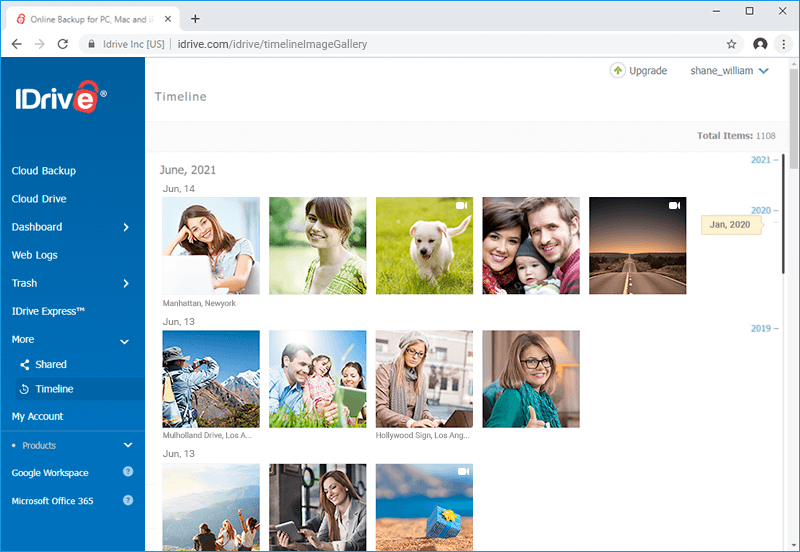
On the IDrive web interface, the 'Timeline' tab displays all the photos and videos, uploaded via multiple mobile devices, sorted by date. Additionally, location for all the photos and videos will be displayed if the GPS location is enabled in your mobile device.
Using Timeline, you can share and download your mobile photos / videos, backed up with IDrive.
To share,
Sign in to IDrive, and click the 'Timeline' tab. A list of your backed up photos and videos sorted in descending order appears
Right-click the required media files and click .
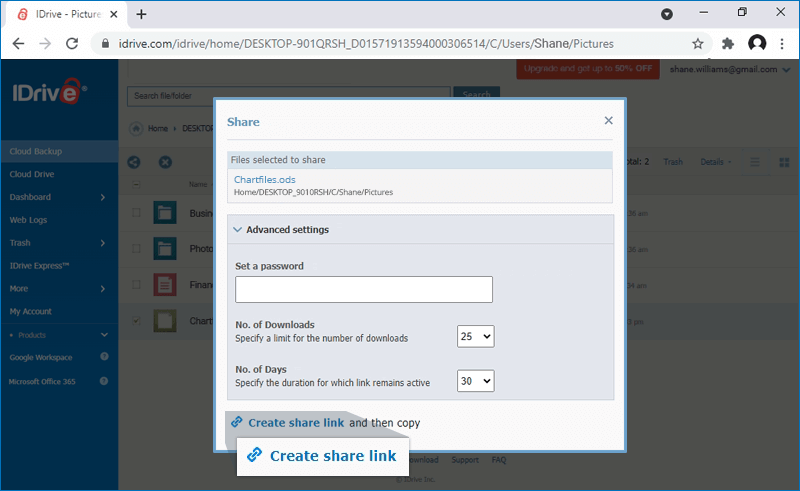
In the share popup that appears, click 'Advanced Settings' to define the following parameters:
Set a password - You can set a password for accessing the link.
No. of Downloads - You can specify a limit for the number of downloads. The maximum limit is 25.
No. of Days - You can specify the duration for which the link remains active. The maximum duration is 30 days.
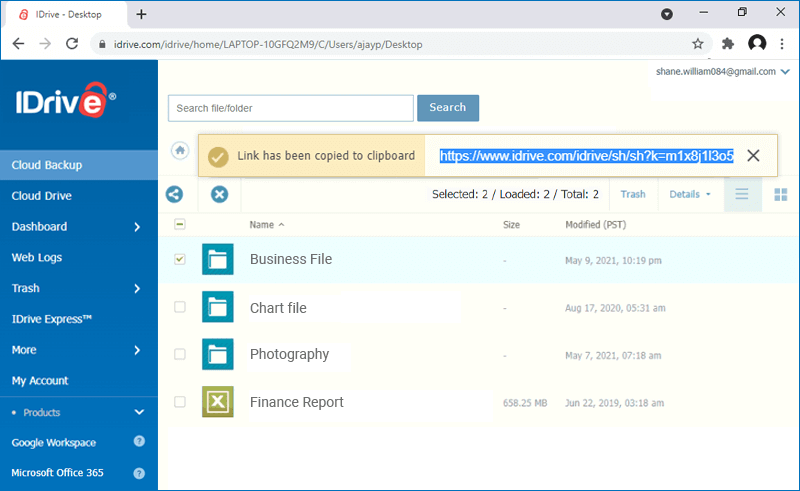
Click 'Create share link'.
Click 'Copy link' to copy the link to clipboard. Share the link with the intended recipients.
A share link will be created and you can access it from the 'Shared' tab.
Note: Share feature is limited to IDrive accounts with default encryption key.
To download,
Sign in to IDrive, and click the 'Timeline' tab. A list of your backed up photos and videos sorted in descending order appears.
Right-click the required media files and click .
If you want to delete a photo or video, however, you will have to go to the 'Backup' tab, open the device folder, and navigate the folder with the images you want to delete. Select the images you want to delete, and click .
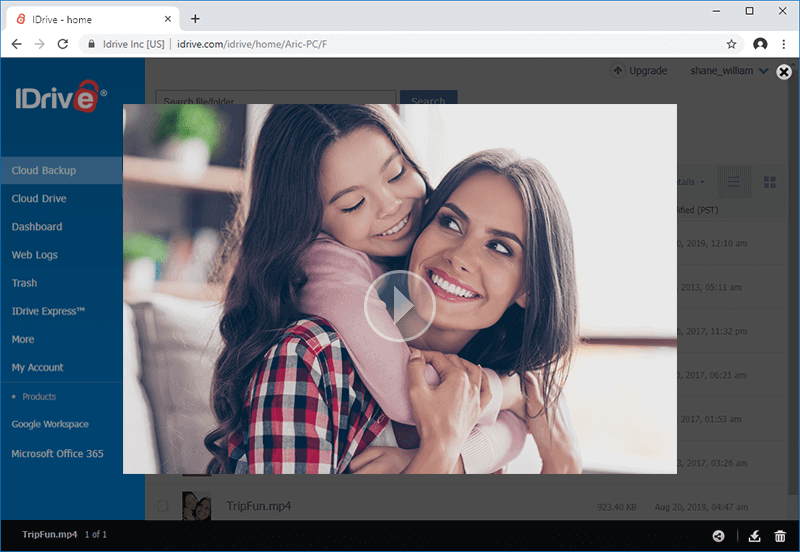
Yes, you can stream video files directly from your IDrive account using any web browser. You can play MP4, WebM, FLV, MOV, .3gp, .3gpp, .3g2, .asf, .avi, .dv, .m2t, .m4v, .mkv, .mpeg, .mpg, mts, .ogv, rm, .ts, .vob, .wmv media file formats.
Note: You can stream videos that are shorter than 30 minutes or have a file size less than 2 GB.
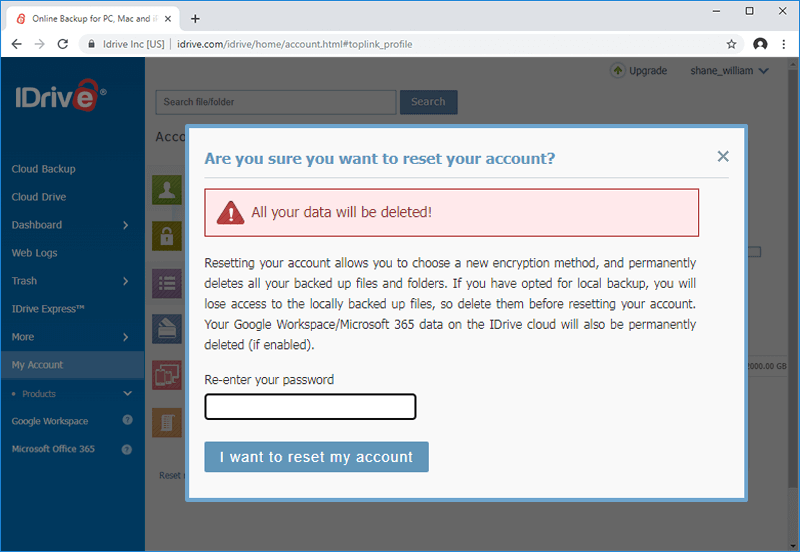
You should reset your IDrive account only if you must modify its encryption type or the encryption key.
Note: Resetting your account permanently deletes all your backed up files and folders. If you have opted for local backup, you will lose access to the locally backed up files, so delete them before resetting your account.
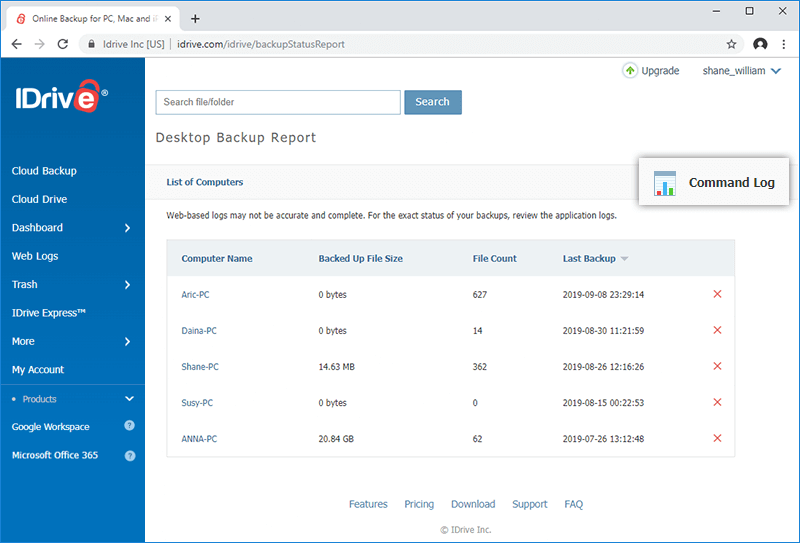
IDrive's Command Log feature maintains a list of all operations like Upload, Download, Rename, Delete etc., performed in your account using the desktop application or the web interface or the IDrive APIs.
To view the command log report,
Click on your user-name on the top right corner.
Click Desktop Backup Report, under Reports.
Click on the 'Command Log' icon.
By default, all activities performed in the current month are displayed.
Click on the view option under “Details”. You can also download the complete details by using the download option.
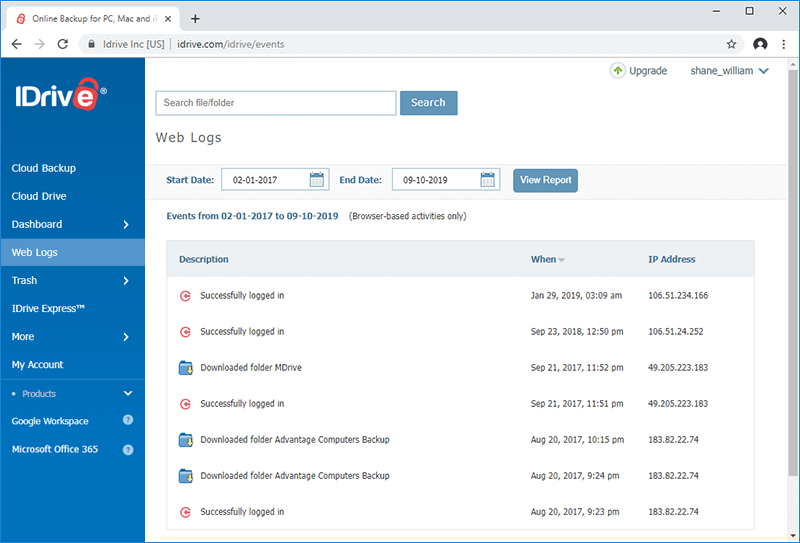
The Events feature provides the history of the activities performed in your IDrive account in a browser session. You can track sign in / sign out activities, file and folder operations like upload, download, share, etc. The date and time of the activity and the IP address from where the activity originated is also listed.
To view the browser based activities,
Click on your user-name on the top right corner.
Click Events, under Reports.
By default, all activities performed in the current day are displayed.
To view previous details, select the Start Date and End Date and click View Report.
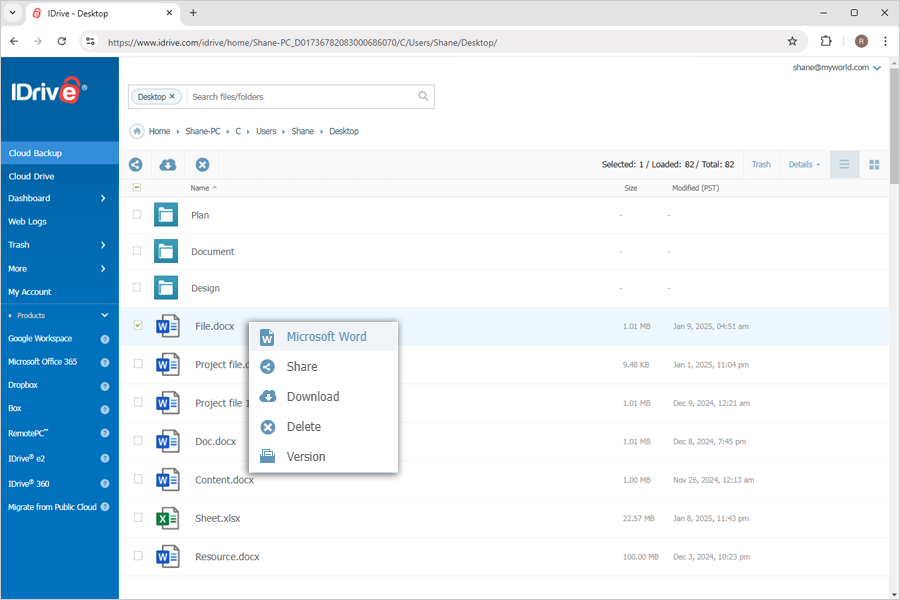
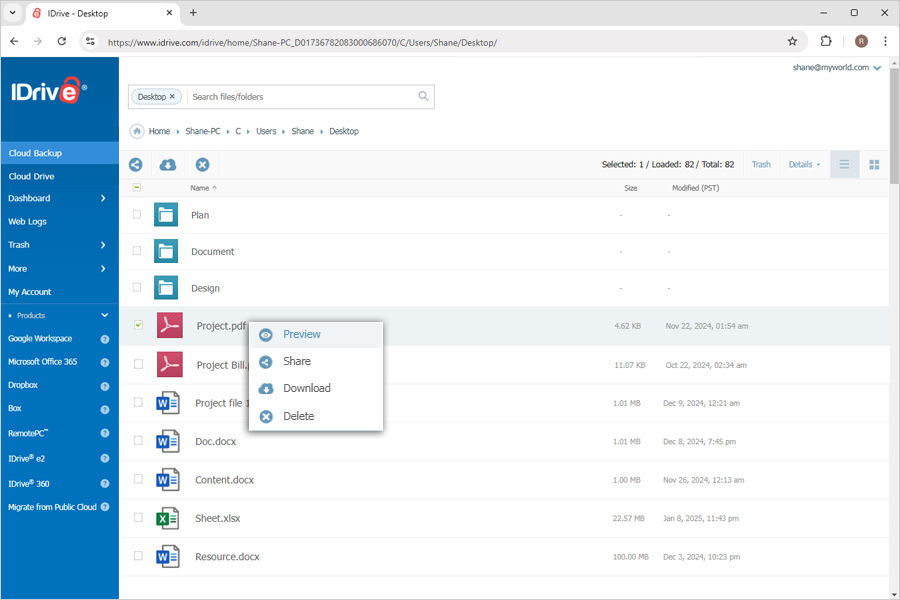
Can I preview backed up Word, Excel, PowerPoint, and PDF files in my IDrive cloud backup account?
Yes, you can preview your backed up Word, Excel, PowerPoint, and PDF files in your IDrive cloud backup account. The following file formats are supported:
Go to the 'Cloud Backup' tab and click on the required file to directly open it in your browser.
Alternatively, right-click on the file you want to preview and select 'Microsoft Word', or 'Microsoft Excel' or 'Microsoft PowerPoint' from the drop-down list to open it in the browser.
View PDF files
To preview a PDF file, click the PDF file to view it in your browser.
Alternatively, right-click on the file you want to preview and select 'Preview' from the drop-down list to open it in the browser.
However, "Cloud Backup" section has only preview support. IDrive does not support editing to ensure integrity of the backed up files.
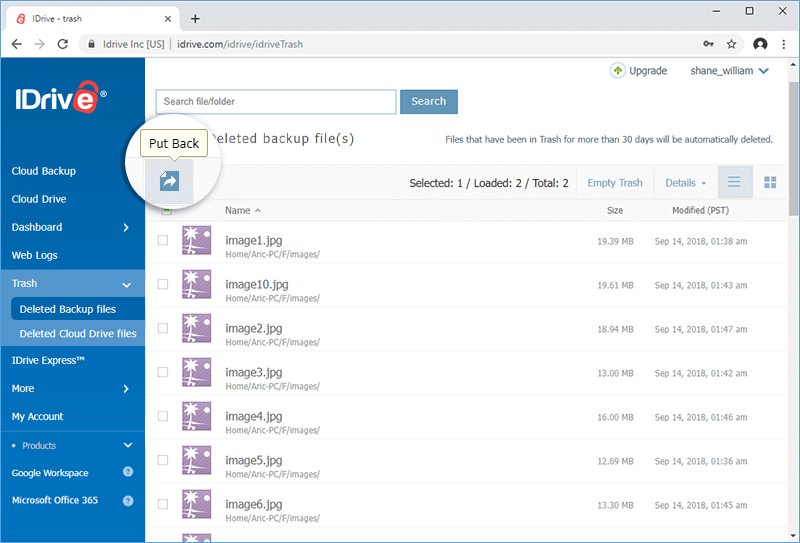
Is it possible to restore the files that are accidentally deleted from my IDrive account via the web?
Yes. All files deleted from your account will be moved to Trash. You can either move your files to the original location in your IDrive account or restore them to your local computer. The files present in Trash will automatically get deleted after a 30 day period.
Select the checkbox and click the 'Put Back' button to move the files to the original location in your IDrive account. You can also delete a file permanently from Trash, if it is no longer required.
 alongside the file that you wish to restore and select 'Version'.
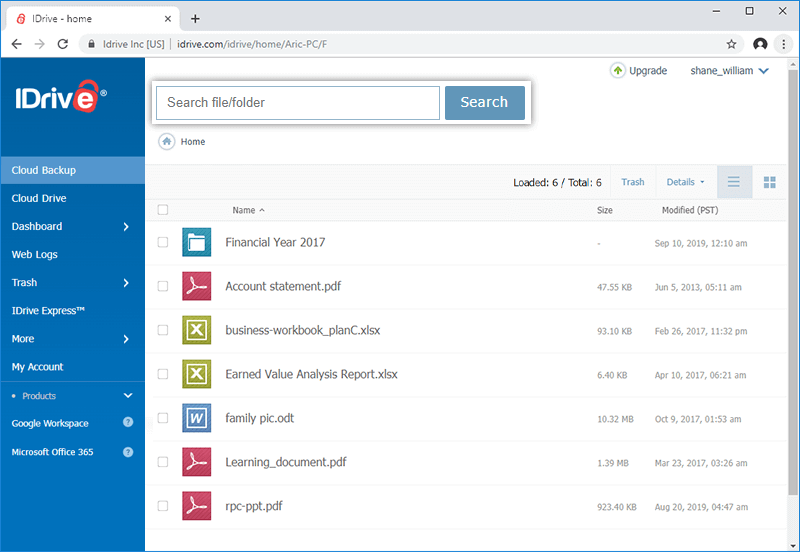
 .
.
 displayed on the top-right corner of the browser and click 'Internet options'. The 'Internet Options' window appears.
 .
.