Microsoft Office 365 Backup
If your question is not addressed below, please contact us through our support form and we'll get back to you shortly. |
||
General |
||
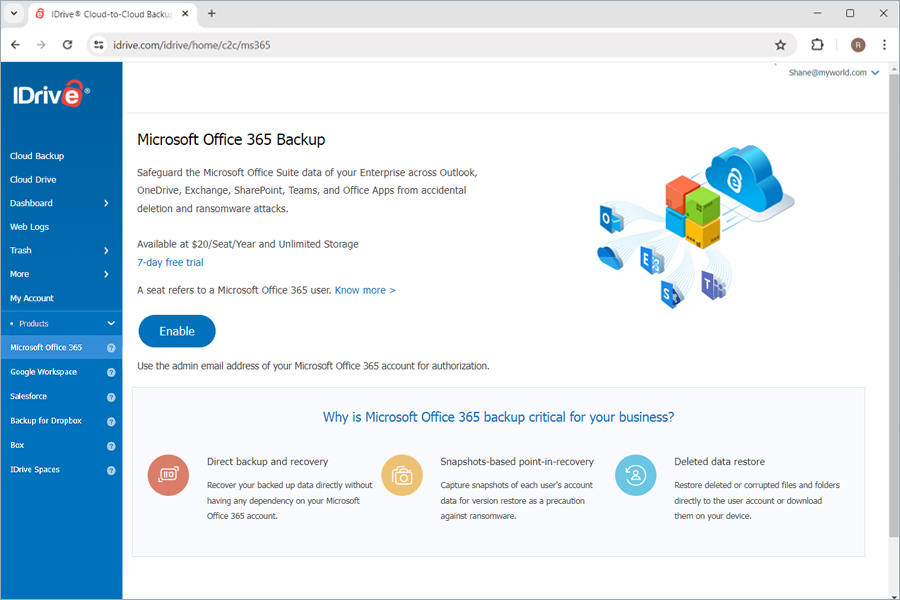
| What is IDrive® Microsoft Office 365 Backup? | ||
| Why do you need to backup your Microsoft Office 365 Suite? | ||
| Which applications are supported by IDrive® Microsoft Office 365 Backup? | ||
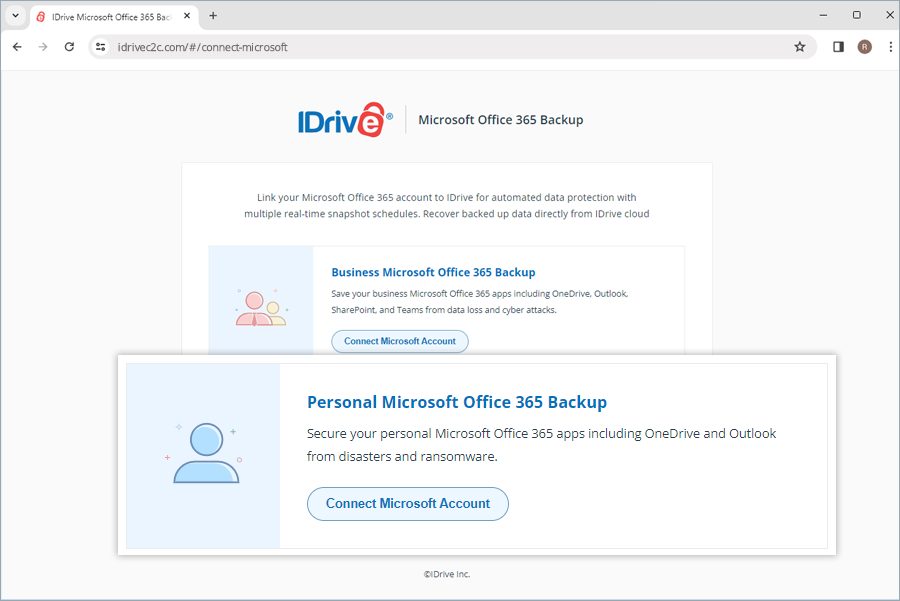
| How do I get started with IDrive® Microsoft Office 365 Backup? | ||
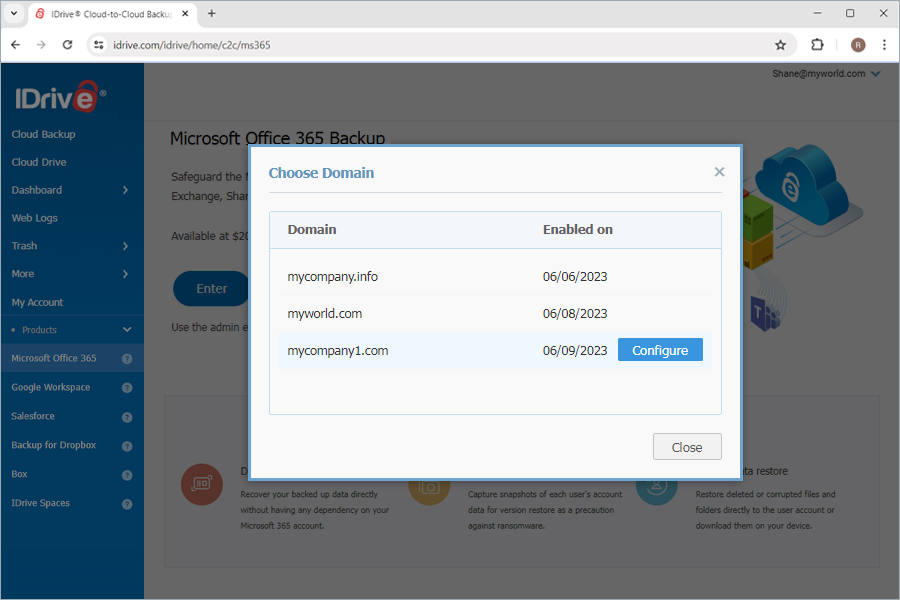
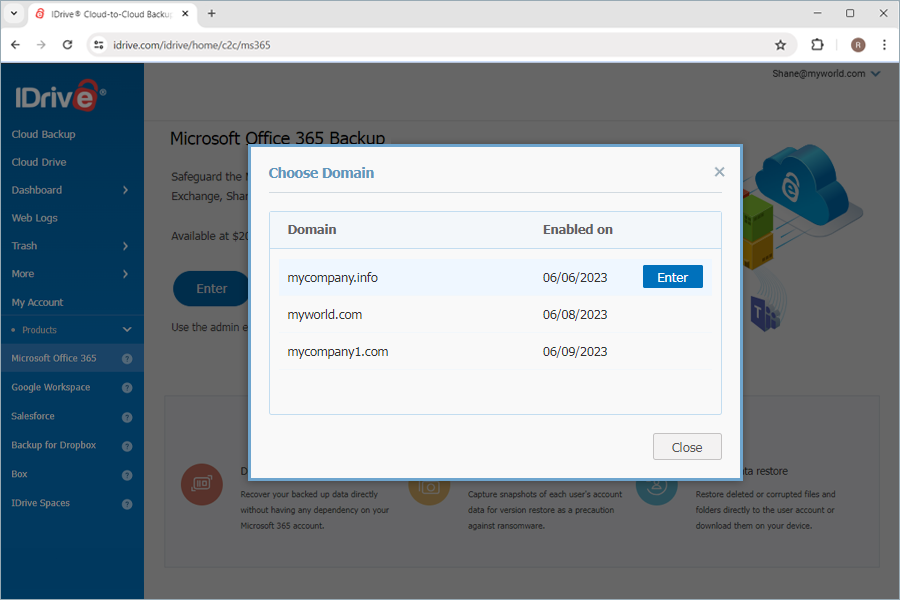
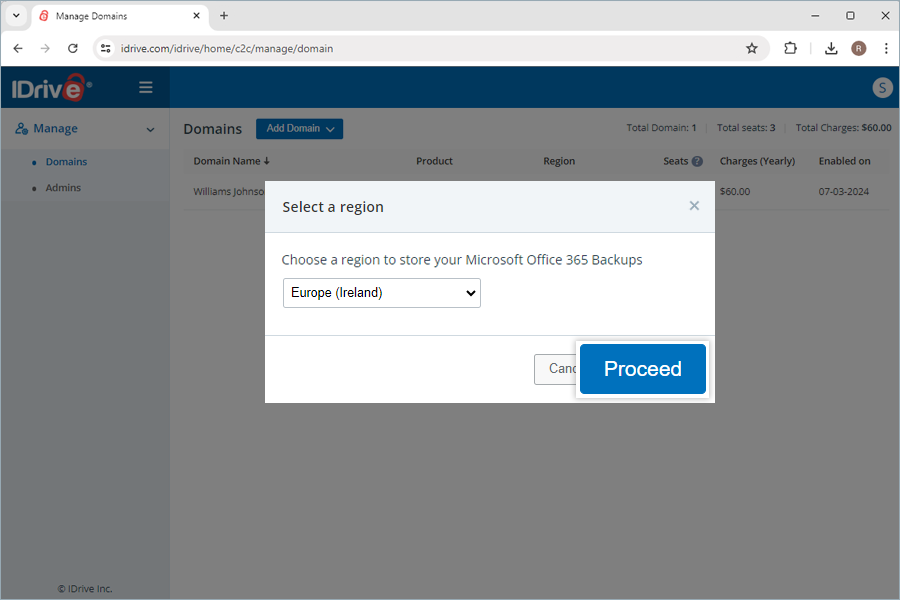
| How to add and manage new domains in IDrive® Microsoft Office 365 for backup? | ||
| Can I rename domains in IDrive® Microsoft Office 365 Backup? | ||
| Is it possible to add a user to manage backup and recovery for my Microsoft Office 365 domains? | ||
| Can I access the backed-up data from anywhere? | ||
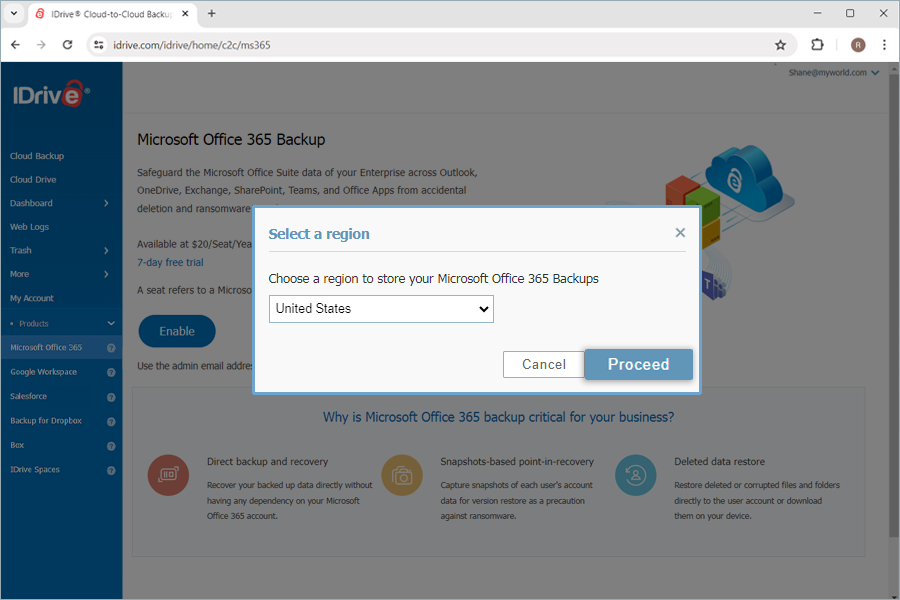
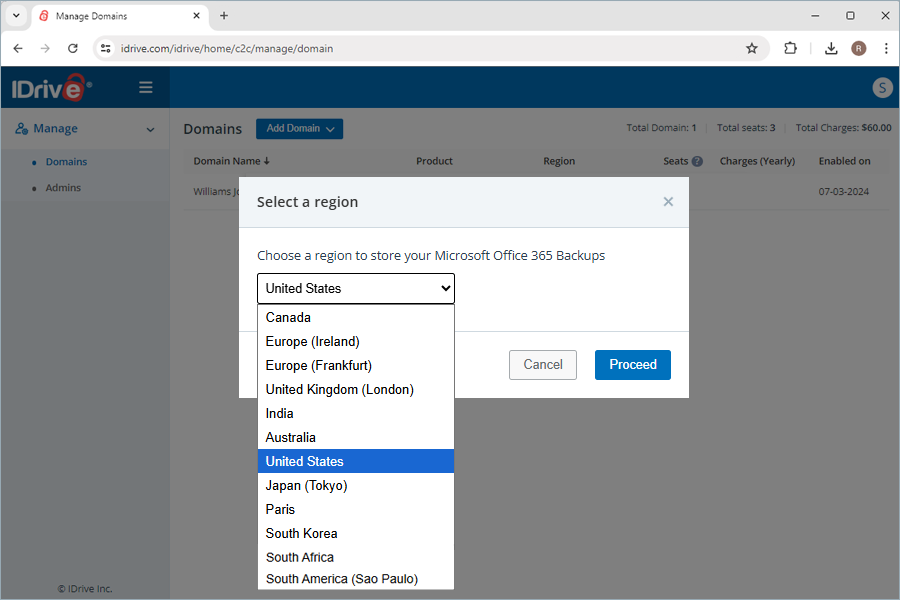
| How many storage regions are available for my backups? | ||
| How does IDrive® Microsoft Office 365 backup secure my data? | ||
| How does IDrive® Microsoft Office 365 Backup meet the HIPAA compliance requirements? | ||
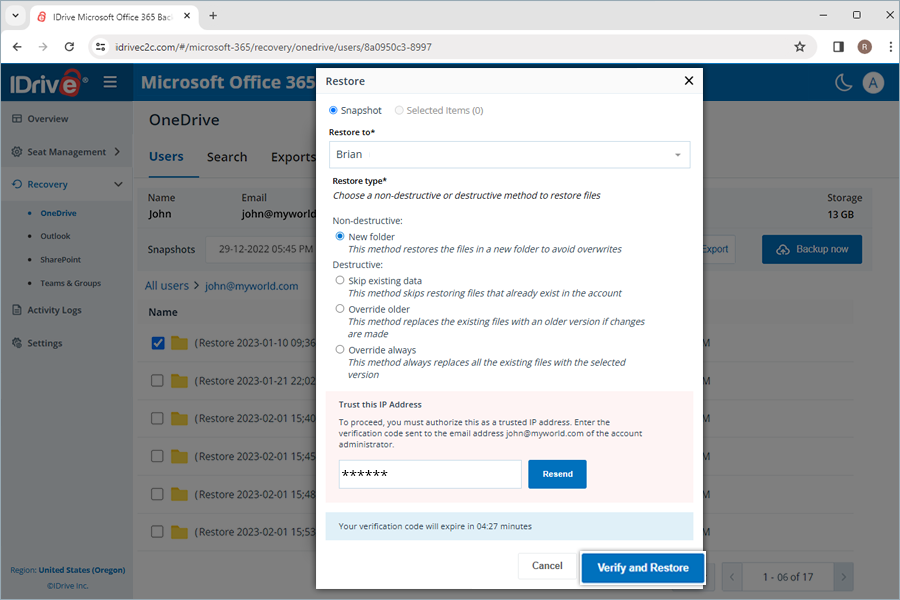
| Why am I asked to trust the IP Address while trying to export or restore data? | ||
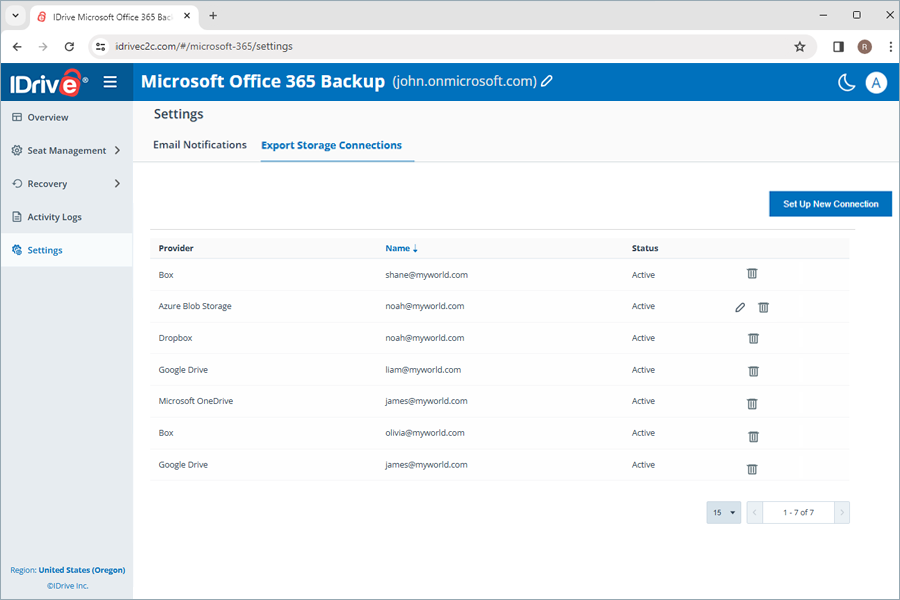
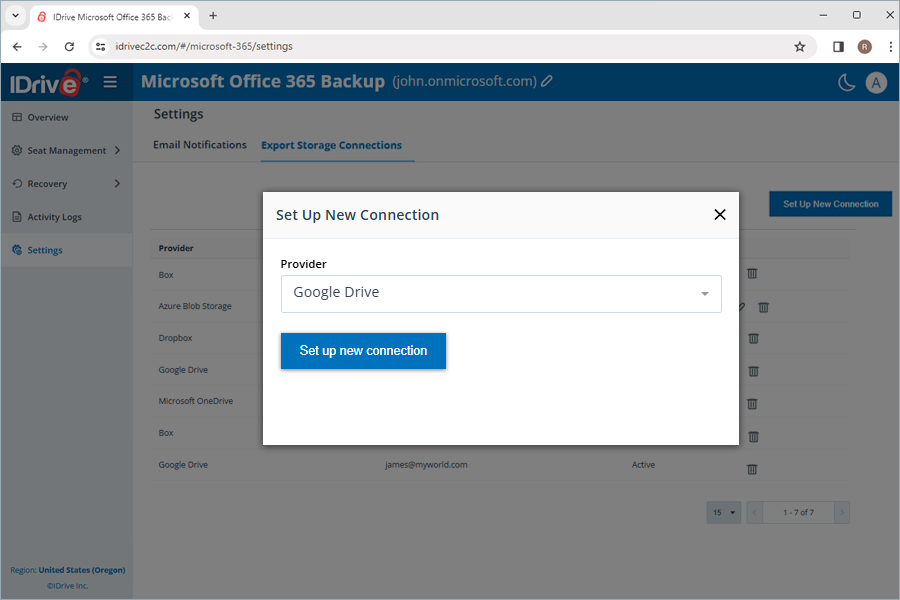
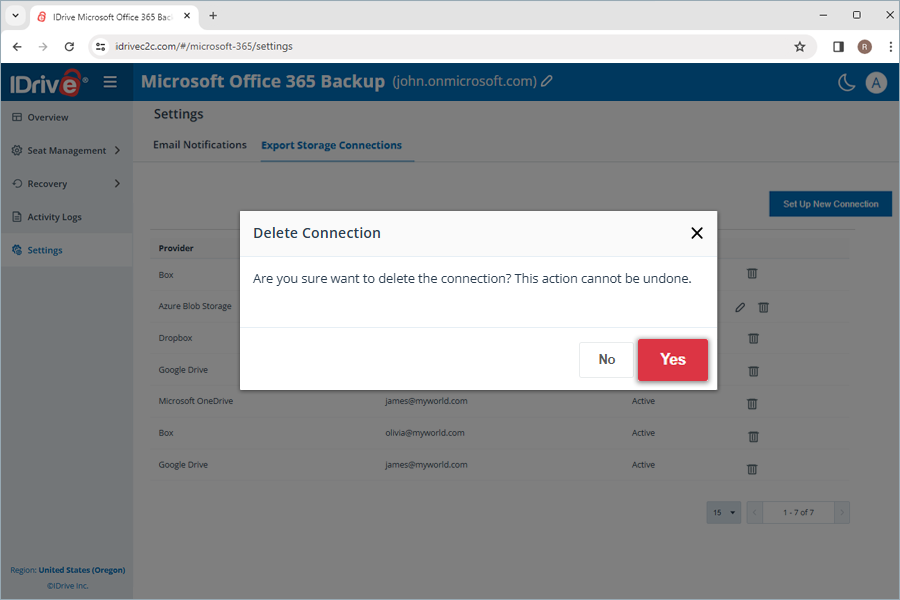
| Can I set up a connection to a storage destination of my choice to export the backups? | ||
| Why do I see errors such as "The server cannot service this request right now", "Timeout exception", or "Unknown error" during Microsoft Office 365 backups? | ||
Backup |
||
| How does IDrive® Microsoft Office 365 Backup work? | ||
| Can I back up my personal Microsoft Office 365 account? | ||
| How are the IDrive® Microsoft Office 365 Backups scheduled? | ||
| Will the subsequent changes in my backed-up files be transferred incrementally to IDrive® Microsoft Office 365 Backup? | ||
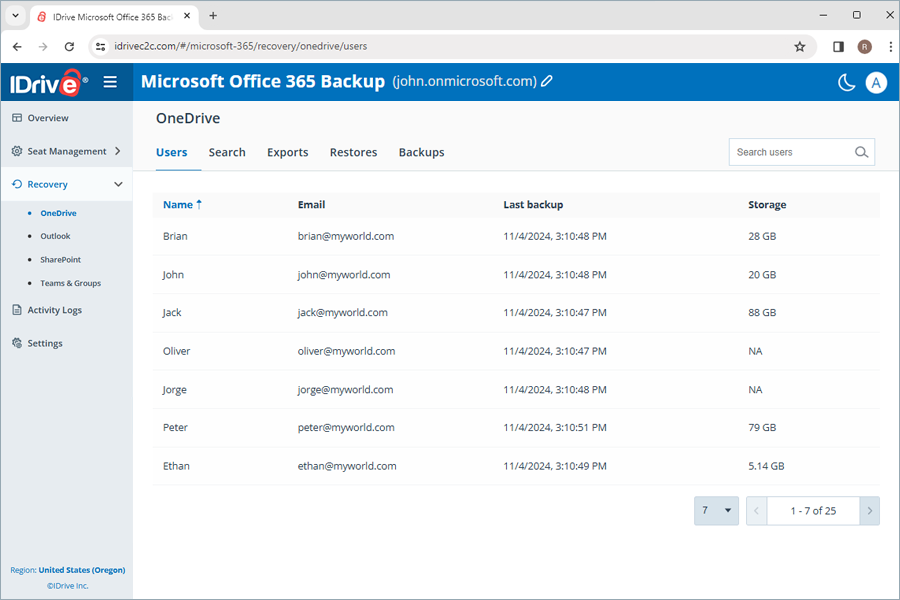
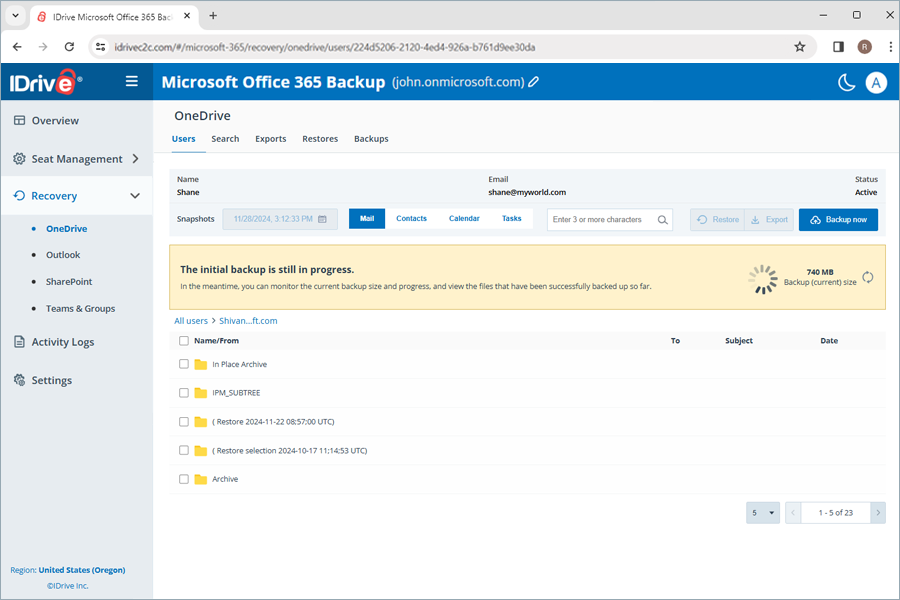
| How do I back up OneDrive data for a specific user from my IDrive® Microsoft Office 365 Backup account? | ||
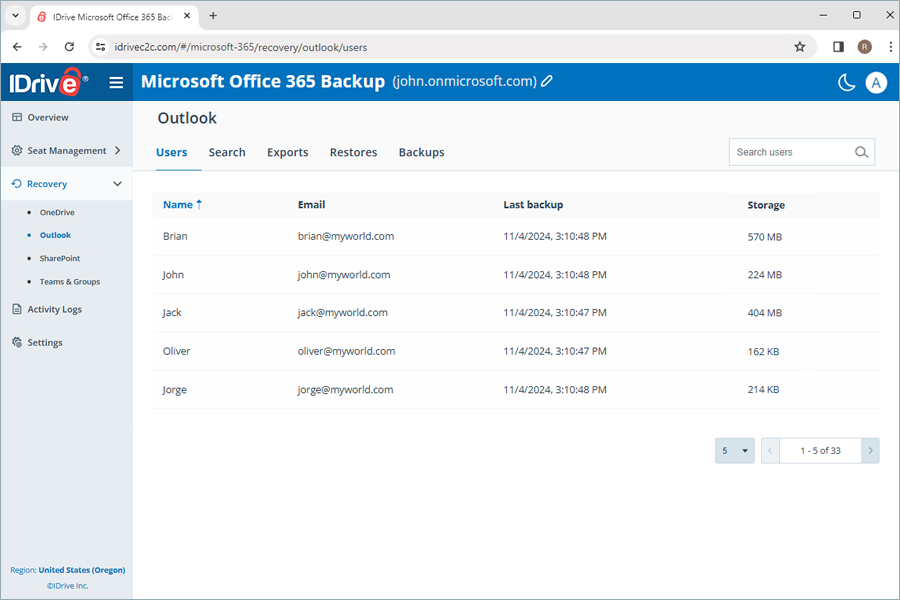
| How do I back up Outlook data for a specific user from my IDrive® Microsoft Office 365 Backup account? | ||
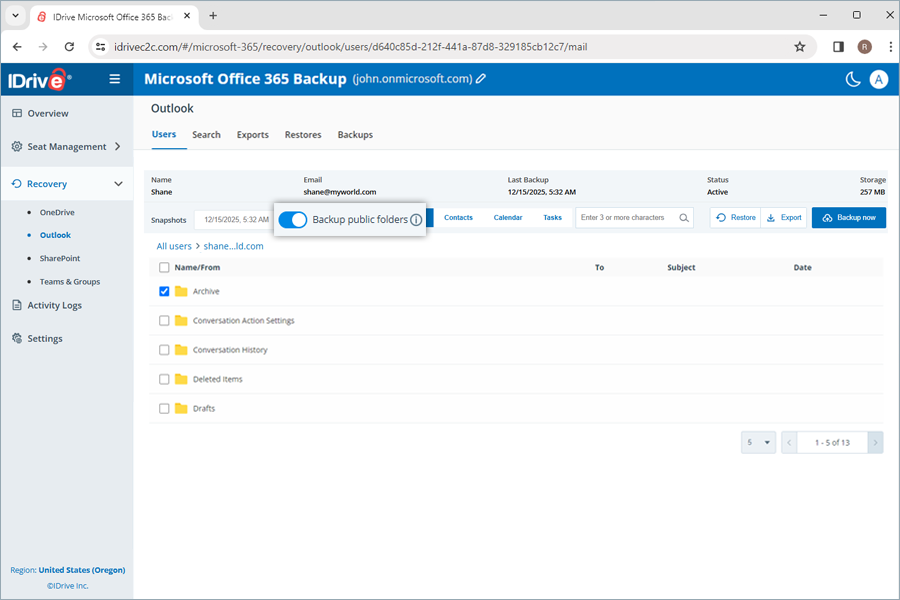
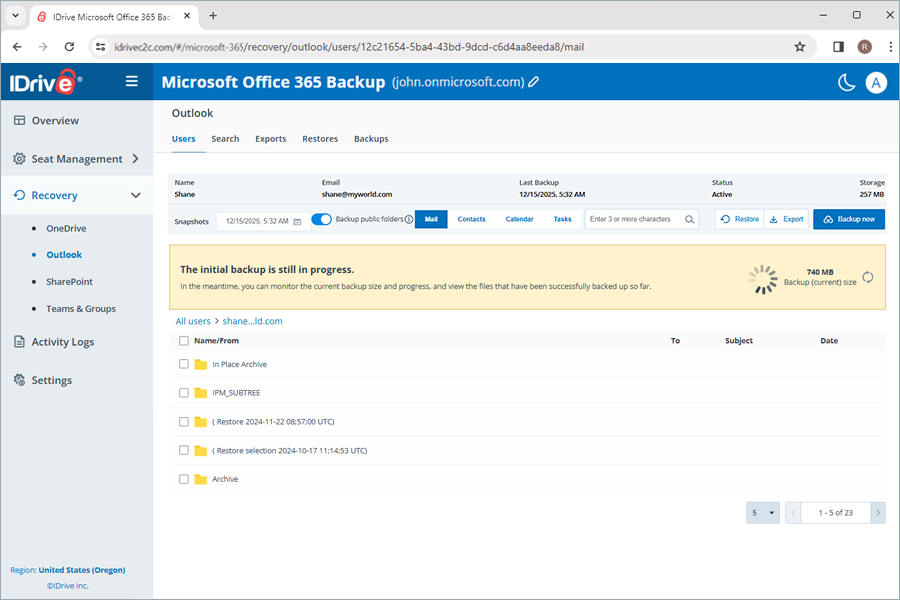
| Can I back up the In-Place-Archive and Public Folder for Outlook to my IDrive® Microsoft Office 365 Backup account? | ||
| The status for my Outlook backup is successful; however, the data in the Public Folder is not backed up. Why? | ||
| I am unable to back up my Exchange mailbox and receive an 'ErrorQuotaExceeded' message. Why? | ||
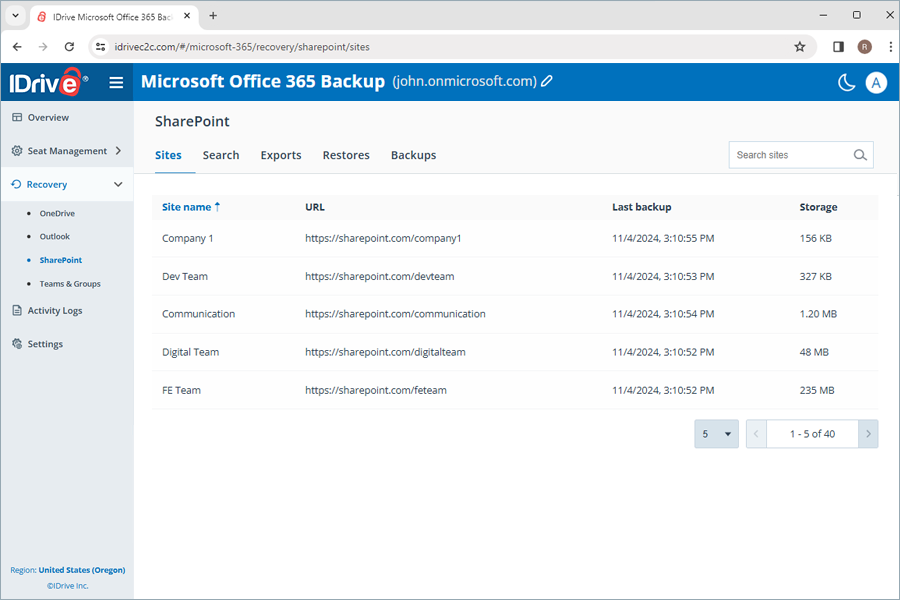
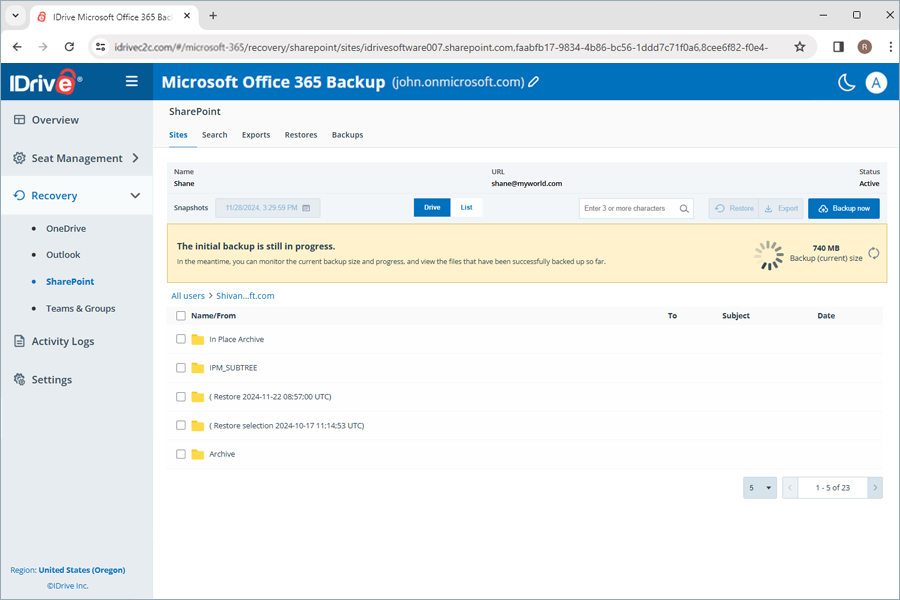
| How do I back up SharePoint data for a specific user from my IDrive® Microsoft Office 365 Backup account? | ||
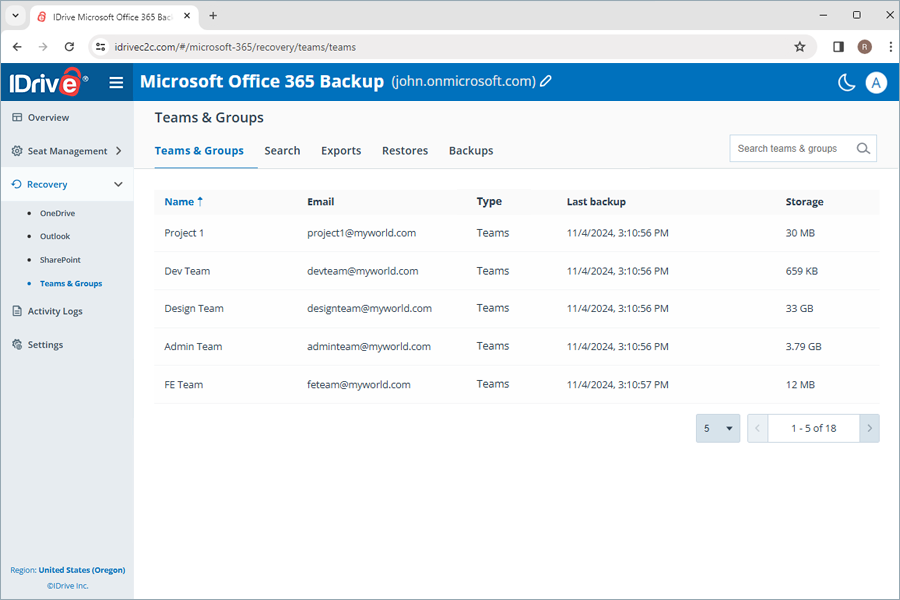
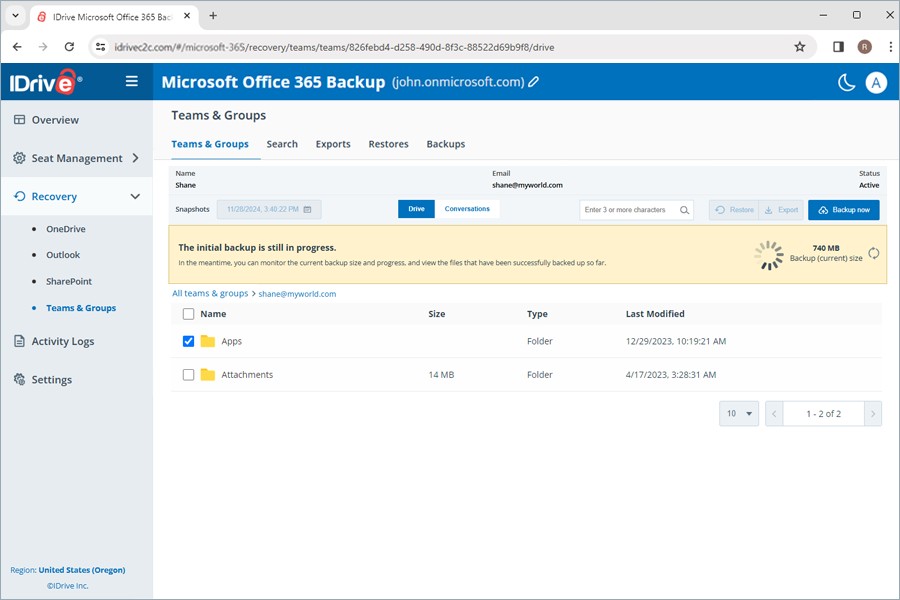
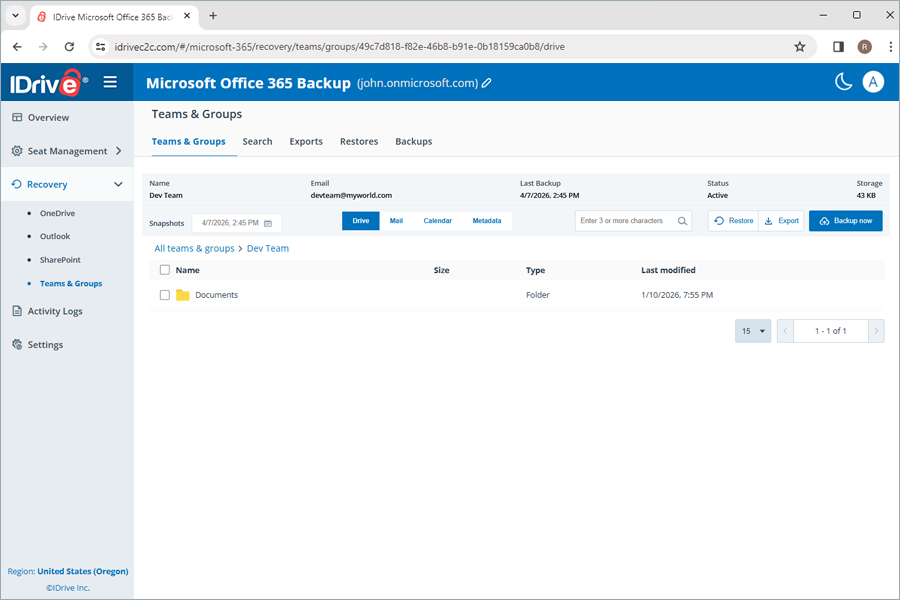
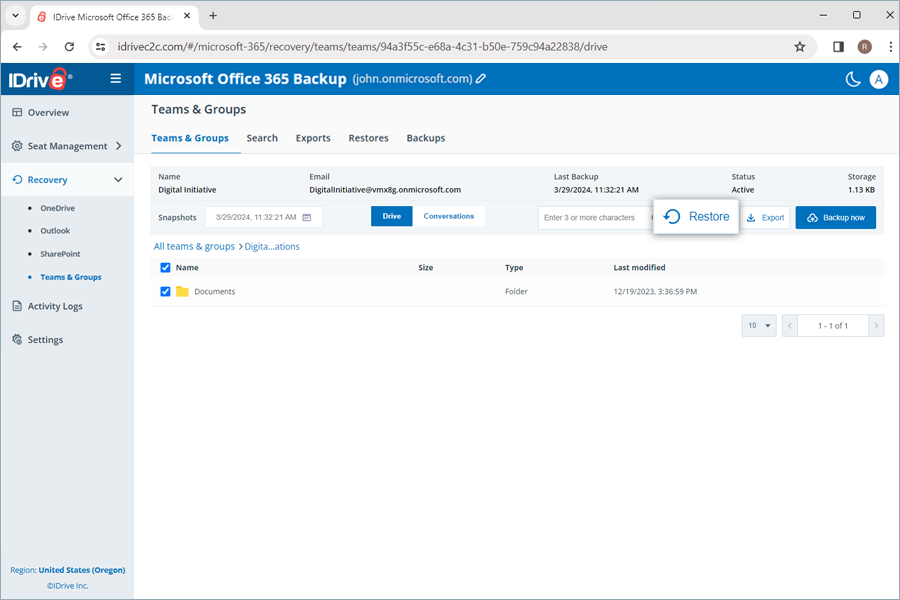
| How do I back up Teams and Groups data for a specific user from my IDrive® Microsoft Office 365 Backup account? | ||
| How does snapshot and versioning work in IDrive® Microsoft Office 365 backup? | ||
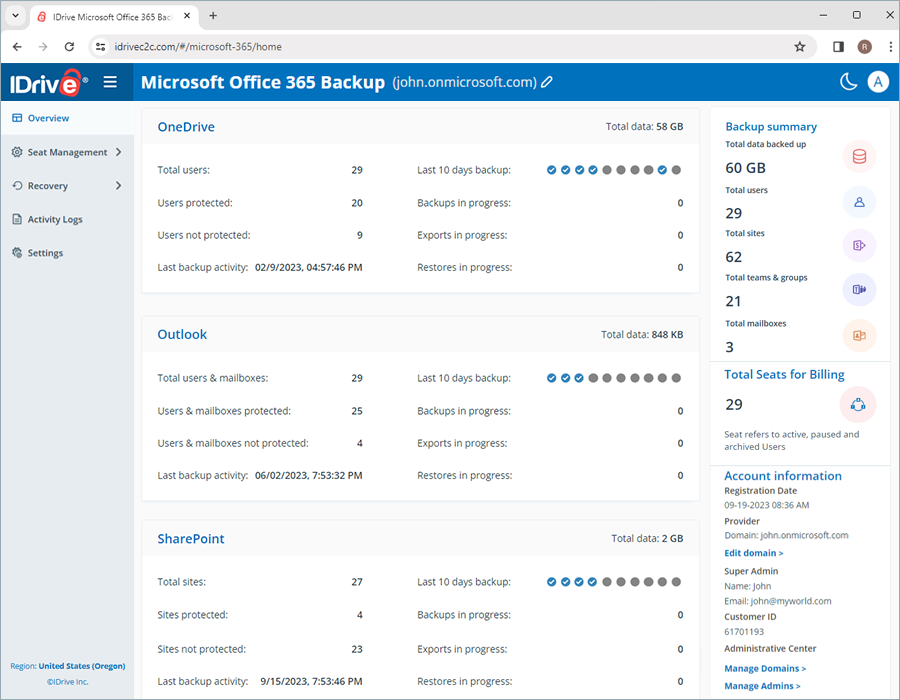
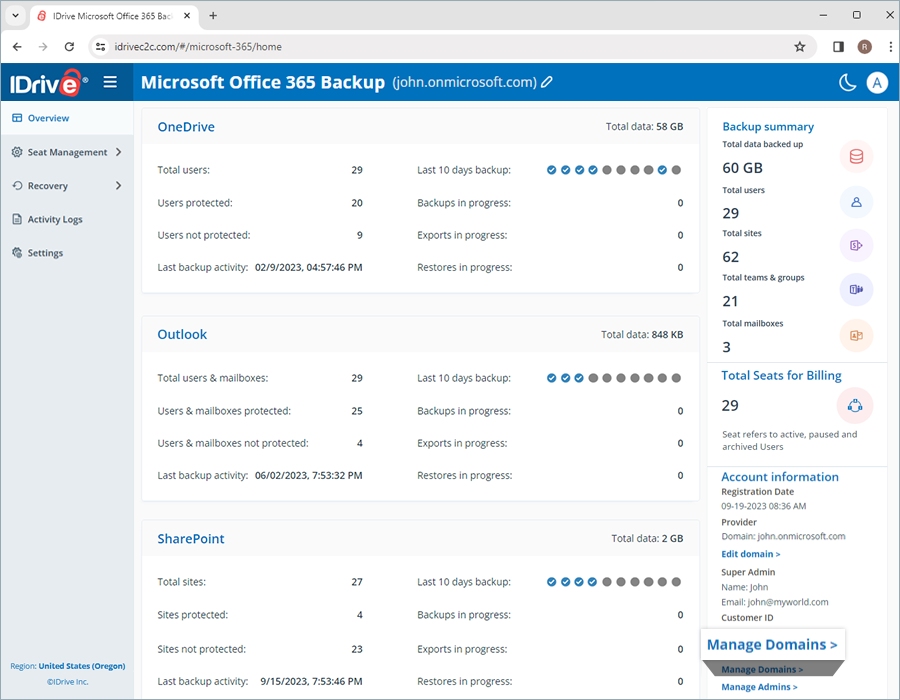
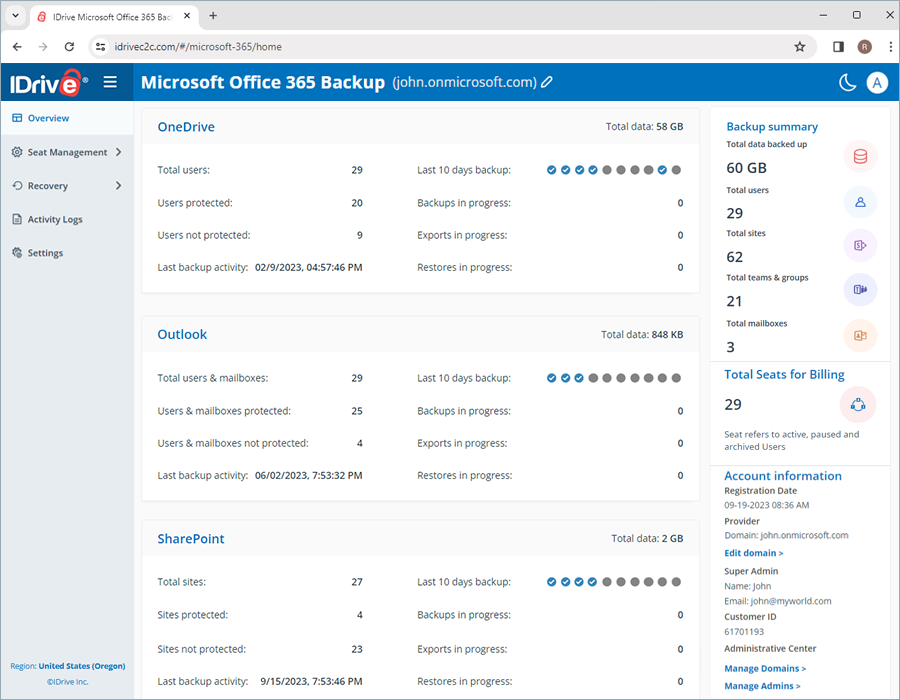
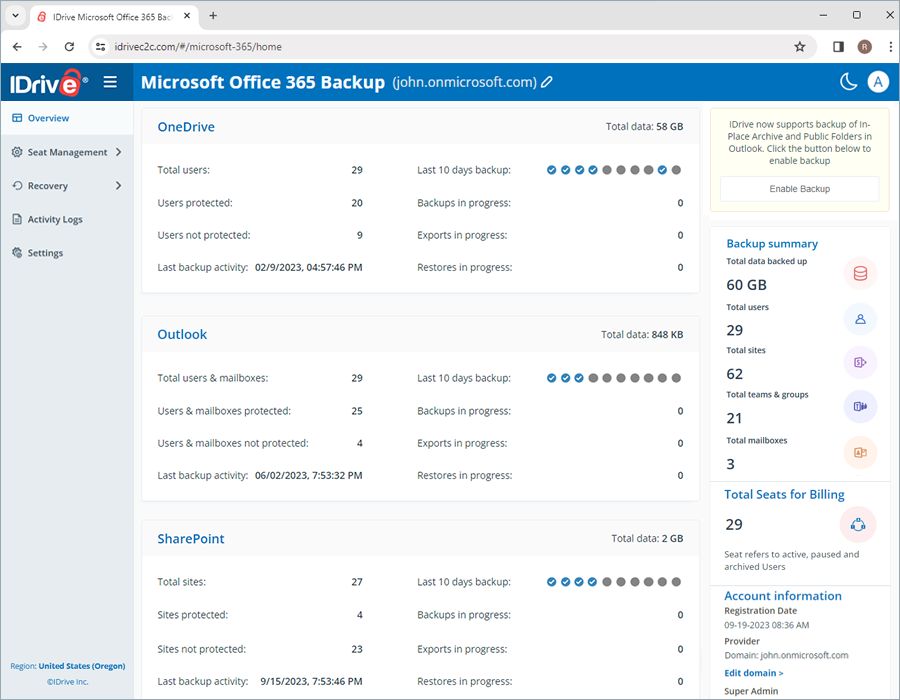
| What information can I view in the Overview tab of my web console? | ||
| Is it possible to back up only SharePoint sites or Teams and Groups data? | ||
| I successfully backed up my Outlook mailbox, but I noticed that some mailbox items were not included. Why? | ||
Seat Management |
||
| What is a Seat? | ||
| Which user management tools can I access under seat management? | ||
| How can I enable Groups backup for the existing users? | ||
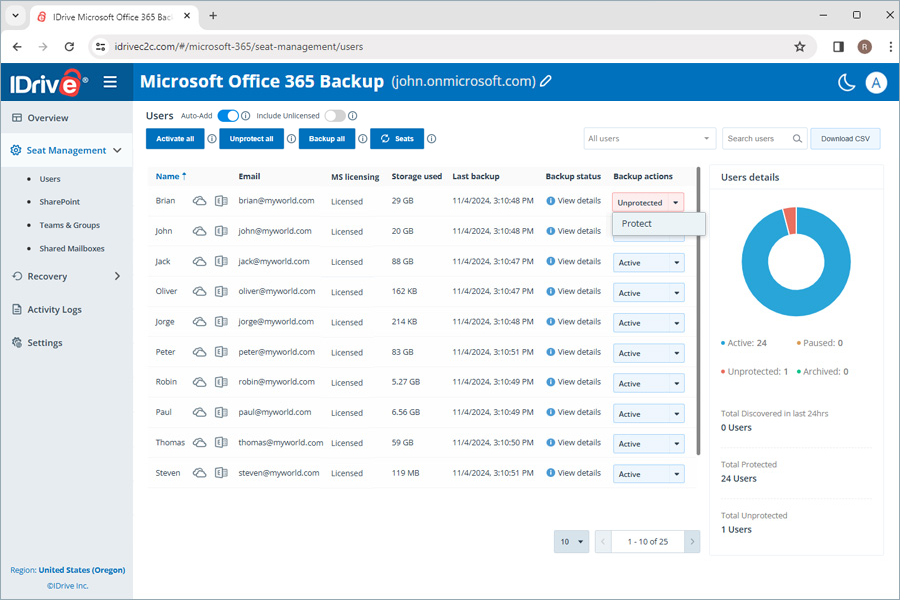
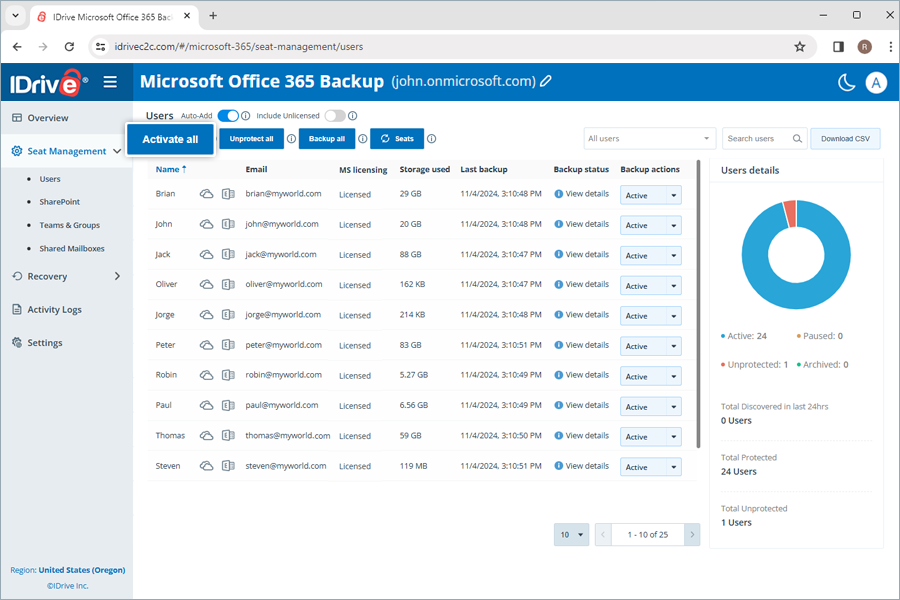
| How do I change seat status for users? | ||
| How do I add users to the IDrive® Microsoft Office 365 Backup set? | ||
| How do I enable backup for unlicensed Microsoft Office 365 accounts? | ||
| How do I re-add users to the IDrive® Microsoft Office 365 Backup set? | ||
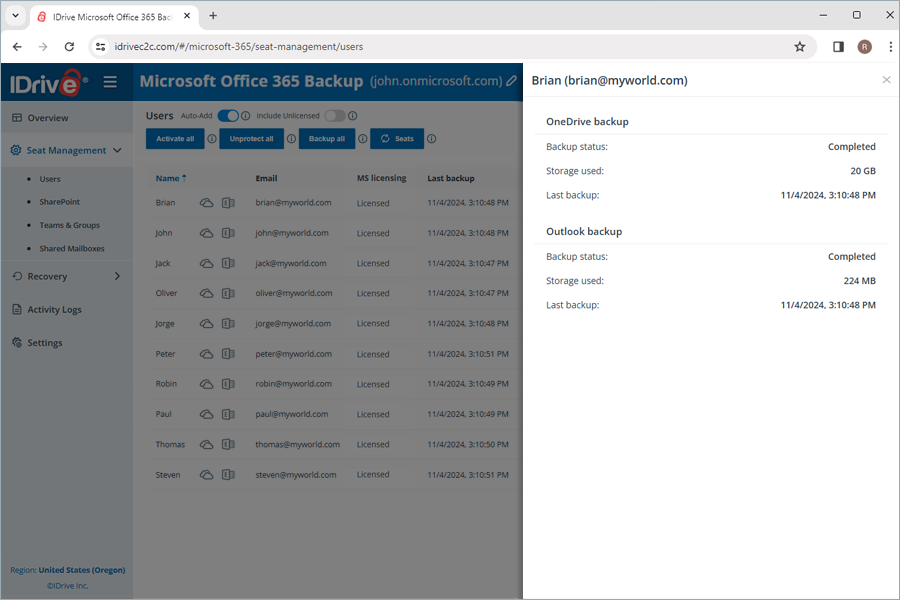
| How do I view the backup status of the users? | ||
| How does IDrive® Microsoft Office 365 Backup handle a Microsoft Office 365 user who is converted to a shared mailbox? | ||
Recovery |
||
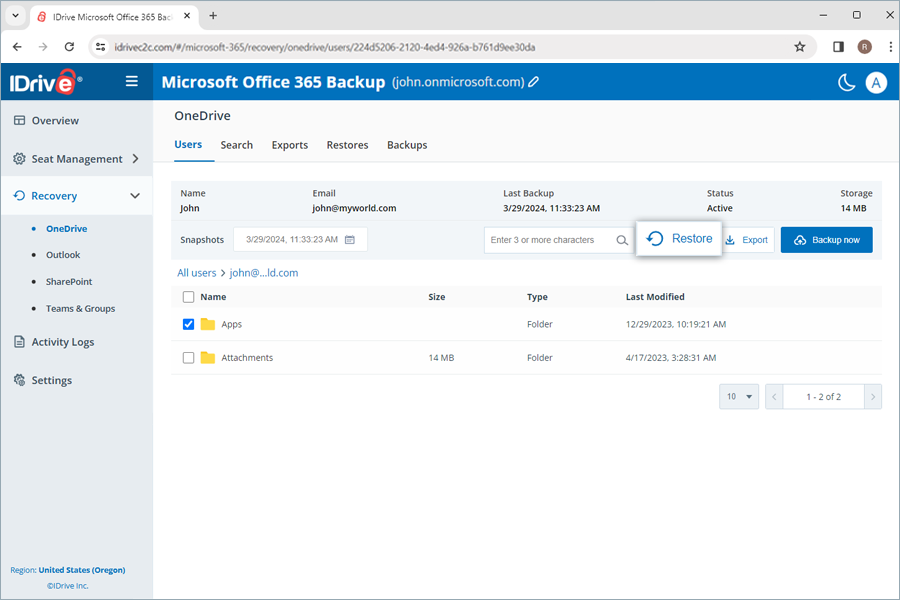
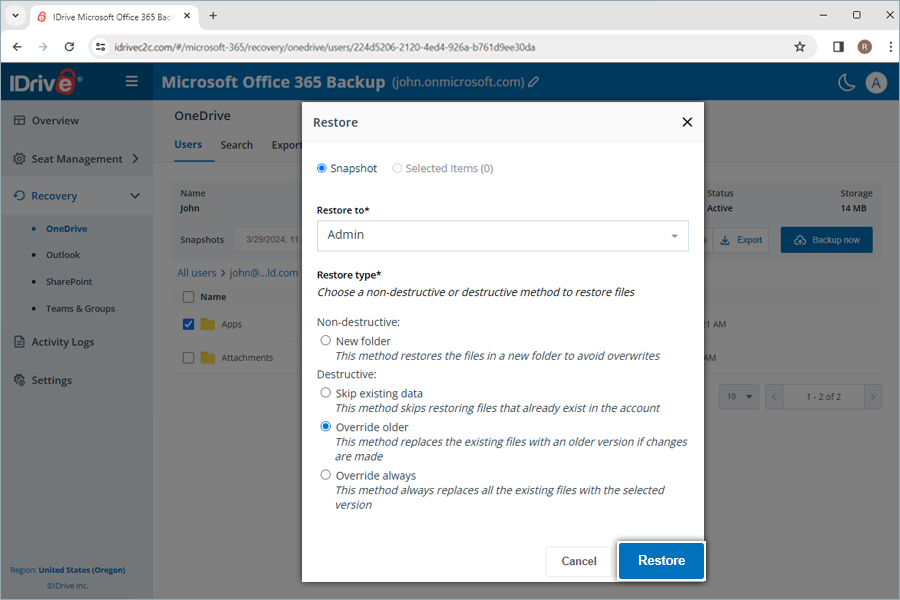
| How do I restore the backed-up OneDrive data from my IDrive® Microsoft Office 365 Backup account? | ||
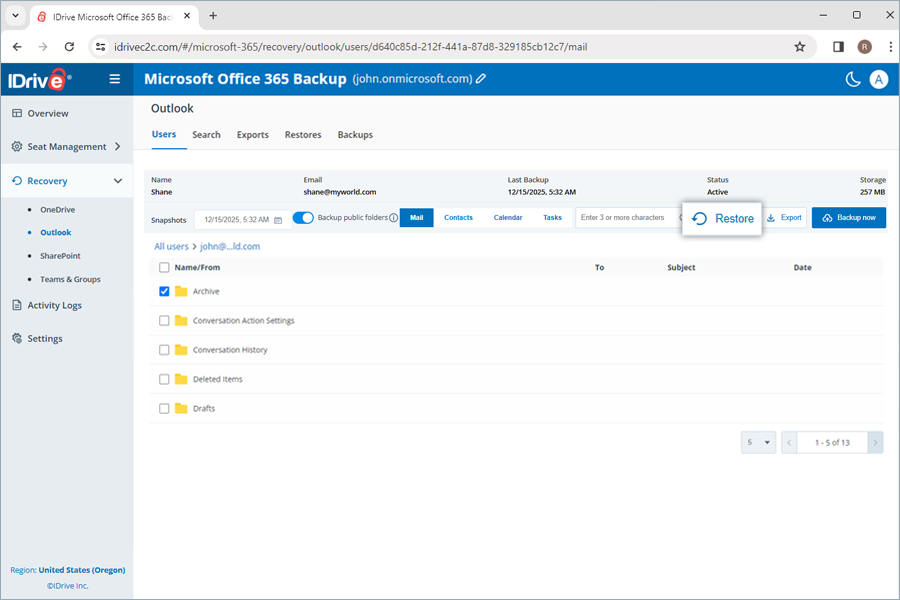
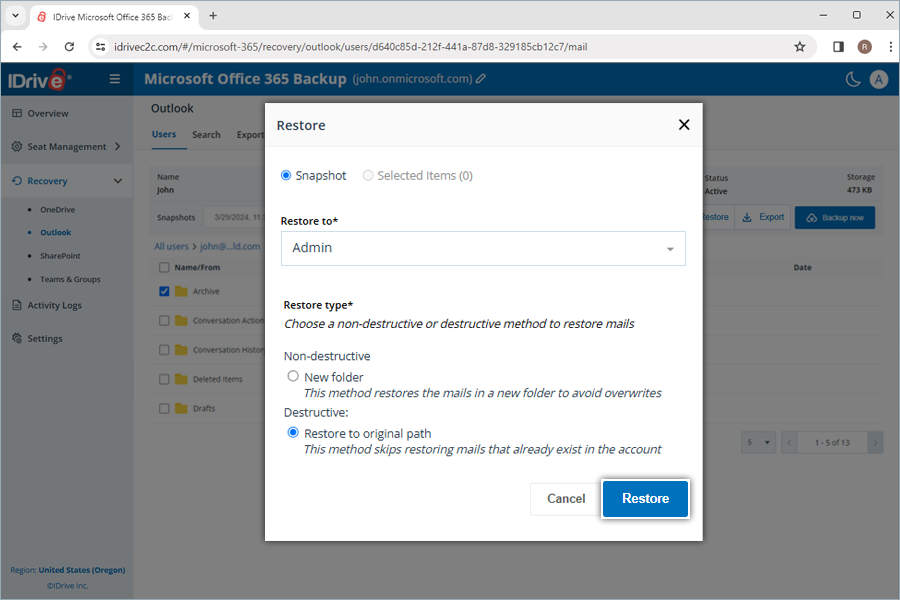
| How do I restore the backed-up Outlook emails from my IDrive® Microsoft Office 365 Backup account? | ||
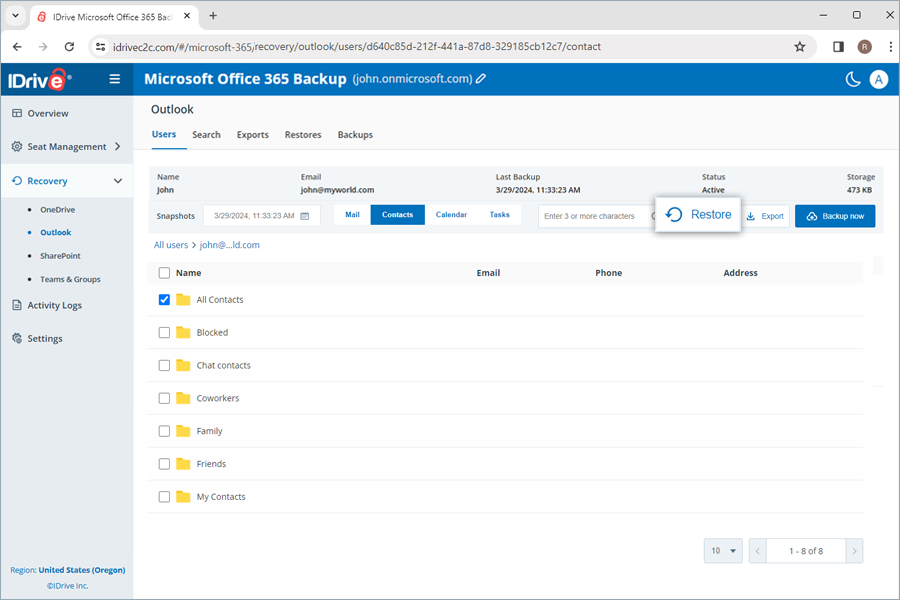
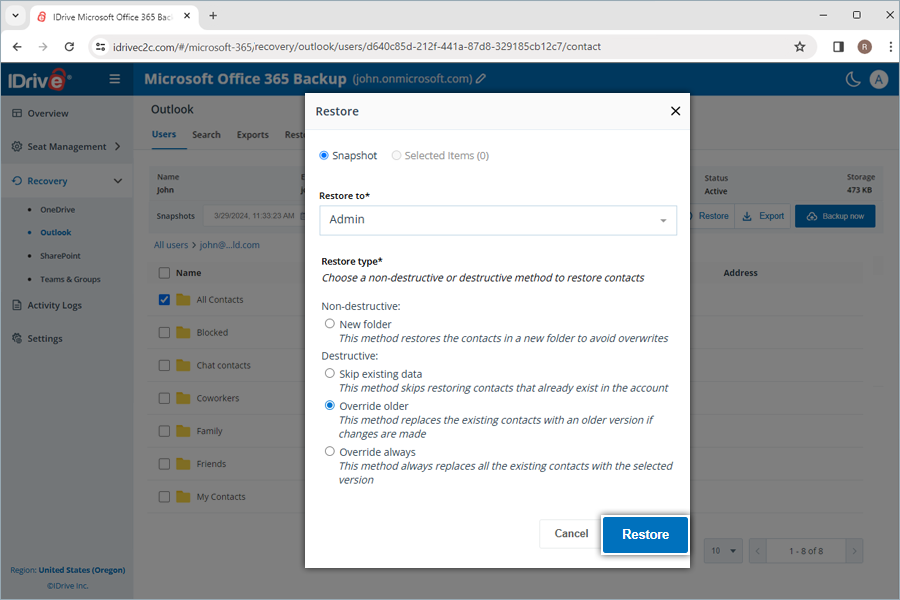
| How do I restore the backed-up Outlook contacts from my IDrive® Microsoft Office 365 Backup account? | ||
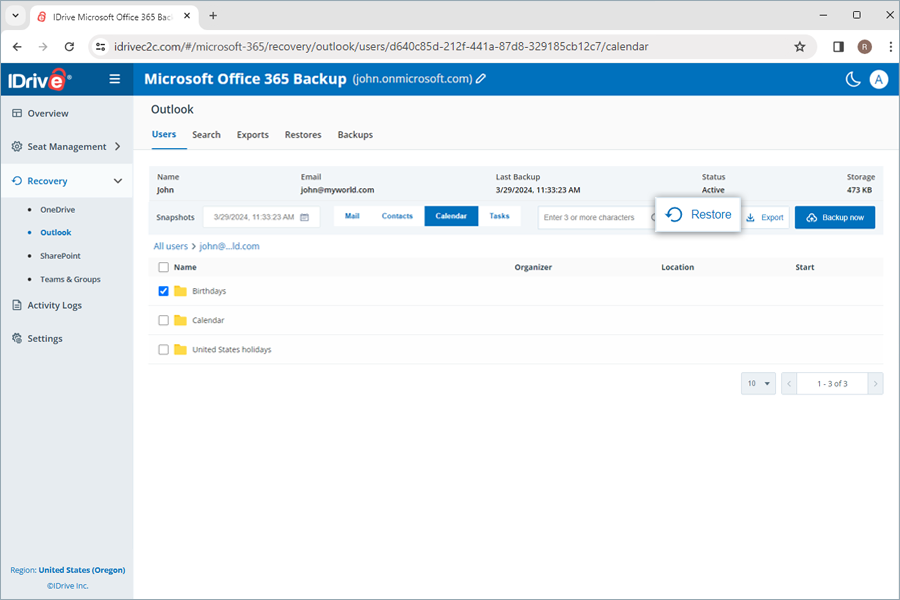
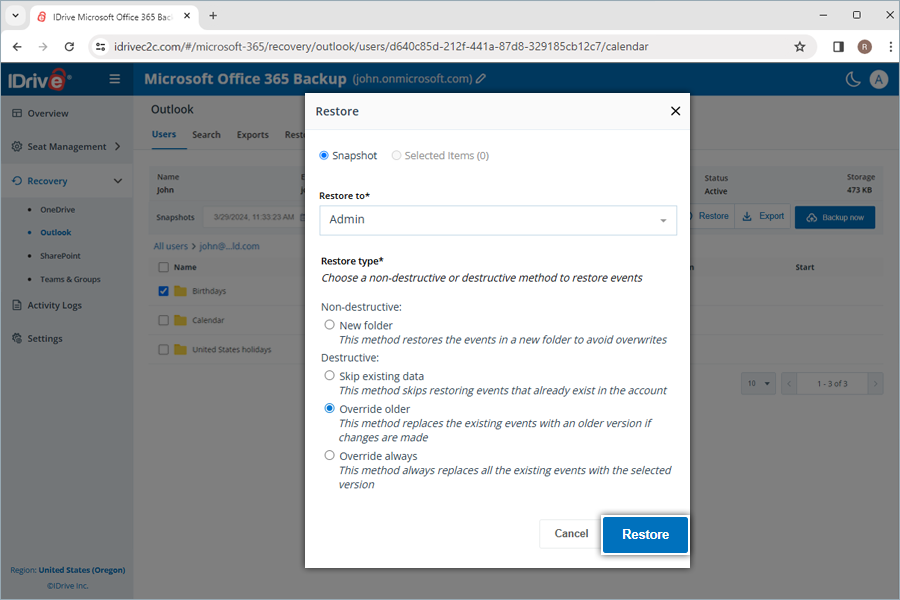
| How do I restore the backed-up Outlook calendars from my IDrive® Microsoft Office 365 Backup account? | ||
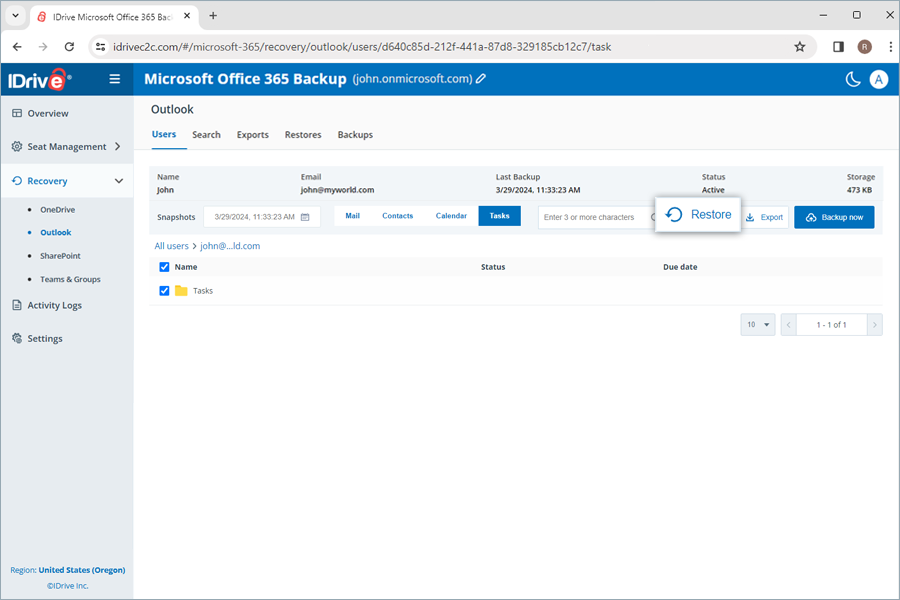
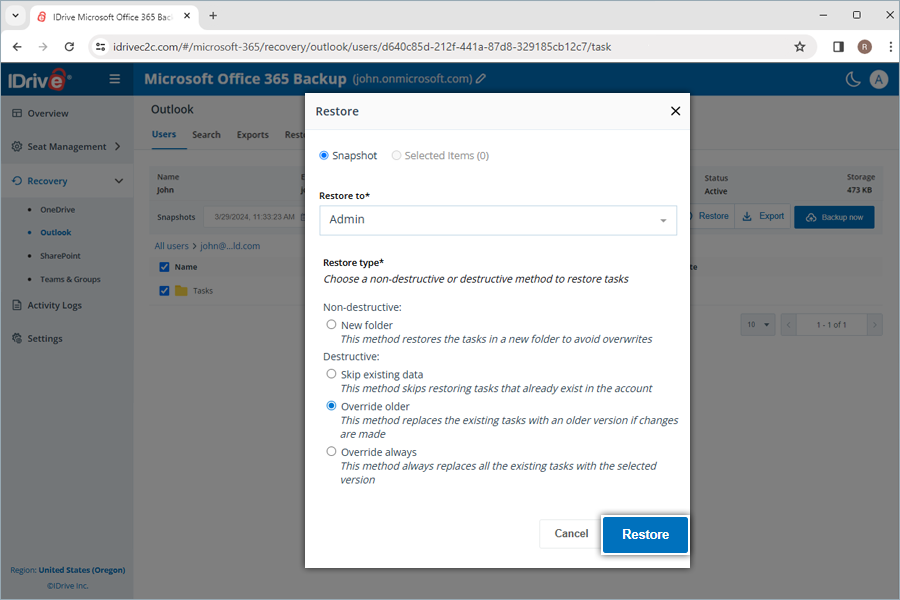
| How do I restore the backed-up Outlook tasks from my IDrive® Microsoft Office 365 Backup account? | ||
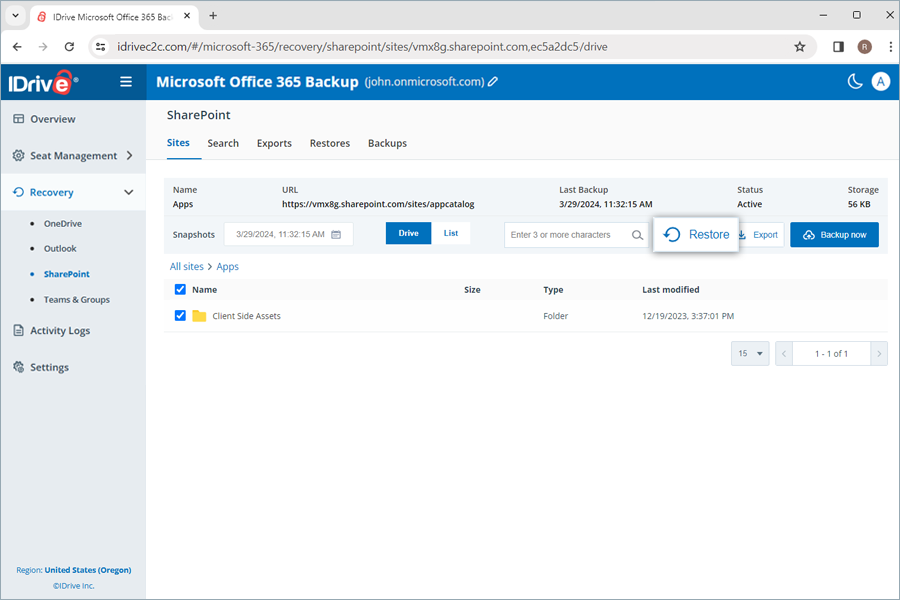
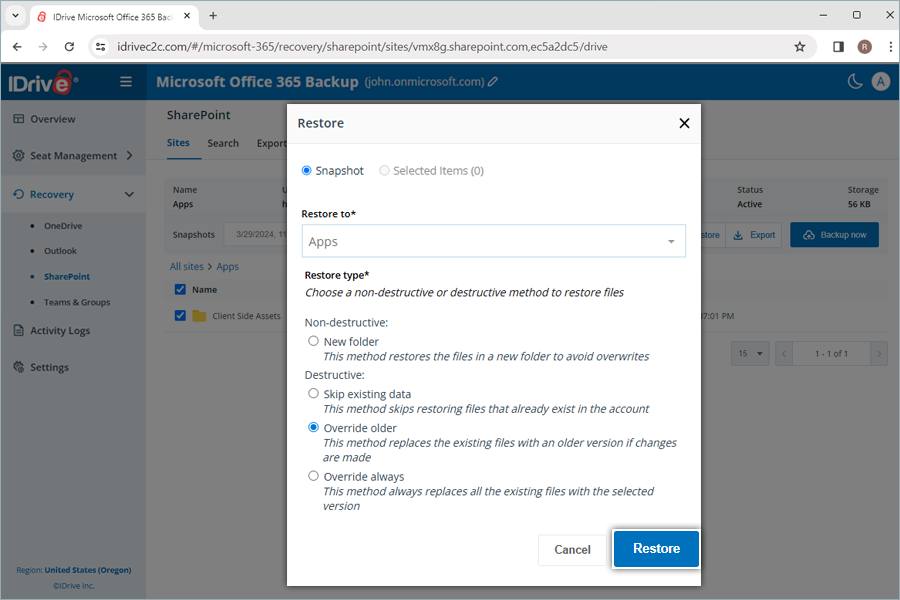
| How do I restore the backed-up SharePoint data from my IDrive® Microsoft Office 365 Backup account? | ||
| How do I restore the backed-up Teams and Groups data from my IDrive® Microsoft Office 365 Backup account? | ||
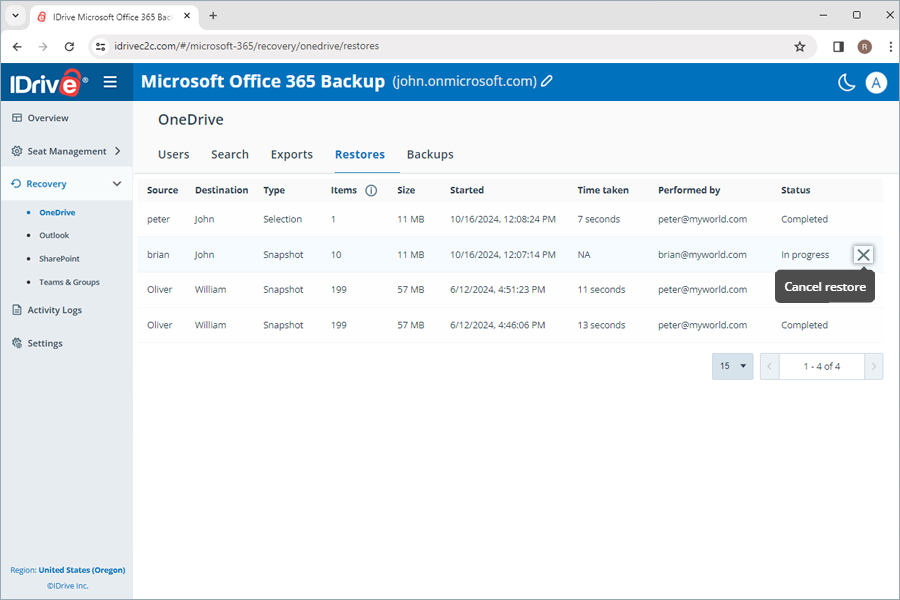
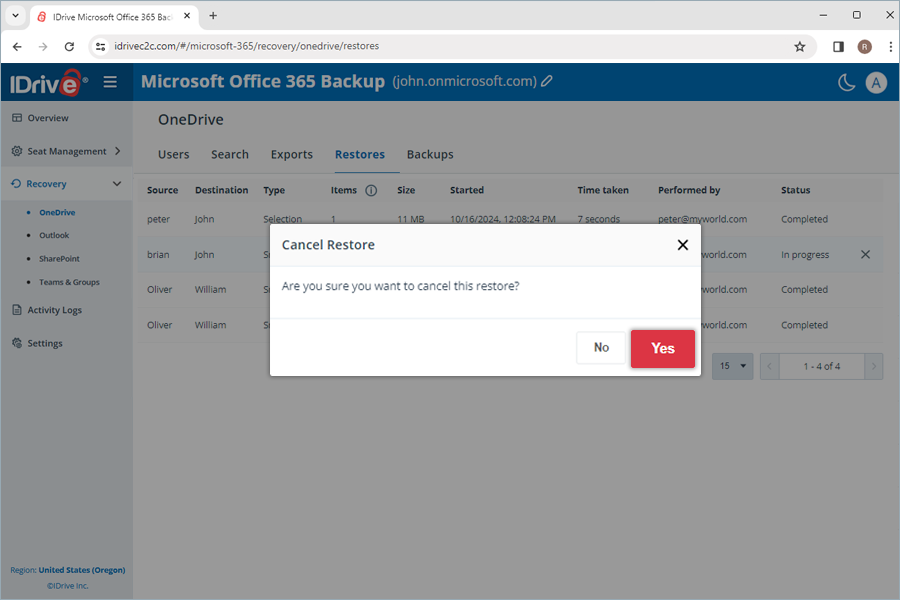
| How do I cancel an ongoing restore in my IDrive® Microsoft Office 365 Backup account? | ||
| Can I search and restore a specific file or folder in IDrive® Microsoft Office 365 Backup? | ||
| How do I search for a specific item from my IDrive® Microsoft Office 365 Backup account? | ||
| How do I export the backed-up Microsoft Office Suite data from my IDrive® Microsoft Office 365 Backup account ? | ||
| What search terms are supported for export and restore in my IDrive® Microsoft Office 365 Backup account? | ||
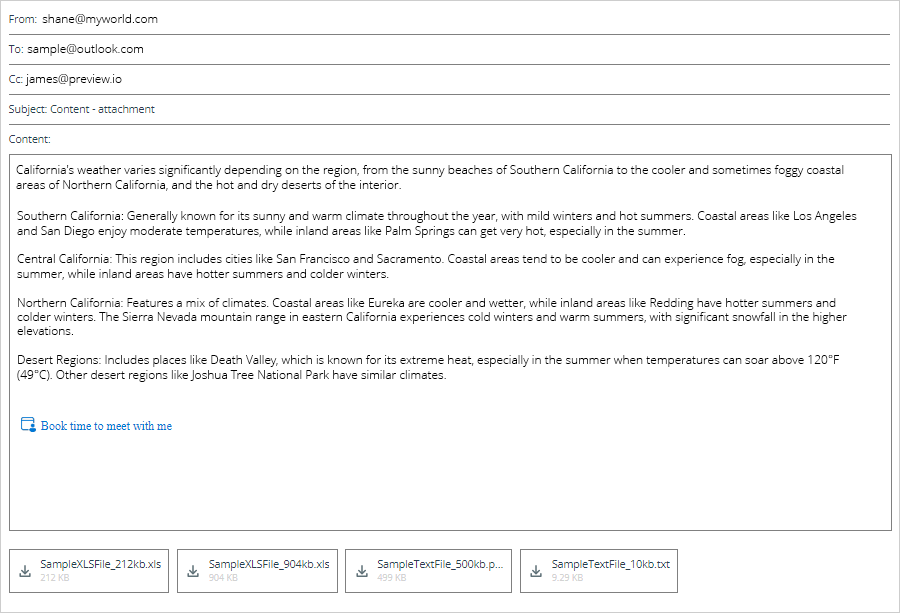
| Can I preview the content of a backed-up email? | ||
| Can I restore corrupted files and folders from my IDrive® Microsoft Office 365 Backup account? | ||
| Why is there no restore option for Microsoft Office 365 Personal Backup for Outlook data? | ||
Activity Logs |
||
| Can I view the activity logs for my IDrive® Microsoft Office 365 Backup account? | ||
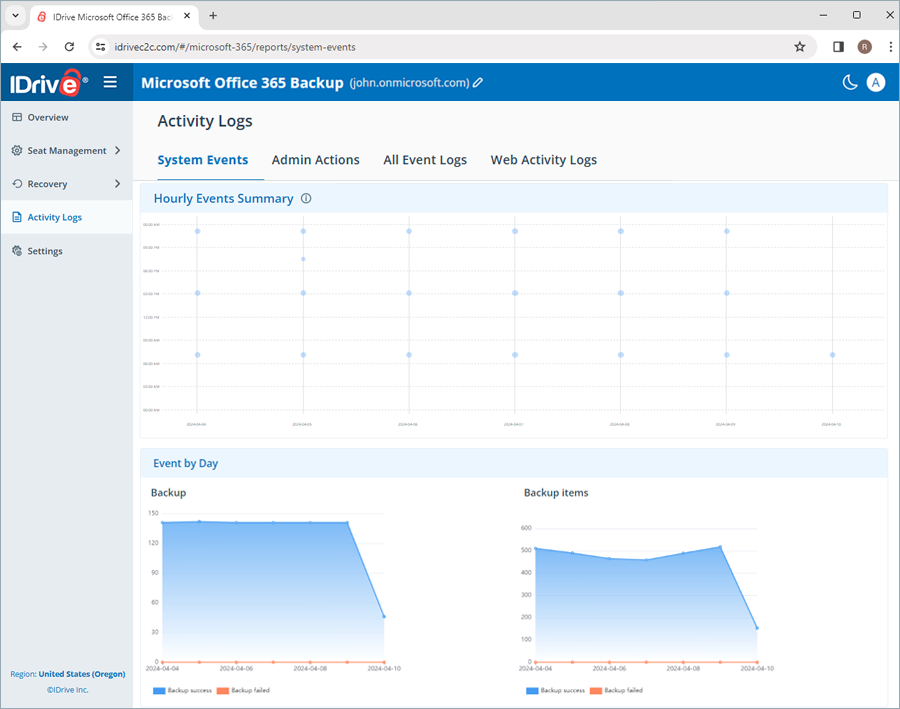
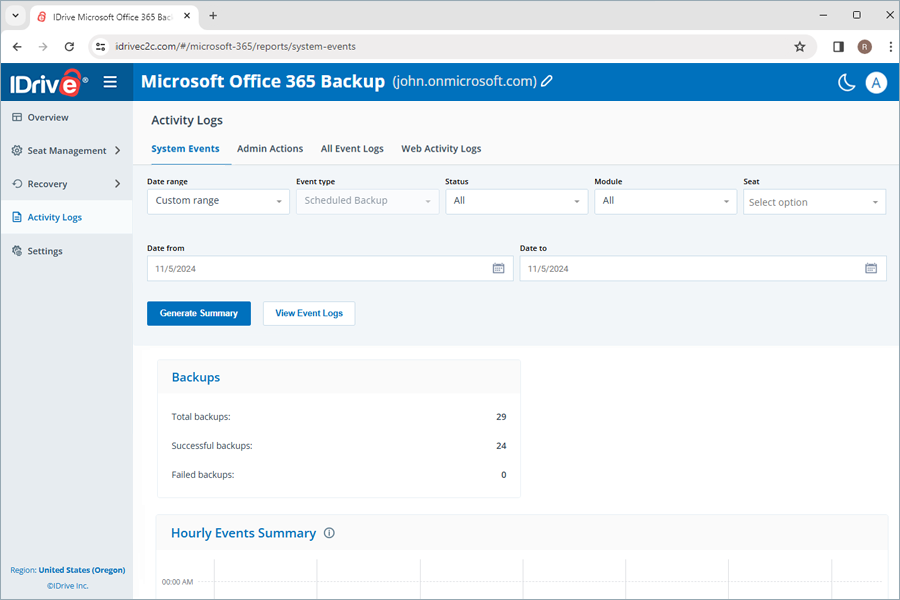
| How do I view system activity logs for my IDrive® Microsoft Office 365 Backup? | ||
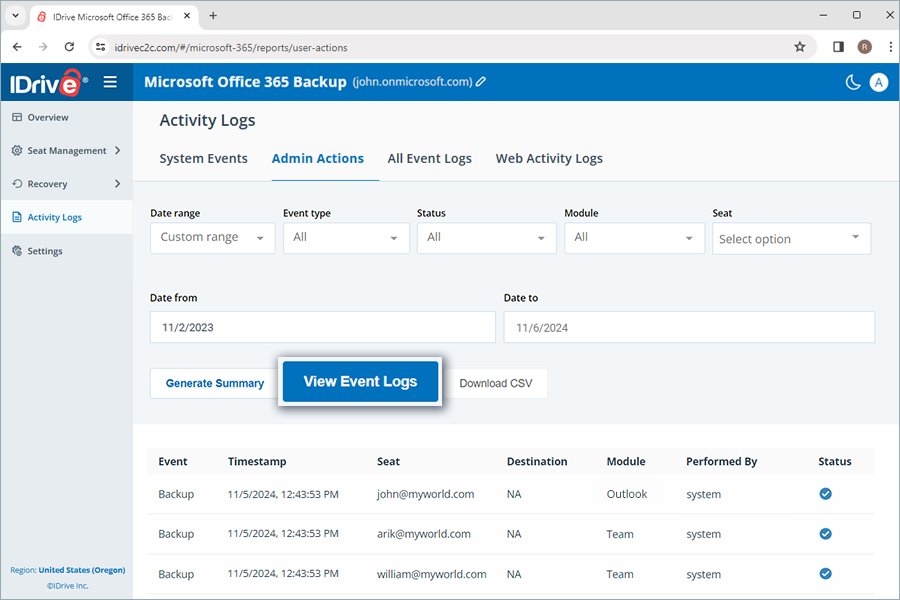
| How do I view admin activity logs for my IDrive® Microsoft Office 365 Backup account? | ||
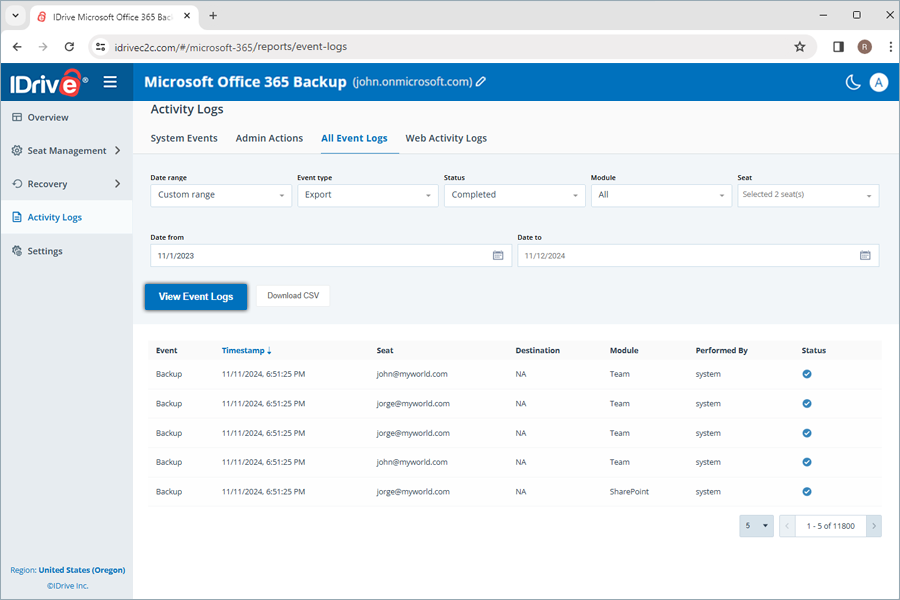
| How can I view all event activity logs reports for my IDrive® Microsoft Office 365 Backup? | ||
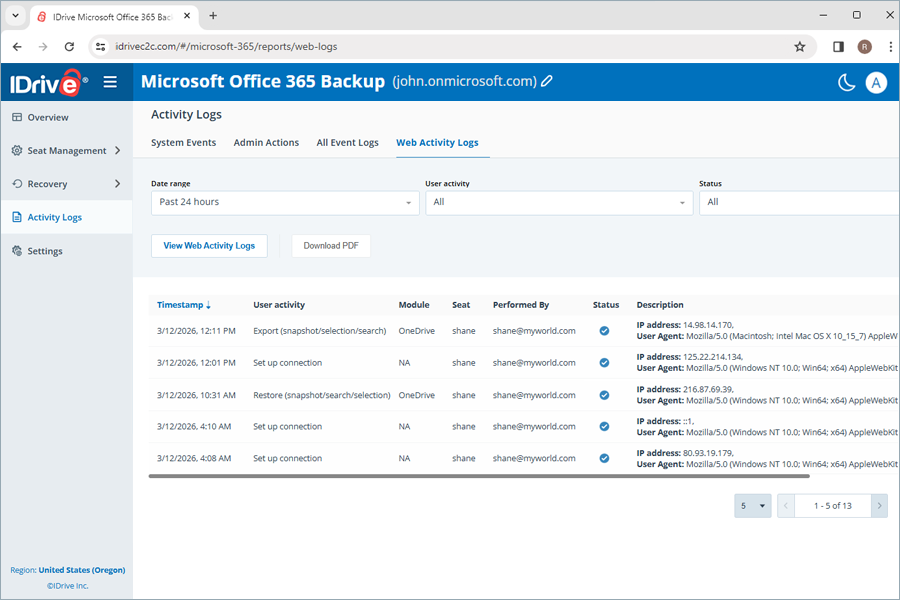
| How do I view all web activity logs for my IDrive® Microsoft Office 365 Backup? | ||
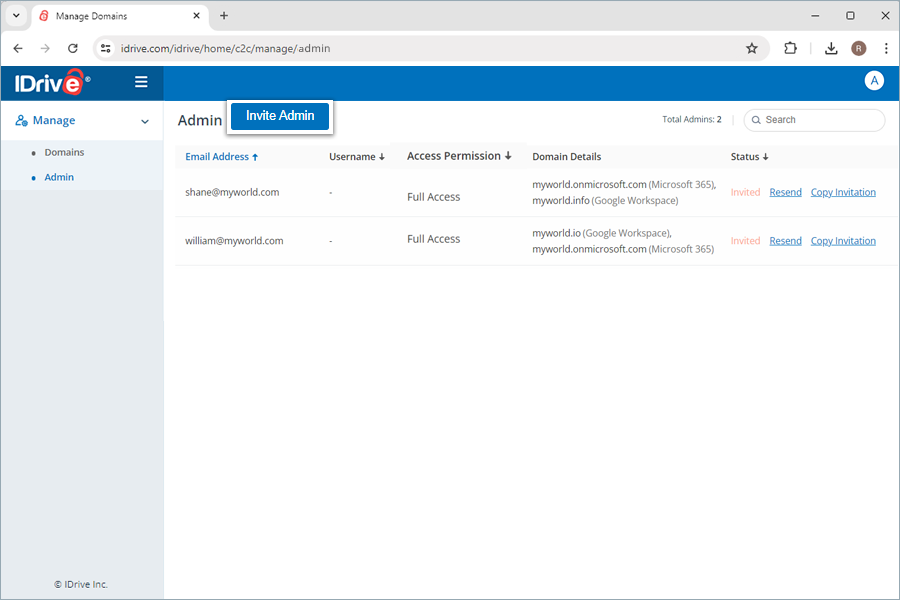
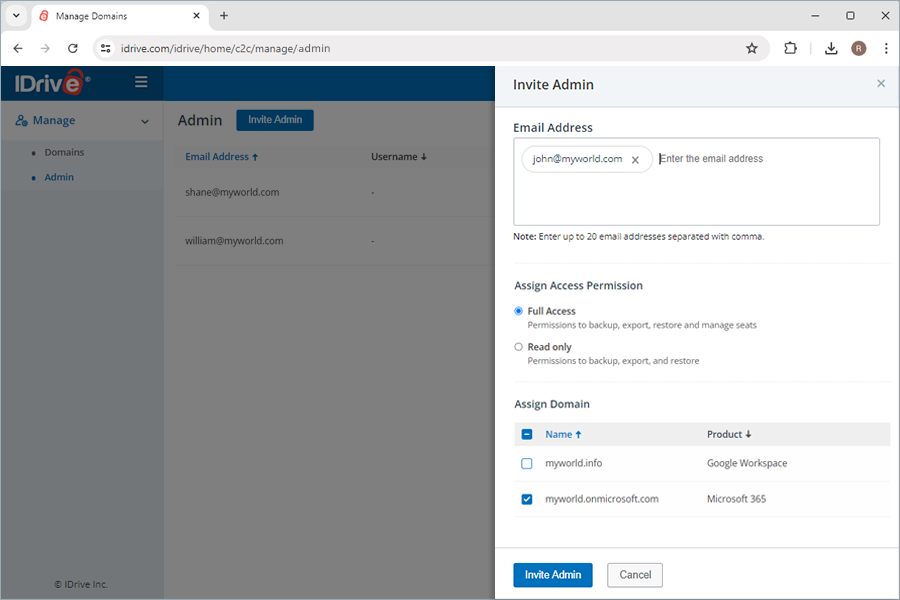
Is it possible to add a user to manage backup and recovery for my Microsoft Office 365 domains?Yes, you can add a user with administrative privileges to manage backup and recovery for your Microsoft Office 365 domains. To invite an admin,
The user will receive an email invitation. Once they create an account using the link in the invitation, they will be able to manage operations for assigned domains according to assigned permissions.
| |

 next to your IDrive Microsoft Office 365 Backup domain name.
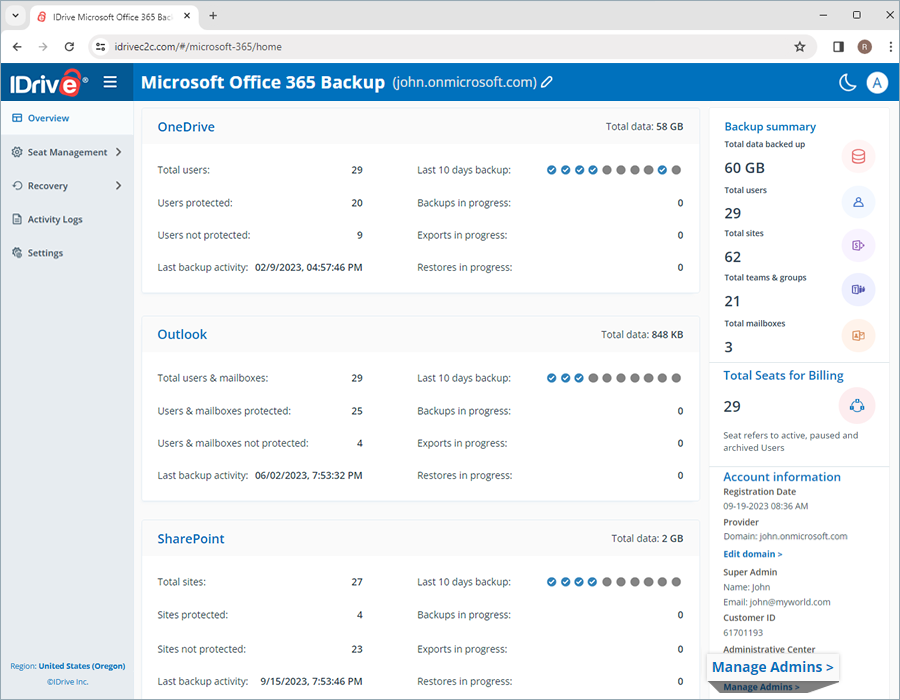


 - backup failure
 - backup was 100% successful
 - backup has not yet commenced
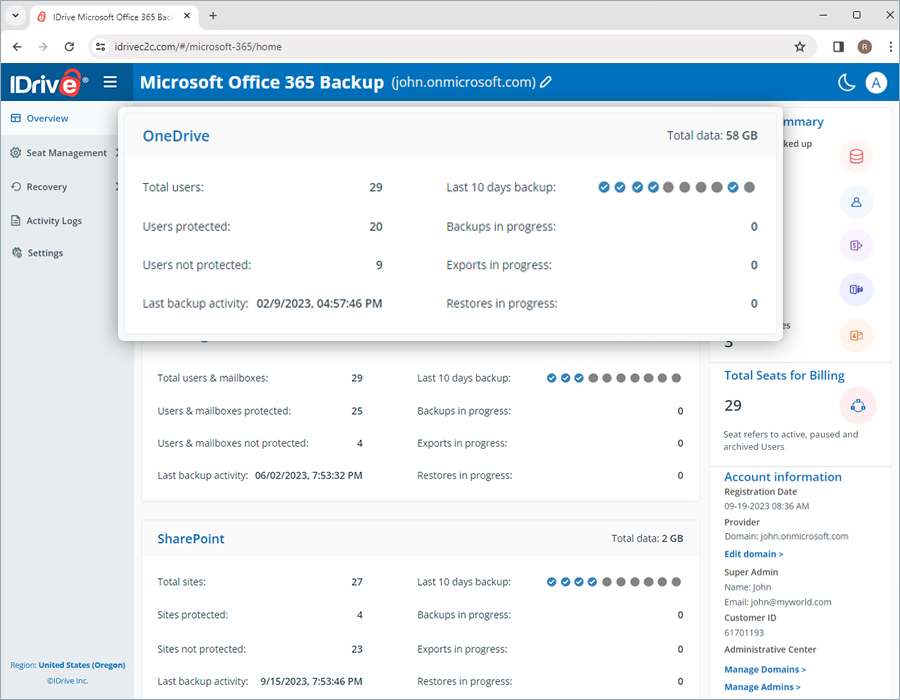
What is a Seat?A seat refers to a Microsoft Office 365 user. Each seat added to the account is billed as per the subscribed plan. |
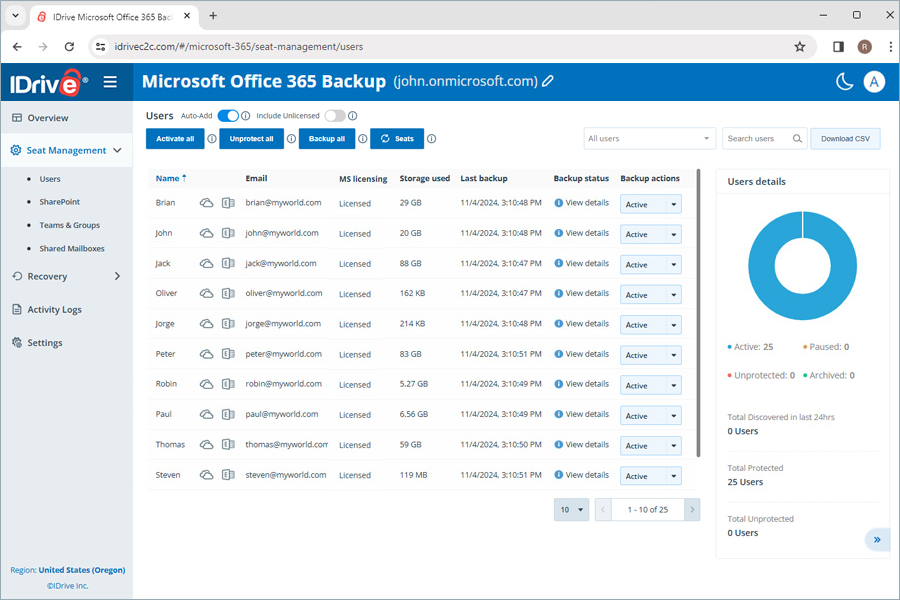
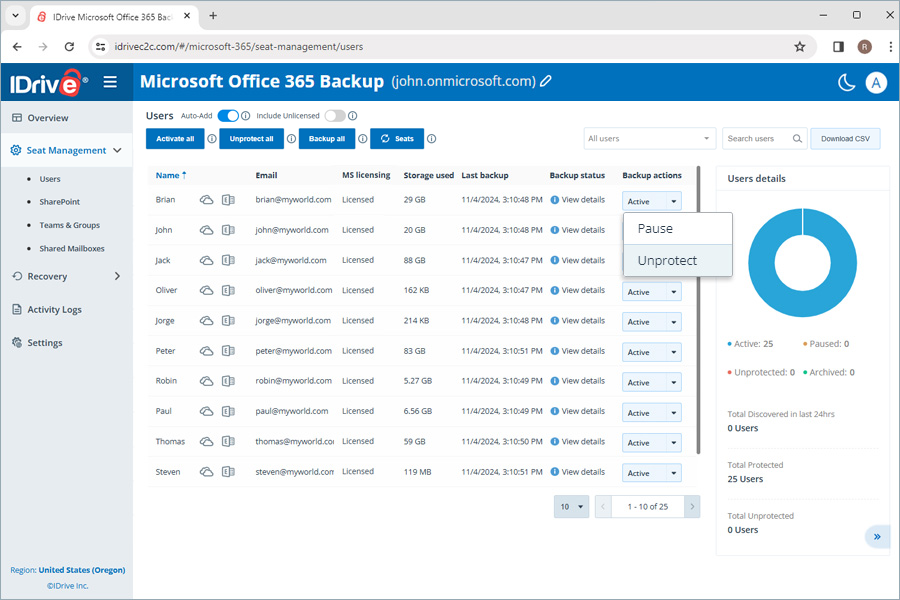
Which user management tools can I access under seat management?You can access the records of all users under the Seat Management tab in your IDrive Microsoft Office 365 Backup web console, regardless of their backup status. Navigate to the Users tab under Seat Management to access the following management tools:
|

 to refresh the data.
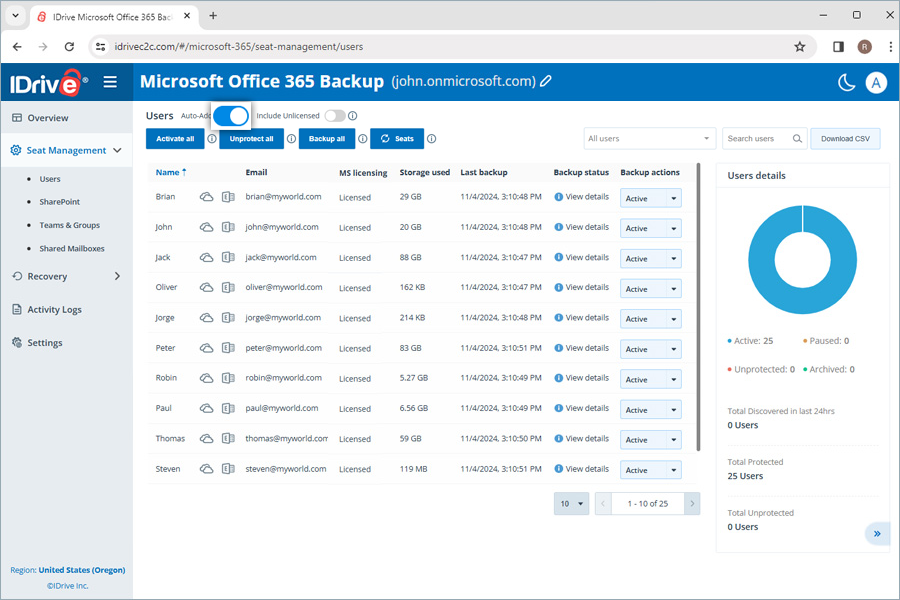


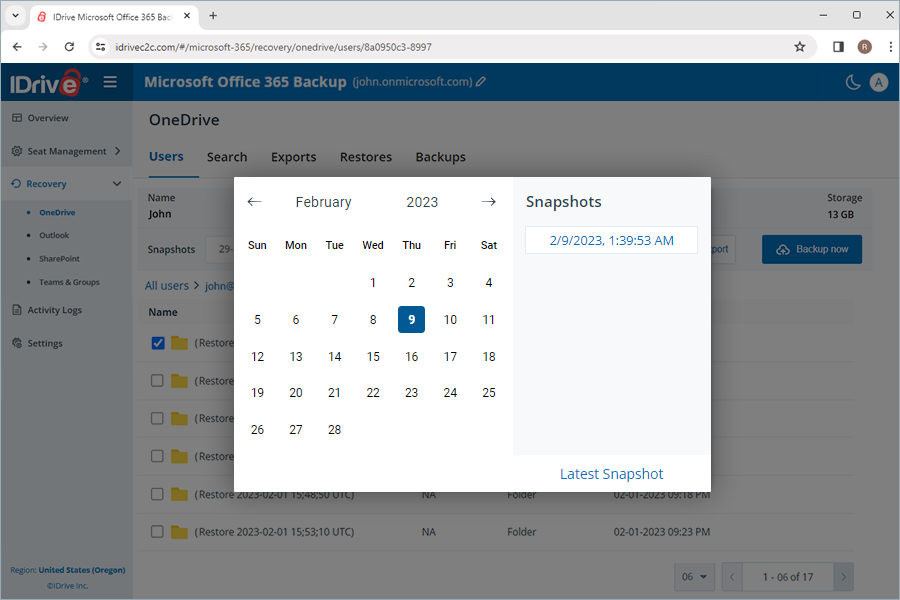
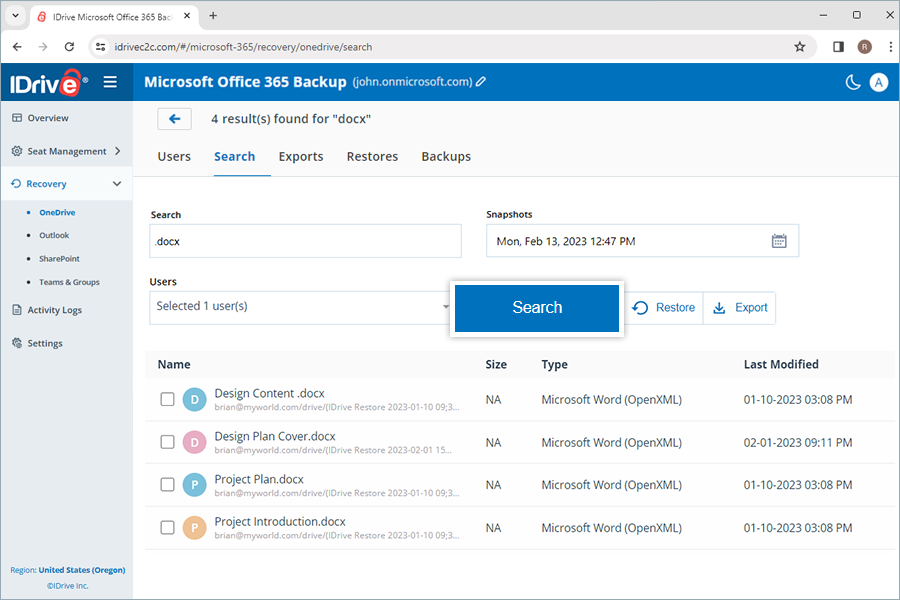
How do I search for a specific item from my IDrive® Microsoft Office 365 Backup account?You can perform both point-in-time and file-level searches across multiple search parameters to perform a granular restore. To perform a point-in-time search for restoring a specific version of the backed-up data from a user account,
A file-level search lets you locate specific backed-up files and folders in a user account. To perform a file-level restore,
|
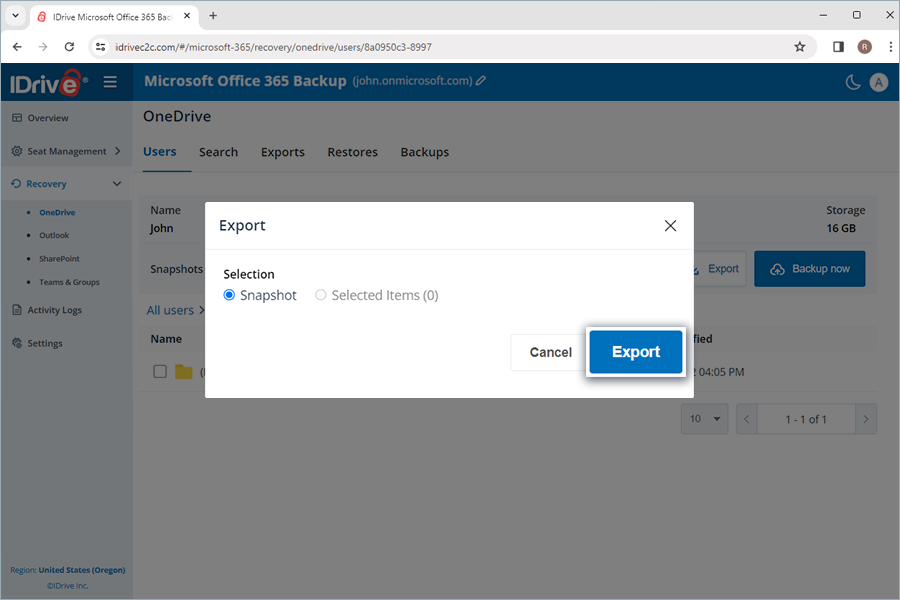
How do I export the backed-up Microsoft Office Suite data from my IDrive® Microsoft Office 365 Backup account ?To export the backed-up data,
Note: The Selected Item option will be enabled only if you have selected items for restoration. If nothing is selected, Snapshot is selected by default. You can download the generated export files in the Exports tab by clicking Note: Exported data will be downloaded as zip files. To cancel an ongoing data export, click 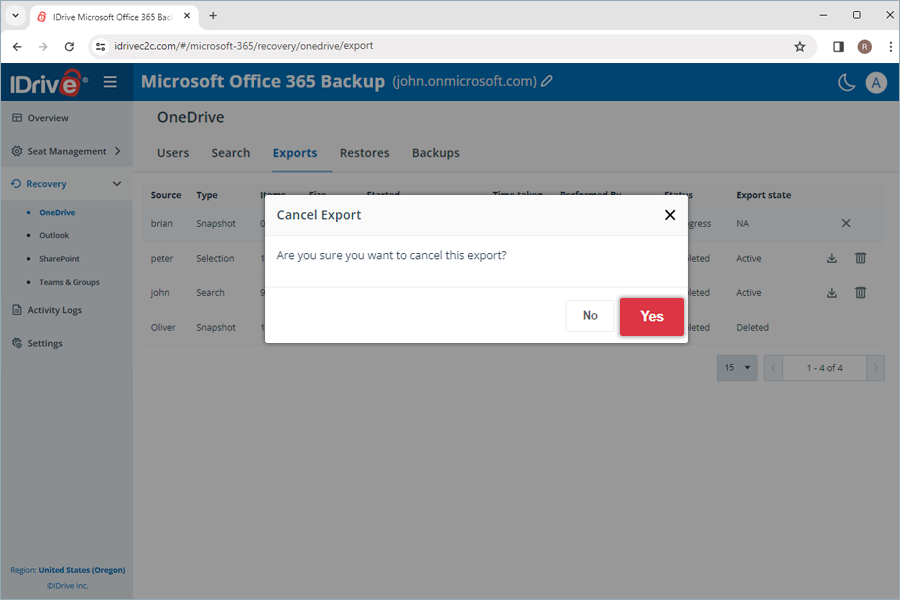 |