- S3 Developer Guide
- Endpoints and Access Keys
- Third-Party Tools
- Veeam®
- Veeam® 12
Direct-to-Cloud - MSP360
- Ahsay
- Anchorpoint
- AirLiveDrive
- Archiware P5
- Arcserve
- Arcserve ImageManager
- Arq Backup
- BackupAssist
- Bunny.net
- ChronoSync
- Cloudmounter
- Cloudflare
- Comet
- Couchbase
- CrossFTP
- CuttingRoom
- CubeBackup
- Cyberduck
- Dropshare
- Duplicacy
- Duplicati
- EditShare
- ExpanDrive
- Fastly CDN
- Files.com
- Filezilla Pro
- Flexify.IO
- GoodSync
- Hammerspace
- Hedge OffShoot
- iconik
- Iperius Backup
- iRODS
- LucidLink
- Milestone XProtect
- Mountain Duck
- /n software S3 Drive
- Nextcloud
- NovaBACKUP
- odrive
- Photos+ Cloud Library
- PureStorage
- qBackup
- QNAP
- Rclone
- Retrospect
- S3 Browser
- S3cmd
- S3FS
- SimpleBackups
- Snowflake
- SyncBackPro
- Syncovery
- Synology Hyper Backup
- Transmit
- TrueNAS® CORE
- UpdraftPlus WordPress
- Vantage Gateway
- Veeam® Backup for Microsoft 365
- Vembu BDR Suite
- Veritas Backup Exec
- WinSCP
- Windows Network Drive
- CNAME Record Guide
- S3 API Documentation
Use IDrive® e2 to speed up your content delivery with bunny.net
With IDrive® e2 and bunny.net, you can share content seamlessly without any scalability or performance limitations.
Prerequisites:
Before uploading files using bunny.net, you require:
- An active IDrive® e2 account. Sign up here if you do not have one.
- A bucket in IDrive® e2. See how to create a bucket.
- Valid Access Key ID and Secret Access Key. Learn how to create an access key.
- A valid bunny.net account. Sign up for one here.
Create a Pull Zone
- Sign in to your bunny.net account.
- Go to Add Pull Zone.
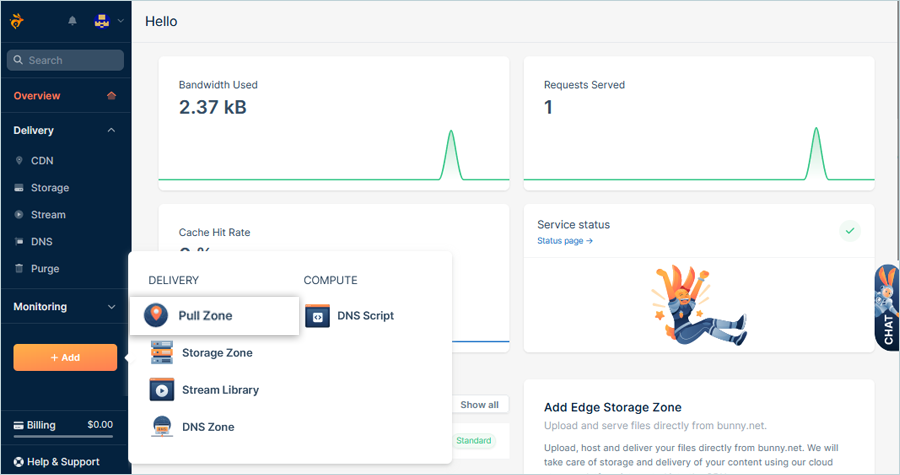
- Enter a name for your Pull Zone.
- For the S3 URL, enter the IDrive® e2 public bucket URL and click Save Origin.
Note: The URL must start with https://
E.g., https://e2-bunnybucket.u6a5.bn.idrivee2-61.com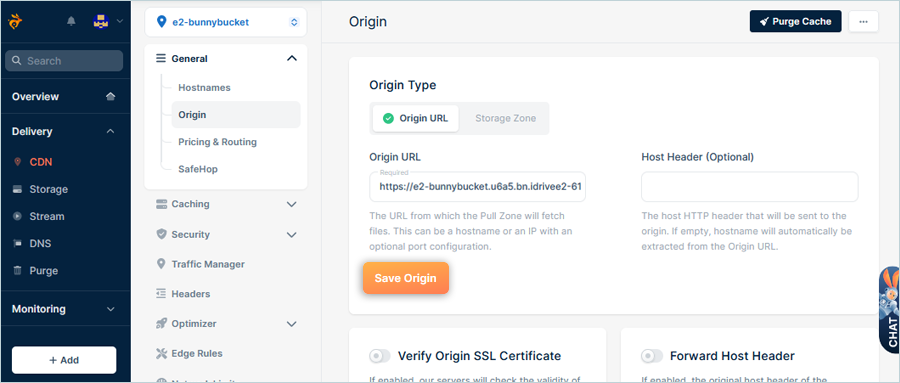
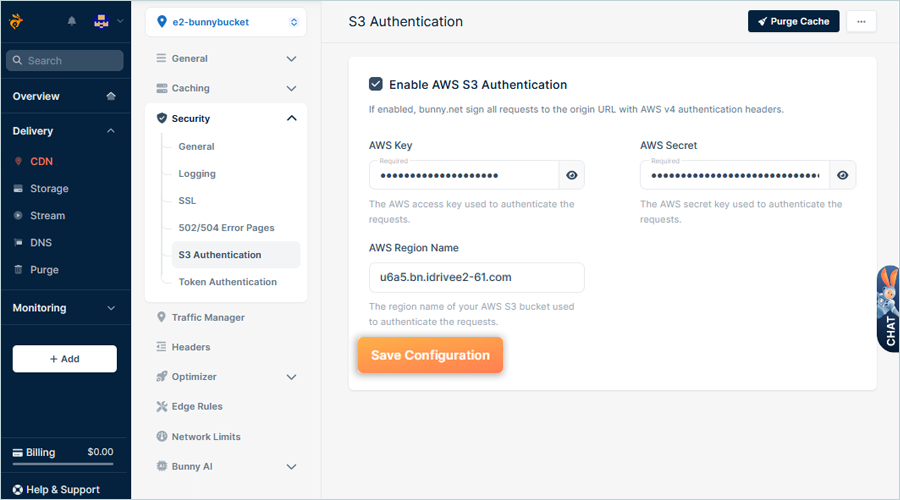
Configure a Public CDN Pull Zone
- Navigate to Pull Zones > Security > S3 Authentication.
- In the AWS Key field, enter the IDrive® e2 Access Key ID.
- In the AWS Secret field, enter the IDrive® e2 Secret Access Key.
- Enter the endpoint URL, where the IDrive® e2 bucket is located.
- Click Save Configuration.
Configure a Private CDN Pull Zone
- Navigate to Pull Zones > Security > S3 Authentication.
- Enable AWS S3 Authentication.
- In the AWS Secret field, enter the IDrive® e2 Secret Access Key.
- Enter the endpoint URL, where the IDrive® e2 bucket is located.
- Click Save Configuration.
Test the new pull zone
Once the IDrive® e2 bucket is configured and integrated with Bunny.net, you will be able to test the new pull zone.
To test the Pull zone created in the above steps, enter the name of the pull zone in the web browser, followed by the file name of the object available in the bucket linked to the pull zone, you wish to deliver using Bunny.net CDN. So if the pull zone name was
https://https://edge2.b-cdn.net and file name is Test.png, the URL in the browser will be
https://edge2.b-cdn.net/Test.png
If the configuration was successful, the test file and the contents of it should now be visible on the browser.

To experience faster connectivity replace the existing URLs in the application with the new CDN URL.
Note: Data restoration is handled by your specific backup solution provider and is affected by multiple variables that are unique to your environment. For application-related enquiries/support, it is strongly recommended you seek guidance from the technical team of your backup solution provider.