Migrating data to IDrive® e2 cloud storage
To migrate data to IDrive® e2,
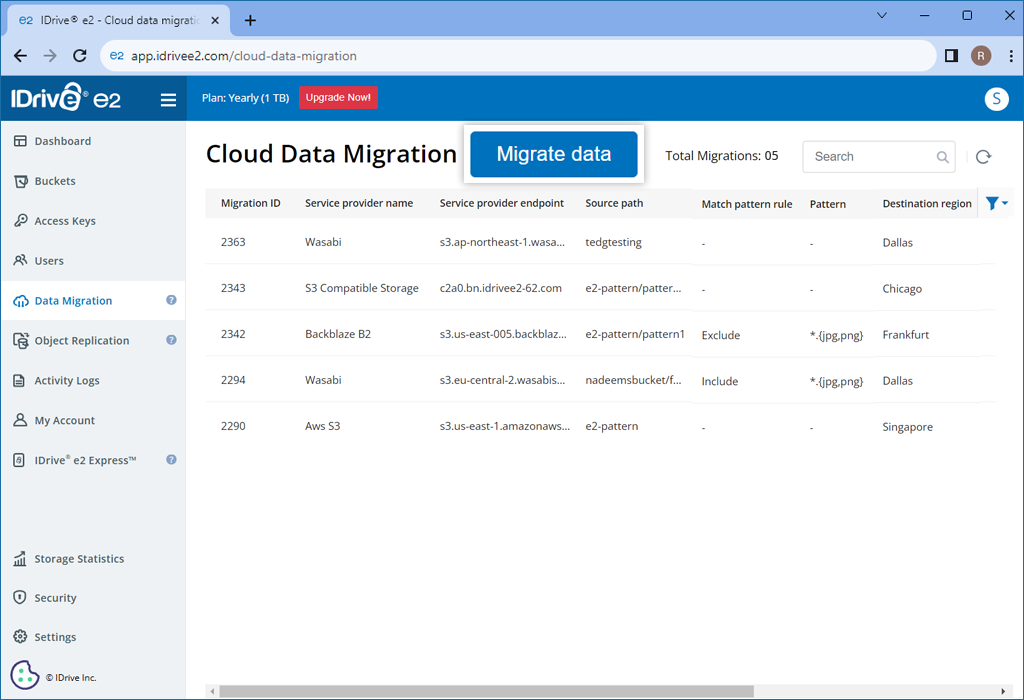
- Sign in to IDrive® e2 account via any browser.
- Navigate to the Data Migration tab, and click Migrate data.
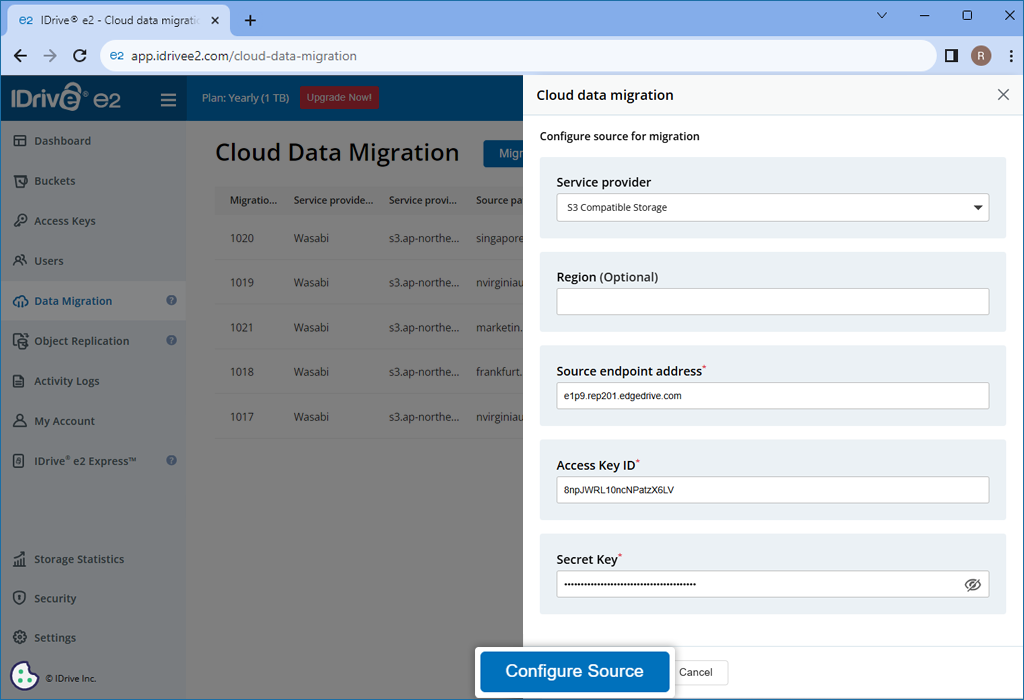
- Select a service provider - AWS, Wasabi, Backblaze B2, Azure, Google Cloud Storage, etc from the dropdown.
- Configure the source of migration by selecting the options as applicable:
- Access Key ID - Enter the access key for your service provider.
- Secret Key - Enter the secret key for your service provider.
- Source regions - Select a region from the dropdown or click Add Source Endpoint in the dropdown and add the source endpoint URL.
- Source endpoint - Enter the endpoint URL for your service provider.
- Click Configure Source.
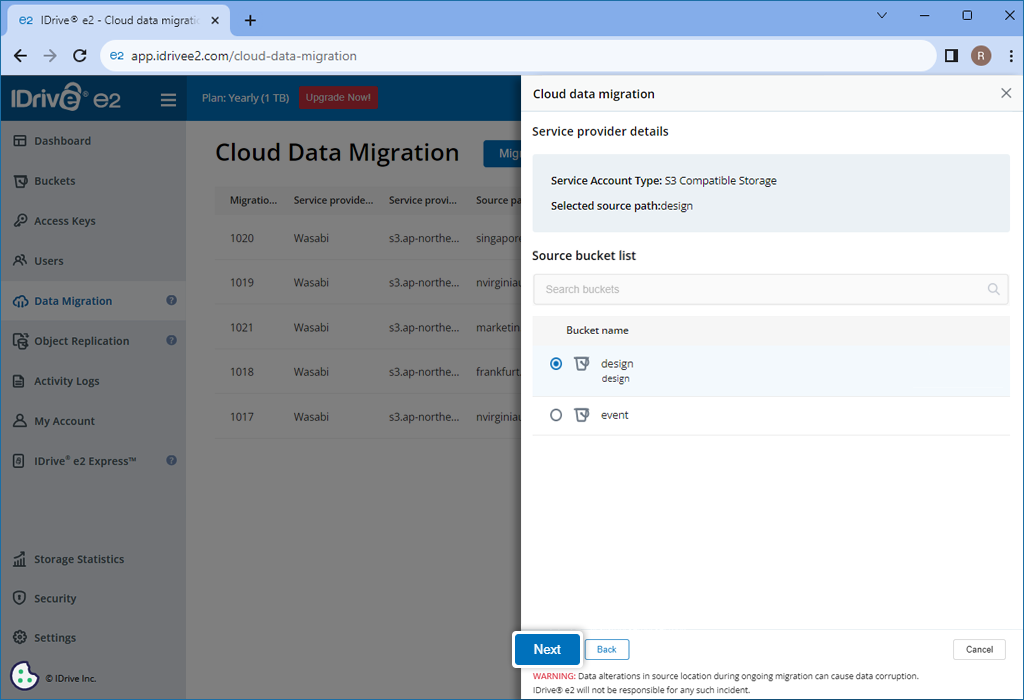
- Select the bucket that you wish to migrate.
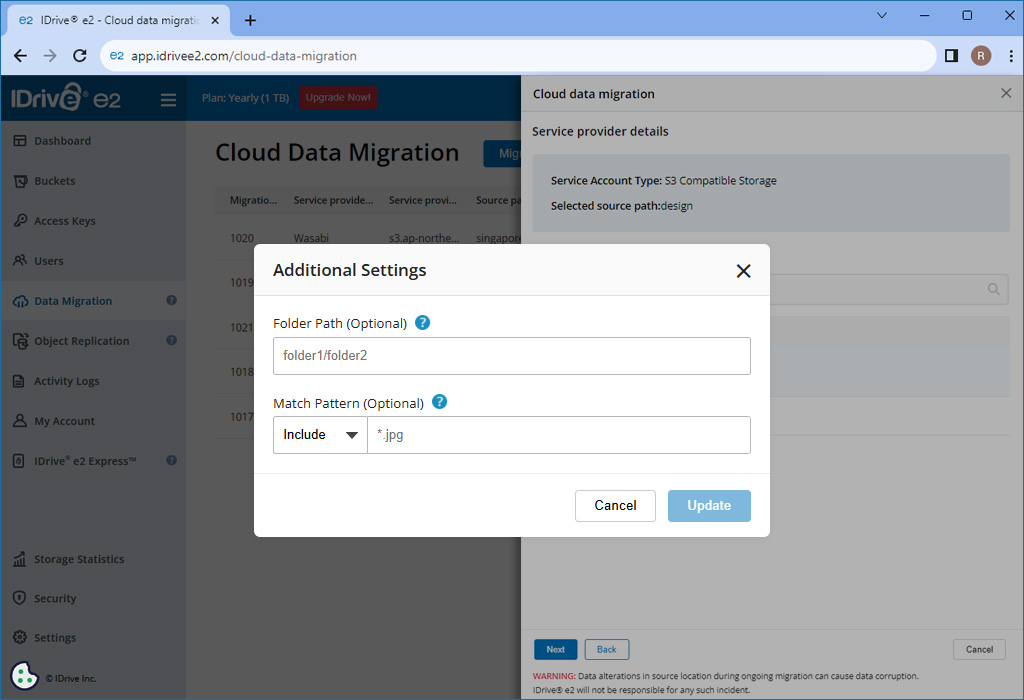
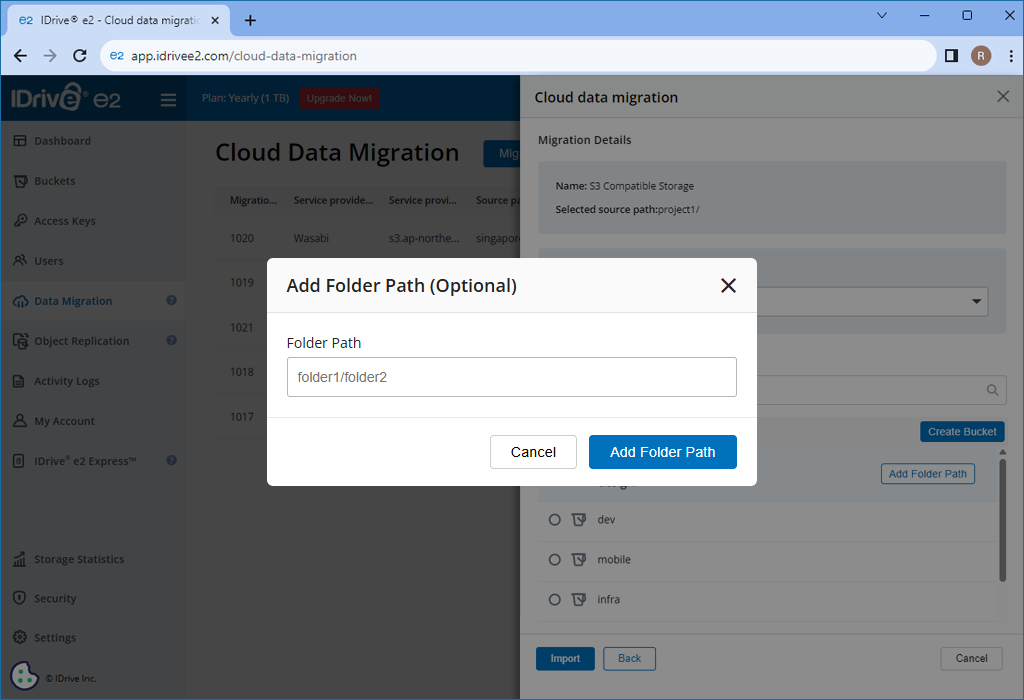
- Click Folder if you want to enter a folder within the selected bucket as source.
- In the Match Pattern field, enter the file pattern you want to include or exclude. This will determine which files will be copied to the bucket.
Note: You can add or exclude these patterns *.jpg, /*.jpg, *.{jpg,png}, dir/**, *.t?t, *.[a-z], *.\?1?\?, *.\d\d\d, *.{{jpe?g}}, /{{.* \.jpe?g}}.
- Click Next.
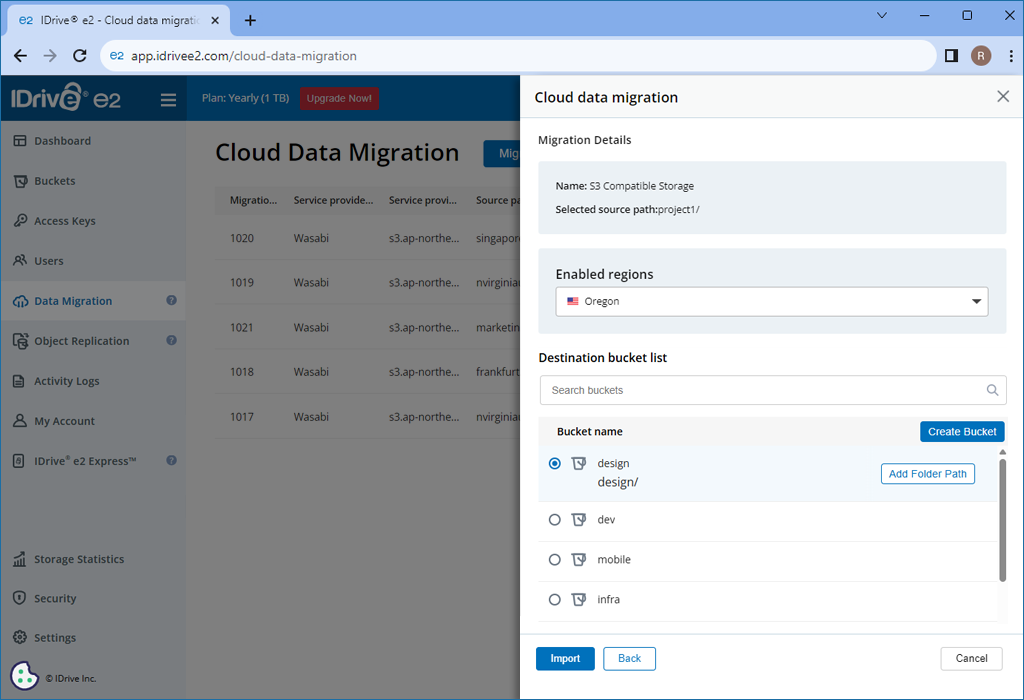
- Select the destination region in IDrive® e2 where you want to migrate the data.
- Choose a destination bucket.
If you want to move your data to a particular folder, specify the destination folder. Click Folder to enter a folder name.
Note: The folder name should be present in your destination bucket.
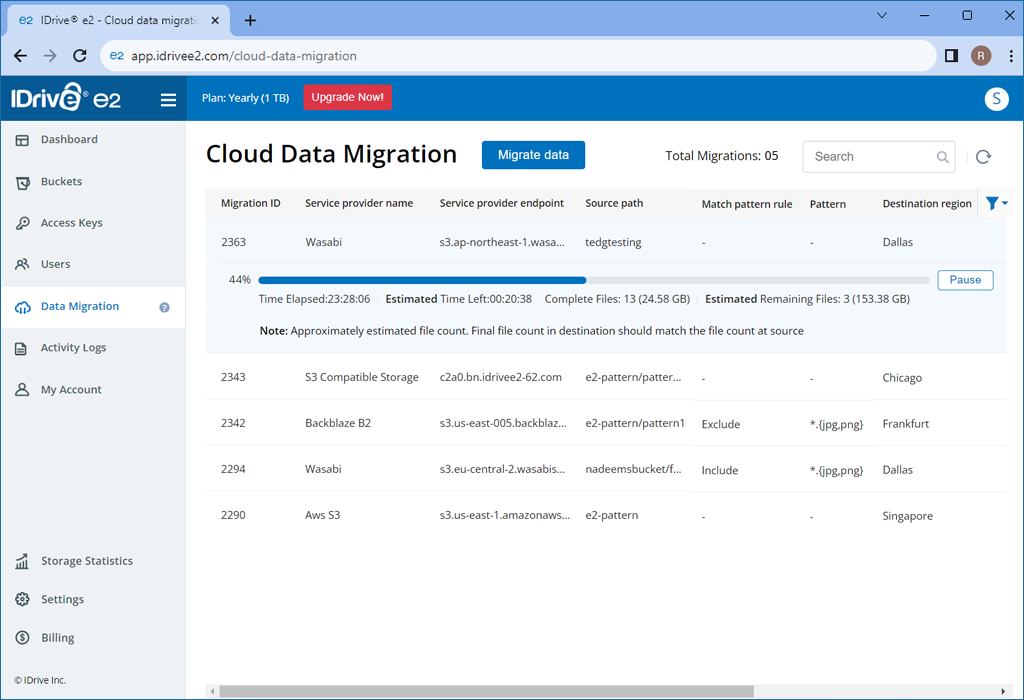
- Click Import. The process of data migration will start. You can view the progress of the migration, estimated time of completion, and copied object size under Status in the Data Migration tab.
- You can pause the data migration by clicking
 , resume migration by clicking
  , or delete the migration from the list by clicking
  . You can also restart a failed migration by clicking
  .
.
Note:
- Altering or modifying the data at the source location while the migration is ongoing can cause data corruption and IDrive® e2 will not be responsible for any such incident.
- Only the latest version of objects will be migrated.

 AWS S3, Any cloud object storage (eg: Wasabi, Backblaze B2), Azure Blob and Google Cloud.