This guide will help you use IDrive® e2 as a Windows Network Drive. We are using the MSP360 Drive tool to configure IDrive® e2 as a Windows Network Drive.
MSP360 Drive enables you to work on any file stored in your IDrive® e2 account directly from Windows Explorer. Using MSP360 you can make your cloud storage available as local Windows disks or network drives.
Download and install the MSP360 Drive app on your computer. Once the application has been installed follow the steps below to set up an IDrive® e2 account with S3:
Setup an IDrive® e2 account using MSP360 via S3 APIs (This is an one-time process)
- Go to the 'Storage Account' tab from the config menu.
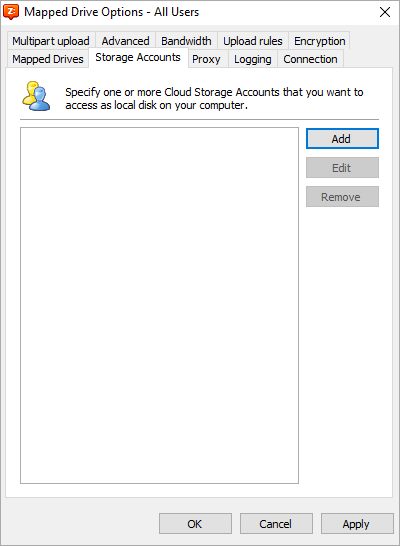
- Click 'Add' and enter the following in the 'Add Storage Account' pop-up:
- Storage Provider: S3 Compatible.
- Service Point: l4g4.ch11.idrivee2-2.com. Know more.
- Access key: This should be your IDrive® e2 Access Key ID. If you do not have a key, create it from the account. Know more
- Secret key: This should be your IDrive® e2 Secret Access Key. If you do not have a key, create it from the account. Know more
- Tick the 'Use SSL' checkbox, and select 'Signature Version' = 4.
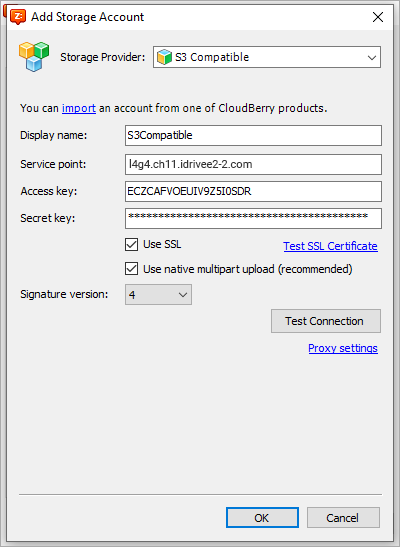
- Click 'Test Connection' and then click 'Ok' to verify the connection and the API key set.
A success message will be displayed if the connection and the API password are validated against IDrive® e2.
Note: Restart the machine if required.
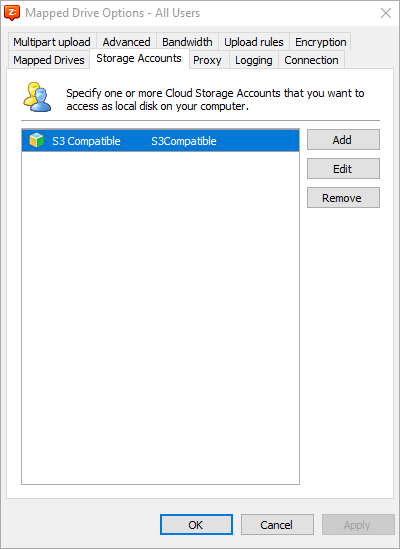
The newly created account will be listed as a valid account under 'Storage Account'.
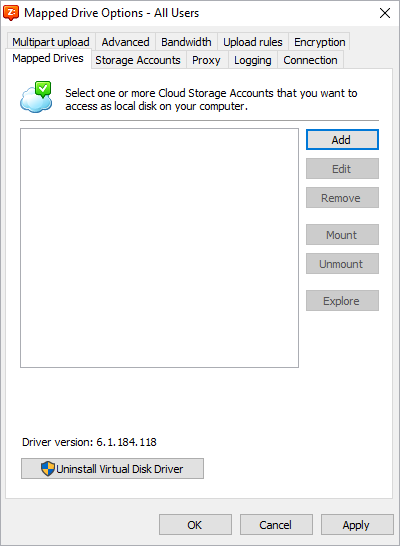
Once the IDrive® e2 storage account is set up, attach a bucket or folder as a network drive.
Attach a bucket or folder as a network drive
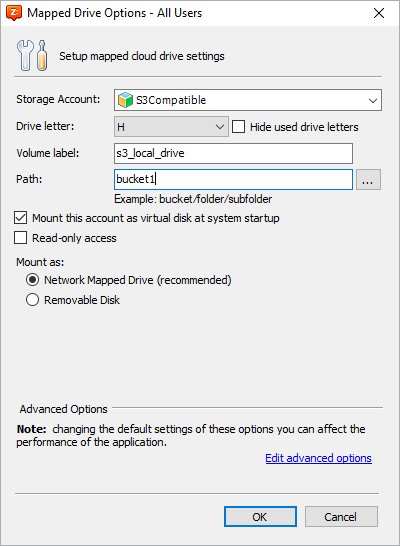
- Go to the 'Mapped Drives' tab to set up a mapping between the IDrive® e2 account and your preferred Windows letter drive.
- Click 'Add' and enter the following:
- Storage Account: S3Compatible.
- Drive letter: As per your choice.
- Volume label: As per your choice. This will be the name of the volume in Windows File Explorer.
- Path: As per your choice. This is the target IDrive storage bucket. Click Action to get the list of the buckets available.
- Click 'OK'.
After successful mapping, the selected drive will be displayed under 'Windows File Explorer'.