How to use Snowflake with IDrive® e2?
Snowflake has been verified for use with IDrive® e2. You can also visit the Snowflake Documentation on configuring IDrive® e2 hot cloud object storage for further reference.
Using Snowflake with IDrive® e2 you can:
- Create an external Snowflake table to query an existing, partitioned, data set from IDrive® e2 Cloud Storage.
- Copy data from Snowflake to IDrive® e2 and make it available to applications and tools compatible with cloud object storage.
- Migrate your data from Snowflake and take advantage of IDrive® e2's predictable pricing, particularly for storing infrequently accessed data.
This article explains how to perform the following tasks:
Prerequisites:
- An active IDrive® e2 account. Sign up here if you do not have one.
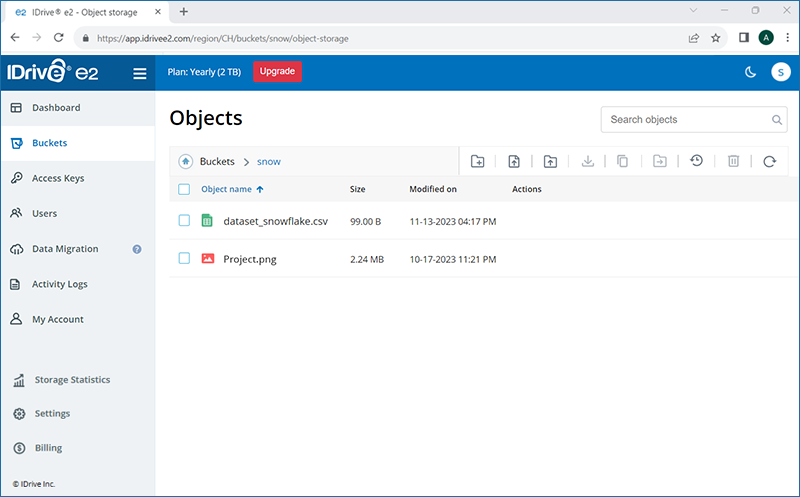
- A dataset supported by Snowflake uploaded to your IDrive® e2 bucket. See how to create a bucket and add objects to it.
- An active Snowflake account.
- An understanding of Data Lake / Data Warehouse terminology and basic usage of Snowflake.
Create SQL Worksheet
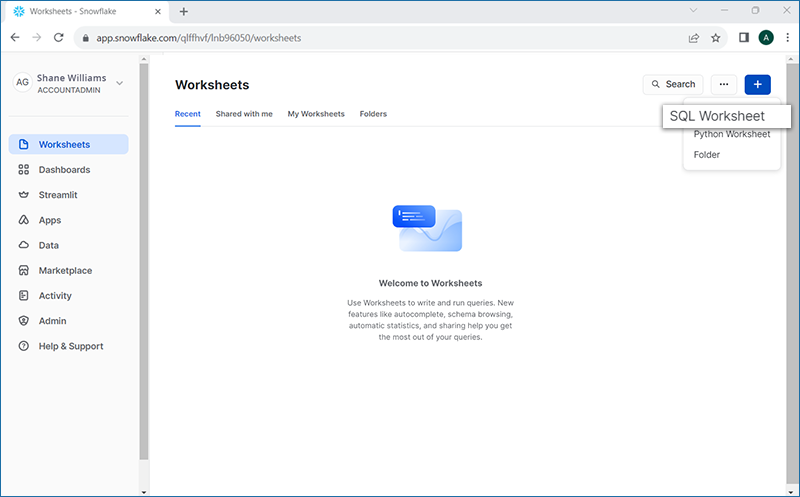
Login to your Snowflake account and click ![]() and select SQL Worksheet. You can write queries for data in IDrive® e2 and run them from this worksheet.
and select SQL Worksheet. You can write queries for data in IDrive® e2 and run them from this worksheet.
Create Snowflake Database
After creating the Worksheet, you need to create a Database to hold the information about the External Table and any related data. We will create a database e2_sample_database.
Copy and paste the following two commands in the Worksheet:
CREATE DATABASE e2_sample_database;
USE DATABASE e2_sample_database;
The first command will create the database. The second will select it to be used for further queries in the Worksheet. To run the commands, select the SQL and click ![]() on the top-right corner.
on the top-right corner.

Create a Snowflake Stage Object
A stage object should be created on Snowflake to tell where your data is being held or staged. We will create a reference to IDrive® e2 bucket with the region and Access Keys credentials.
We will create a stage object s3_e2 in this example and we will use the endpoint URL for the Virginia region, and IDrive® e2 Access Key ID and Secret Key.
create or replace stage s3_e2
url = 's3compat://snow'
endpoint = 'k3d1.va21.idrivee2-1.com'
credentials = (AWS_KEY_ID = 'xxx' AWS_SECRET_KEY = 'xxx');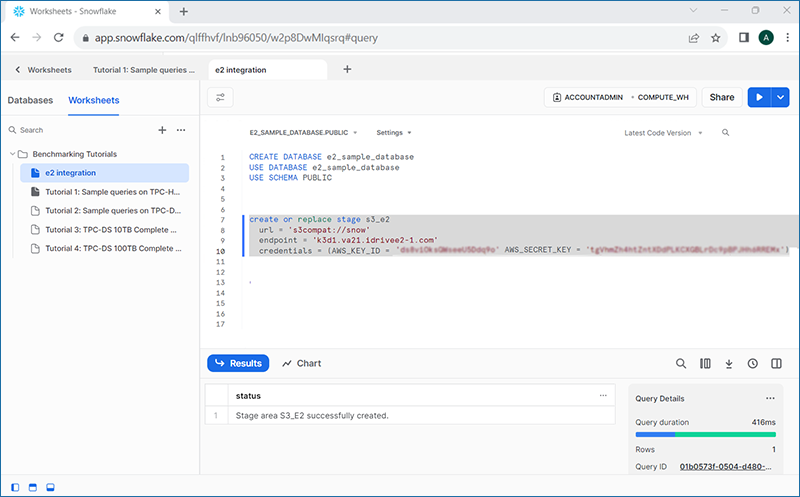
Create a Snowflake External Table
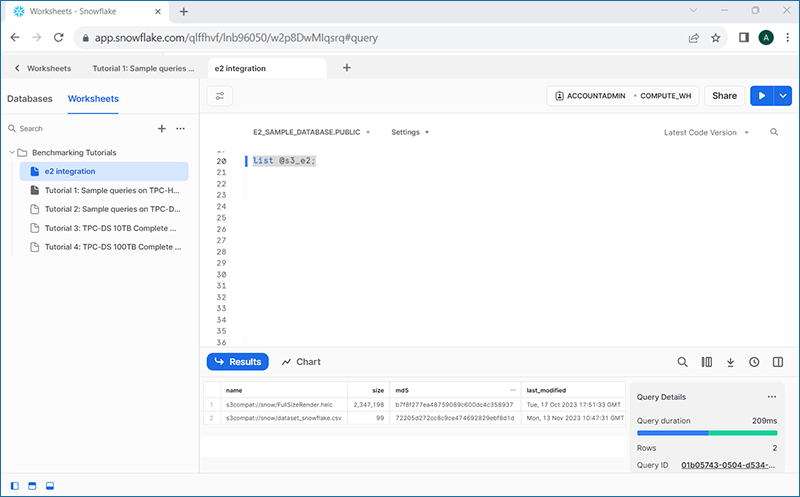
Once the contents of the IDrive® e2 Bucket are listed, we can create a Snowflake External Table to be used to query your data. You will need to update the stage name, and the file format type based upon your dataset, and name chosen for the stage.
CREATE OR REPLACE EXTERNAL TABLE e2_user_ref
WITH LOCATION = @s3_e2/
FILE_FORMAT = (TYPE = CSV  SKIP_HEADER = 1)
PATTERN='dataset_snowflake.csv';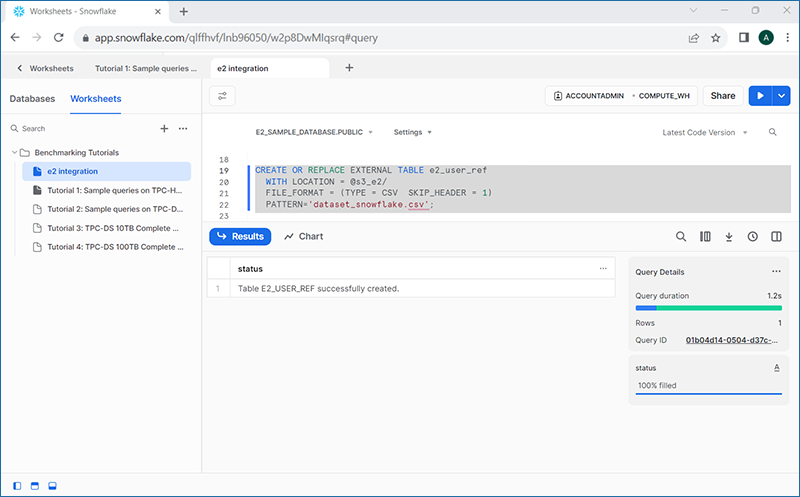
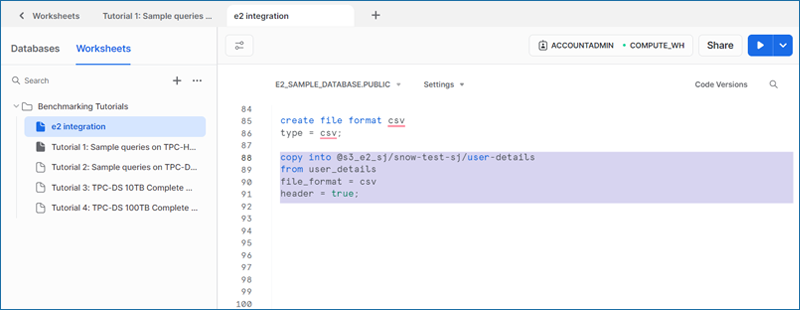
Copy data from a Snowflake table to IDrive® e2
You can also copy data from a Snowflake table to your IDrive® e2 storage.
copy into user_details from @s3.e2
files = ('dataset_snowflake.csv')
on_error = continue;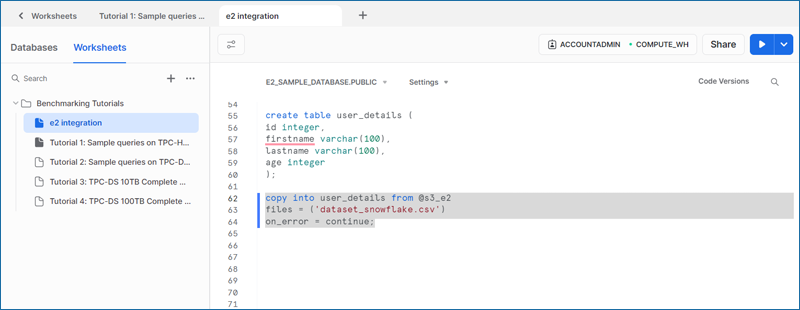
Run a Query on your data
After creating the table, you can also run some queries against your data in order to validate it.
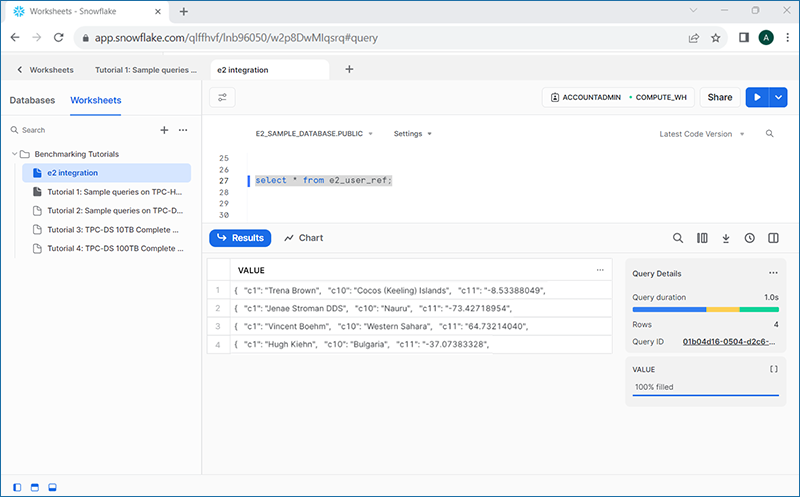
You have now learned how to create a Snowflake External Table referencing data residing on IDrive® e2.