- S3 Developer Guide
- Endpoints and Access Keys
- Third-Party Tools
- Veeam®
- Veeam® 12
Direct-to-Cloud - MSP360
- Ahsay
- Anchorpoint
- AirLiveDrive
- Archiware P5
- Arcserve
- Arcserve ImageManager
- Arq Backup
- Bunny.net
- ChronoSync
- Cloudmounter
- Cloudflare
- Comet
- Couchbase
- CrossFTP
- CuttingRoom
- Cyberduck
- Dropshare
- Duplicacy
- Duplicati
- EditShare
- ExpanDrive
- Fastly CDN
- Files.com
- Filezilla Pro
- Flexify.IO
- GoodSync
- Hammerspace
- Hedge OffShoot
- iconik
- Iperius Backup
- iRODS
- LucidLink
- Milestone XProtect
- Mountain Duck
- /n software S3 Drive
- Nextcloud
- NovaBACKUP
- odrive
- Photos+ Cloud Library
- PureStorage
- qBackup
- QNAP
- Rclone
- Retrospect
- S3 Browser
- S3cmd
- S3FS
- SimpleBackups
- Snowflake
- SyncBackPro
- Syncovery
- Synology Hyper Backup
- Transmit
- TrueNAS® CORE
- UpdraftPlus WordPress
- Vantage Gateway
- Veeam® Backup for Microsoft 365
- Vembu BDR Suite
- Veritas Backup Exec
- WinSCP
- Windows Network Drive
- CNAME Record Guide
- S3 API Documentation
Use Flexify.IO to Transfer Data from any cloud storage to IDrive® e2
Move large data sets from any source to IDrive® e2 Cloud Storage—at no cost to you.
Contact sales
Prerequisites:
Before uploading files using Flexify.IO, you require:
- An active IDrive® e2 account. Sign up here if you do not have one.
- A bucket in IDrive® e2. See how to create a bucket.
- Valid Access Key ID and Secret Access Key. Learn how to create an access key.
- A valid Flexify account. Sign up for one here.
Set Up Your Flexify.IO Account
You need to add storage accounts in Flexify for IDrive® e2 and the other cloud storage providers from which you wish to migrate data.
Create storage account for IDrive® e2:
- In the left navigation menu, select Data, and click ADD STORAGE ACCOUNT.
- Select IDrive e2 under Storage Provider.

- Enter your IDrive® e2 endpoint URL, Access Key ID and Secret Access Key.
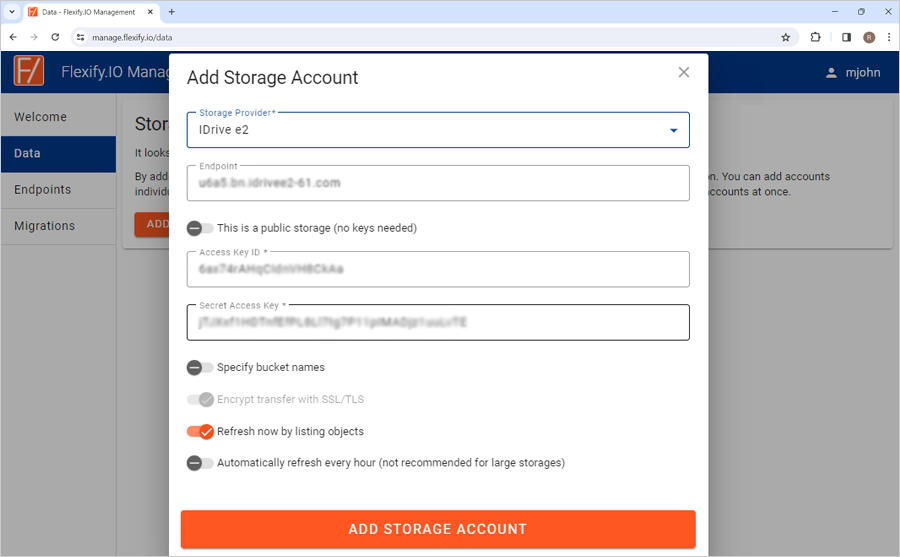
- Click ADD STORAGE ACCOUNT.
Create storage account for AWS S3:
- In the left navigation menu, select Data, and click ADD STORAGE ACCOUNT.
- Select Amazon S3 as your storage provider, and enter your Amazon S3 Access Key ID and Secret Access Key.
- Click ADD STORAGE ACCOUNT.
Create storage account for Google Cloud Storage:
- In the left navigation menu, select Data, and click ADD STORAGE ACCOUNT.
- Select Google Cloud Storage as your storage provider, and enter your Google Cloud Storage Access Key ID and Secret Access Key.
- Click ADD STORAGE ACCOUNT.
Create storage account for Azure Blob Storage:
- In the left navigation menu, select Data, and click ADD STORAGE ACCOUNT.
- Select Azure as your storage provider.
- Enter the Azure Blob Storage Account Name.
- Provide the Key or SAS token.
- Click ADD STORAGE ACCOUNT.
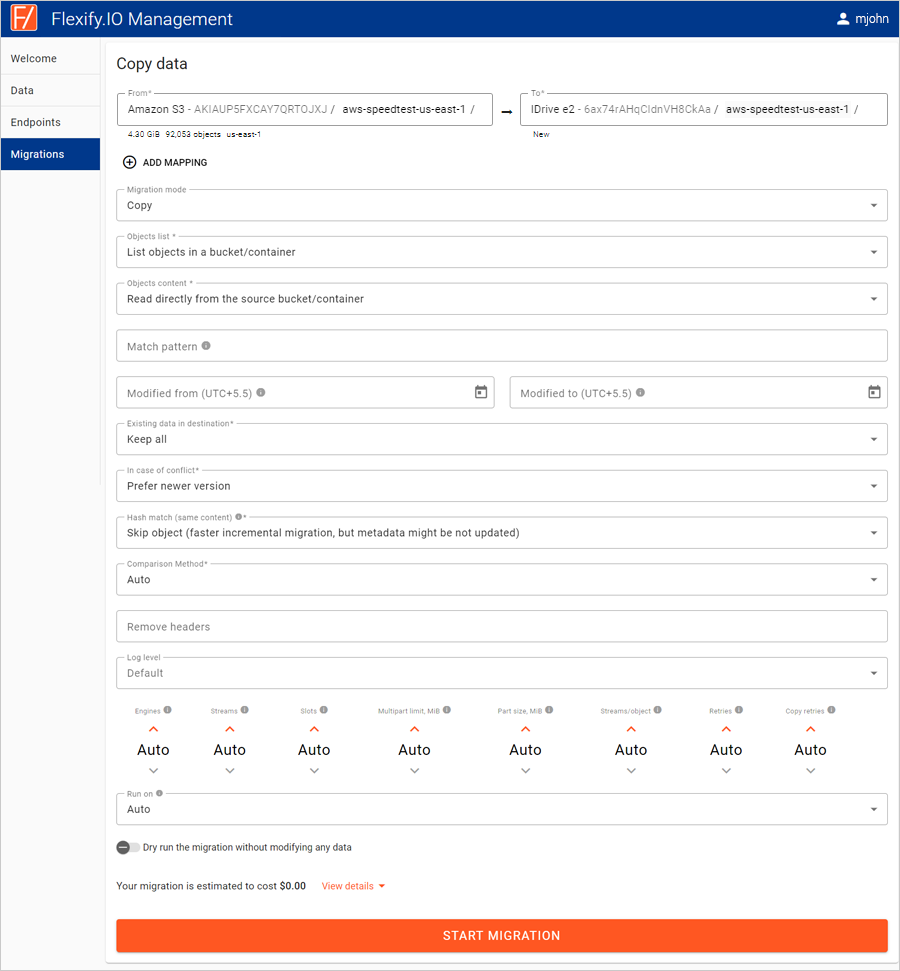
Migrate Files to IDrive® e2
- In the left navigation menu, select Migrations, and click NEW MIGRATION.
- Click From, and select the source buckets that contain the data you want to copy.

- Click To, and select the IDrive® e2 bucket that you want to copy your data into
 and enter additional buckets.
 - Click Advanced settings and make any necessary changes.
- Click START MIGRATION to begin the data transfer.