Differential and incremental backup for Microsoft SQL Server
Ensure reliable protection of your company’s active SQL Server databases with the option to configure scheduled backups, receive status alerts, and view detailed log reports.
Performing a differential backup
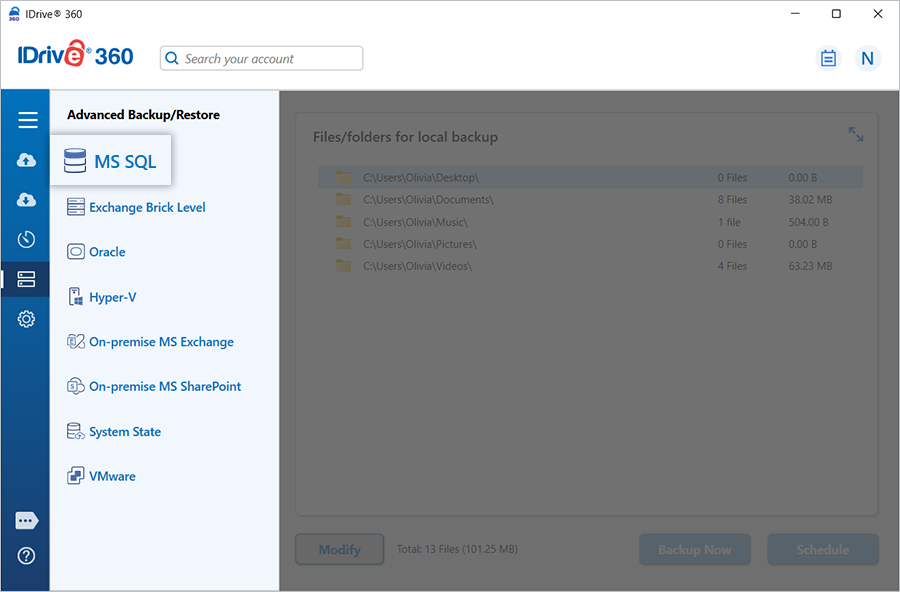
- Sign in to the IDrive 360 desktop application and navigate to 'Server Backup'. A side panel appears.
- Select ‘MS SQL’ to view the MS SQL connection screen, where ‘MS SQL backup’ is selected by default.
- When prompted, provide the authentication details.
IDrive 360 supports two authentication methods: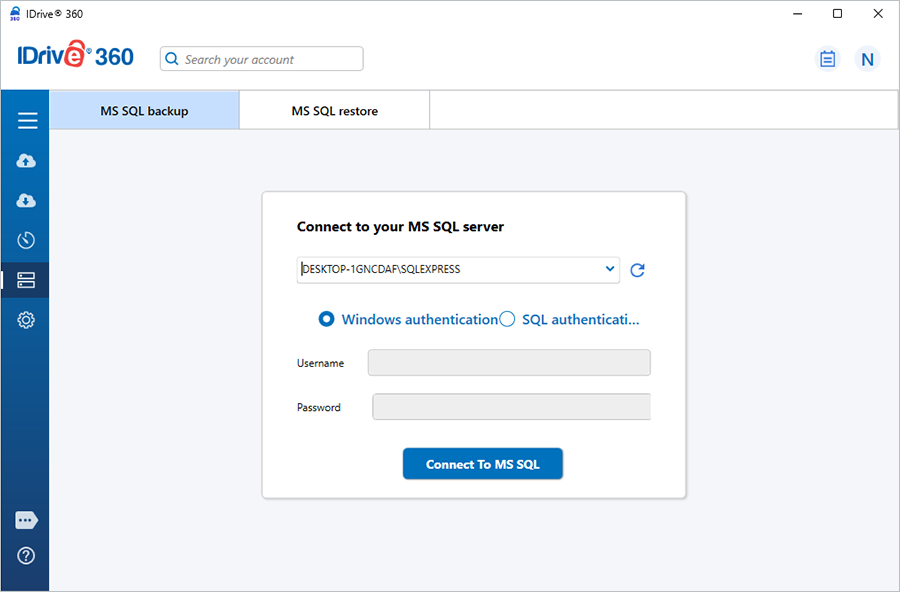
Windows Authentication Mode: When you connect using a Windows user account, SQL Server relies on the Windows principal token to validate your identity. Windows performs the authentication, so SQL Server does not request or verify a password. This is the default authentication mode and is generally more secure than SQL Server Authentication.
SQL Server Authentication Mode: When using SQL Server Authentication, logins are created and managed within SQL Server independently of Windows accounts. Both the username and password are stored in SQL Server. Each time you connect, you must provide these credentials. Ensure that all SQL Server logins use strong passwords to maintain account integrity.
Note: If you enter a blank login name, SQL Server automatically uses Windows Authentication. If the SQL Server instance is configured to allow only Windows Authentication, any SQL login you enter is ignored and Windows Authentication is used instead.
- Click 'Connect to MS SQL'.
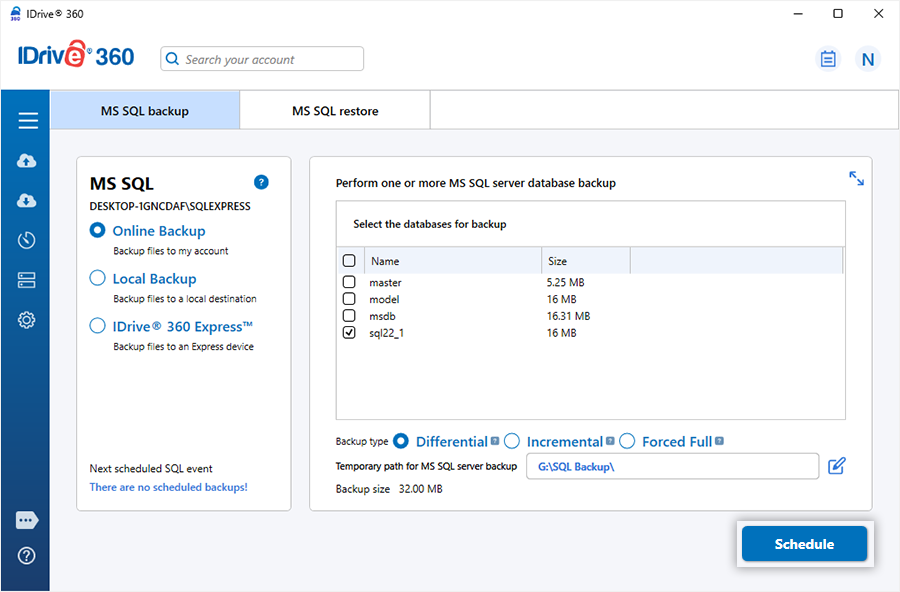
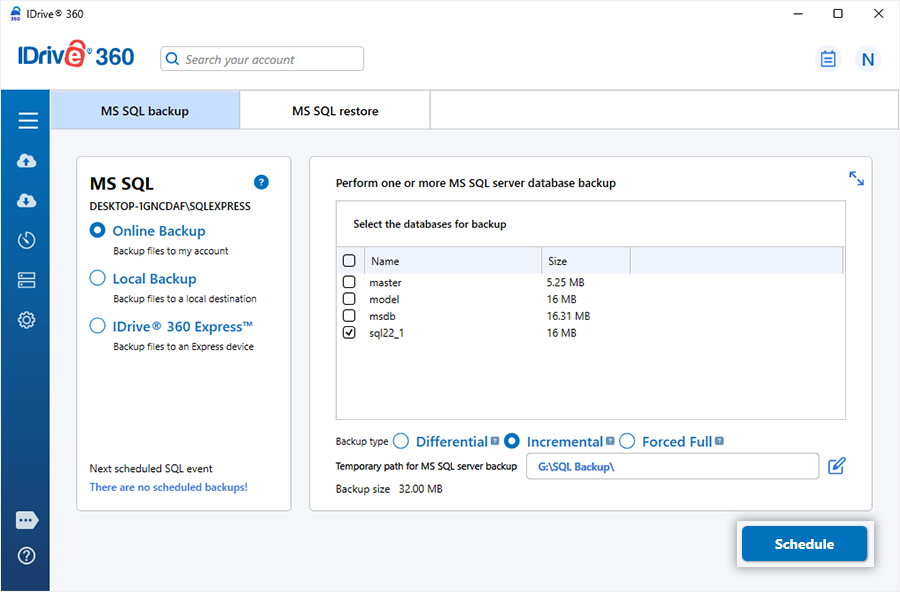
- Select 'Online Backup', 'Local Backup', or 'IDrive® 360 Express™'.
Note: Online Backup stores data in the IDrive 360 cloud. Local Backup and IDrive 360 Express store data on the local drive.
- Choose the required database(s) and specify the temporary backup path for local backup.
Note: When a local backup starts, a .ServerBackup folder is automatically created.
- Click 'Schedule Now'.
- The 'Scheduler' screen appears, allowing you to schedule the backup for a future date and time or run it immediately.
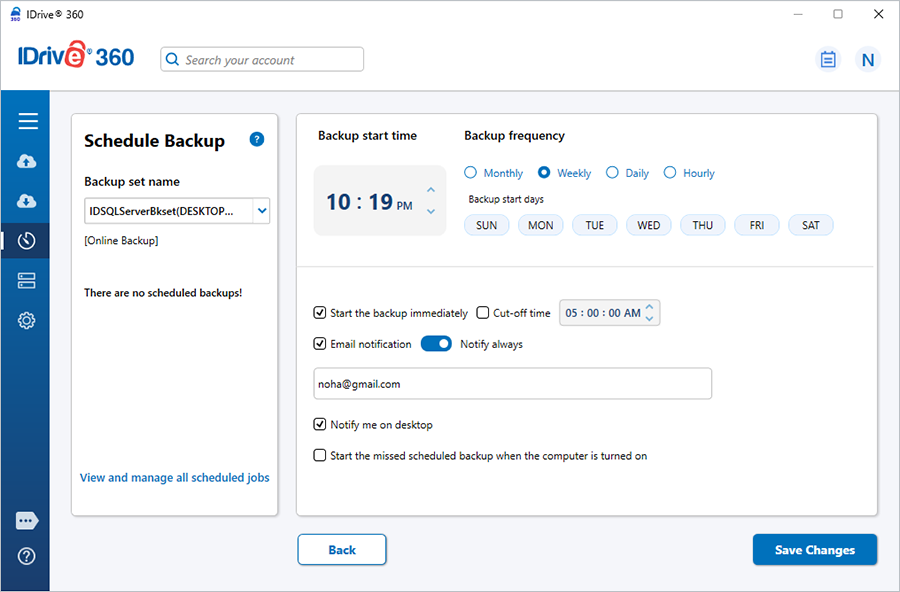
- Click 'Save Changes'.
Note: IDrive 360 for Windows allows scheduling SQL Server backups across multiple instances. Each backup set is named using the format ‘IDSQLServerBkset’ followed by the instance name.
Example: For the instance ‘MJOHN\INSTMJOHN’, the backup job name becomes ‘IDSQLServerBkset (MJOHN##INSTMJOHN)’.
Performing an incremental backup
- Sign in to the IDrive 360 desktop application and click ‘Server Backup’.
- Select 'MS SQL'. The MS SQL connection screen appears with 'MS SQL backup' preselected.
- Provide authentication details and click 'Connect to MS SQL'.
- Select 'Online Backup', 'Local Backup', or 'IDrive® 360 Express™'.
Note: The database must be in Full or Bulk-logged recovery model to support incremental backups.
- Select the required databases and choose 'Incremental'.
Note: To perform the incremental backup, database should be in a full/bulk-logged recovery model.
- Specify the local backup path and click 'Schedule Now'.
- In the 'Scheduler', configure a future schedule or run the backup immediately.
- Click 'Save Changes'.