On-premise MS Exchange Server Restore
IDrive 360 supports restoring Microsoft Exchange Server 2010, 2013, and 2016 databases either to the original mailbox database or to a Recovery database. A Recovery database provides a separate copy of your mailbox store, allowing you to extract or recover mailboxes and mailbox items without affecting the active mailbox database currently in use.
Restore to Original Location
Before starting the restore, dismount the required mailbox store and update its database properties.
Steps to dismount and modify mailbox database properties in Exchange Server 2013
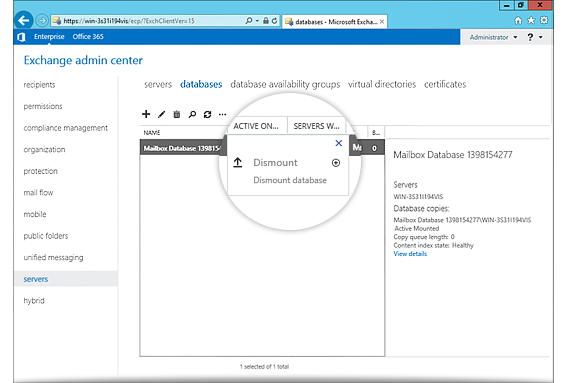
- Open the 'Exchange Admin faq_ss_img' and go to the 'databases' section.
- From 'servers', select the mailbox database you want to restore. Open the 'More' menu and choose 'Dismount database'.
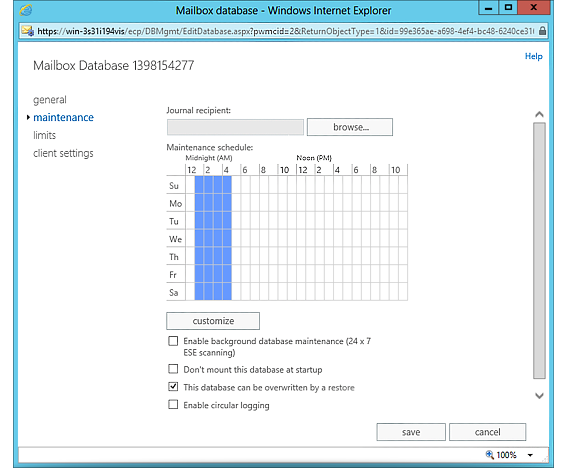
- Double-click the mailbox database to open its 'Properties' window. Under the 'maintenance' tab, enable 'This database can be overwritten by a restore' and save the changes.
- Repeat steps 3 for any other database that must be restored.
Note: After applying these changes, close the 'Exchange Control Panel' before running the restore.
Refer to the steps for Exchange Server 2010, 2007, 2003, and 2000
Start the Restore in IDrive® 360
- After the databases are dismounted, sign in to the IDrive 360 desktop application and click 'Restore'.
- Choose 'Online Restore', 'Local Restore', or 'IDrive® 360 Express™'.
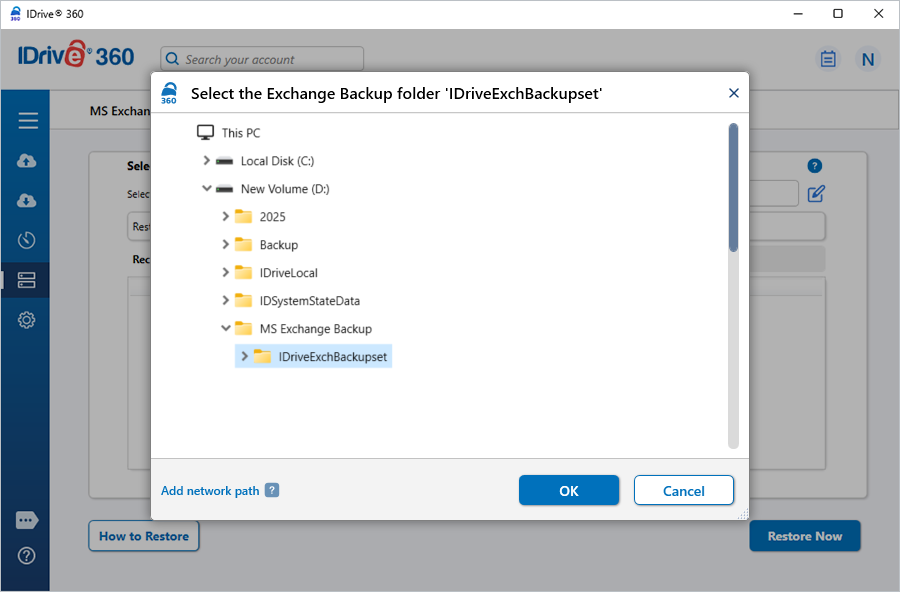
- Browse and select the 'IDriveExchBackupset' folder from your cloud account or local drive.
- For 'Local Restore', choose the required version from the 'Version' list.
- Click Restore Now to copy the 'IDriveExchBackupset' folder to the local system.
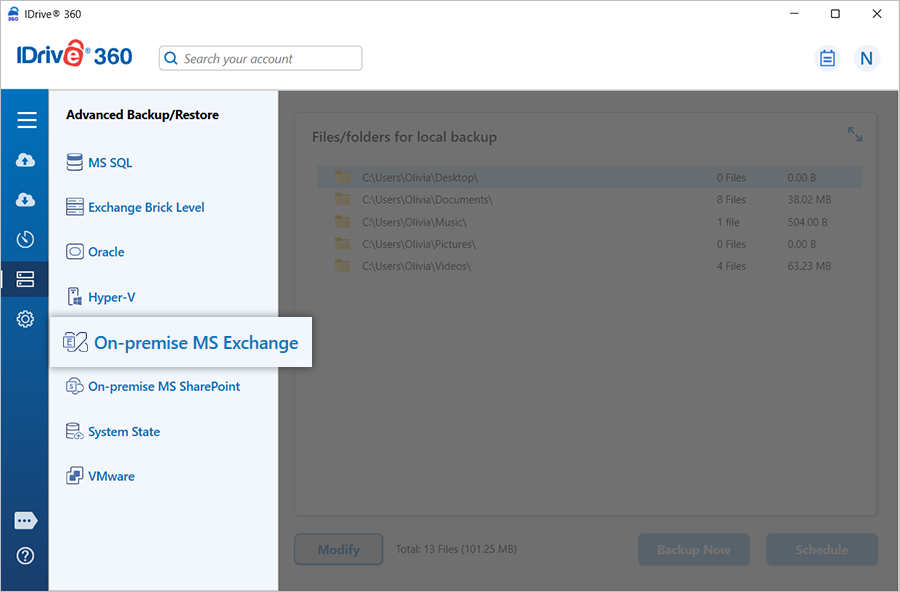
Note: If 'Local Restore' is selected, you can choose the required version from the 'Version' list. - After the restore completes, go to Server Backup > 'On-premise MS Exchange'.
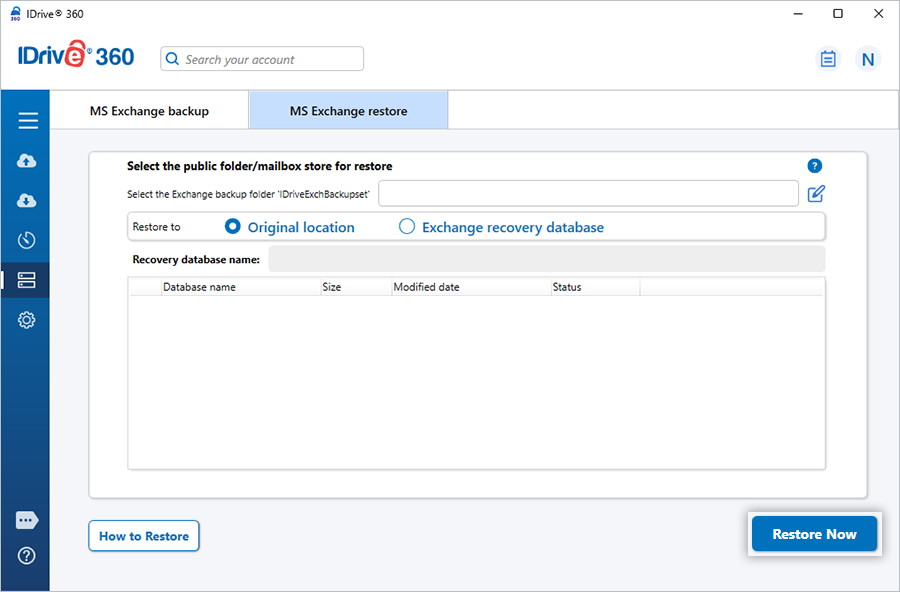
- In the backup/restore console, select 'MS Exchange Restore'.
- Browse for the previously restored 'IDriveExchBackupset' folder and click 'Restore Now'.
- A trained Exchange administrator should ideally perform the restore.
- The restore process replaces the existing Exchange databases on the server.
- Always keep an offline copy of Exchange databases before starting the restore.
- Do not stop or interrupt the operation once it begins.
- When the restore finishes, the restored Public Folder or Mailbox databases are automatically mounted.
- Create a Recovery database using the Exchange Management Shell:
New-MailboxDatabase -Recovery -Name <database name> -Server <servername> -EdbFilePath <path> -LogFolderPath <path>
Example: New-MailboxDatabase -Recovery -Name RDB2 -Server MBX1 -EdbFilePath "C:\Recovery\RDB2\RDB2.EDB" -LogFolderPath "C:\Recovery\RDB2"
Note: If If a Recovery database already exists, dismount it: Dismount-Database <"database name">
- Enable file-level restore permissions:
Set-MailboxDatabase -Identity <database name> -AllowFileRestore $true - After the database is dismounted, sign in to the IDrive 360 desktop application and click 'Restore'.
- Select the 'IDriveExchBackupset' folder from your account or local storage and click 'Restore Now'.
Note: The folder must be restored to the same path that existed during the backup.
- Once the folder is restored locally, open 'Server Backup' > 'On-premise MS Exchange'.
- In the console, choose'MS Exchange Restore', pick the restored 'IDriveExchBackupset' folder, and click 'Restore'.
Important Considerations