Seamless Synology Hyper Backup to S3 – Native, Secure, and Fully Featured
Seamless Synology Hyper Backup to S3 – Native, Secure, and Fully Featured
Your Synology NAS deserves a backup destination that unlocks its full potential without compromise. Unlike generic network shares, IDrive integrates natively with Hyper Backup, preserving everything:
- Complete system protection: Files, system settings, applications, LUNs, and metadata
- Bare-metal restore: Full NAS recovery in one click
- Synology-exclusive features: Snapshots, Cloud Sync, and hybrid workflows stay intact
No middleman PCs. No feature gaps. Just pure NAS-to-IDrive Storage efficiency.
Hyper Backup runs entirely on the Synology NAS. Schedule automated backups 24/7 – your computer stays off, your data stays safe.
Intelligent Versioning & Smart Rotation
Keep exactly what you need:
- Multi-version backups with point-in-time recovery
- Smart Rotate policies including Auto-delete by age, count, or custom rules
- No storage bloat as you only pay for active versions
Why IDrive + Synology - Hyper Backup Beats Mapped Drives Backups
Feature
S3 (Hyper Backup)
Mapped Network Drive
Backs up configs & apps
Bare-metal restore
Runs without PC
Versioning & rotation
Yes (native)
No (manual)
Synology snapshot syn
How to backup Synology NAS with IDrive® using Hyper Backup
Easily back up your Synology NAS to IDrive® using Hyper Backup. The setup has been tested and validated with Synology DSM 7.1 for seamless integration.
Follow the steps in this guide to backup Synology NAS to IDrive®
- Enable Synology Backup in IDrive
- Install Hyper Backup
- Configure Backup Destination
- Select Data for Backup
- Customize Backup Settings
- Finalize and Start Backup
- Enable Synology Backup in IDrive
- Sign in to your IDrive account.
- Navigate to NAS Backup > Synology Backup.
- Click Enable.

- Select a region and a plan and click Enable.
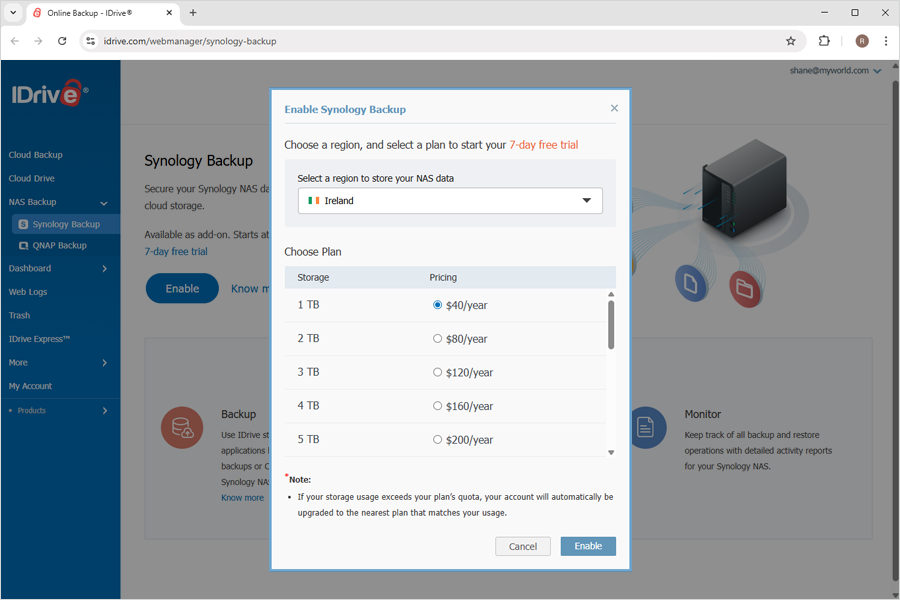
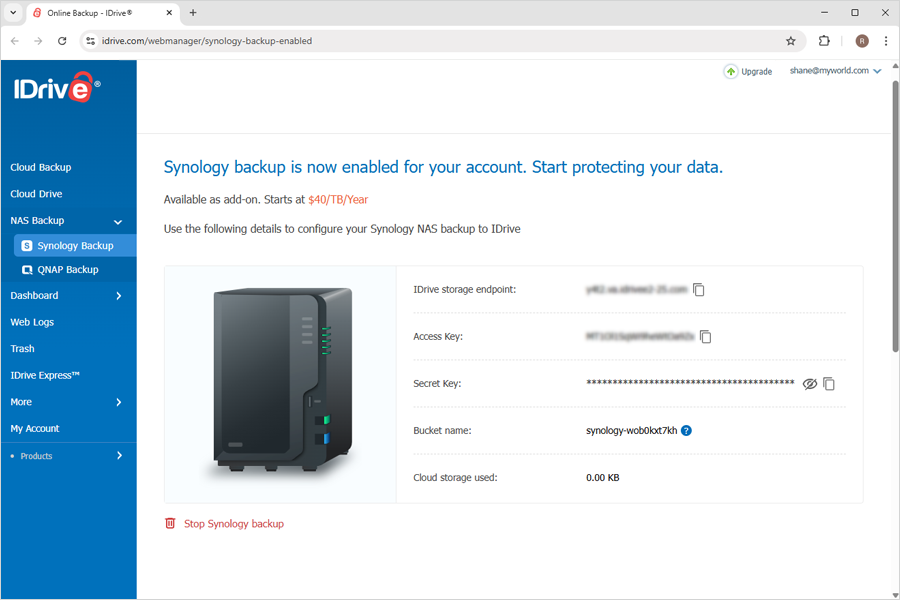
- Use the generated IDrive storage endpoint, secret and access keys for adding IDrive storage as destination in Hyper Backup, as shown in the below steps.
- Install Hyper Backup
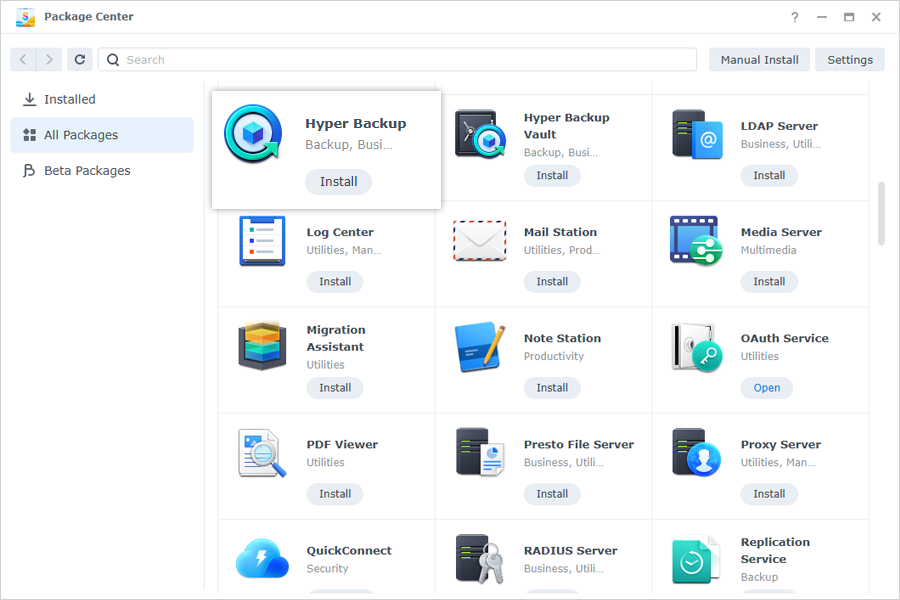
- Open Package Center on your Synology NAS.
- Search for Hyper Backup and install it.
- Configure Backup Destination
- Launch Hyper Backup and select S3 Storage as the backup destination.
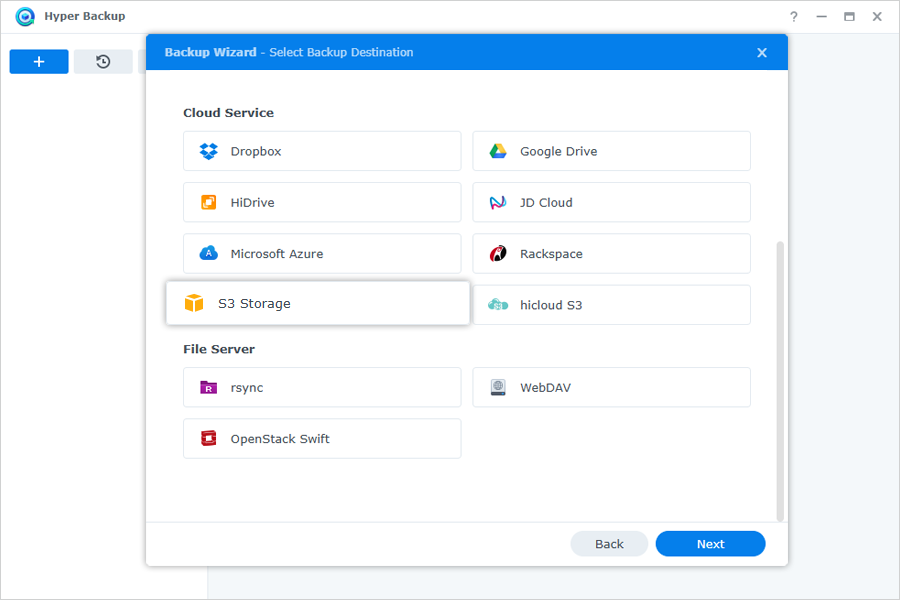
- From the S3 Server dropdown, choose Custom Server URL.
- Enter your IDrive® access keys and IDrive storage endpoint, then click Next.
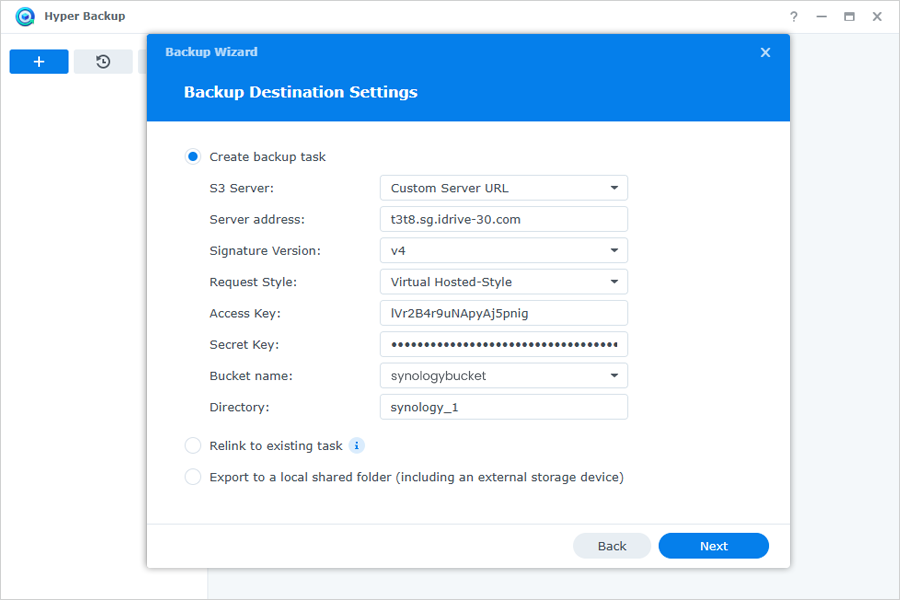
- Launch Hyper Backup and select S3 Storage as the backup destination.
- Select Data for Backup
- Choose the folders you want to back up.

- You can also select applications to include in the backup.
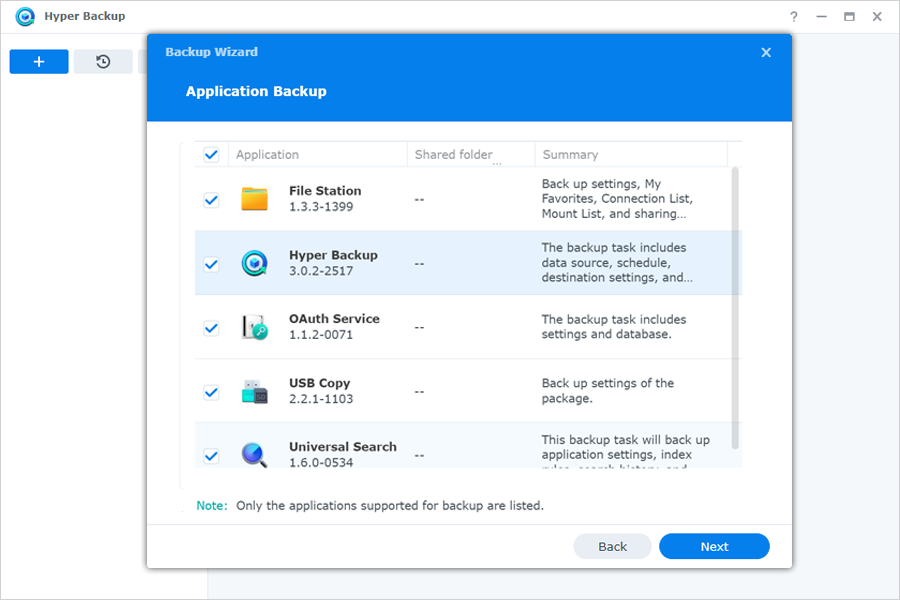
- Click Next to proceed.
- Choose the folders you want to back up.
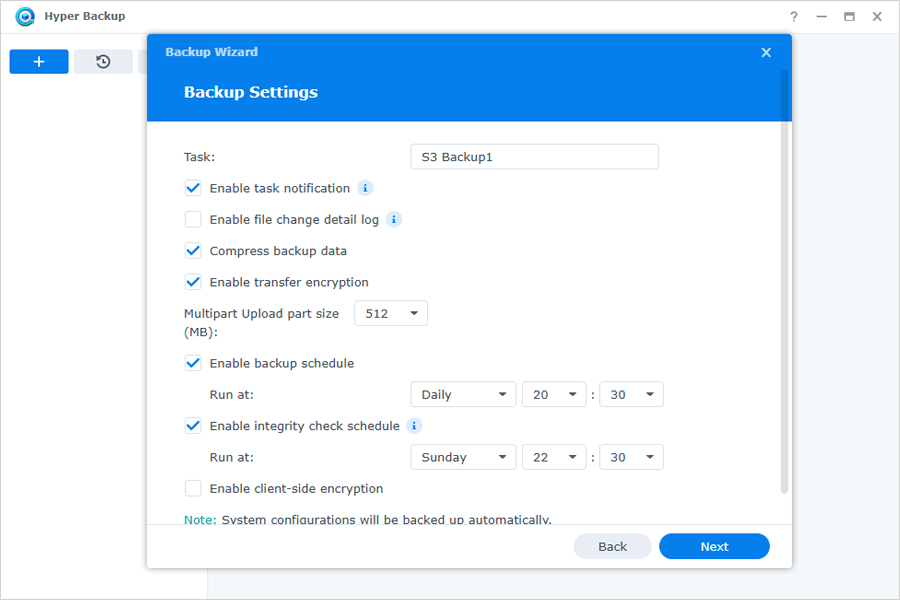
- Customize Backup Settings
- Set a backup schedule based on your needs.
- Ensure Enable transfer encryption is selected.
- Adjust other backup settings as required.
- Finalize and Start Backup
- Select the versioning option if needed.
- Click Done.
- Confirm the backup in the Back Up Now popup.
