- Getting Started
- Backup Console
- Management Console
- Windows Backup
- Mac Backup
- Linux Backup
- Mobile Backup
- Cloud Applications Backup
- Server Cloud Backup
- Mass Deployment
- Entire Machine Backup
- Google Drive Backup
- IDrive® 360 Express
- Single Sign-On
- System Requirements
- Account Management
- Security
- Firewall Guidance
Management Console
If your question is not addressed below, contact us through our support form and we will get back to you shortly.
Companies
- What is a company? How can I add companies to my account?
- How do I add users to a Company?
- How can I delete a company from my account?
- How many computers can I add in one company?
Users
- How do I add users to my account?
- Can I add multiple users to my account from a CSV file?
- Can I edit the user permissions?
- How do I move users between companies?
- Can I delete a user from my account?
- If I want to disable a user account, can I?
- What are active and inactive users?
- Can I reset the password for any of my users?
Settings
- How do I set up IP based login control for my IDrive® 360 account?
- How do I enable two-factor authentication for my IDrive® 360 account?
- How do I add or remove trusted devices for my IDrive® 360 account?
- How do I configure two-factor authentication for my IDrive® 360 account with Time-based OTP authentication method?
- Which Time-based OTP authenticator apps are supported by IDrive® 360?
- As an admin, how do I disable two-factor authentication for particular users?
- Can I disable two-factor authentication for my IDrive® 360 account with Time based OTP authentication, in case I lost access to my mobile device?
- I am unable to receive the SMS containing OTP for two-factor authentication. What should I do?
- How do I set backup email notifications in my IDrive® 360 account?
- Can I auto-archive inactive computers in my IDrive® 360 account?
General
What is a company? How can I add companies to my account?
You can add the companies of your organization within your IDrive® 360 account as a 'Company'. Create unlimited companies, delegate company administration to users, and remotely supervise all companies.
To add a company,
- Sign in to your IDrive® 360 account.
- Click 'Management Console'.
- Click the 'Add' button and click 'Add Company'. Alternatively, go to the 'Companies' tab, and click 'Add Company'.

- Enter the 'Company Name'. Create an admin by entering 'Email', 'First Name' and 'Last Name' of the admin.
- Click 'Create'.
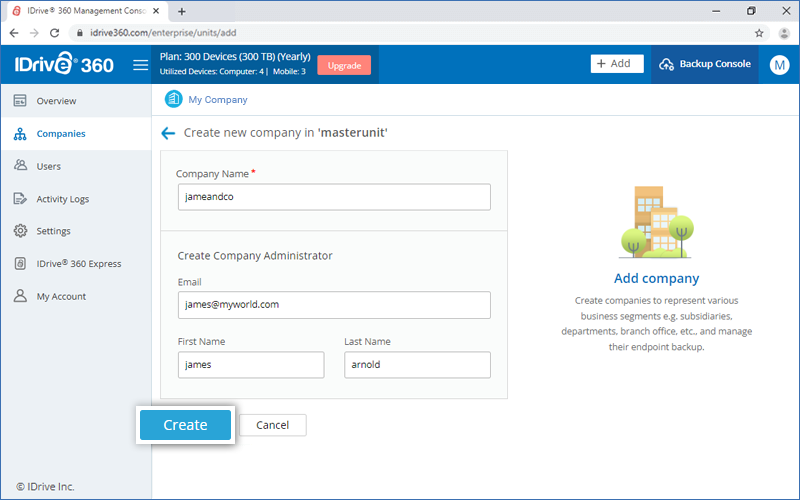
All the added companies appear in the 'Companies' tab, with details such as company name, overall storage usage, total number of users and computers in the company.
To further add sub-companies within a company, in the 'Companies' tab, click on a company name -> 'Add Company'.
How do I add users to a Company?
To add users to a company,
- Sign in to your IDrive® 360 account.
- Click 'Management Console'.
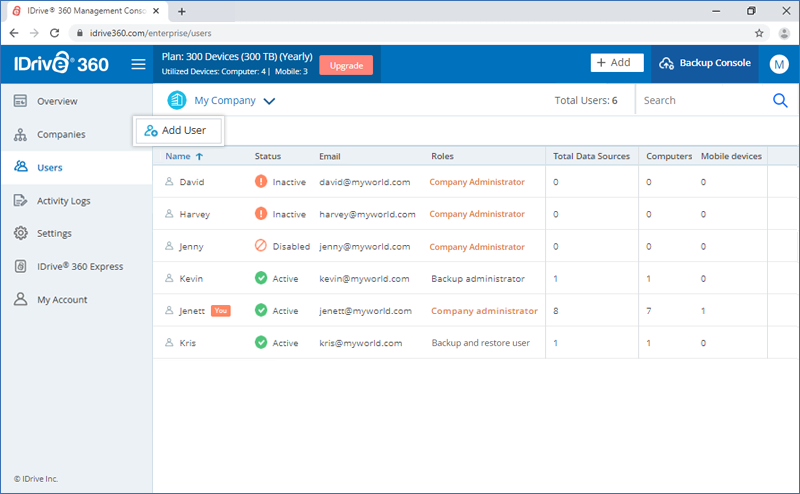
- Click the 'Add' button and click 'Add User'.
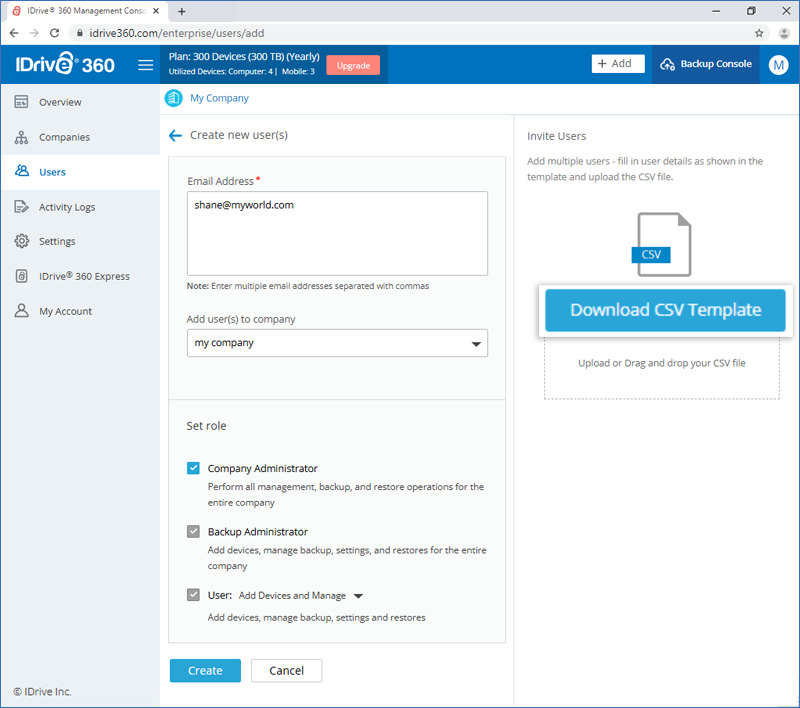
- In the 'Create new user(s)' section, enter the email addresses of the users, separated by commas. You can also add multiple users via a CSV template.
- Select the company where you wish to add the user from the 'Add user(s) to company' section.
- Set a role by selecting the required checkbox.
- Company Administrator: Perform all management, backup, and restore operations for the entire company.
- Backup Administrator: Add devices, manage backup, settings, and restores for the entire company.
- Users:
The following permission levels can be assigned to user profiles:- Add Devices and Manage: Add devices, manage backups, restores, and settings for the assigned company.
- Backup User: Perform backups and manage settings for assigned computers and mobile devices.
- Restore User: Perform restores from assigned computers and mobile devices. Enable the ‘Download files’ option to allow users to download backed-up files while managing assigned devices remotely.
- Backup and Restore User: Perform both backup and restore, and manage settings for assigned computers and mobile devices. Enable the ‘Download files’ option to allow users to download backed-up files while managing assigned devices remotely.
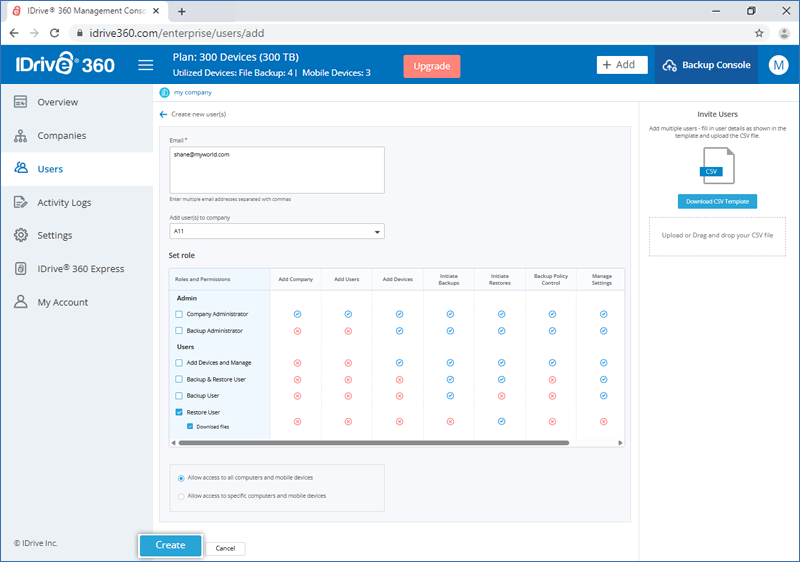
- Click 'Create'.
The invited users will get an email with the link to register to IDrive® 360. Once the users register, their accounts will be added to your account.
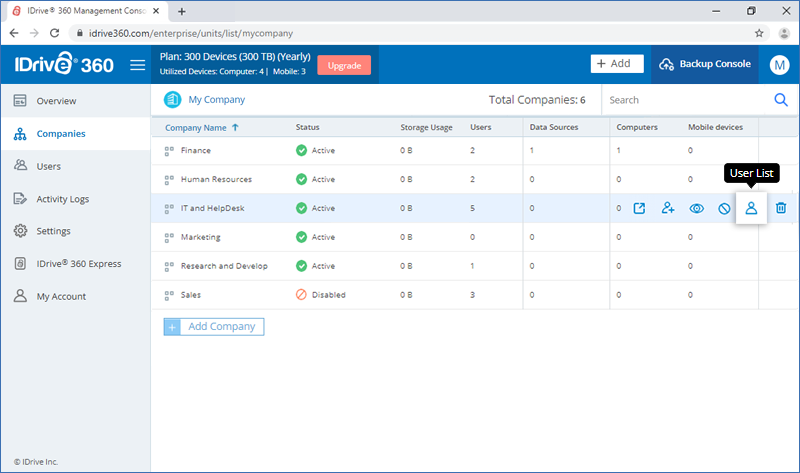
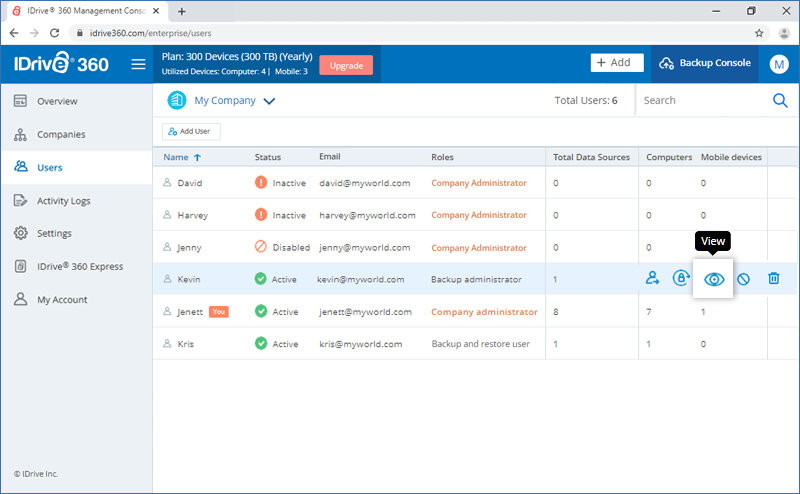
To view all the users in a company, hover over the company name and click  .
.
How can I delete a company from my account?
To delete a company,
- Sign in to your IDrive® 360 account.
- Click 'Management Console'.
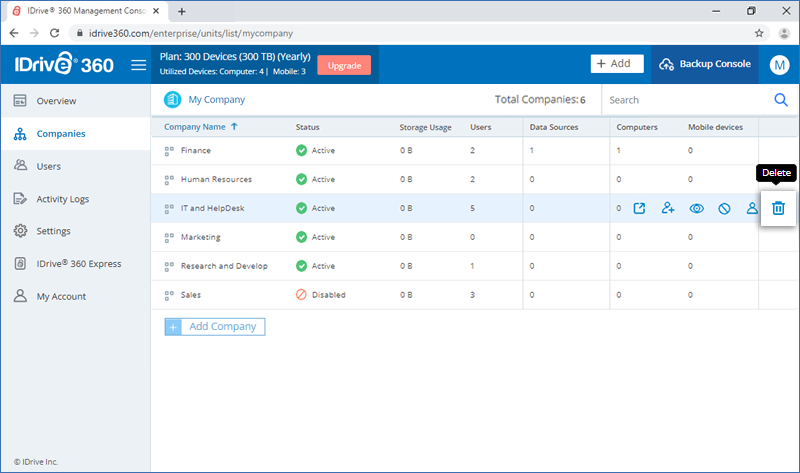
- Go to the 'Companies' tab and navigate to the company you wish to delete. Hover over the company and click

- In the popup that appears, agree to the terms by clicking the checkbox.
- Click 'Delete'.
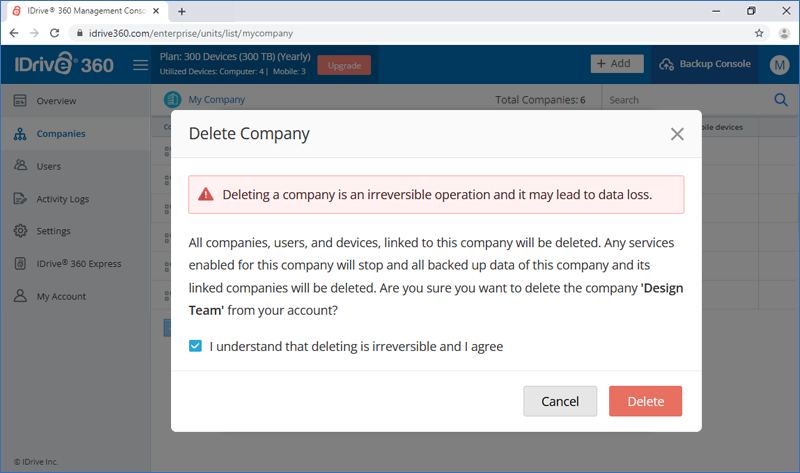
Once you delete a company, all the associated companies and users also get deleted.
How many computers can I add in one company?
You can add a maximum of 5000 computers in one company.
How do I add users to my account?
To add users,
- Sign in to your IDrive® 360 account.
- Click 'Management Console'.
- Click the 'Add' button and click 'Add User'. Alternatively, go to the 'Users' tab and click the 'Add User' button.
- In the 'Create new user(s)' section, enter the email addresses of the users, separated by commas. You can also add multiple users via a CSV template.
- Add the user to any existing company or sub-companies, by selecting from the dropdown list.
- Set a role by selecting the required checkbox.
- Company Administrator: Perform all management, backup, and restore operations for the entire company.
- Backup Administrator: Add devices, manage backup, settings, and restores for the entire company.
- Users:
The following permission levels can be assigned to user profiles:- Add Devices and Manage: Add devices, manage backups, restores, and settings for the assigned company.
- Backup User: Perform backups and manage settings for assigned computers and mobile devices.
- Restore User: Perform restores from assigned computers and mobile devices. Enable the ‘Download files’ option to allow users to download backed-up files while managing assigned devices remotely.
- Backup and Restore User: Perform both backup and restore, and manage settings for assigned computers and mobile devices. Enable the ‘Download files’ option to allow users to download backed-up files while managing assigned devices remotely.
- Click 'Create'.
The invited users will get an email with the link to register to IDrive® 360. Once the users register, their accounts will be added to your account and will appear in the 'Users' tab.
Note: To view the list of users added under a company or sub-company, click  and select the respective company or sub-company from the drop down.
Can I add multiple users to my account from a CSV file?
Yes, admin can invite and add multiple users at a time by uploading a CSV file.
To invite multiple users,
- Sign in to your IDrive® 360 account.
- Click 'Management Console'.
- Click the 'Add' button and click 'Add User'. Alternatively, go to the 'Users' tab and click the 'Add User' button.
- In the 'Invite Users' section, click the 'Download CSV Template' button.
- Once the file is downloaded, open the file, delete the sample entry and add the information of your users. Save the modified file.
- Drag and drop your saved CSV file onto the 'Upload or Drag and drop your CSV file' area. Alternatively, click the area to browse for your CSV file and upload.
In the popup that appears, click 'Add Users'.
Note: You can add up to 500 users at a time using the CSV file.
The invited users will get an email with the link to register to IDrive® 360. Once the users register, their accounts will be added to your account and will appear in the 'Users' tab.
Can I edit the user permissions?
Yes, you can edit user permissions for all the existing users.
To edit,
- Sign in to your IDrive® 360 account.
- Click 'Management Console'.
- Go to the 'Users' tab and navigate to the user for which you wish to edit the permissions. Hover over the user and click
 .
.
- In the popup that appears, click
 and edit the necessary permissions.
For 'Restore User' and 'Backup and Restore User' roles, select or clear the 'Download files' checkbox to control whether users can download backed-up files while managing assigned devices remotely. Enabling this option allows remote download of backed-up files, while disabling it prevents remote downloads.
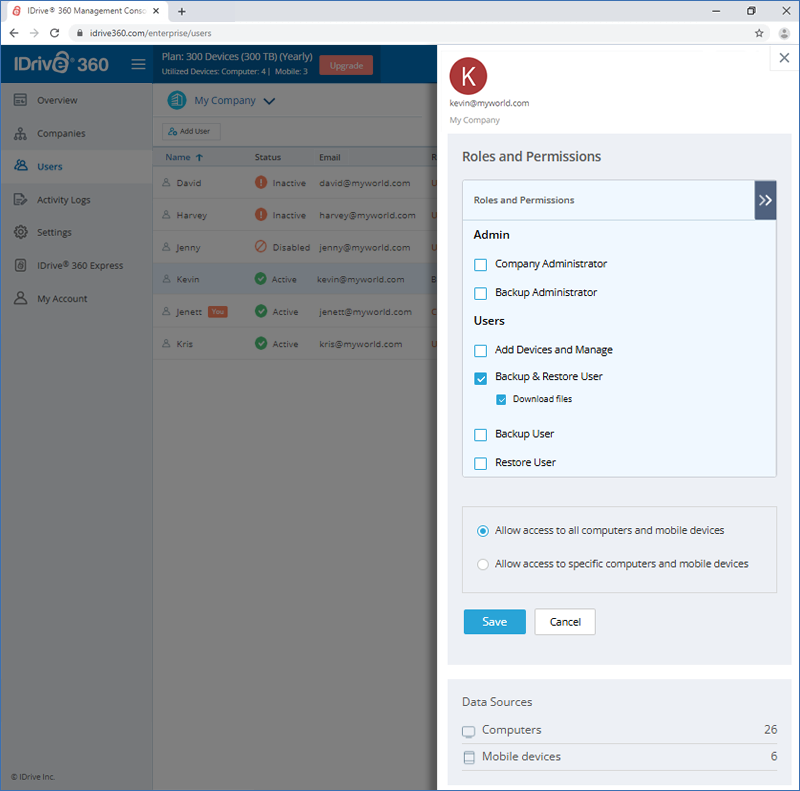
- Click 'Save'.
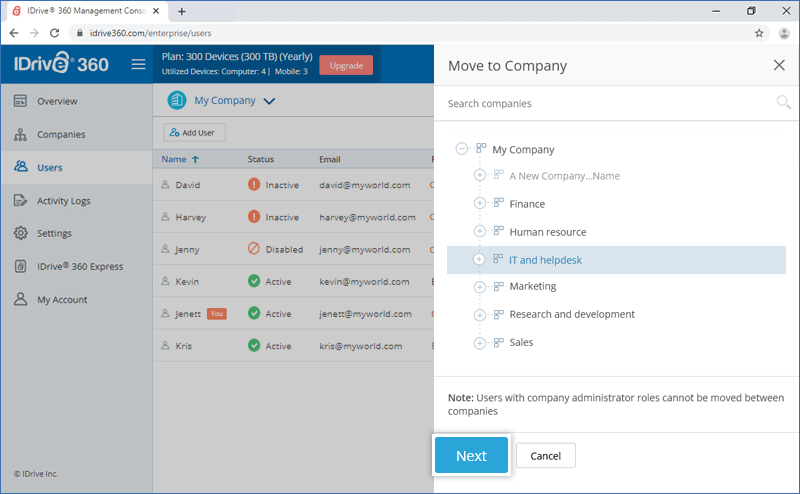
How do I move users between companies?
Only users with Account Owner or Company Administrator roles can move users between companies.
To move users,
- Sign in to your IDrive® 360 account.
- Click 'Management Console'.
- Go to 'Users'.
- Click
 corresponding to the user you want to move. The 'Move to Company' slider appears.
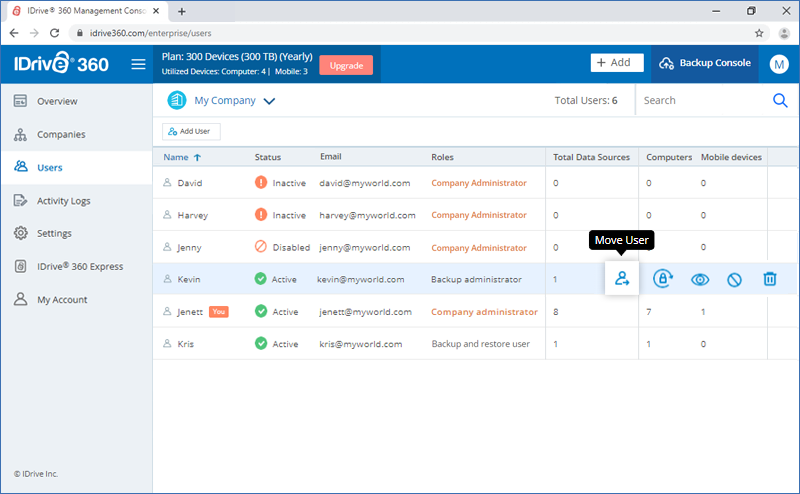
- Choose the destination company.
- Click 'Next', then verify the roles and selected company.
- Click 'Move' to confirm.The moved users will appear under the new company in the 'Users' tab. To view the moved users, select the target company from the dropdown menu at the top-left.
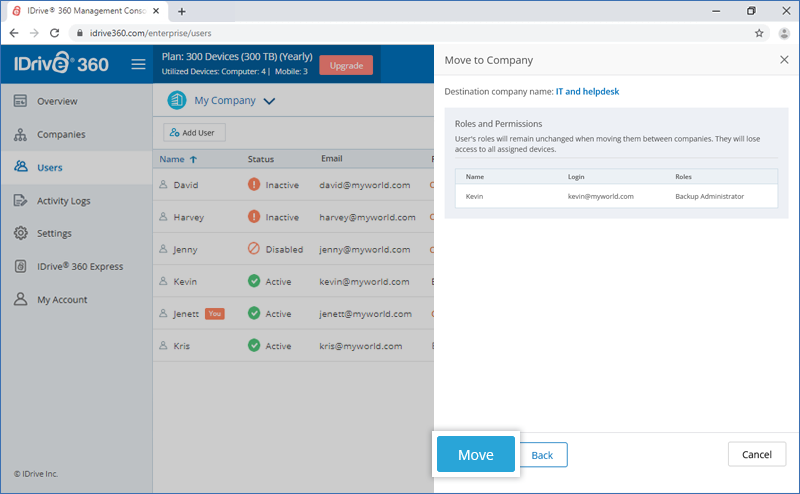
Note:
- Moving a user to another company will not change their assigned role.
- All devices currently assigned to the user will be unlinked after the move.
- Only users with the Backup Administrator, Backup User, Restore User, or Backup and Restore User roles can be moved.
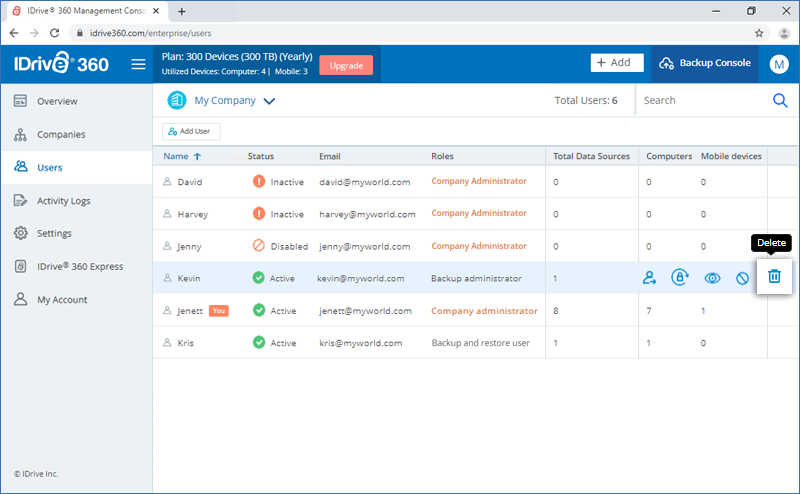
Can I delete a user from my account?
Yes, you can delete a user from your account.
To delete a user,
- Sign in to your IDrive® 360 account.
- Click 'Management Console'.
- Go to the 'Users' tab and navigate to the user you wish to delete. Hover over the user and click

- In the popup that appears, agree to the terms by clicking the checkbox.
- Click 'Delete'.
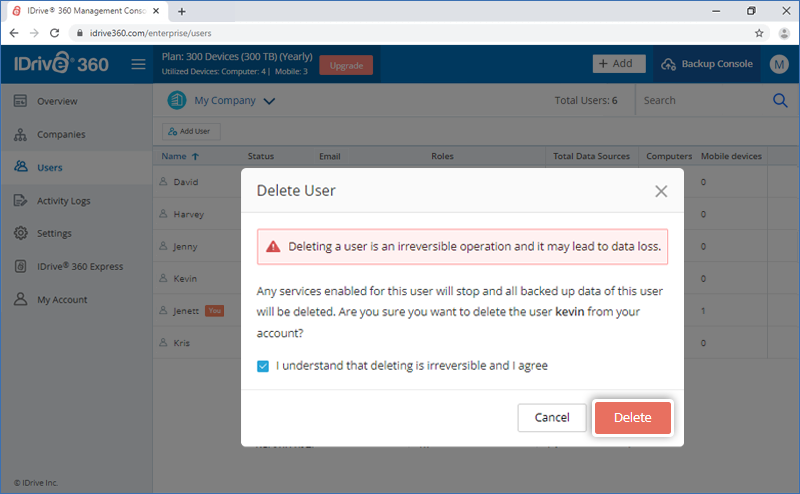
Once you delete, the user will not be able to sign in to their account. However, the configured computers can still be accessed by the admin.
If I want to disable a user account, can I?
Yes, as an admin, you can disable an active users' account from your IDrive® 360 account.
To disable,
- Sign in to your IDrive® 360 account.
- Click 'Management Console'.
- Go to the 'Users' tab, hover over an active users' name and click
 .
.
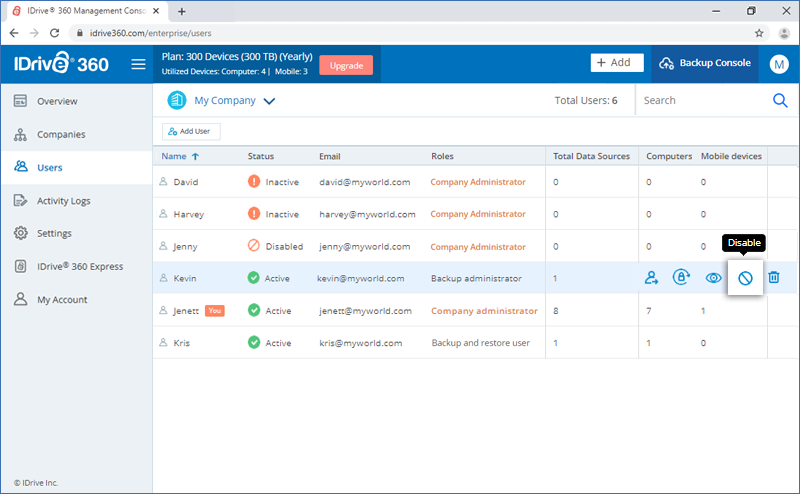
- In the popup that appears, click 'Disable'.
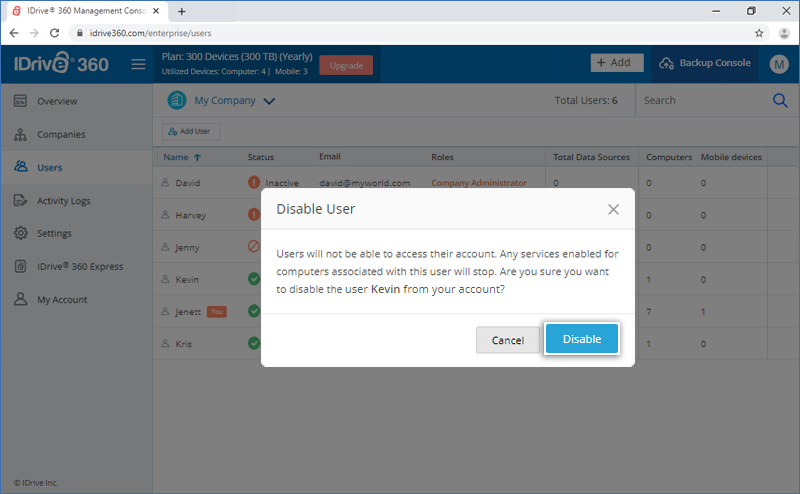
Once disabled, the user will not be able to sign in to their account.
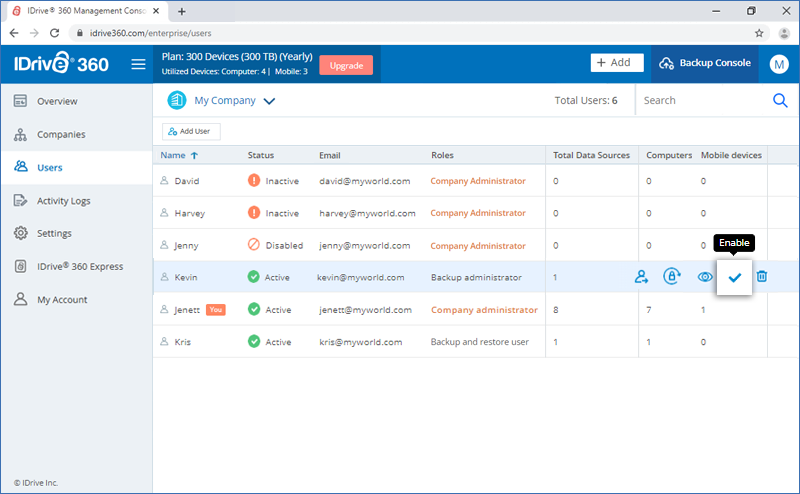
To enable the account, hover and click  against the disabled users' name. Click 'Yes' in the popup that appears.
What are active and inactive users?
When you invite and add a user to your account, they appear listed in the 'Users' tab. However, the status against the name will show as inactive till the user accepts the invite and registers for an IDrive® 360 account.
To resend the invitation, click  against the name of the inactive user.
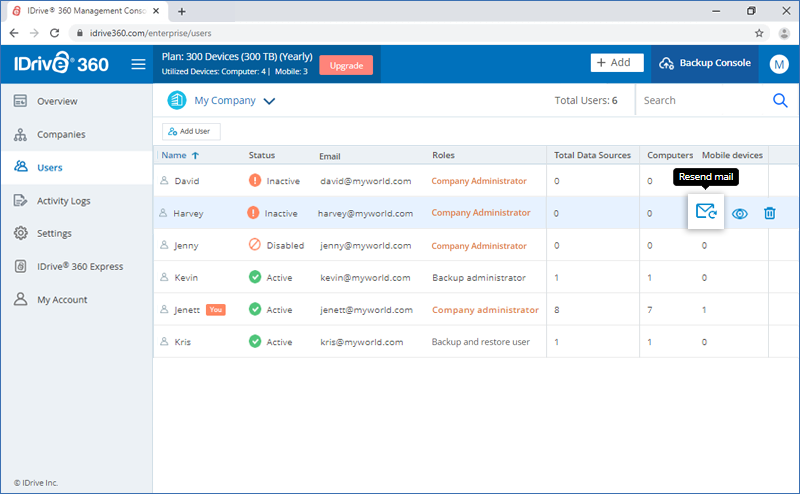
Once the user has registered for an account, the status changes to 'Active'.
Can I reset the password for any of my users?
Admin of an IDrive® 360 account has the option to initiate a password reset request for any of the active users.
To initiate,
- Sign in to your IDrive® 360 account.
- Click 'Management Console'.
- Go to the 'Users' tab, hover over an active users' name and click
 .
.
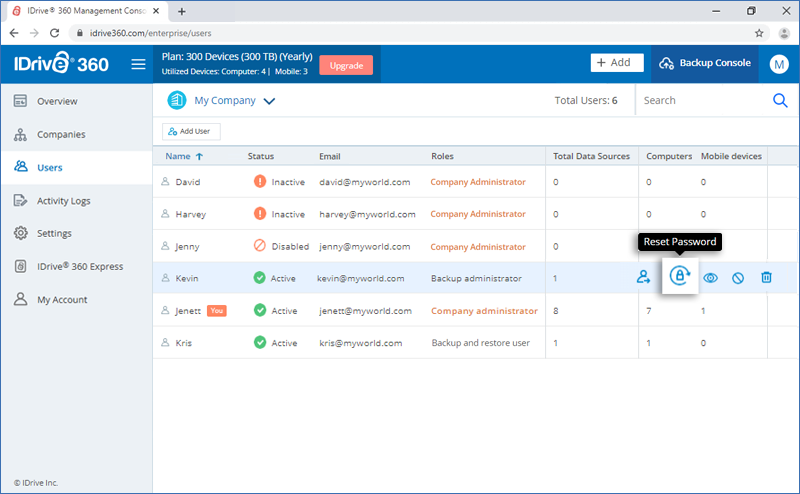
- In the popup that appears, click 'Reset'.
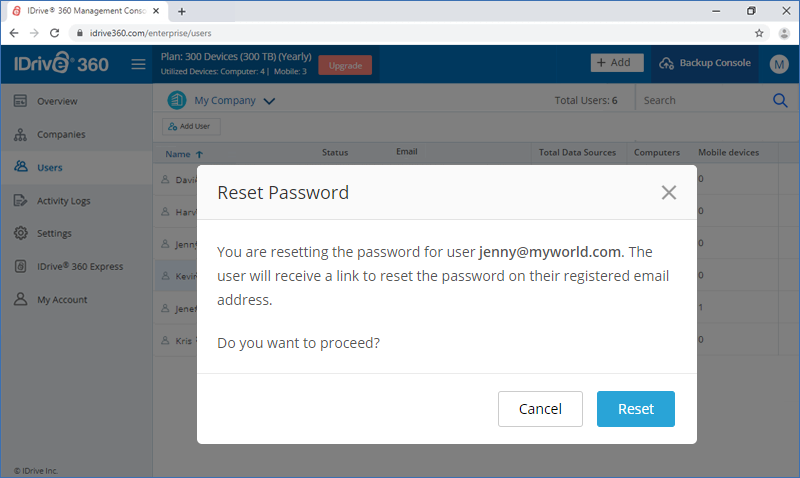
The user will receive an email with a link to reset the password for their account.
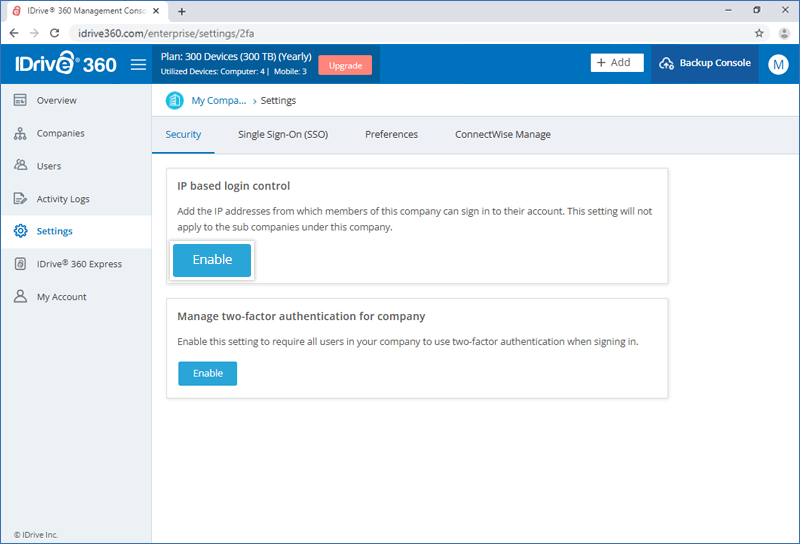
How do I set up IP based login control for my IDrive® 360 account?
'IP based login control' allows you to control your IDrive® 360 account access to the specific IP addresses, range of IP addresses or subnets.
To enable IP based login control,
- Sign in to your IDrive® 360 account.
- Click 'Management Console' and go to the 'Settings' tab -> 'Security'.
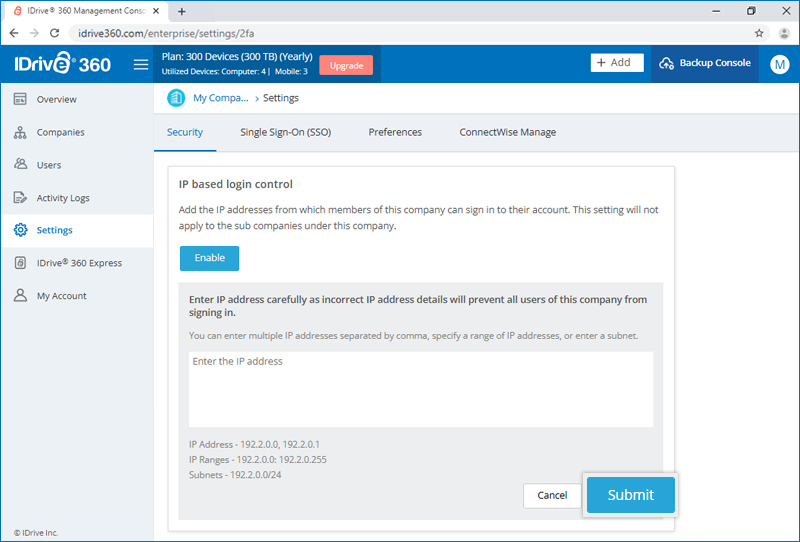
- In the 'IP based login control' section, click 'Enable'.
- Enter the IP addresses, range of IP addresses or subnets from which the members of a company can sign in to the backup or management console.
Note: You can enter multiple IP addresses separated by commas, specify a range of IP addresses, or enter a subnet
- Click 'Submit'.
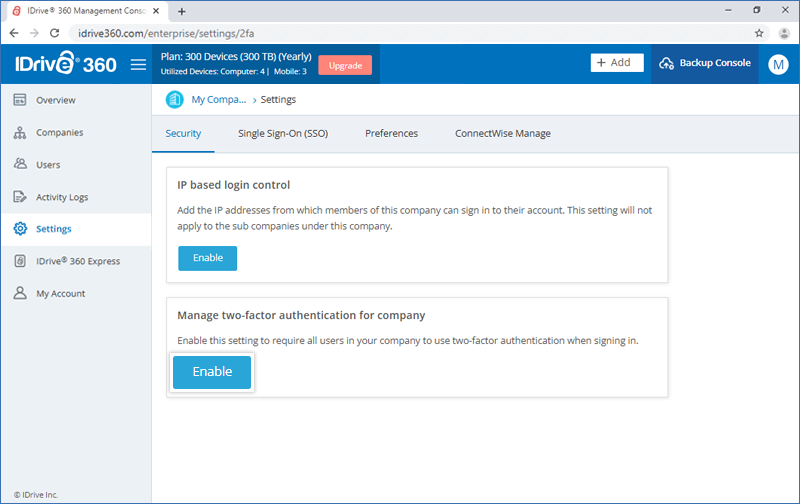
How do I enable two-factor authentication for my IDrive® 360 account?
The two-factor authentication process enhances the security of your account and prevents access by unauthorized parties. Once two-factor authentication is enabled, in addition to your password, you will need to enter a verification code received on your registered email address, phone number or Time-based OTP authenticator app, while signing in to your IDrive® 360 account.
To enable two-factor authentication for all the users in your account,
- Sign in to your IDrive® 360 account.
- Click 'Management Console' and go to 'Settings' -> 'Security'.
- In the 'Two-factor Authentication' section, click 'Enable'.
- In the popup that appears, click 'Enable'.
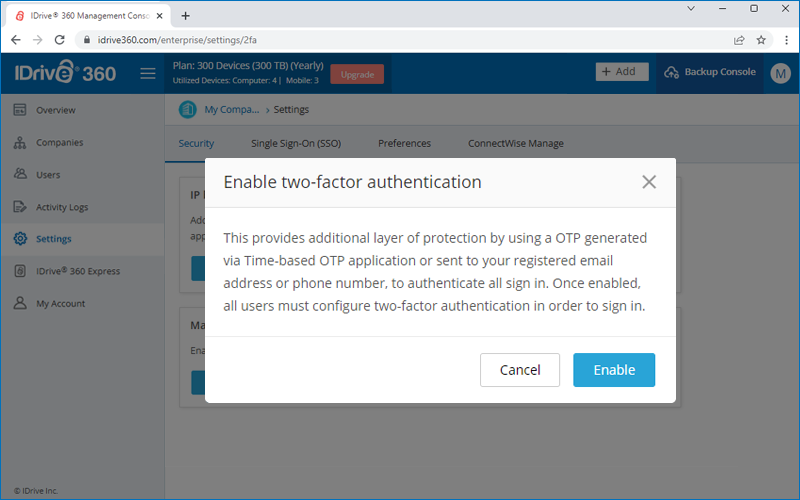
Note: Once enabled, all users as well as the admin must configure two-factor authentication in order to sign in. If you do not wish to configure for all users, you can select and disable it for particular users. Read more.
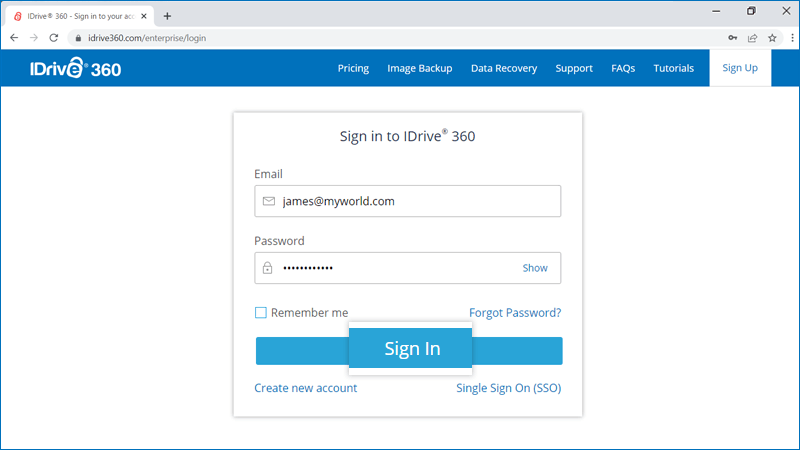
To sign in after two-factor authentication is enabled,
- On the sign in screen, enter your email address and password and click 'Sign In'.
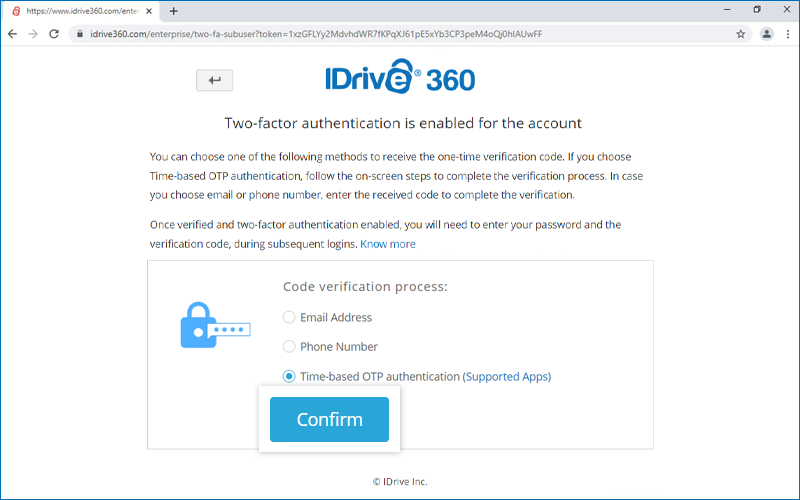
- Select 'Email Address' or 'Phone Number' or 'Time-based OTP authentication' as your preferred method of receiving the one-time verification code and click 'Confirm'. If you have chosen a Phone Number, enter the same and click 'Send Code'. Click here to know how to set up via Time-based OTP Authentication method.

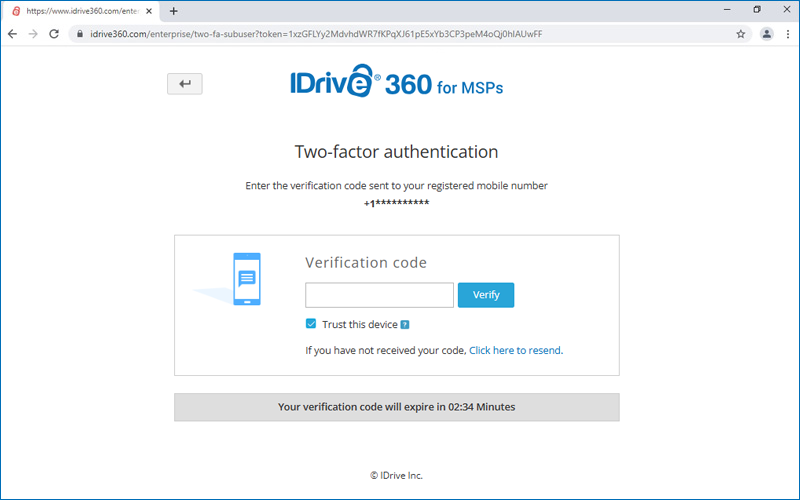
- You will be prompted to enter the verification code sent to your email address or phone number.
- Enter the code and click 'Verify'.
How do I add or remove trusted devices for my IDrive® 360 account?
When signing in to your IDrive® 360 account with two-factor authentication enabled, you can choose to trust the browser or device you are using. The 'Trust this device' option allows you to skip the secondary verification code when signing in from a recognized browser for the next 30 days, reducing repeated verification prompts while maintaining account security.
To add a trusted device,
- Navigate to the IDrive® 360 sign-in screen.
- Enter your email address and password, and click 'Sign In'.
- Enter the verification code received through your configured two-factor authentication method.
- Select 'Trust this device'. The browser will be added to your list of trusted devices.
To view or delete trusted devices,
- Sign in to your IDrive® 360 account and go to 'My Account' > 'Security'.
- Under 'Trusted Devices', view the list of trusted browsers.
- To delete a single device, click
 next to it.
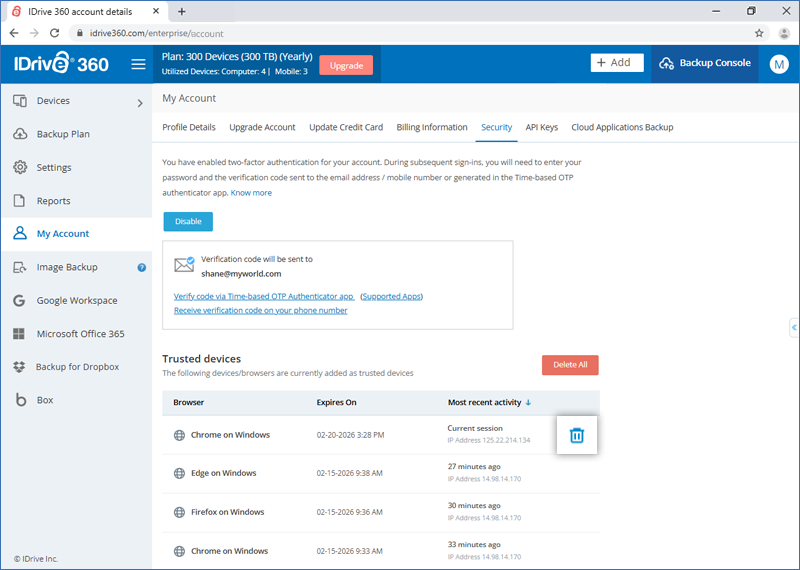
- Click 'OK' on the confirmation popup.
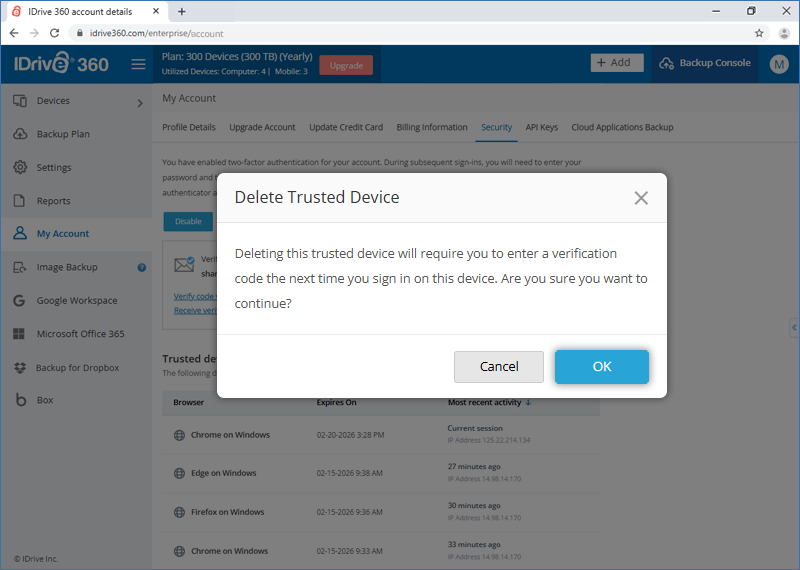
- The device will be removed, and secondary verification will be required at the next sign-in.
To delete all trusted devices,
- Click 'Delete all'.
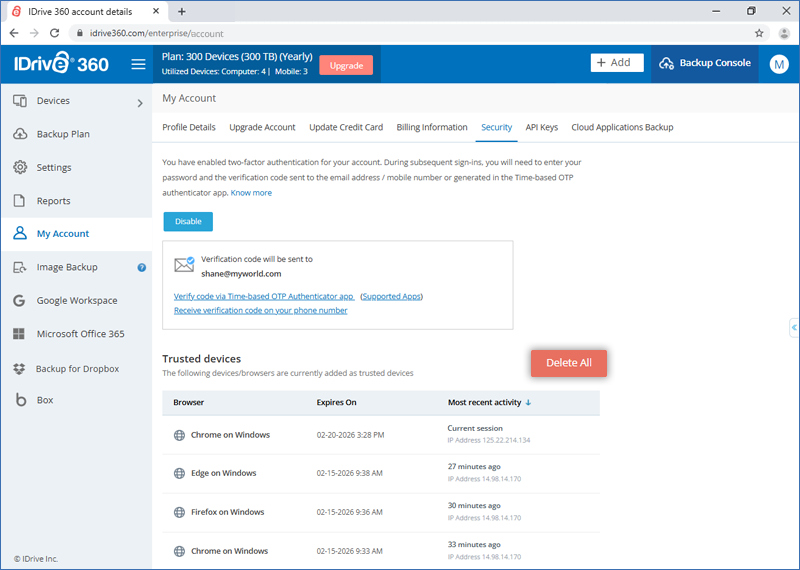
- Click 'OK' on the confirmation popup.
All devices will be removed, and secondary verification will be required at the next sign-in.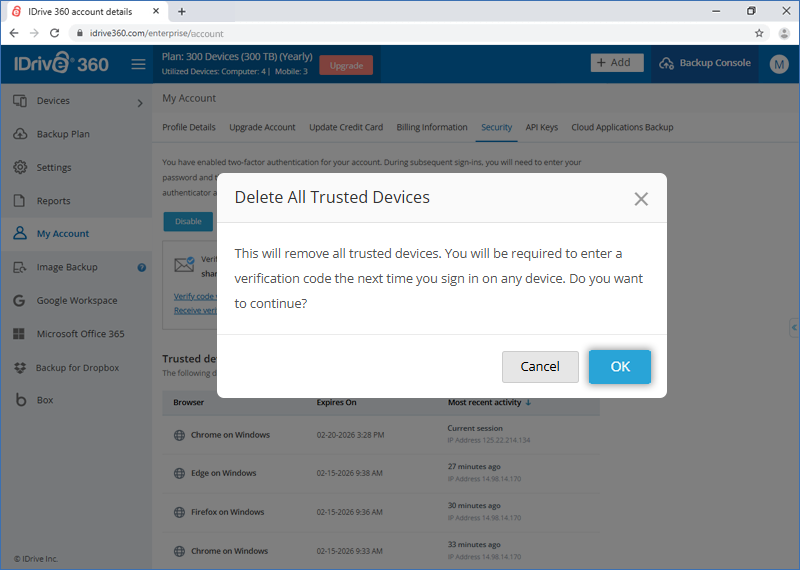
Note: Deleting trusted devices does not disable two-factor authentication. Secondary verification will be required during the next sign-in for all authentication methods, including Email, Phone, and Time-based OTP.
How do I configure two-factor authentication for my IDrive® 360 account with Time-based OTP authentication method?
To configure two-factor authentication for your IDrive® 360 account with the Time-based OTP authentication method, you will need to enter a verification code generated by the Time-based OTP authenticator app, installed on your mobile device, while logging in to IDrive® 360.
Follow the below steps to set up two-factor authentication with the Time-based OTP authenticator app:
- Once the Two-factor Authentication is enabled for your IDrive® 360 account, on the sign in screen, enter your email address and password and click 'Sign In'.
- Select 'Time-based OTP authentication' as your preferred method of receiving the one-time verification code, and click 'Confirm'. See supported TOTP apps
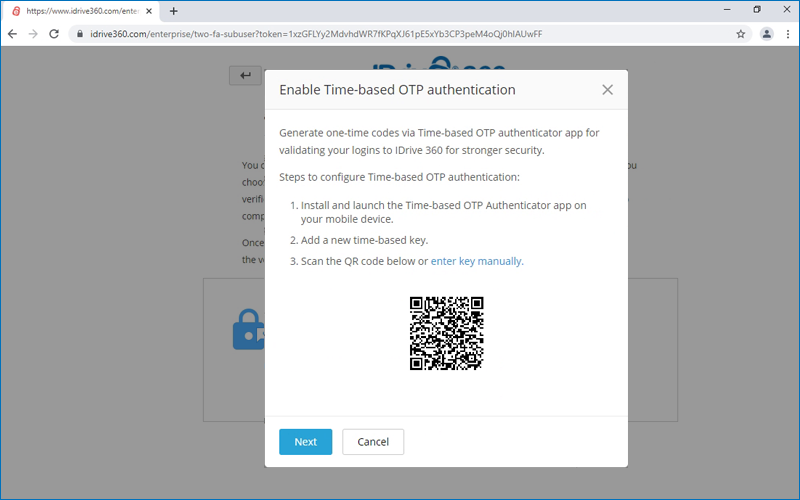
- Install and launch any Time-based OTP authenticator app on your mobile device and scan the QR code displayed on your computer screen. Alternatively, you can also view the key by clicking on 'enter key manually' and type it manually on your mobile device and click 'Next'.
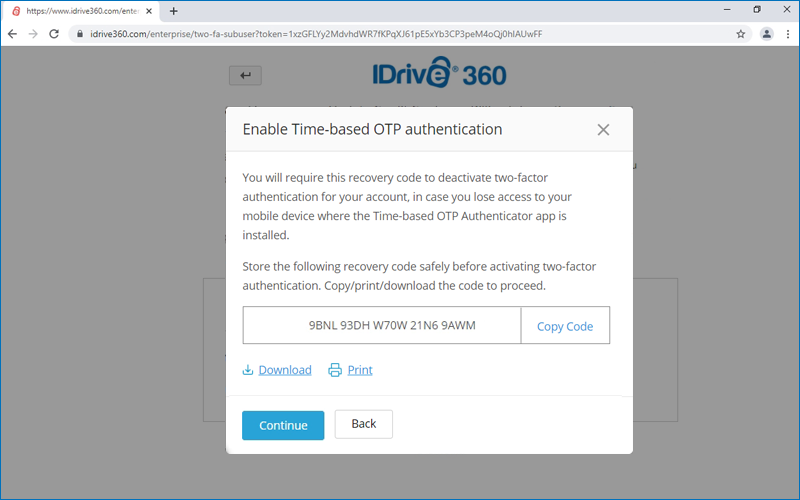
- Copy and save the recovery code displayed on your computer screen securely or click 'Download' to download and save as a .txt file. Click 'Continue'.
Note: You will require the recovery code to deactivate two-factor authentication for your account, in case you lose access to your mobile device where the Time-based OTP Authenticator app is installed.
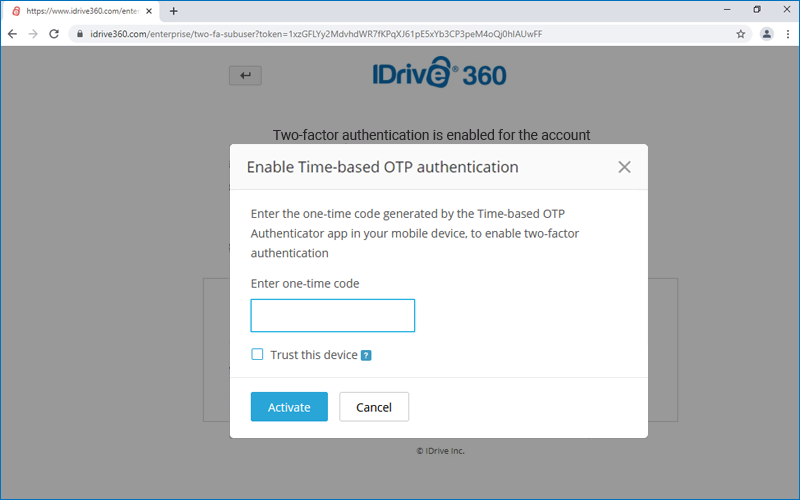
- Enter the one-time code generated by the Time-based OTP Authenticator app in your mobile device and click 'Activate'.
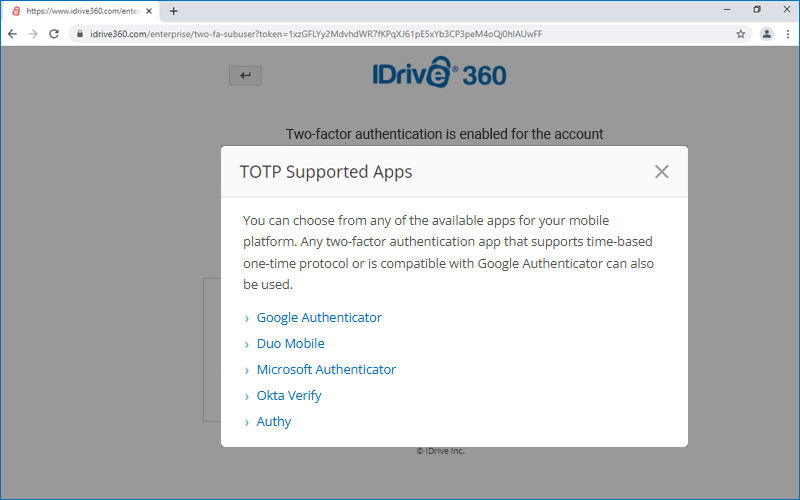
Which Time-based OTP authenticator apps are supported by IDrive® 360?
IDrive® 360 supports the following Time-based OTP authenticator apps:
- Google Authenticator (Android/iPhone/BlackBerry)
- Duo Mobile (Android/iPhone)
- Microsoft Authenticator (Android/iPhone/Windows Phone 7)
- Okta Verify (Android/iPhone)
- Any other authentication app that supports time-based one-time protocol, or compatible with Google Authenticator
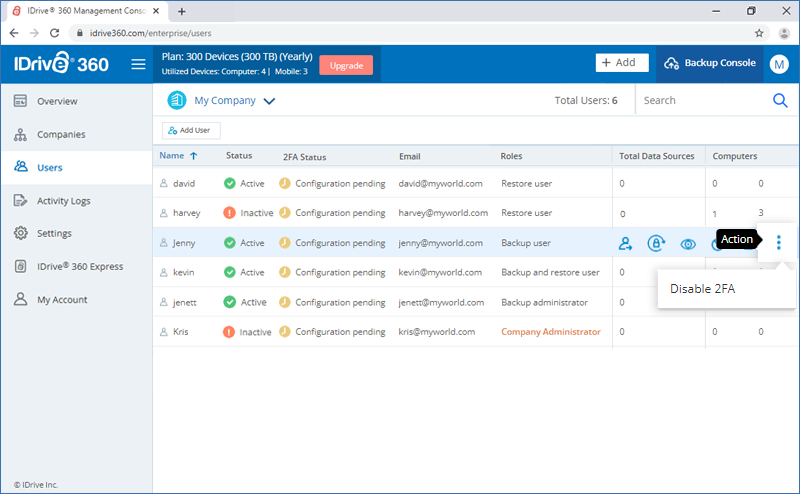
As an admin, how do I disable two-factor authentication for particular users?
To disable two-factor authentication for a particular user in your account,
- Sign in to your IDrive® 360 account.
- Click 'Management Console'.
- Go to the 'Users' tab. Hover over a user's name, click
 and select 'Disable 2FA'.
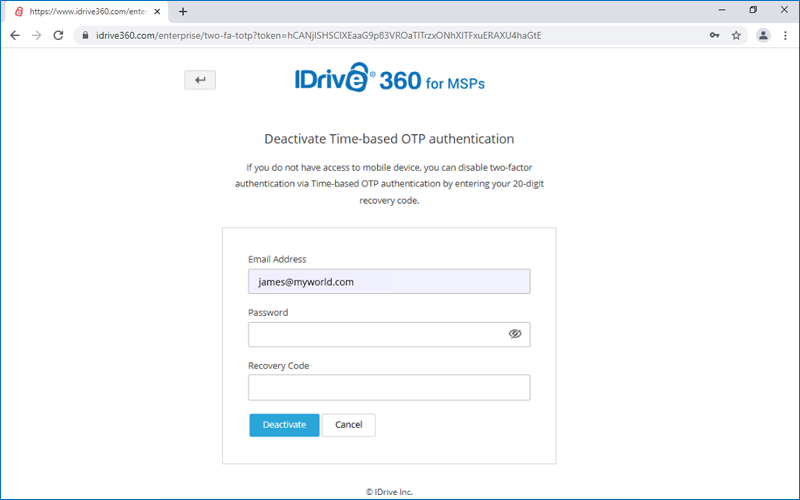
Can I disable two-factor authentication for my IDrive® 360 account with Time based OTP authentication, in case I lost access to my mobile device?
Yes, you can disable two-factor authentication for your IDrive® 360 account with Time based OTP authentication.
To disable,
- Navigate to IDrive® 360 sign in screen, enter your username and password, and click 'Sign In'.
- In the verification code screen that appears, click the link 'I can't access my code'.
- In the 'Recovery Code' field, enter the recovery code received while configuring two-factor authentication for your IDrive® 360 account.
- Click 'Deactivate'.
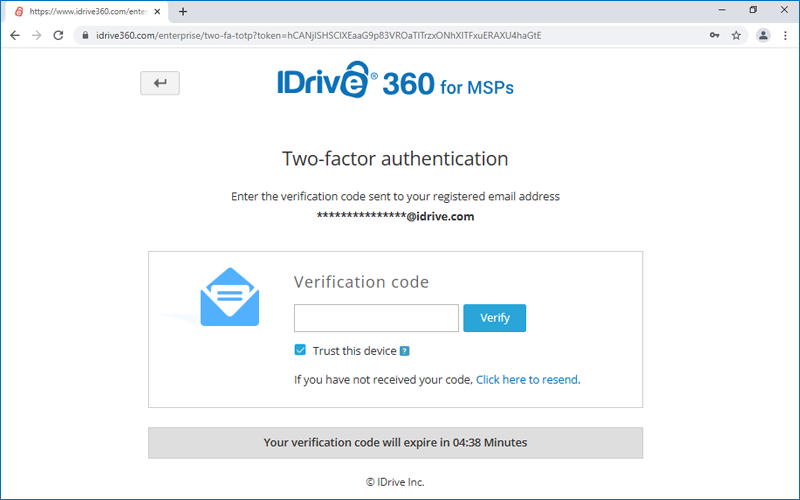
I am unable to receive the SMS containing OTP for two-factor authentication. What should I do?
During the two-factor authentication process, if you are unable to receive the SMS containing the OTP, you can choose to receive the verification code via email address.
Click 'Receive verification code via email address' in the two-factor authentication page.
A code will be sent to the registered email address. You can use this code to complete the verification process.
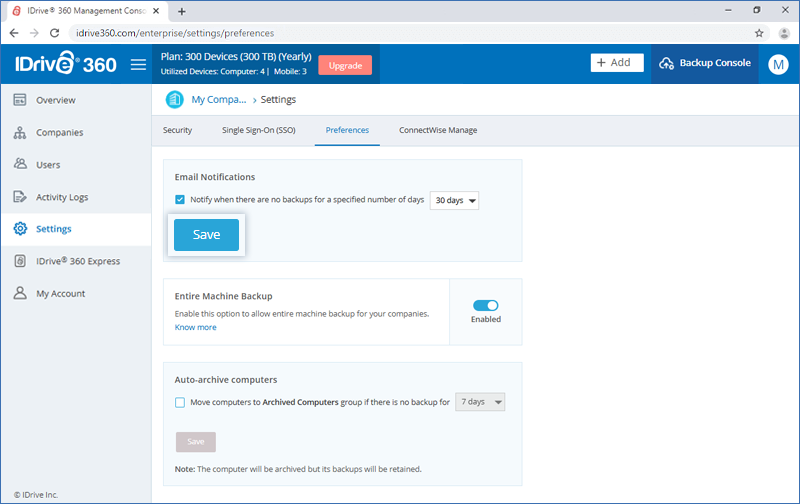
How do I set backup email notifications in my IDrive® 360 account?
To get notified when backups have not run for a set number of days,
- Go to 'Settings' > 'Preferences' > 'Email Notifications'.
- Enable 'Notify when there are no backups for a specified number of days'.
- Set the number of days with no backups after which you want to receive a notification.
- Click 'Save'.
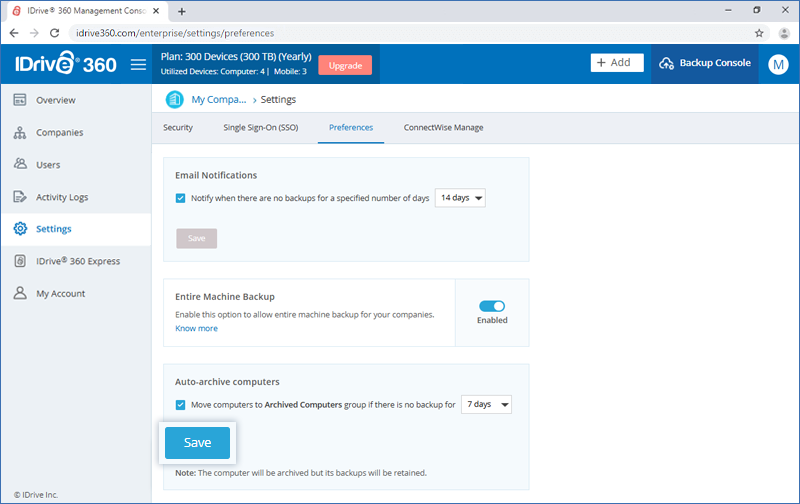
Can I auto-archive inactive computers in my IDrive® 360 account?
Yes, you can. When auto-archive is enabled, inactive computers are moved to the 'Archived Computers' section, while their backups remain intact.
- Go to 'Settings' > 'Preferences' > 'Auto-archive computers'.
- Enable 'Move computers to Archived Computers group if there is no backup for'.
- Set the number of inactive days and click 'Save'.
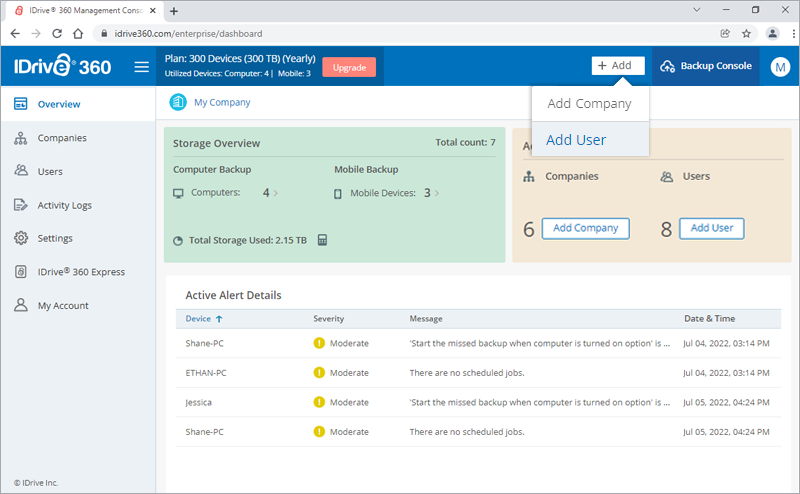
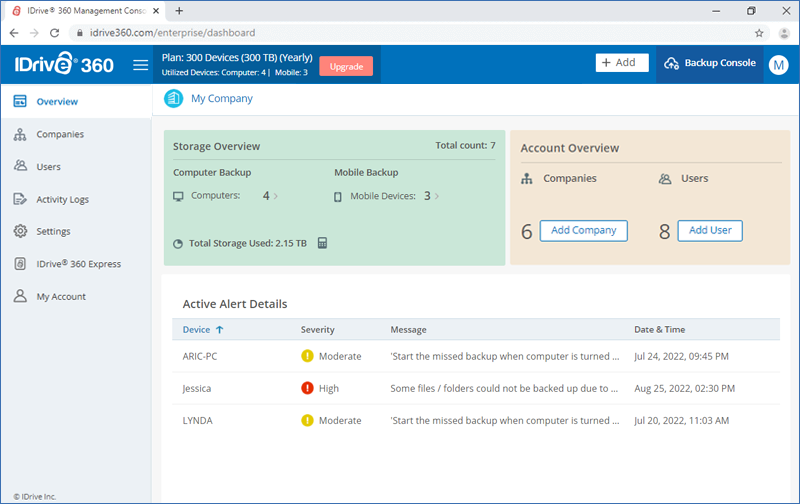
From where can I get an overview of my account?
To get an overview of your IDrive® 360 account,
- Sign in to your IDrive® 360 account.
- Click 'Management Console'.
- In the 'Overview' tab, you can:
- View the overall cloud backup storage usage
- View the number of devices in use
- Access the backup console by clicking the 'Go To Backup Console' button
- View the overall companies and users in the business company
- Add new companies and users
- View the active alert details of devices
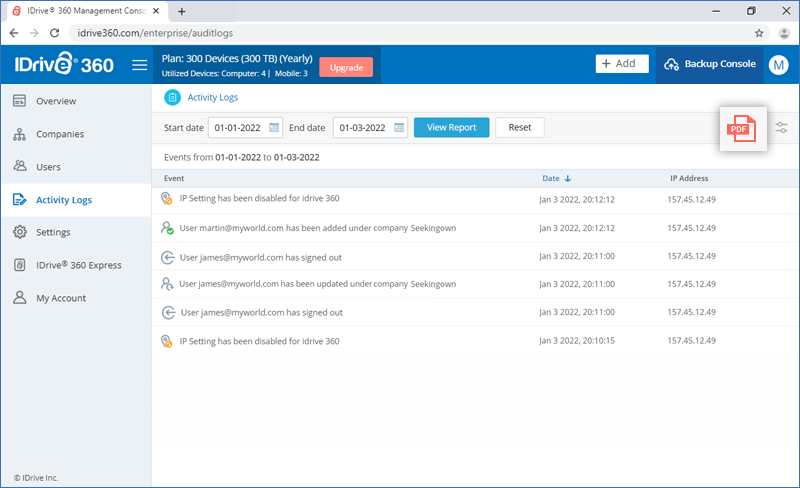
Where can I view the activity logs of my account?
To view the web activity logs of your account,
- Sign in to your IDrive® 360 account.
- Click 'Management Console'.
- Go to the 'Activity Logs' tab.
- A list of all your recent web-based activities will appear, with details like event description, date and time of the activity, and the IP address used.
- You can also select a particular 'Start Date' and 'End Date' and click 'View Report' to view the activities during the selected date range.
- Click
 to apply filters based on event type, to generate a report.
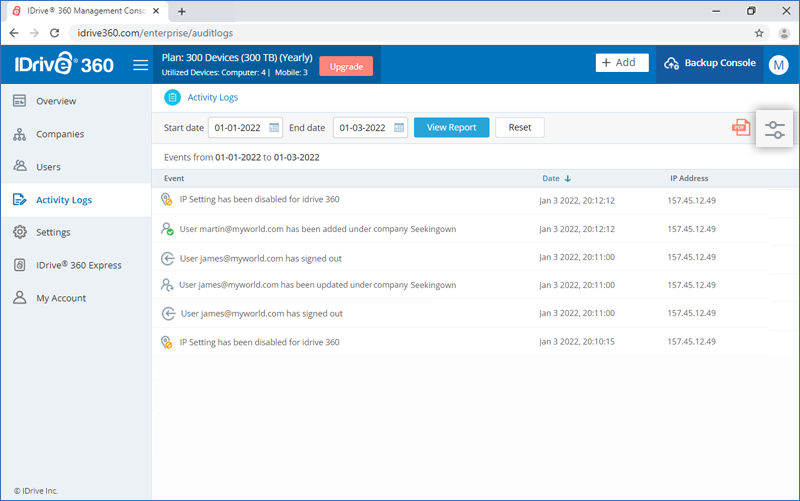
- Click
 to download a copy of the generated log report.