MSI deployment with MST Via Group Policy Object (GPO)
Deploy an MST (Microsoft Transform) file together with the MSI package using Group Policy Object(GPO) to deliver customized software installations across the network. Once you create an MST file, it allows you to preconfigure settings such as license keys, installation paths, or auto-update preferences before deployment. When creating the software deployment in Group Policy, you must attach the MST file at that time. Group Policy does not allow you to add a transform to an existing deployed MSI package later.
Prerequisites:
- Ensure both the MSI and MST files are placed in a shared network location accessible via a UNC path.
- Verify that the Domain Computers group has Read access to the shared folder.
- If the MSI package was previously deployed without the MST file, remove the existing package from the Group Policy Object (GPO) before redeploying.
Steps to deploy MSI with MST via GPO
- Create or Edit the GPO
- Open Group Policy Management (gpmc.msc).
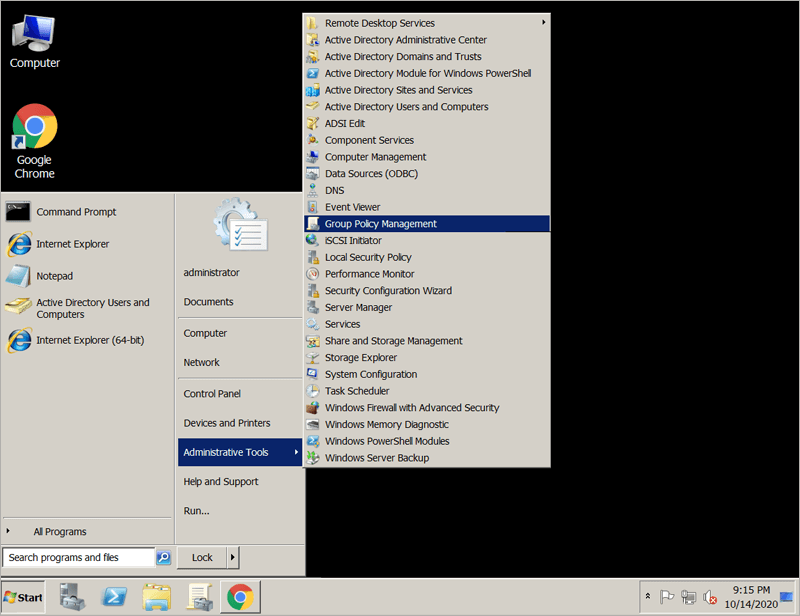
- Right-click the desired Organizational Unit (OU) and select Create a GPO in this domain, and Link it here... or choose an existing GPO to edit.
- In the Group Policy Management Editor, navigate to:
Computer Configuration > Policies > Software Settings > Software installation.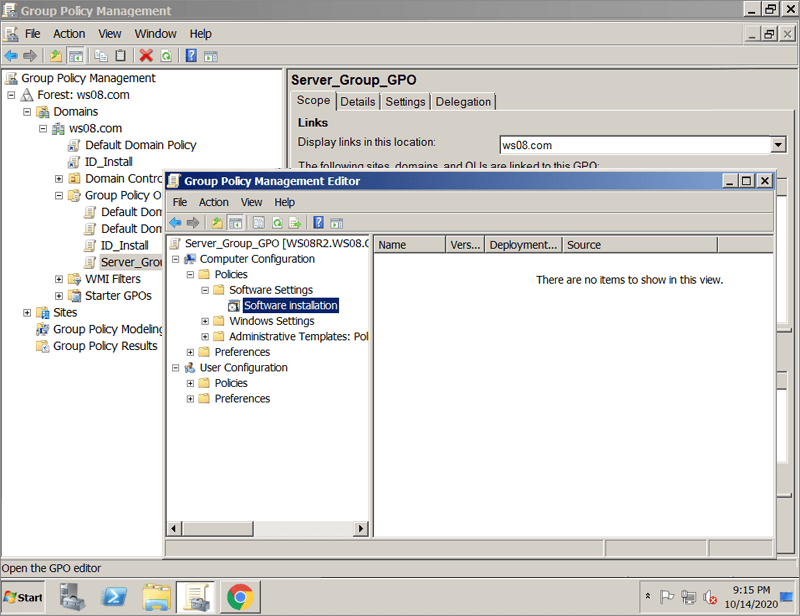
- Open Group Policy Management (gpmc.msc).
- Add the Software Package
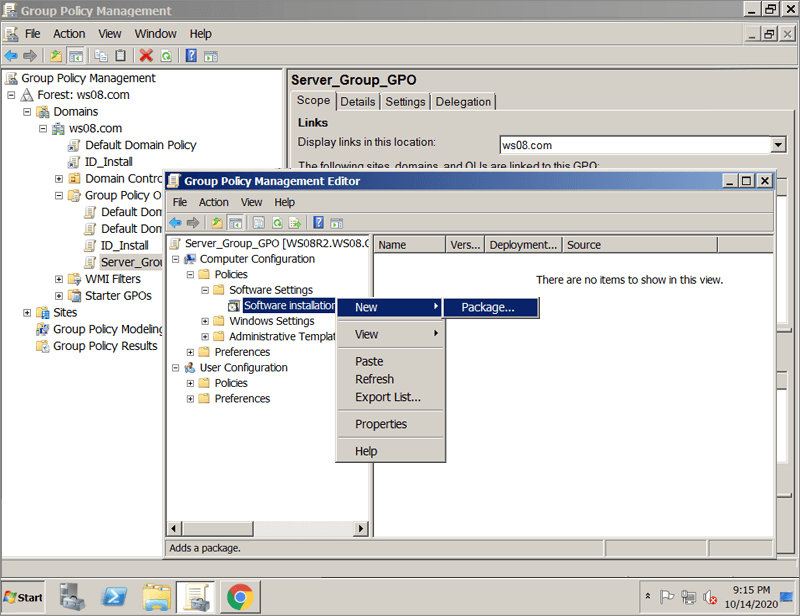
- Right-click Software installation and select New > Package.
- When prompted, browse to the MSI package using the UNC path (for example: \\Server\Share\Software\installer.msi). Important: Do not use a local drive path.
- In the Deploy Software dialog box, select Advanced, and click OK.
Note: Do not select Assigned, as this option does not allow you to add the MST file later. The Advanced option must be selected to attach the transform file during configuration.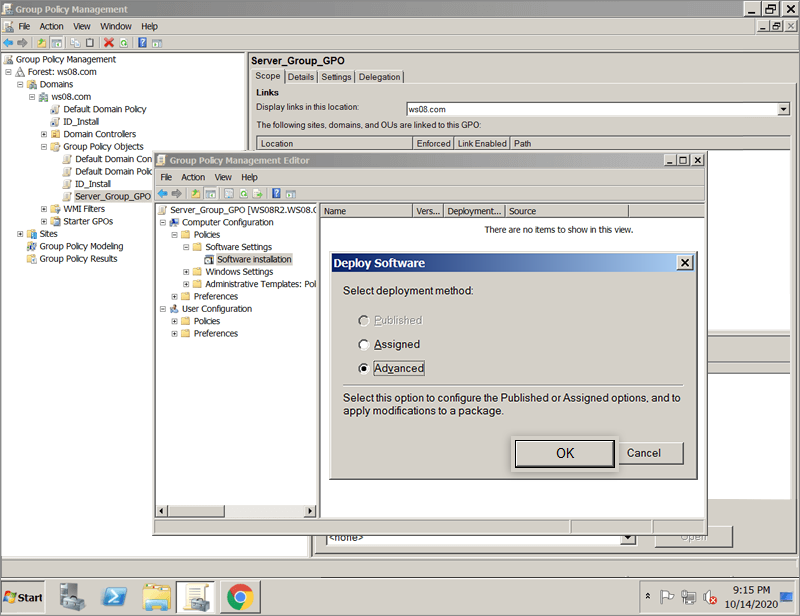
- Right-click Software installation and select New > Package.
- Apply the MST Transform
- The package Properties window will open automatically.
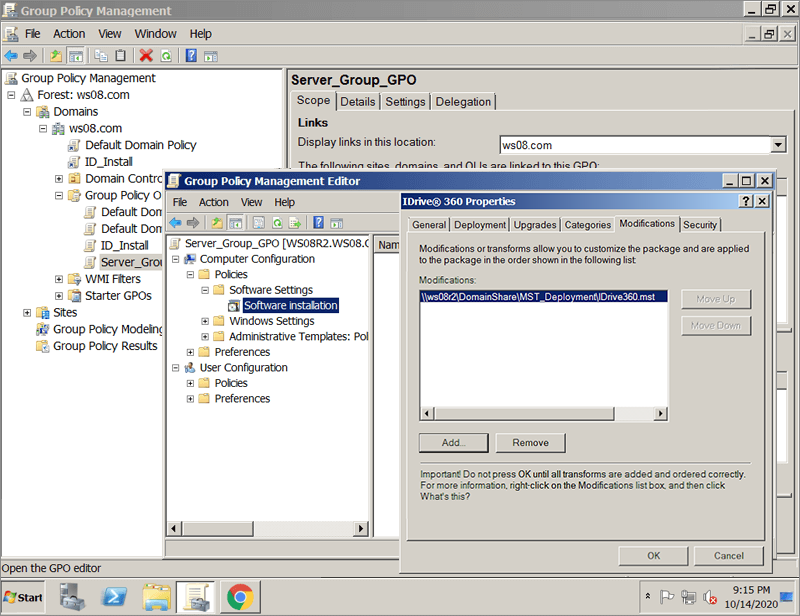
- Navigate to the Modifications tab.

- Click Add, browse to the .mst file using the UNC path, and select the file.
- Switch to the Deployment tab and verify that the deployment type is set to Assigned.
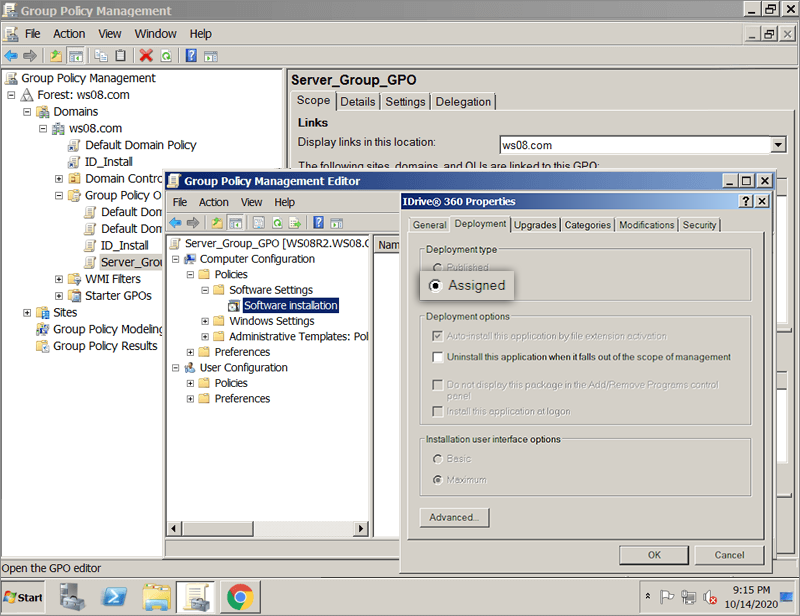
- Click OK to save the configuration.
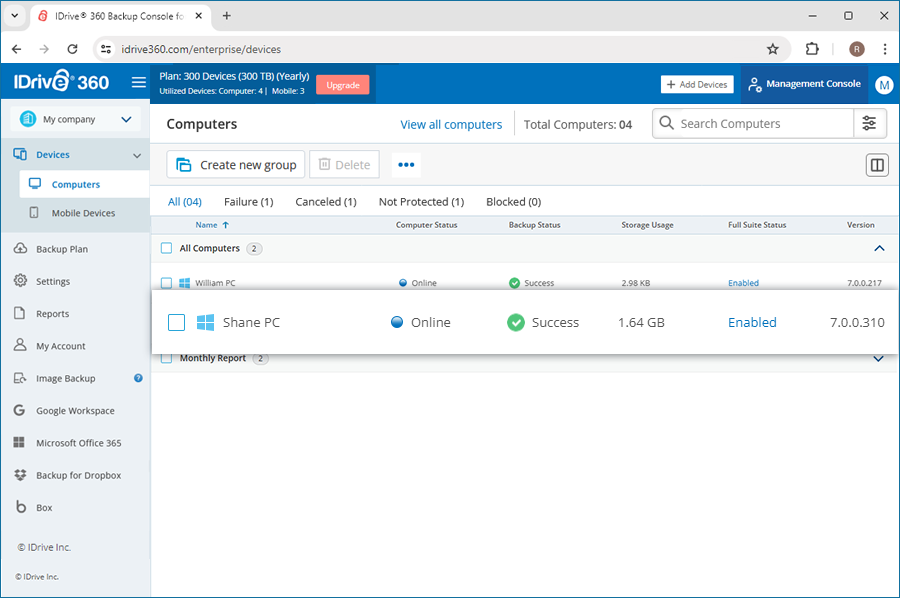
- After the deployment is successfully completed, verify that the device appears as installed and registered in the IDrive® 360 dashboard.
- The package Properties window will open automatically.