Deploy IDrive® 360 via NinjaOne (Formerly Ninja RMM)
Set up cloud backup and recovery for your business-critical Windows endpoints by deploying IDrive® 360 via NinjaOne. Add the IDrive® 360 MSI application to NinjaOne and install it remotely on multiple computers.
Prerequisites:
- Sign in to your IDrive 360 account, choose the type of application you want to install - full suite or thin client, then download the MSI installer package.
- Configuration ID copied from the 'Add Computers' section in the Backup Console.
Steps to deploy the IDrive® 360 MSI package using NinjaOne
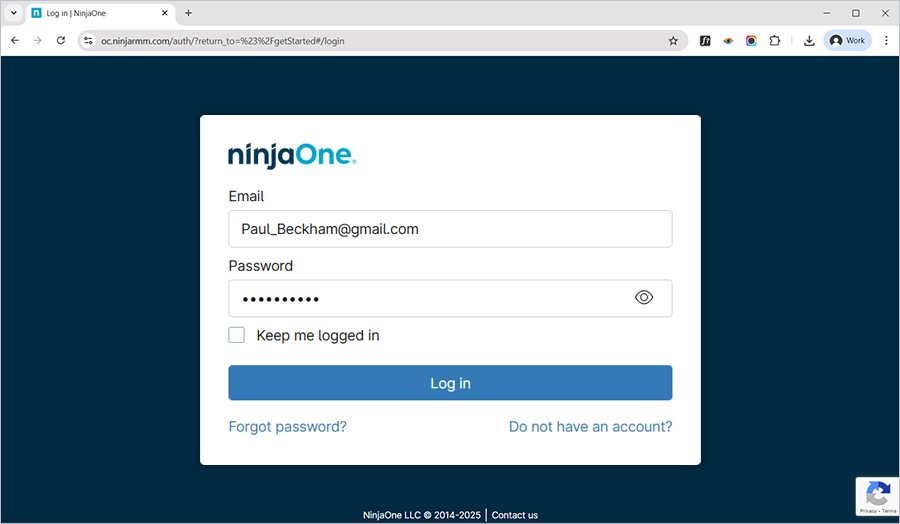
- Navigate to the 'NinjaOne' admin center. Enter your Email and Password and click 'Log in'.
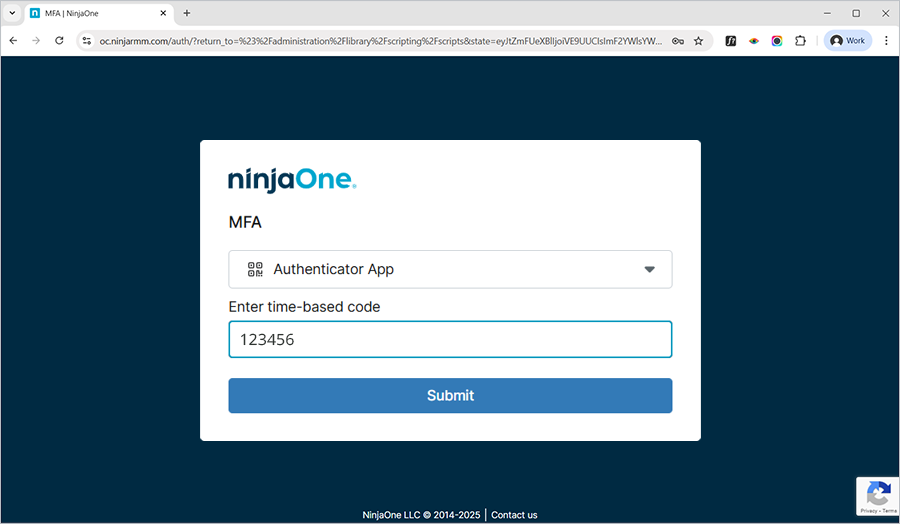
- Under MFA, click the dropdown and select 'SMS' or 'Authenticator'. Enter the 6-digit verification code received on your authentication device and click 'Submit'.
- After successfully logging in to NinjaOne, click
 . Click 'Administration' > 'Library' > 'Automation' to add the IDrive360 build downloaded from the dashboard for deployment via NinjaOne.
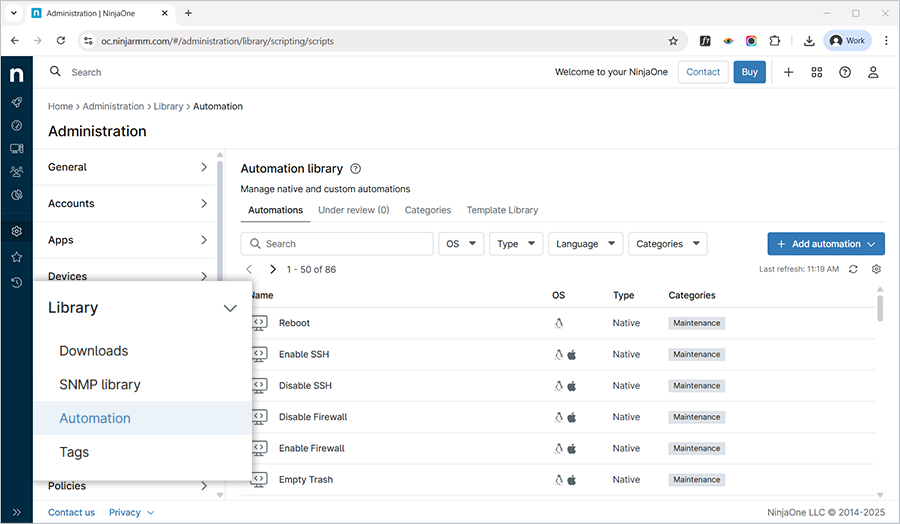
Note: You can choose between a thin client and a full client based on the requirement.
- On the right side of the 'Automation library' section, click the '+Add Automation' dropdown and select 'Installation'.

- In the 'Install application' popup, under the 'General' tab,
- Name: IDrive® 360
- Description: Mass deployment for IDrive® 360
- Select 'Windows' as the Operating System.
- Select the corresponding OS Architecture (64-bit/32-bit/All).
- Click 'Choose installer file', select the installer file, and click 'Open'.
- Select 'System' from the 'Run as' dropdown.
- Insert the necessary wrapped arguments in the 'Parameters (Optional)' section.
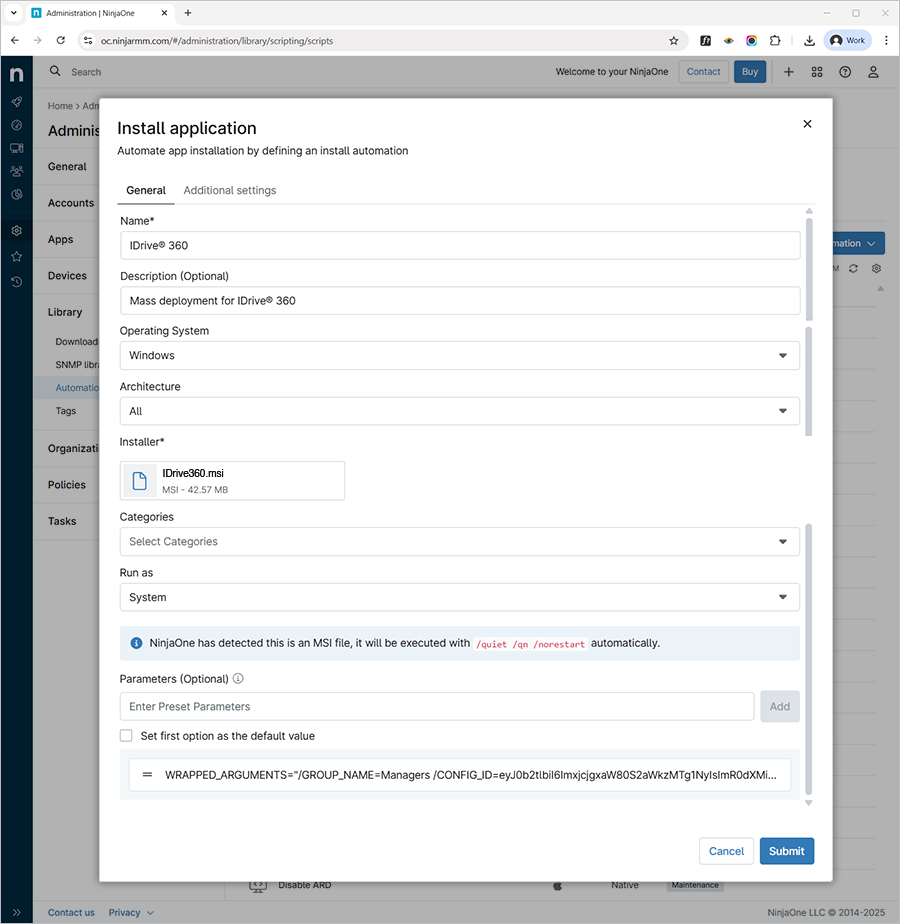
- In the 'Parameters (Optional)' field, enter the command-line arguments based on the format below and click 'Add'.
Syntax
WRAPPED_ARGUMENTS="/CONFIG_ID=eyJ0b2tlbiI6ImxjcjgxaW80S2aWkzMTg1NyIsImR0dXMiOnRydWUsImb25SZXF1aXJlZCI6ZmFsc2V9"
Note: CONFIG_ID is a mandatory parameter for deploying the IDrive® 360 MSI via NinjaOne. Other parameters - GROUP_NAME, PVT_KEY, DEVICE_TAG, and /nodesktopicon - are optional and can be included as needed.
Sample command:
WRAPPED_ARGUMENTS="/GROUP_NAME=Managers /CONFIG_ID=eyJ0b2tlbiI6ImxjcjgxaW80S2aWkzMTg1NyIsImR0dXMiOnRydWUsImb25SZXF1aXJlZCI6ZmFsc2V9 /PVT_KEY=123456"
The parameters and their descriptions are given below:
Parameters DescriptionWRAPPED_ARGUMENTS This is an argument used to define command-line parameters. Command line arguments should always start with a wrapped argument within double quotes.CONFIG_ID This is the unique configuration ID copied from the 'Add Computers' section in the Backup Console./nodesktopicon Prevents creation of the IDrive® 360 desktop shortcut. By default, the desktop icon is created.GROUP_NAME *Name of the group to which the computer will be assigned. Here, the group name used in the example is 'Managers'.PVT_KEY If the installation is configured with a private encryption key, then this parameter should also be passed with the encryption key.DEVICE_TAG If the installation is configured with a device tag, the corresponding tag name must be passed for it to appear under the 'Email Address/Tag Name' column in the IDrive® 360 dashboard.Note: In case the group name does not exist, a new group will be created with the submitted name, and the computer will be assigned to it.
- Click 'Submit.'
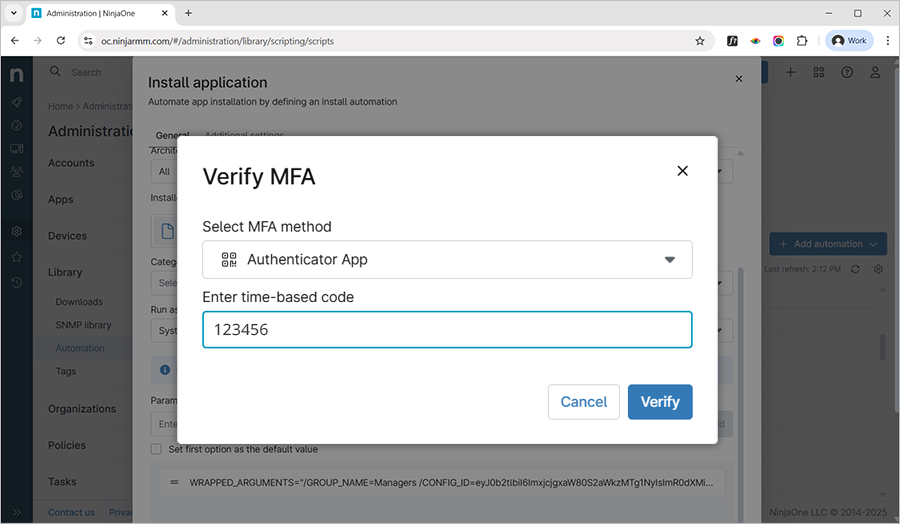
- Enter the 6-digit verification code when prompted and click 'Verify' to complete the MFA.
The installer file upload begins, and the progress bar shows its status.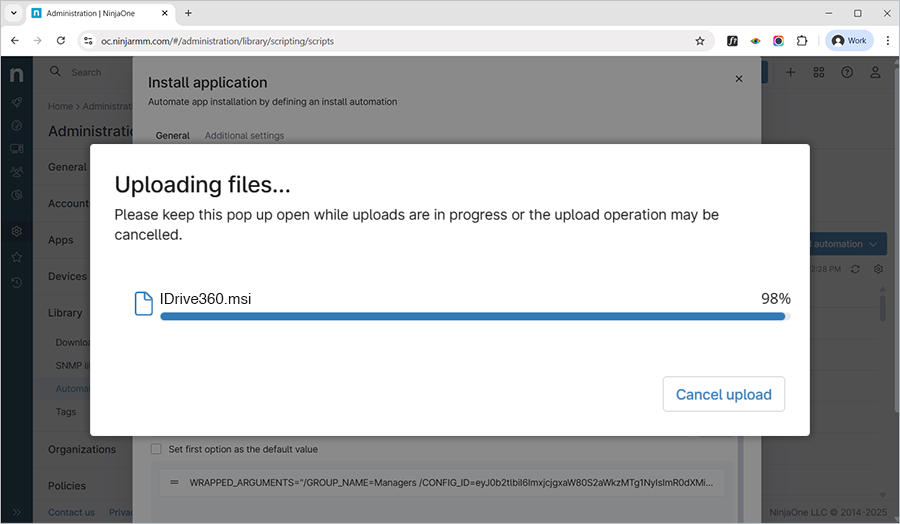
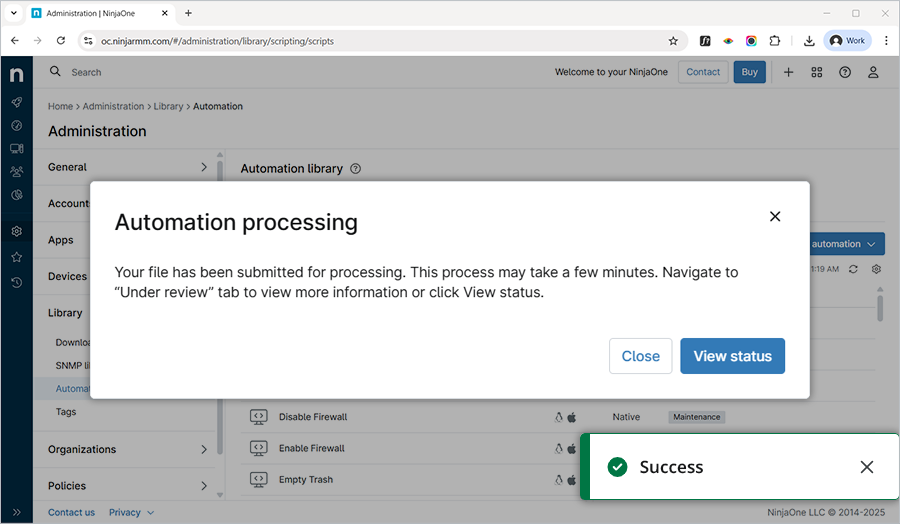
- An 'Automation processing' popup appears, indicating that your installer file has been submitted for processing. Click 'Close' to close the popup or click 'View status' to view the status of your package installation.
- Wait for the IDrive® 360 MSI file to finish uploading and for the application to be saved.
It may take some time for the machines to receive the deployment package.
- Once the IDrive® 360 MSI file is successfully added, navigate to 'Devices' in the NinjaOne admin center, select the corresponding device or groups, and click
 .
.
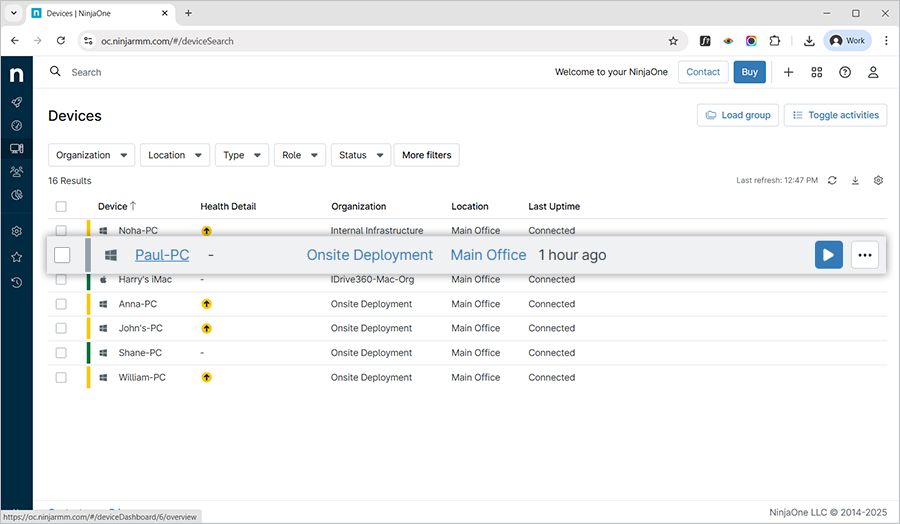
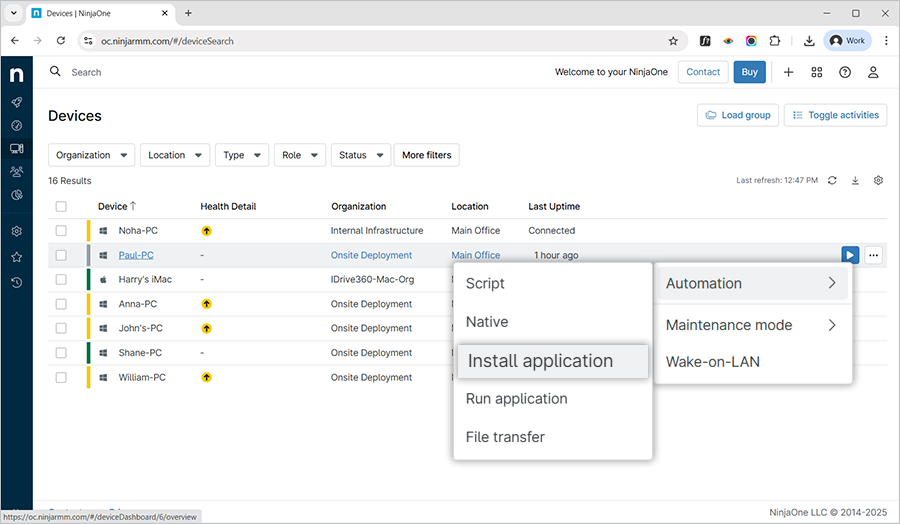
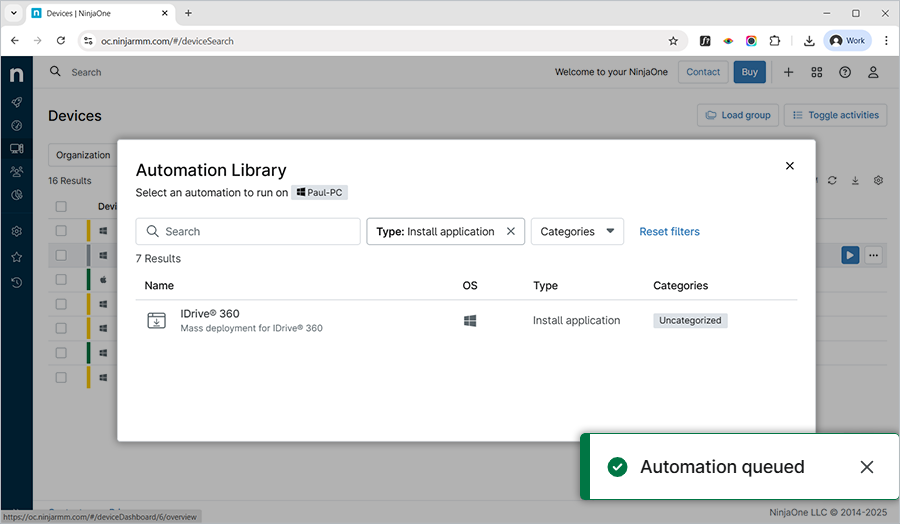
- Click > 'Automation' > 'Install application'.
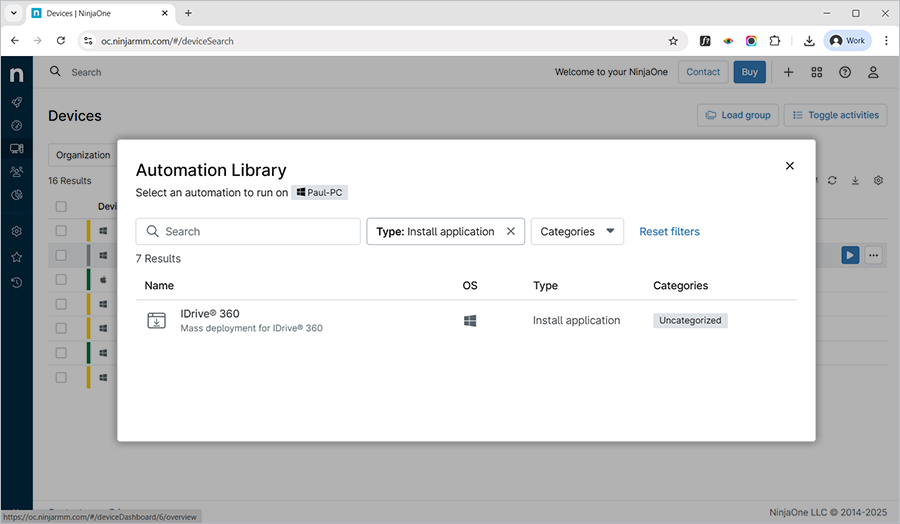
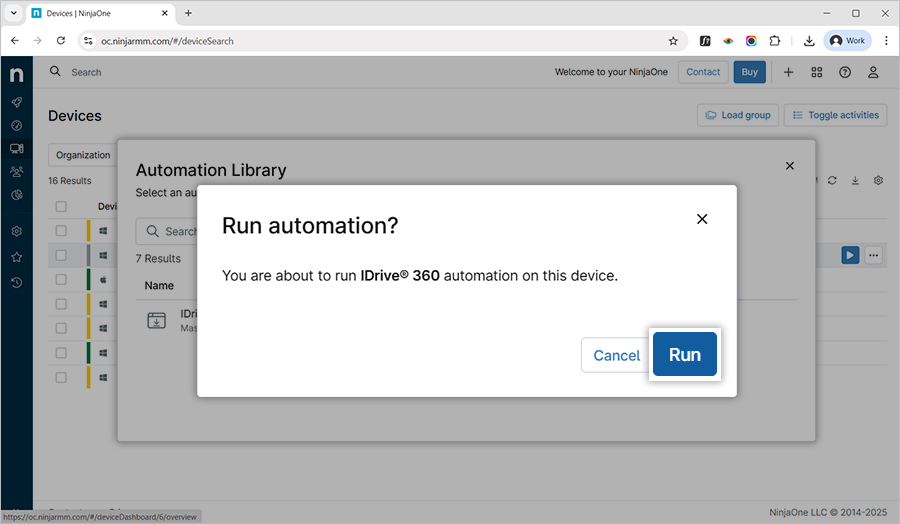
- In the 'Automation Library' popup, click the MSI build you just added.
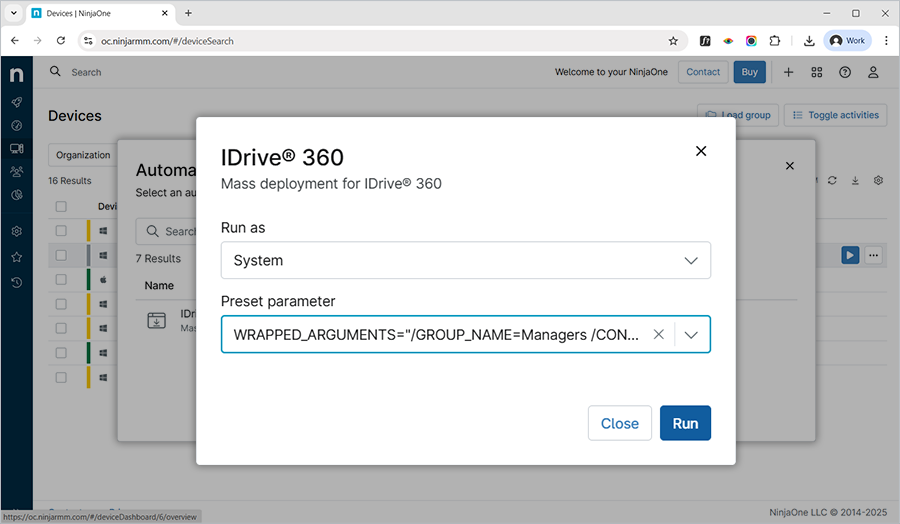
- The build popup appears. Click the 'Run as' dropdown, and select 'System'. Click the 'Preset parameter' from the dropdown and select the corresponding parameter. Click 'Run'.
- A confirmation window appears. Click 'Run' to run automation for the selected device. Based on the selection made, the application will be installed accordingly.The automation is now under processing.
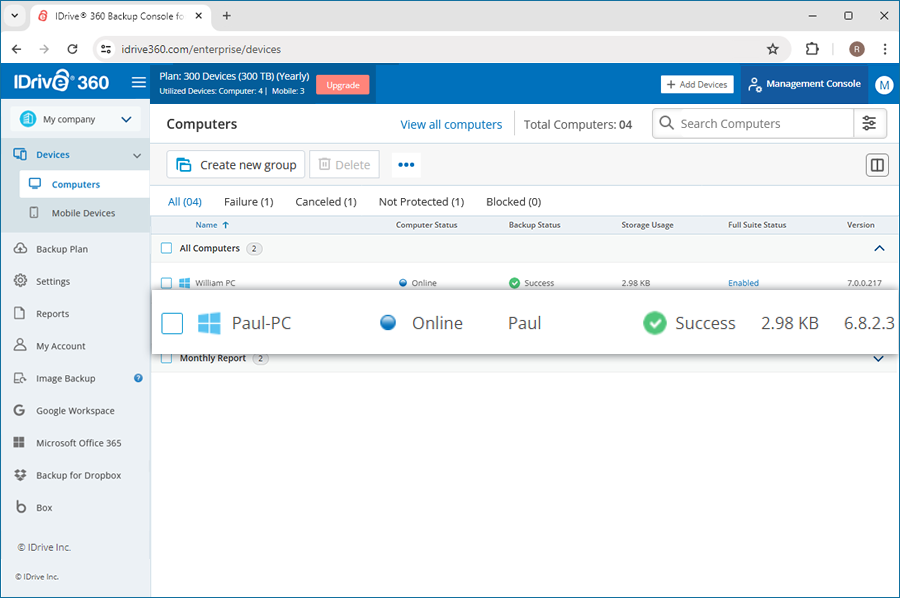
- Once the IDrive® 360 application is successfully installed, check for the device in the IDrive® 360 dashboard. The machine will be registered in the dashboard under 'Devices' > 'Computers'.
It may take some time for the machines to receive the deployment package. To speed up the process, you may manually sync the Windows 10 devices or perform a reboot.