IDrive® Spaces
IDrive® Spaces
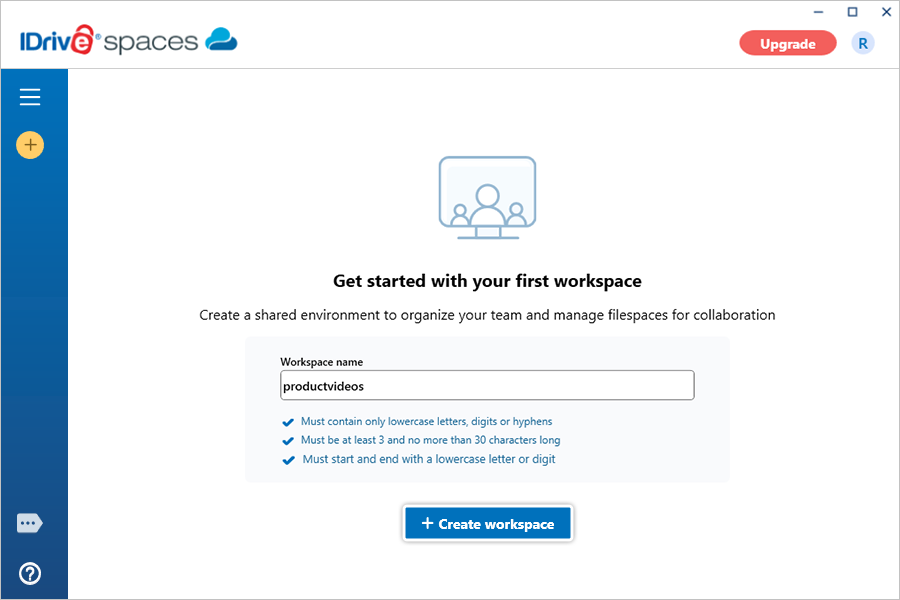
How do I create a workspace?To create a workspace,
After the first workspace is created, click |
How many workspaces can I create?You can create multiple workspaces. Each workspace functions as an independent shared cloud environment. You can set up workspaces for different projects or teams and manage the member access and permissions, as needed. |
Is it possible to exit a workspace?You cannot exit a workspace you created, but you can exit a shared workspace any time. Once you leave, you will no longer have access to the files and folders shared with you. To exit a workspace,
|
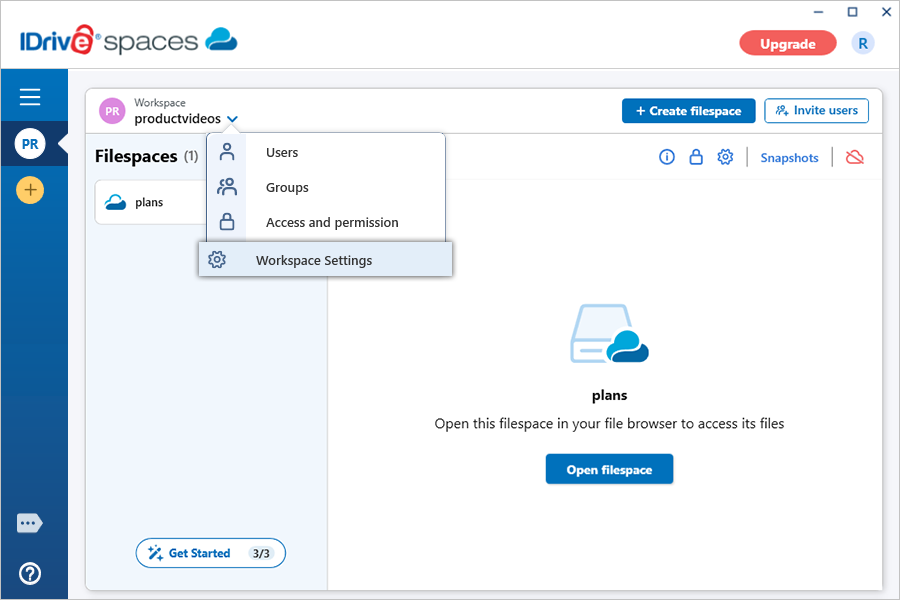
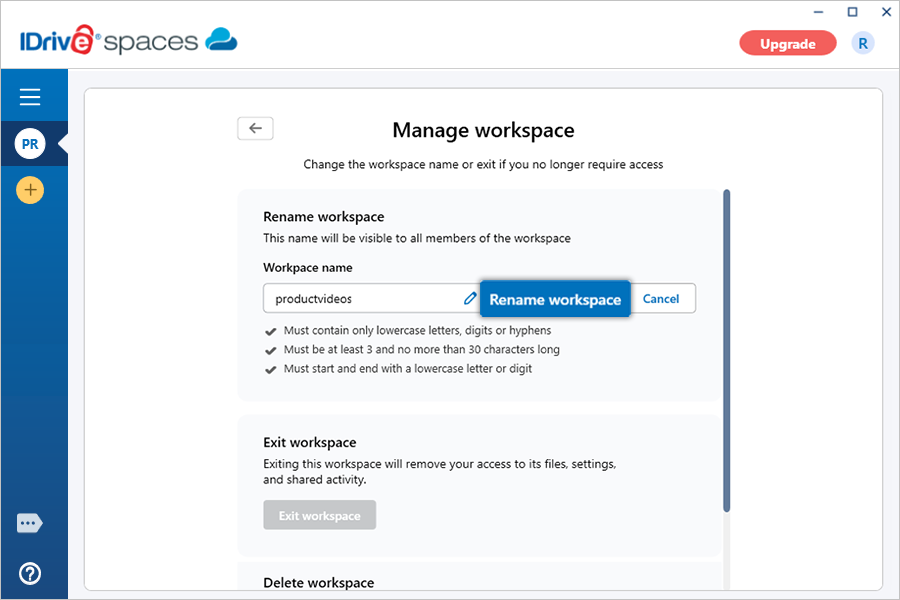
How do I rename a workspace?To rename a workspace,
Note: A workspace can be renamed only if it contains no filespaces. |
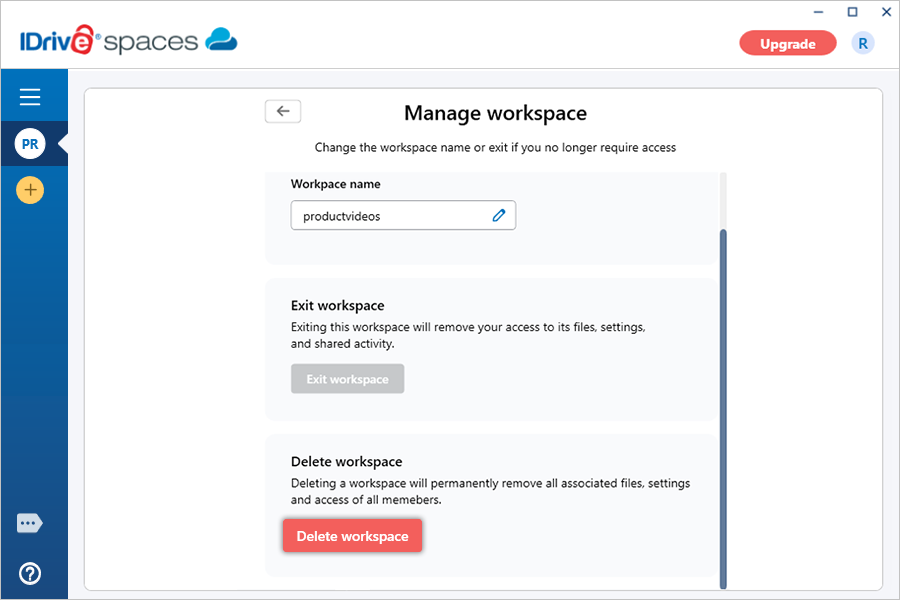
Can I delete a workspace?Only the workspace owner can delete a workspace. The workspace must be empty and contain no filespaces before it can be deleted. To delete a workspace,
After verification, the workspace will be permanently deleted along with all associated files, settings, and member access. |
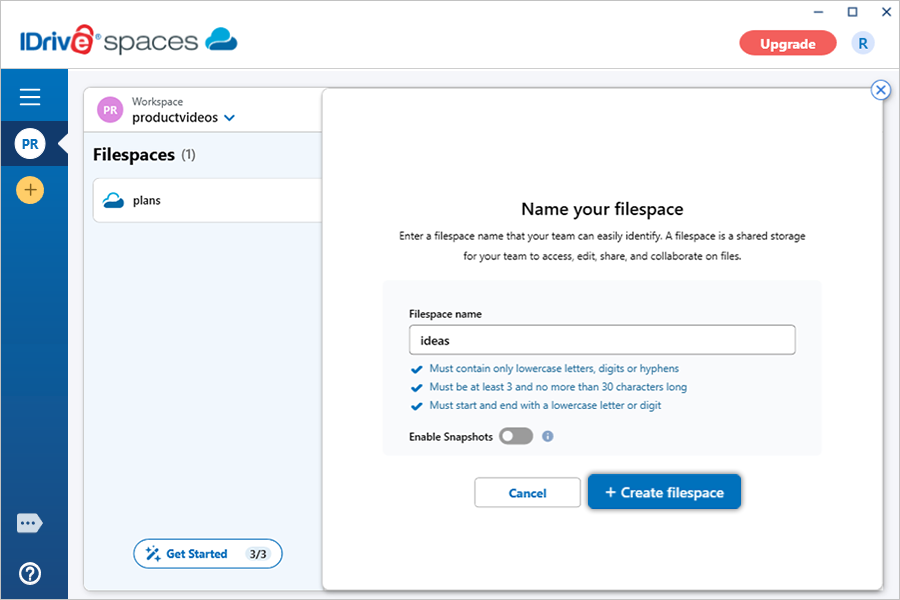
How do I create a filespace?To create a filespace,
The filespace will be created and automatically mounted as a drive on your computer. To create additional filespaces later, click Create filespace from the workspace. |
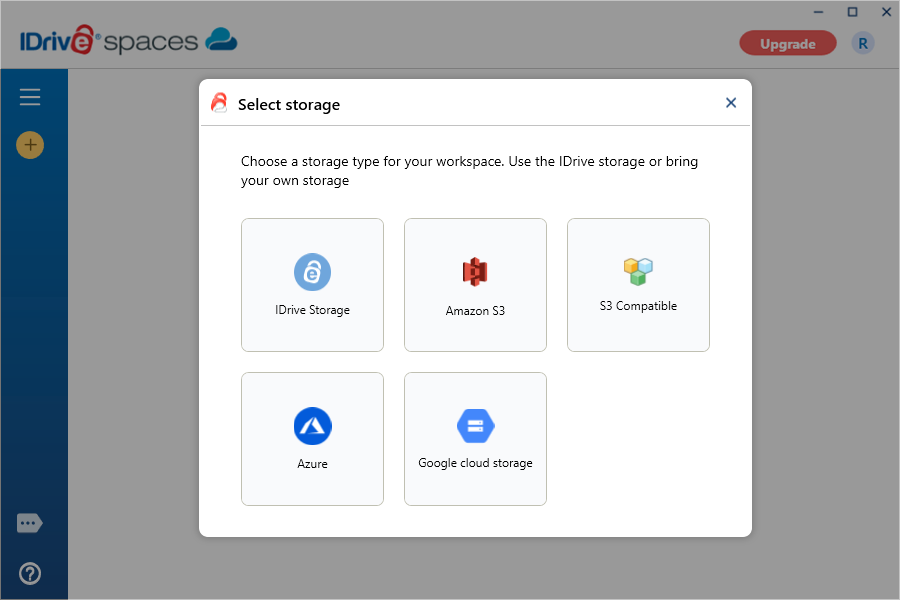
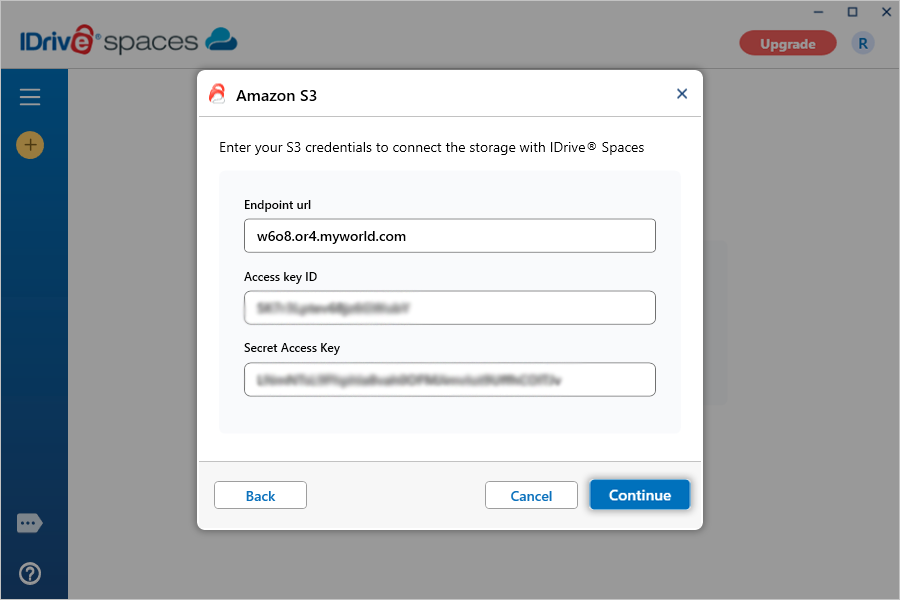
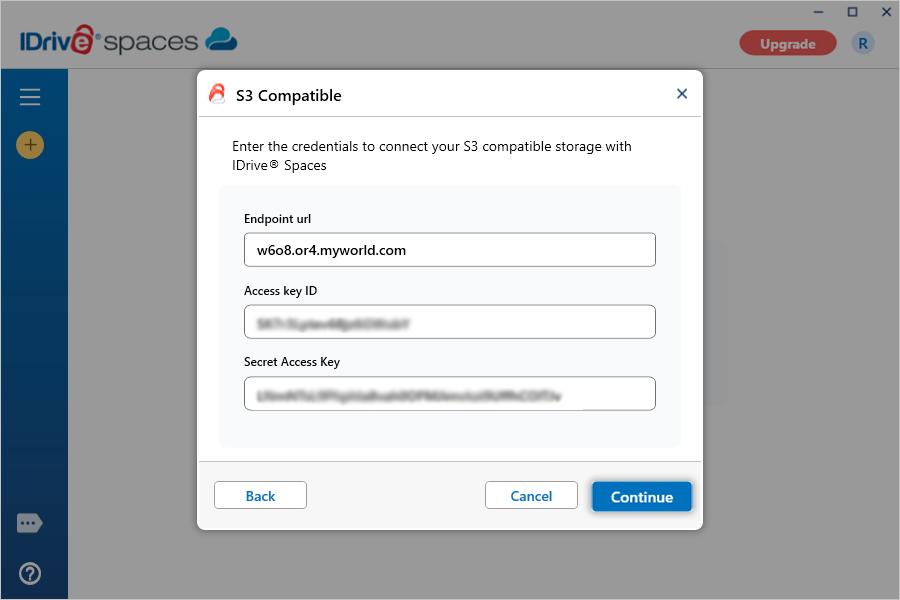
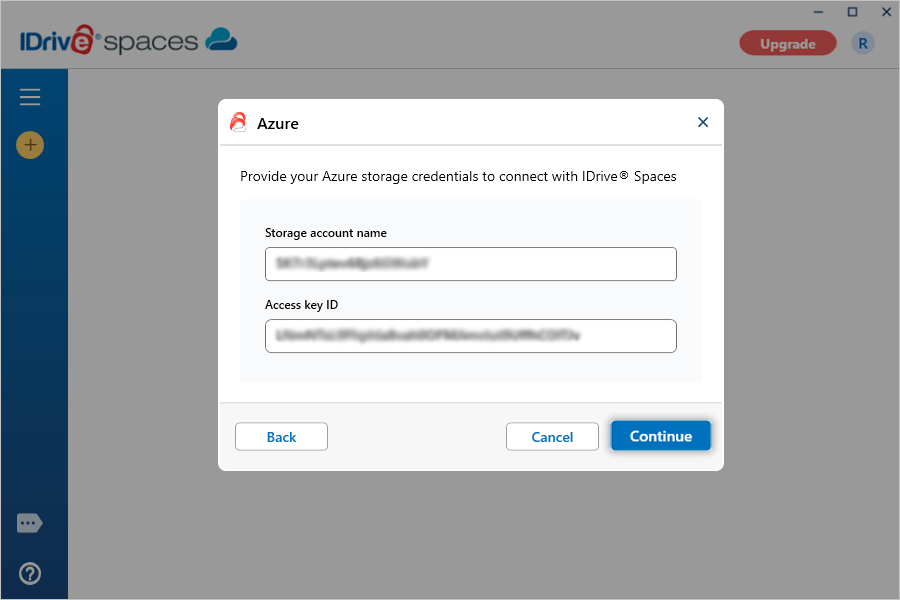
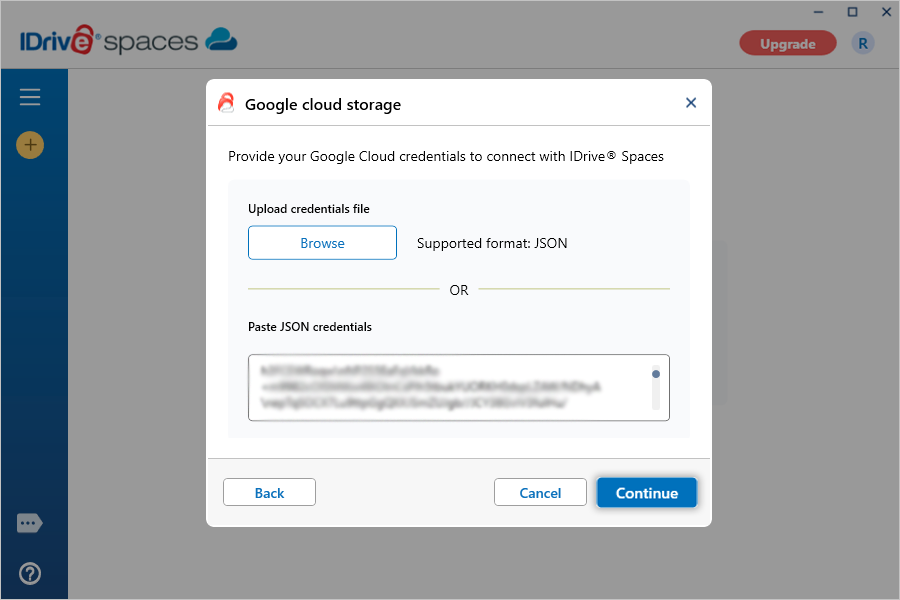
Can I link my own storage to a filespace?Yes, you can link your own storage to a filespace. Integrate your existing AWS S3, other S3-compatible storage, Microsoft Azure, and Google Cloud Storage with IDrive® Spaces. This provides greater control and flexibility by allowing you to use your current storage. To link your storage,
The filespace will be linked to the selected storage, giving you full control and flexibility over where your data is stored. |
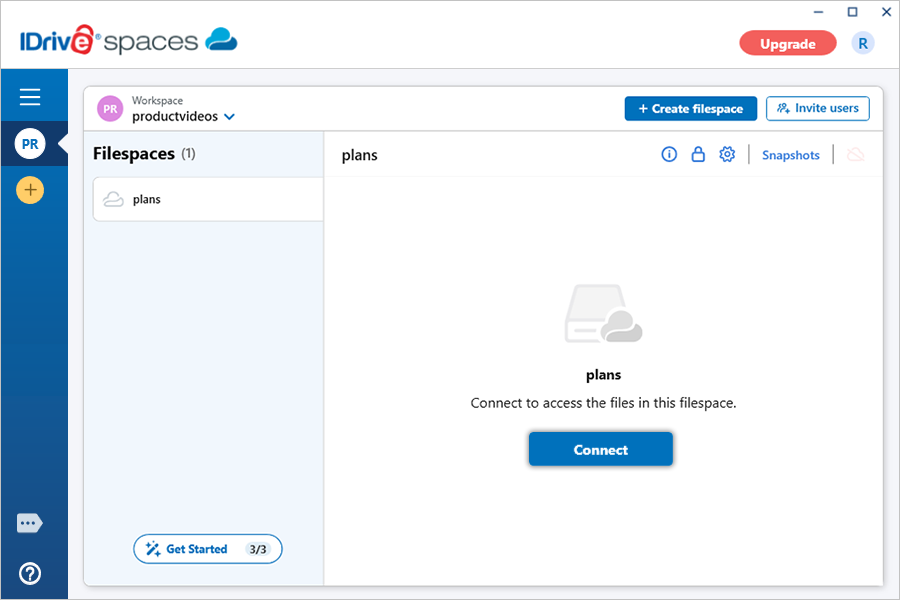
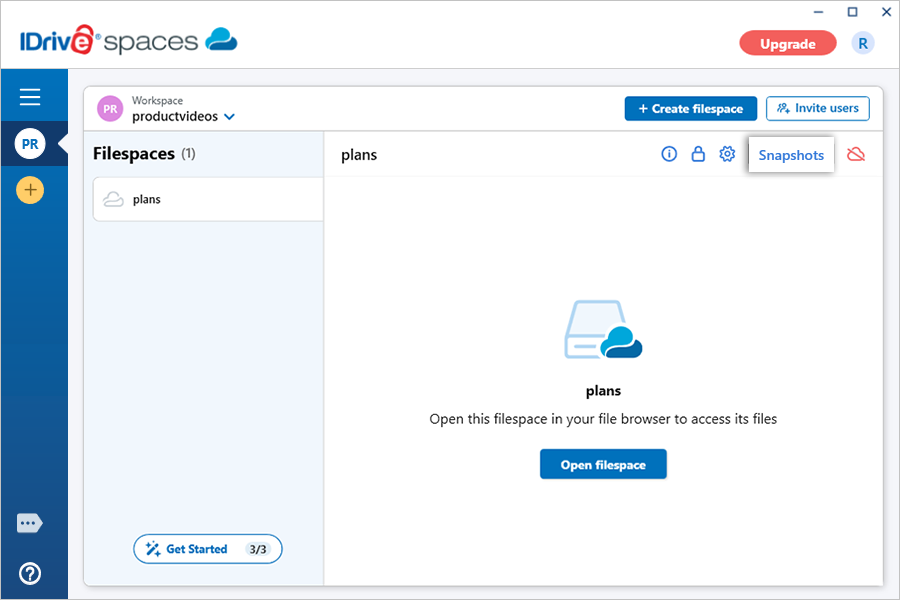
How do I access a filespace?To access a filespace,
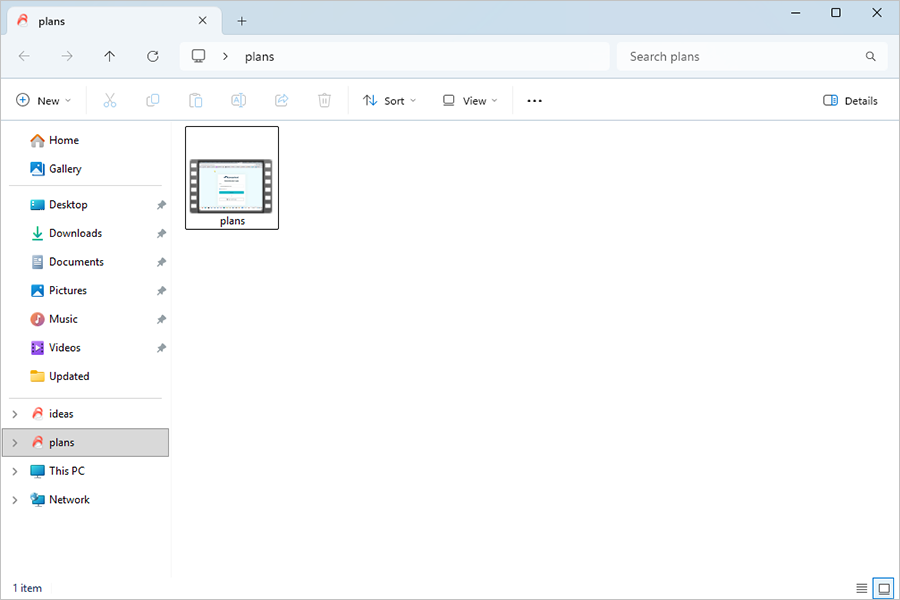
You can now create folders, upload files and folders, and access them from your computer. If you connect to multiple filespaces, each filespace will appear as a separate drive. |
How do I disconnect a filespace?To disconnect a filespace,
Once disconnected, the filespace will be unmounted from your computer. To reconnect to a filespace,
|
How do I transfer files and folders from my computer to a filespace?You can transfer files or folders to a filespace by dragging and dropping them in the filespace drive mounted on your computer. Content can only be added to folders for which you have edit permission. To transfer files or folders,
The transfer progress will be displayed on the screen, and the files or folders will appear in the filespace once the transfer is complete. |
What is a filespace snapshot?A snapshot captures the exact state of all files and folders in a filespace at a specific moment. It allows you to save and restore your entire filespace, or any deleted or modified files, while preserving the exact state of every file. Snapshots can be mounted to access and recover files whenever needed. Snapshots can be enabled by default during filespace creation. You can also capture snapshots manually at any time or schedule snapshots to be created automatically. |
Can I delete files and folders added to a filespace?Yes. You can delete files and folders from a filespace without affecting the original folder on your computer. To delete a file or folder,
 |
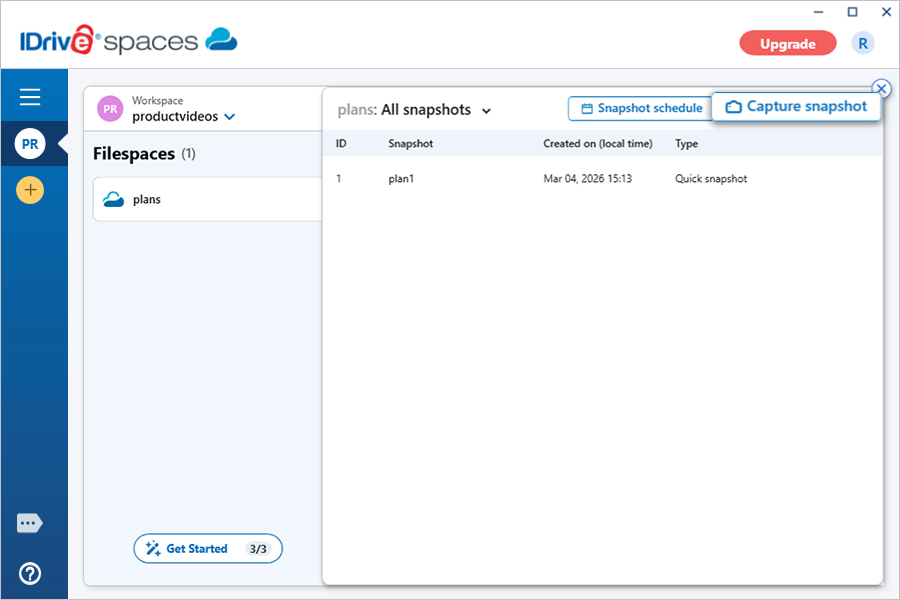
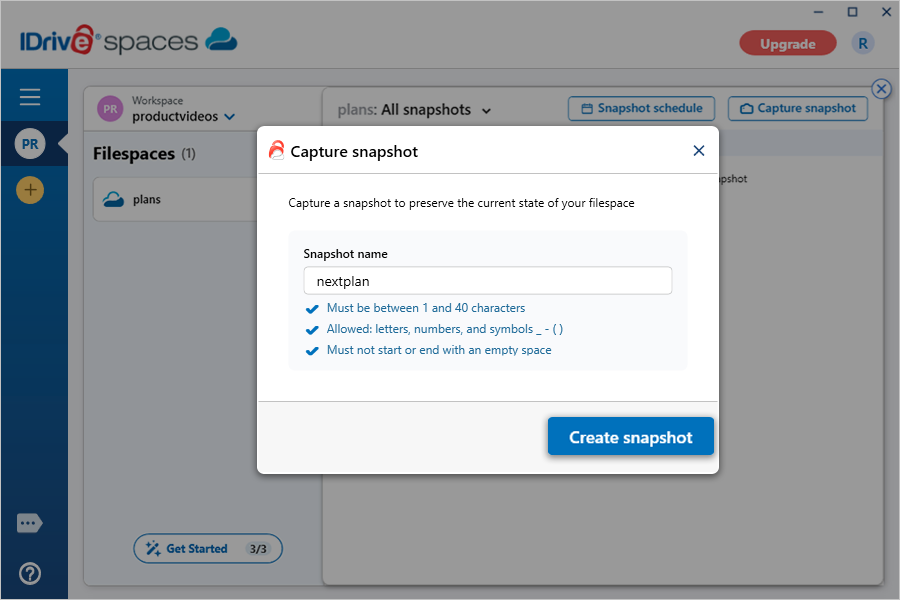
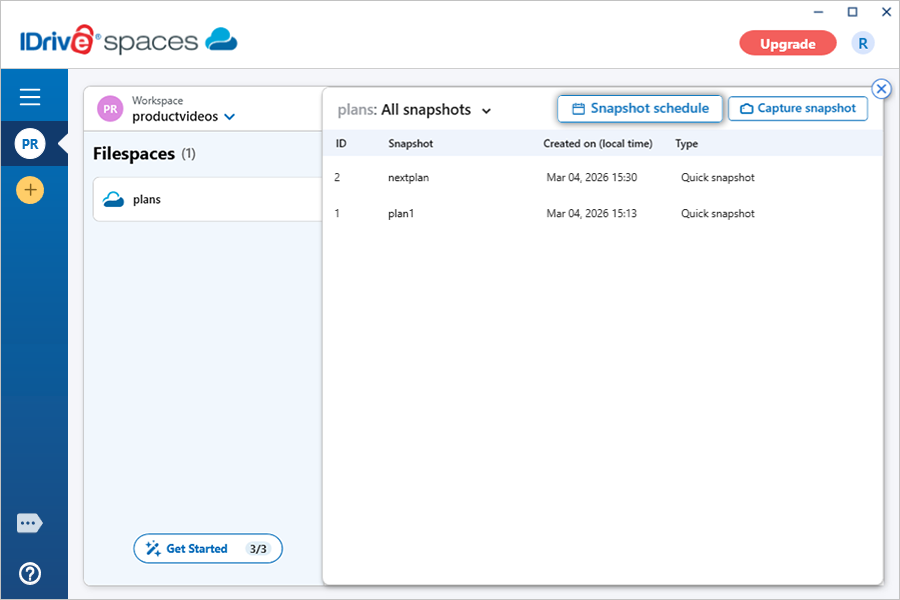
How do I capture a quick snapshot of a filespace?To capture a snapshot manually,
To mount the newly created snapshot and access its data, click . After it is mounted, click to access the snapshot subsequently, or click |
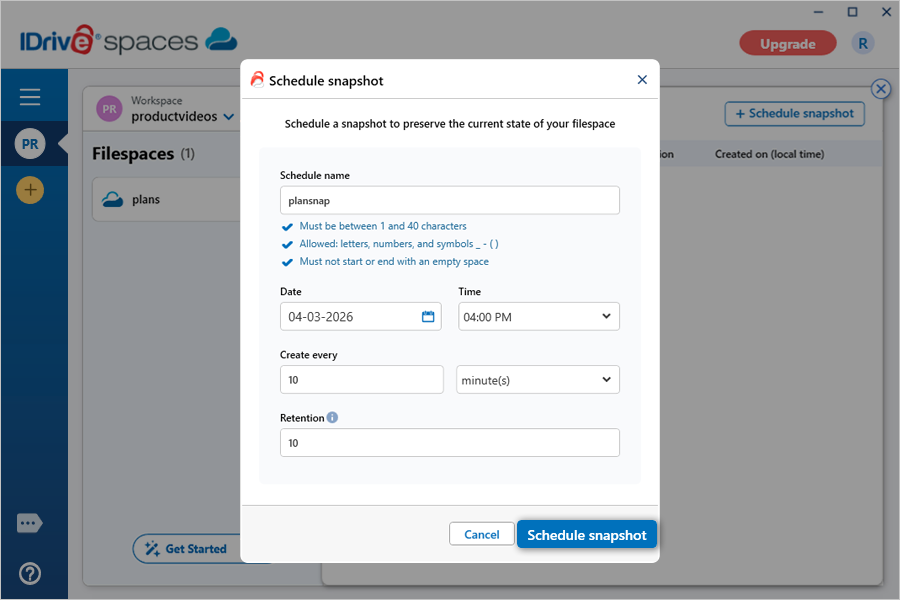
Can I schedule a snapshot for a filespace?Yes, you can schedule snapshots for your filespace to be created automatically at regular intervals, such as every minute, hour, or day. To schedule a snapshot,
|
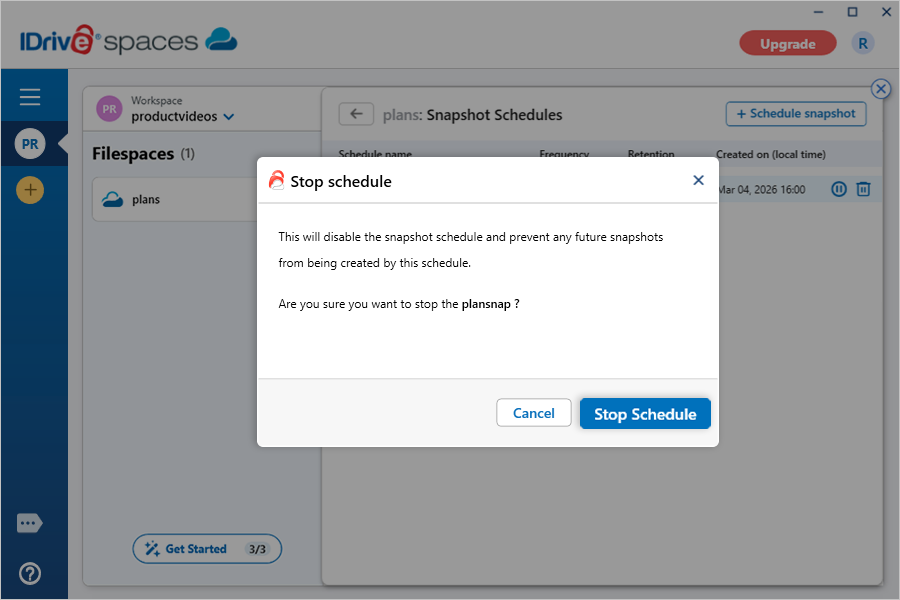
How do I stop a filespace snapshot schedule?To stop a snapshot schedule,
The snapshot schedule is disabled, and no future snapshots will be created by it. |
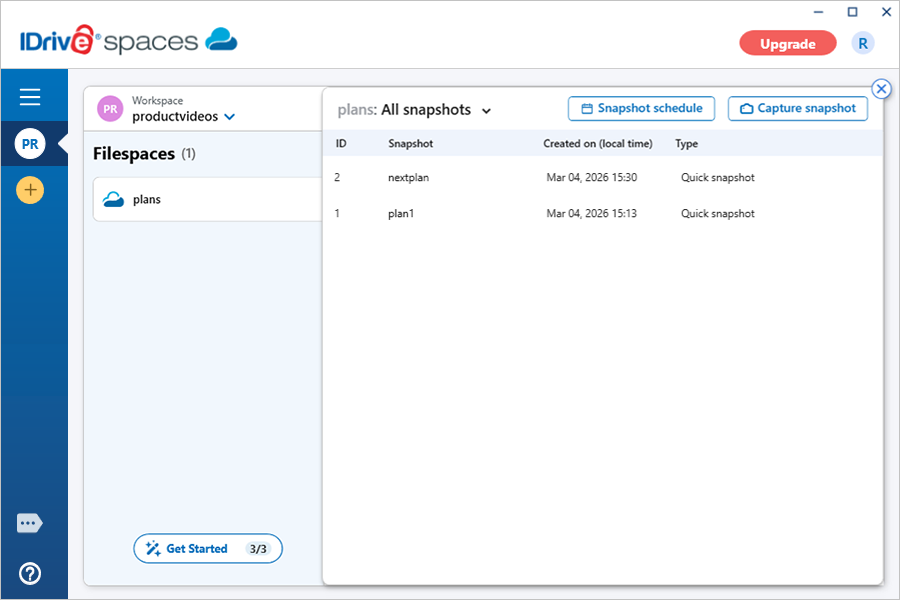
Is it possible to filter snapshots of a filespace?Yes, you can filter the snapshots of a filespace. To filter the snapshots,
A list of all snapshots matching the selected type will appear. |
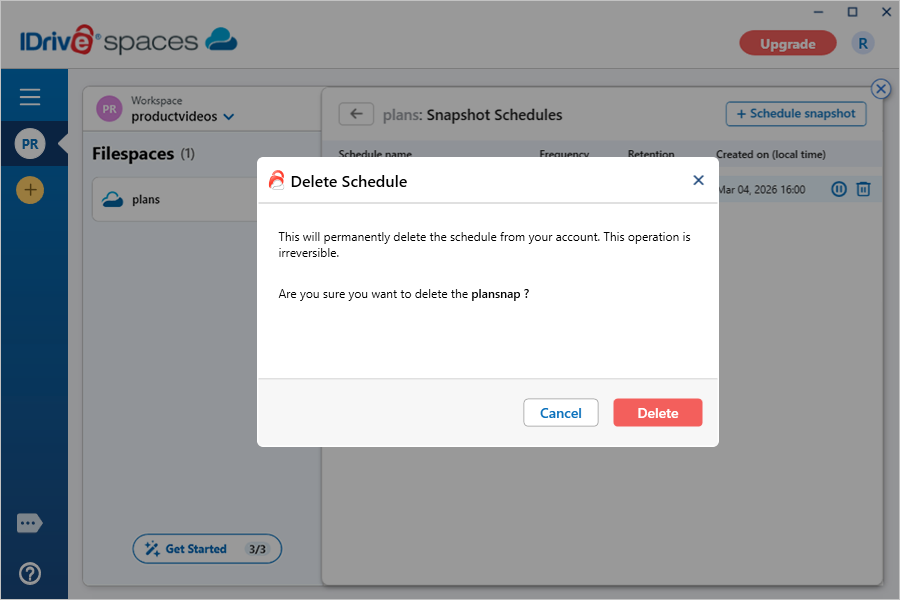
Can I delete a filespace snapshot schedule?Yes, you can delete snapshot schedules configured for a filespace. To delete a snapshot schedule,
The snapshot schedule will be permanently deleted from your account. |
How to recover files or folders from a filespace snapshot?To recover a file or folder from a snapshot for point-in-time recovery,
The restored files or folders will appear as separate folders in the filespace without overwriting existing data, allowing users to access and compare them with existing files. |
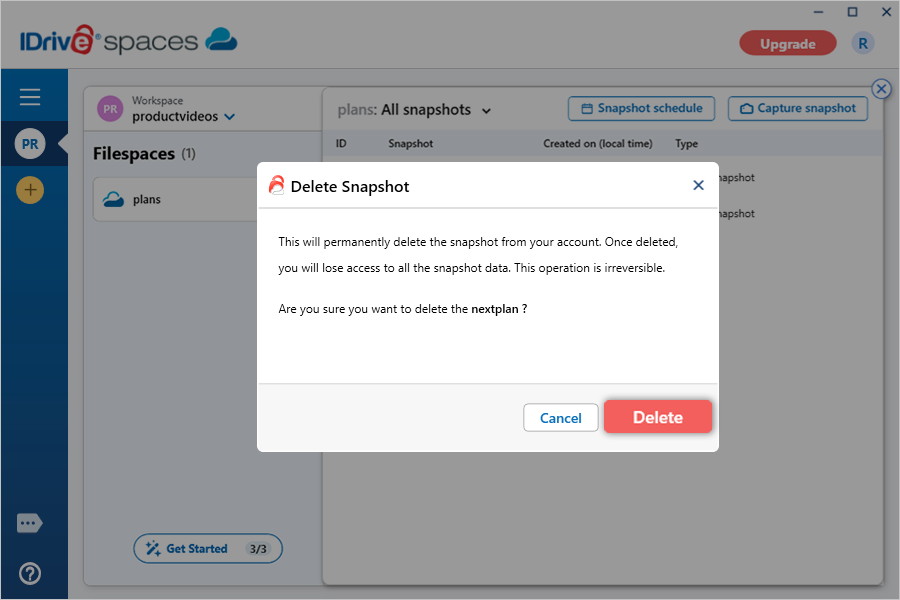
How do I delete a snapshot?To delete a snapshot,
Once a snapshot is deleted, the owner and the team members will no longer be able to access its data. |
What is file pinning?File pinning lets you mark specific files or folders in your IDrive® Spaces account to keep local copies on your device. Once pinned, the files are downloaded and stored locally so they remain available at all times. Any changes made to the pinned files are automatically synced to the cloud, so everyone with access always has the latest version. To pin files,
Note: To pin files, the file size must not exceed the download cache size limit set under 'Filespace settings'. To unpin files,
|
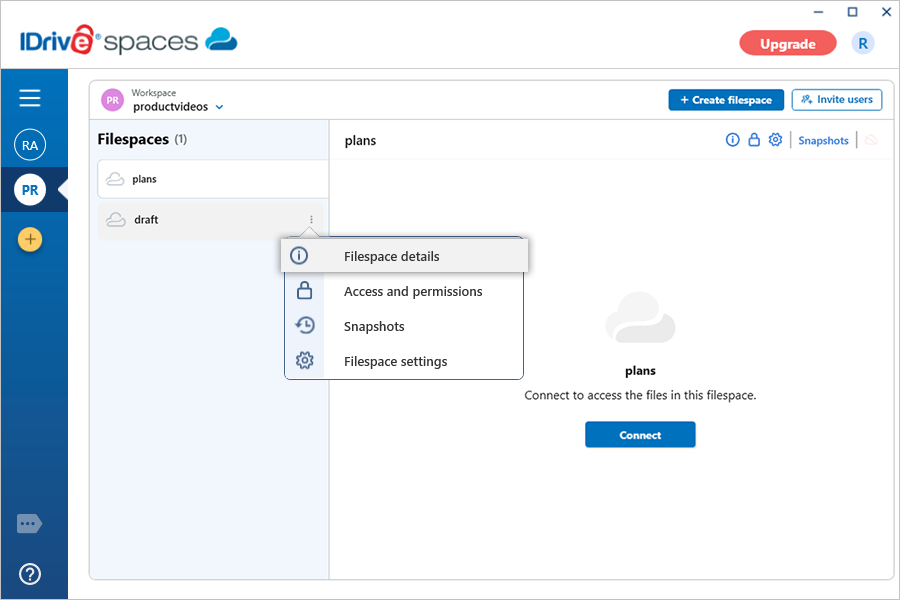
How do I view the details of a filespace?To view the details of a filespace,
From this screen, you can click Open filespace to access the filespace. You can also click |
How do I modify the settings of a filespace?To modify the settings of a filespace,
Alternatively, open the relevant filespace and click |
Can I configure cache sizes for my filespace?Yes. You can configure cache sizes to control local storage used by your filespace for uploads and downloads, helping improve performance and smoother file operations.
Note: By default, the maximum upload cache size is set to 100 GB, and the maximum download cache is set to 25 GB. |
How do I set or change the cache path?The cache path is the folder where temporary cache data is stored on your local computer. To change the cache path,
|
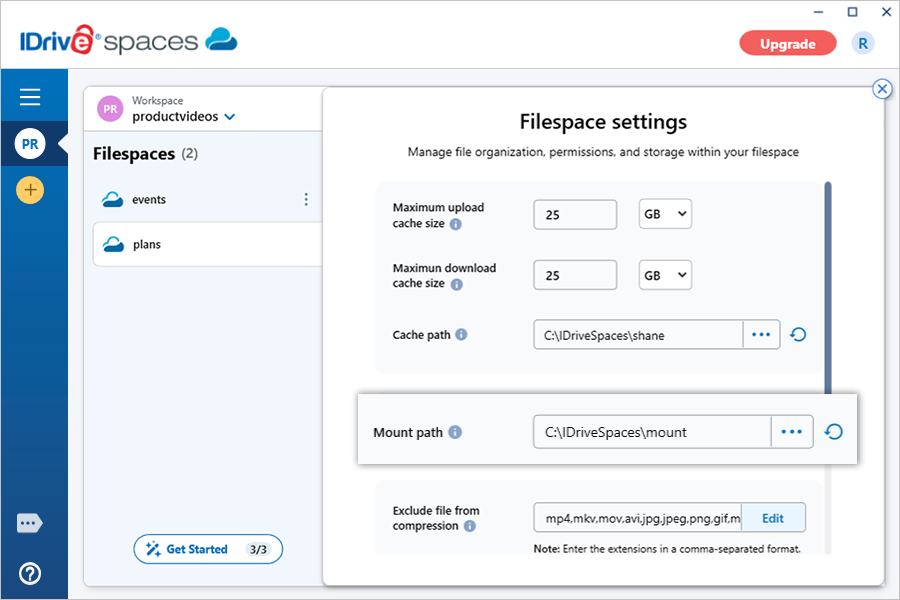
How do I configure a mount path?The mount path is the local folder where your filespace is mounted, allowing you to access your cloud files directly from your computer. To configure a new mount path,
|
Can I exclude specific file types from compression?Yes. IDrive® Spaces allows you to exclude specific file types or extensions from compression during file transfer. To exclude file extensions,
|
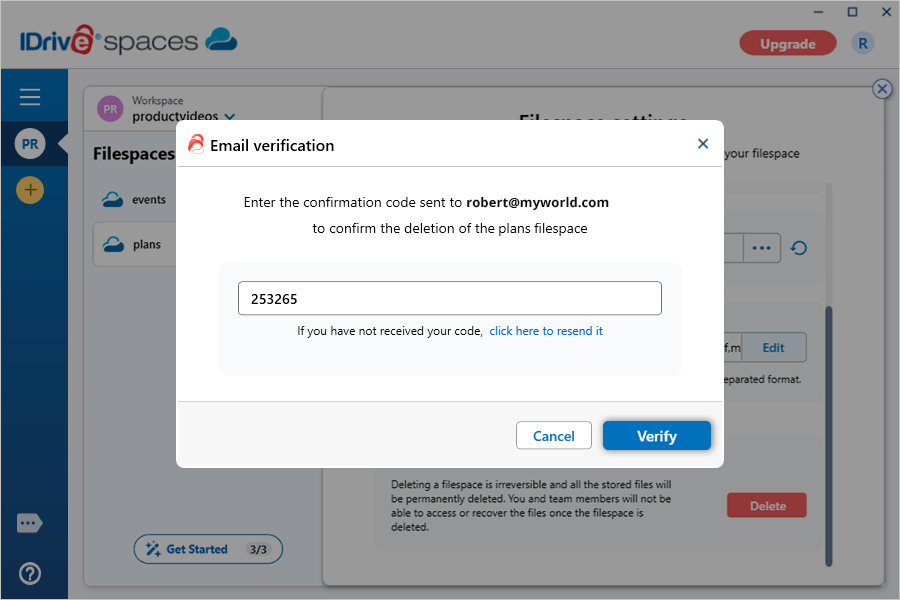
How do I delete a filespace?Only the filespace owner and invited administrators can delete a filespace. To delete a filespace,
After verification, the filespace and its files will be permanently deleted and cannot be recovered. Access to the filespace will be revoked, and all permissions will be removed. |
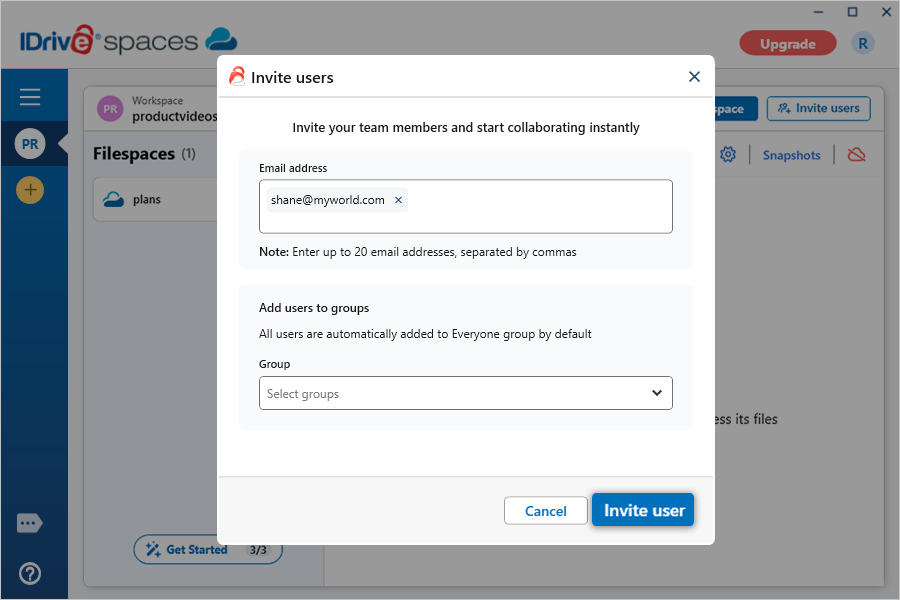
How do I invite users to a workspace?To invite users to a workspace,
Once the recipient accepts the invitation, they will be added to the workspace and appear under Users tab. You can view the status of pending invitations and resend or cancel them. After joining, grant users access to files and folders in the filespaces within the workspace. You can assign them view or edit access to an entire filespace or specific folders. |
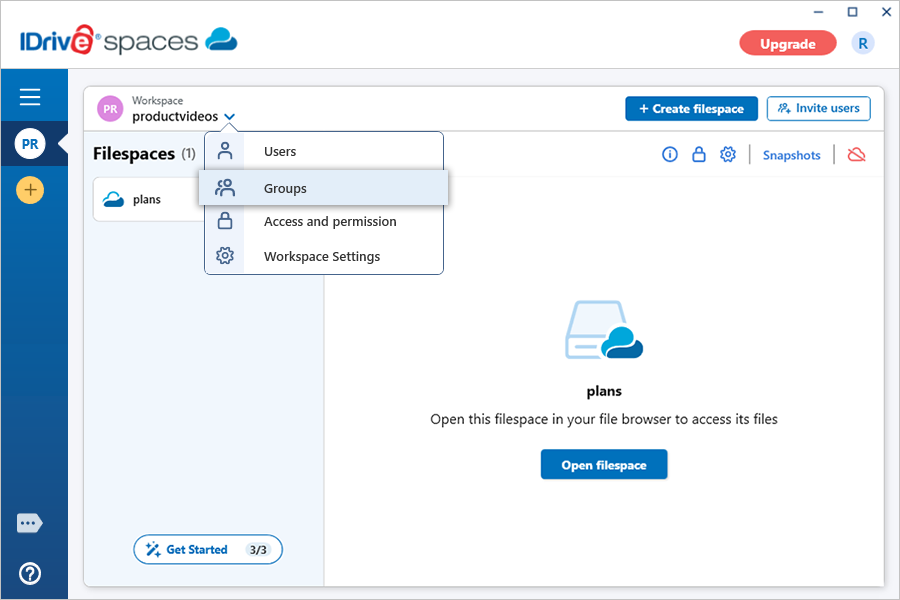
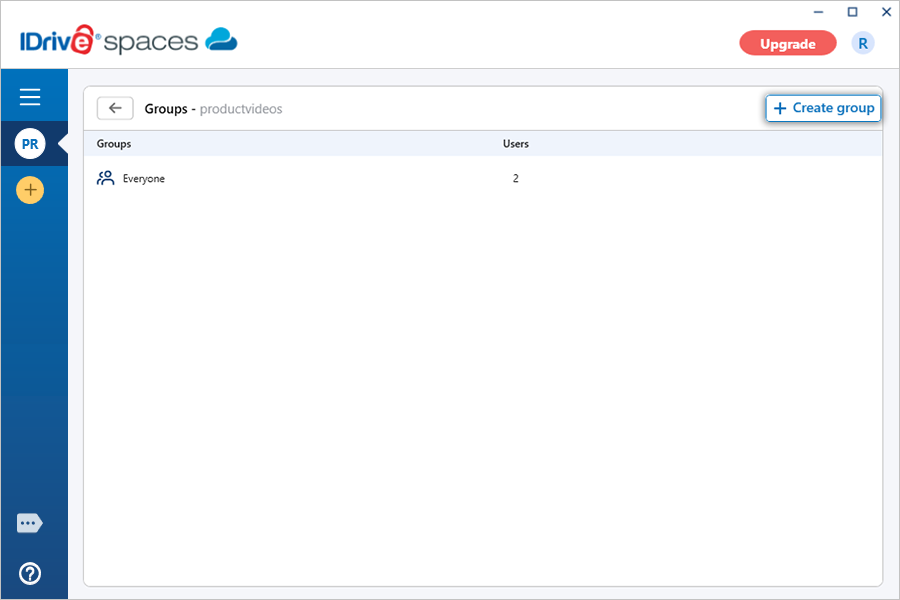
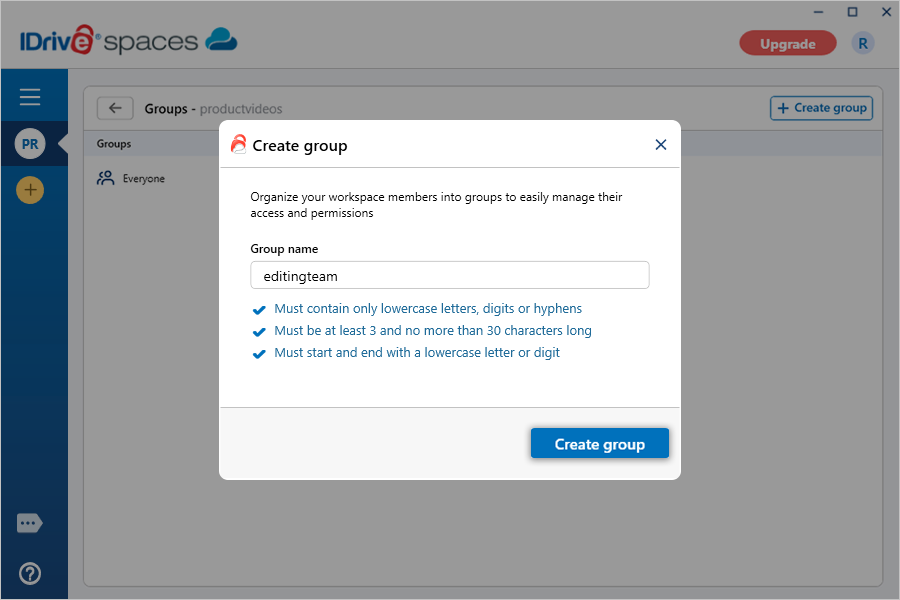
How do I create a group in my workspace?To create a group of users,
|
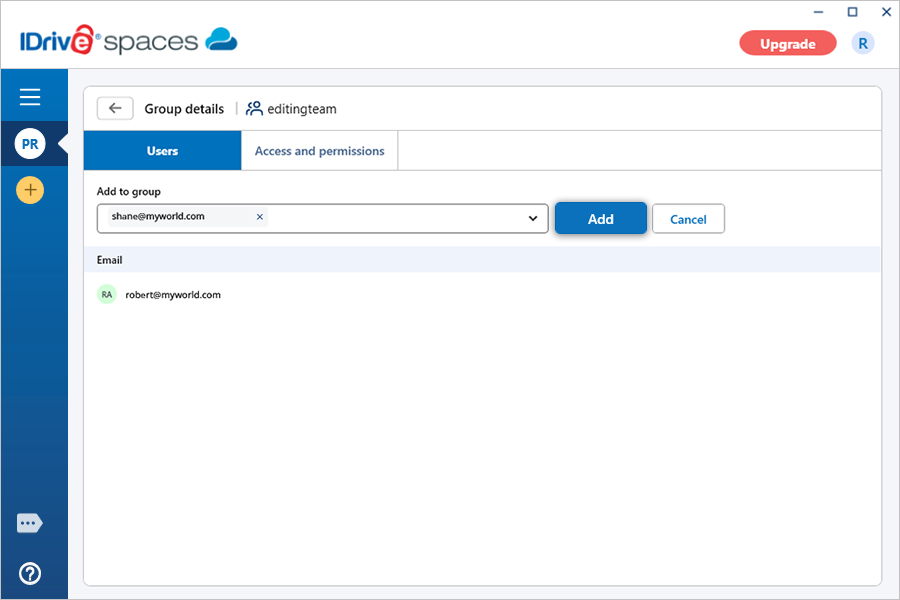
Can I add users to a group?Yes, you can add multiple users to a group. To add users to a group,
Alternatively, to add groups to a user,
|
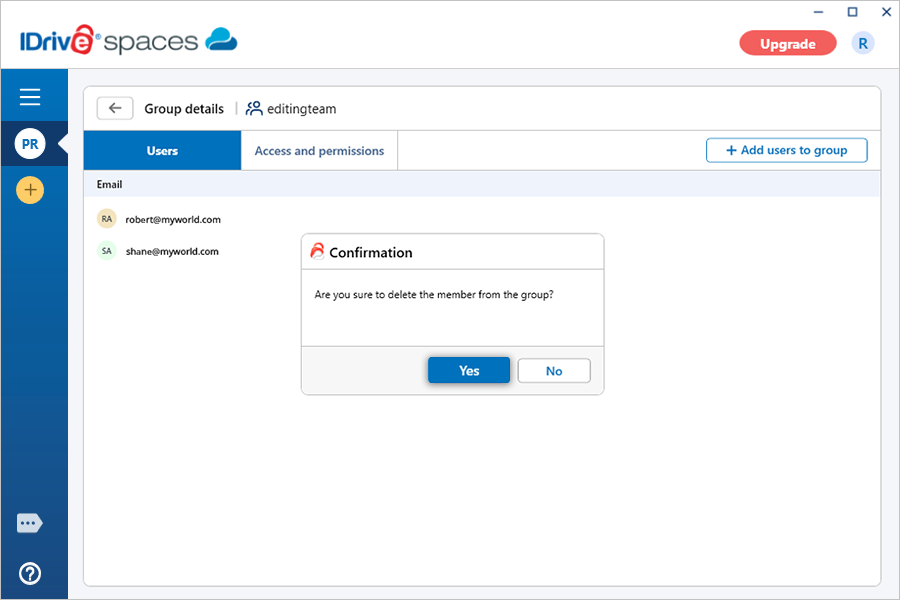
Can I delete users from a group?Yes, you can delete a user from a group. To delete a user,
|
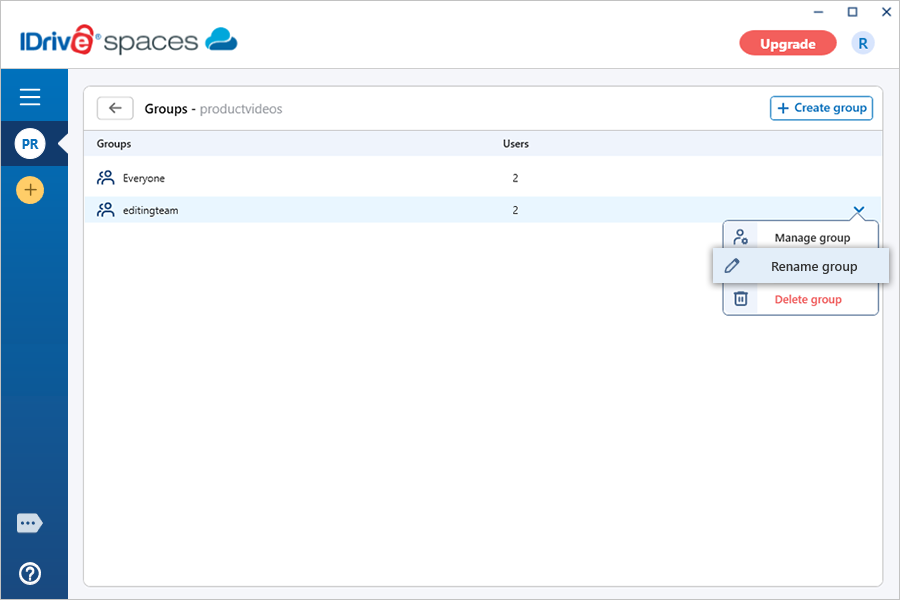
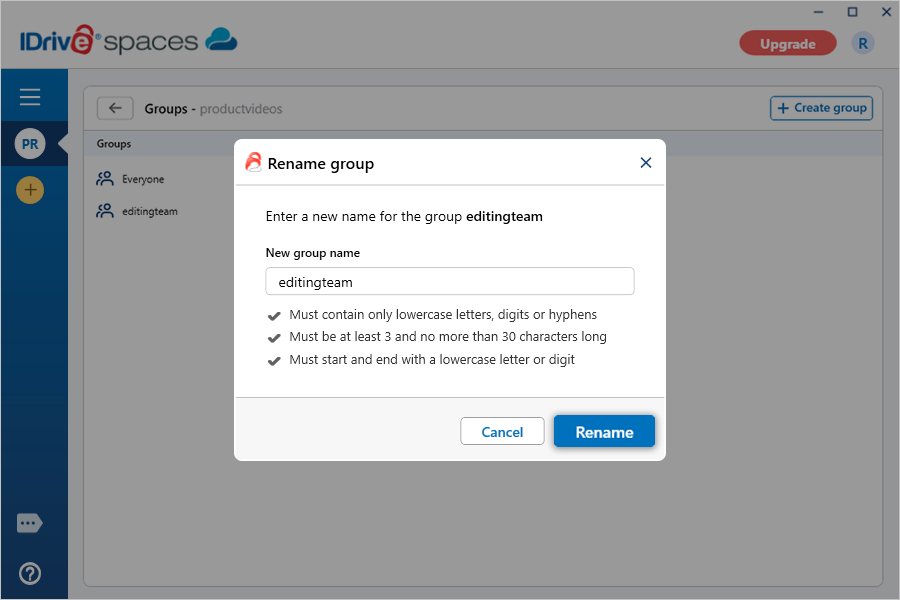
How do I rename a group?To rename a group,
|
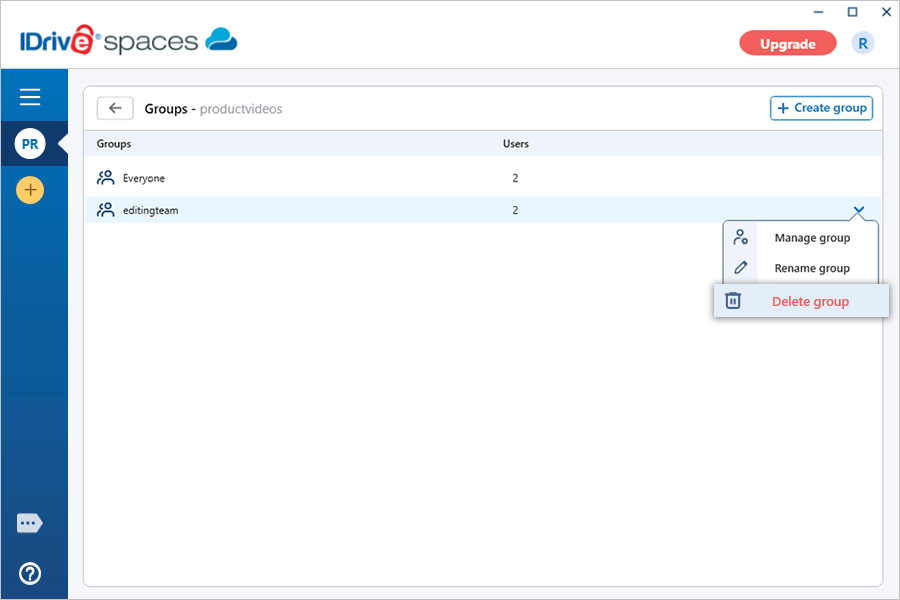
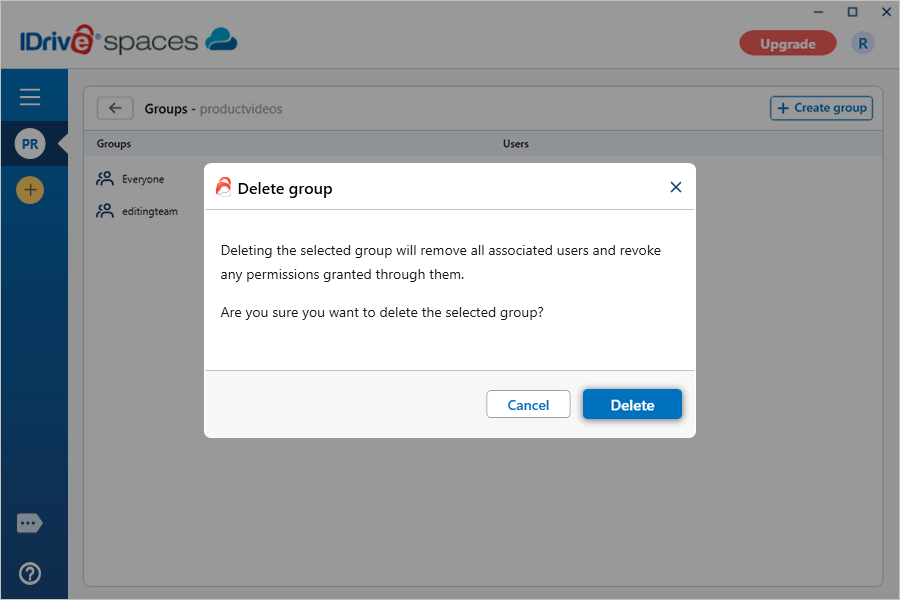
How do I delete a group?To delete a group,
|
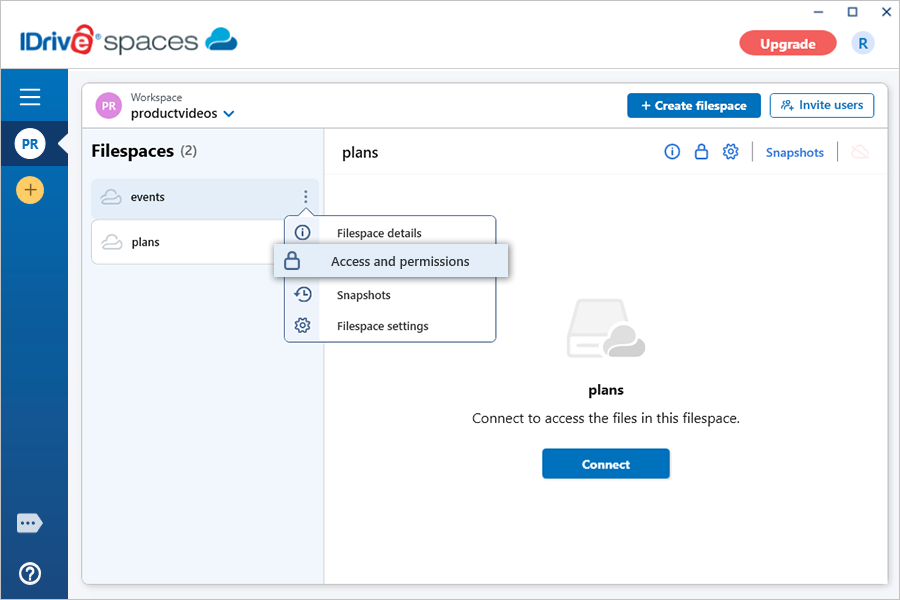
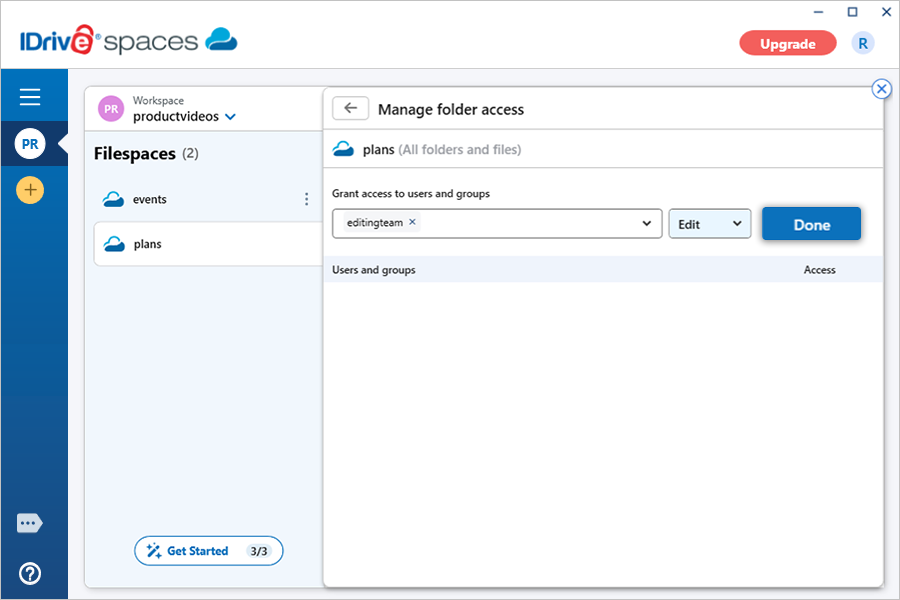
How do I grant access permission to an entire filespace?You can grant View or Edit access to a filespace for multiple users or groups. To grant access to a filespace,
Note: Select the default Everyone group to grant access to all users in the workspace. |
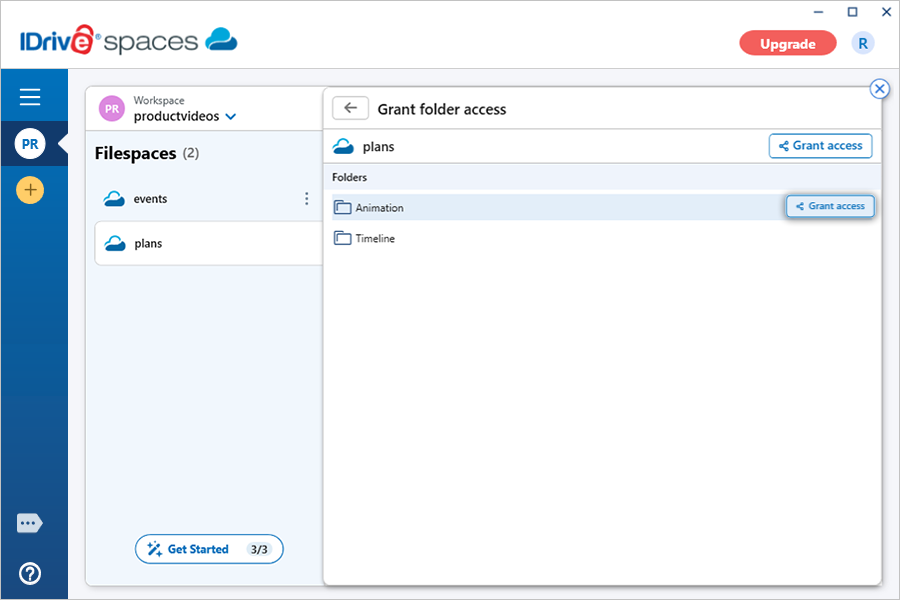
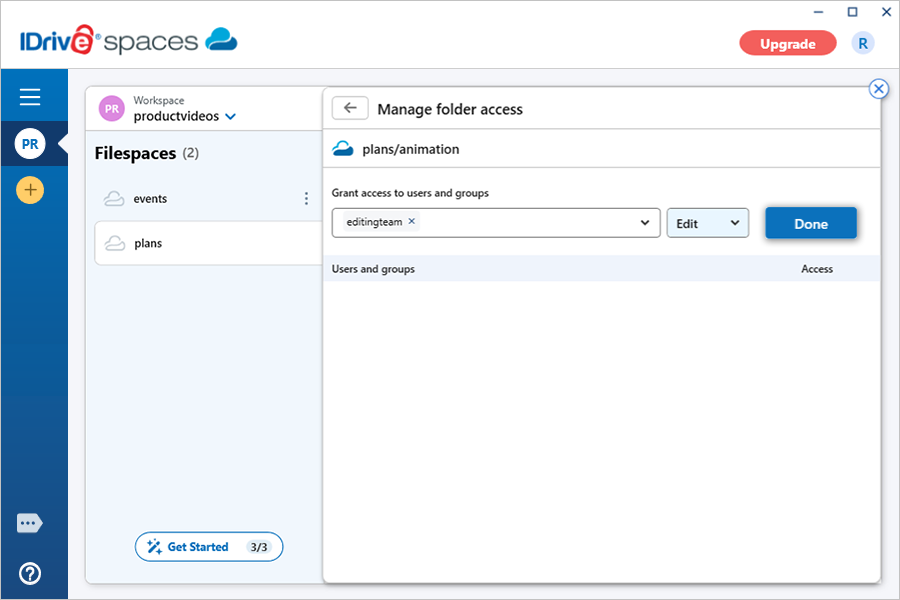
How do I grant access permission to a specific folder?You can grant View or Edit access to a specific folder within a filespace. To grant folder access,
Note: Select the default Everyone group to grant access to all users in the workspace. |
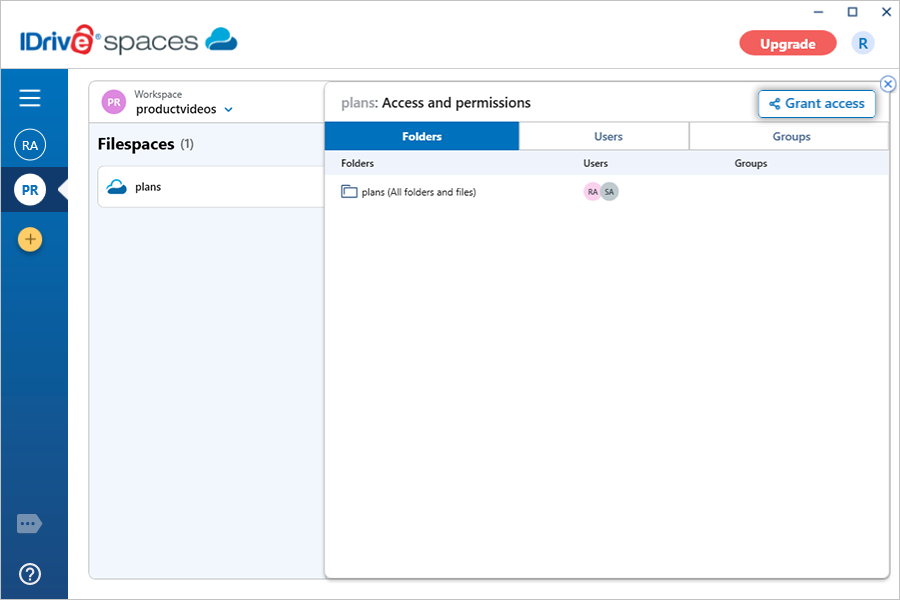
Is it possible to modify the existing permissions for a filespace or specific folders?Yes. You can modify the access permissions for an entire filespace or specific folders within it. To modify permissions for all users and groups,
To modify permissions for a specific user or group,
|
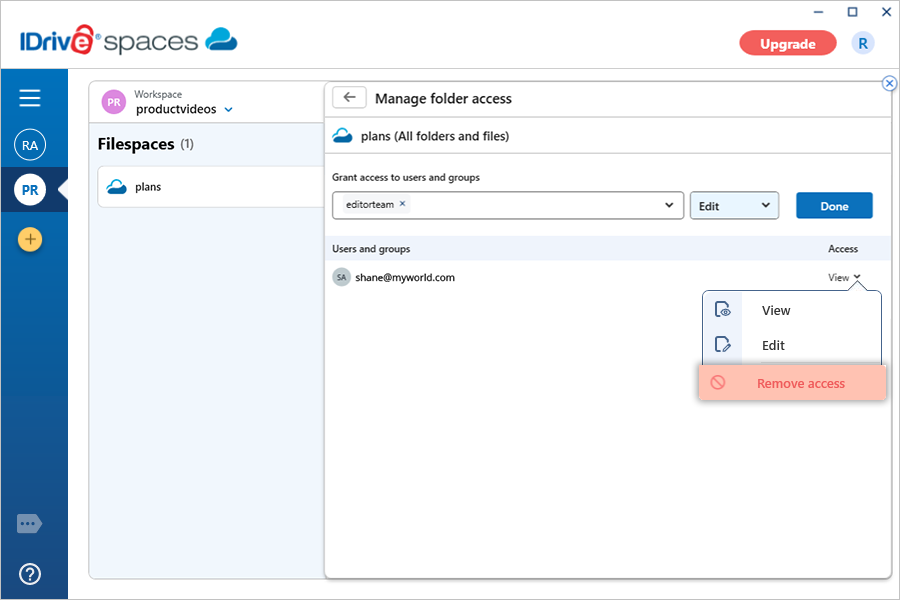
Can I remove the existing permissions for a filespace or specific folders within it?You can remove access permissions for an entire filespace or for specific folders. To remove permissions from a filespace or folder,
To remove permissions for a specific user or group,
|

 in the top-right corner.
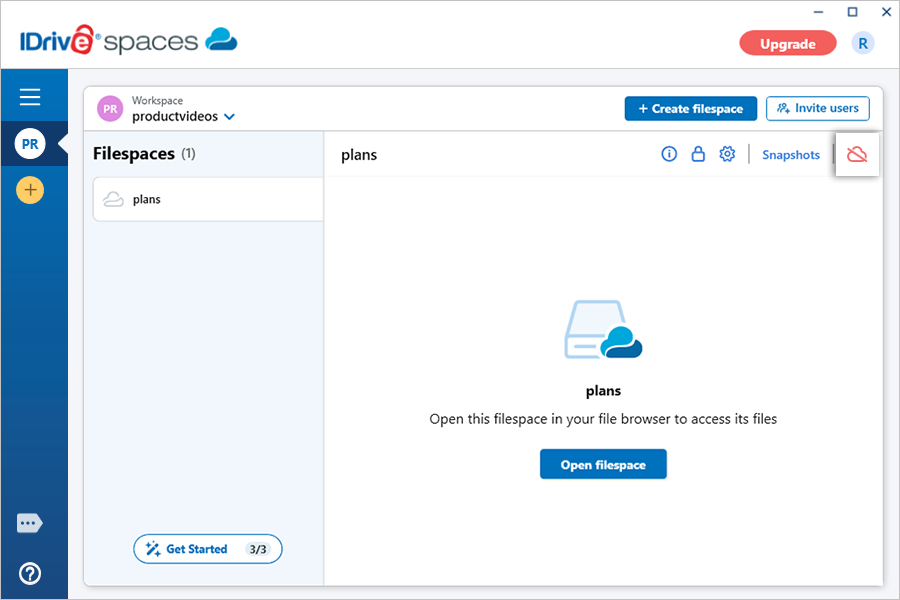
 to manage access and permissions, or click
  to configure filespace settings.


 next to the Cache path field.
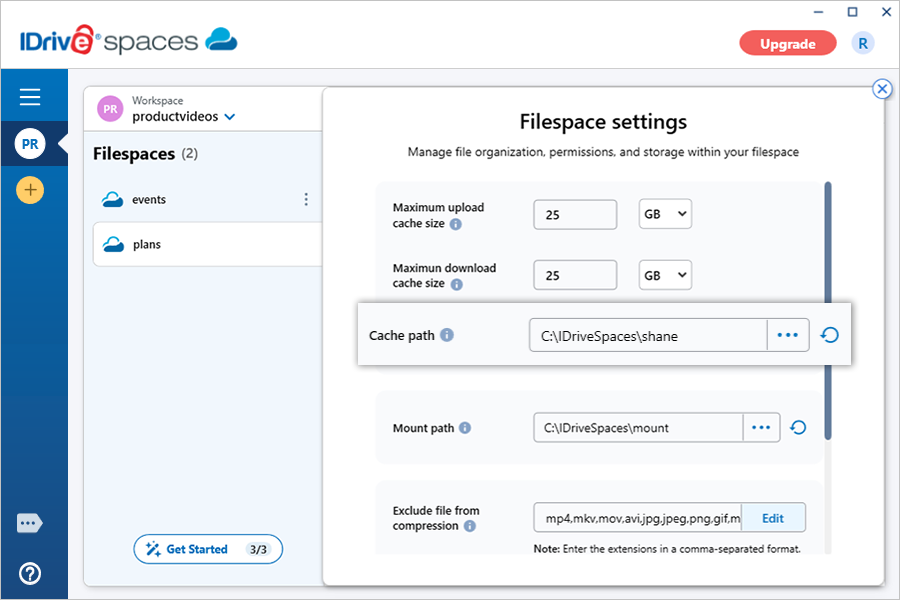
 to reset the cache path to the system default location.