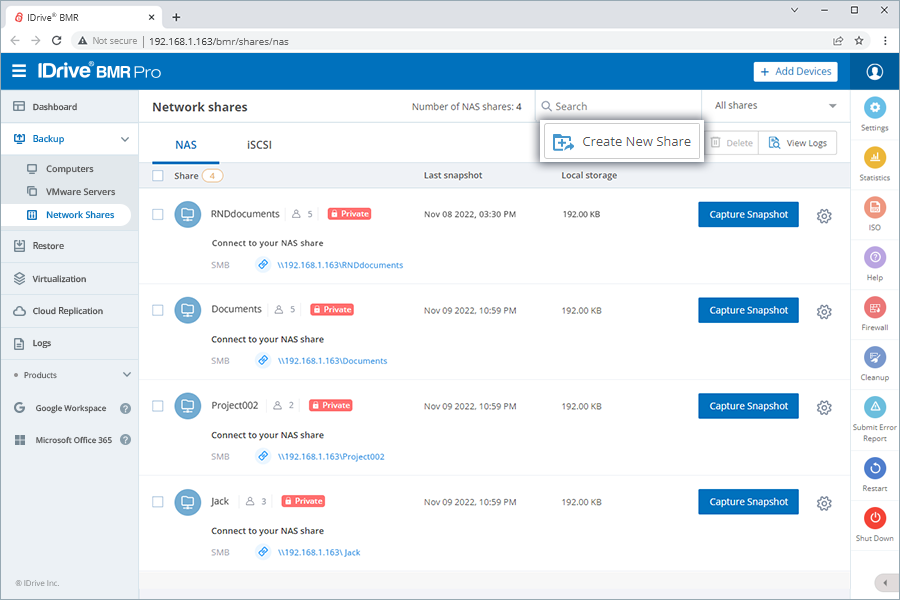
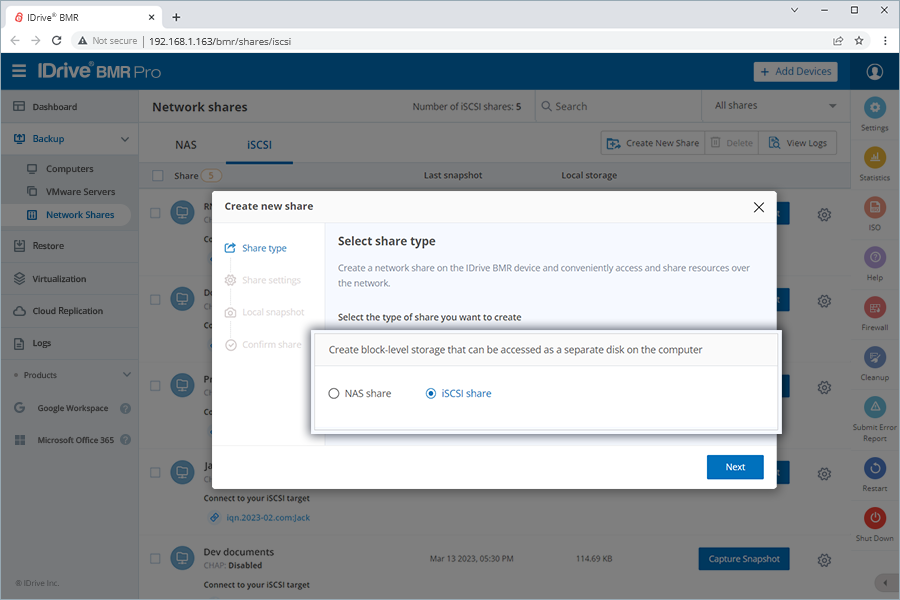
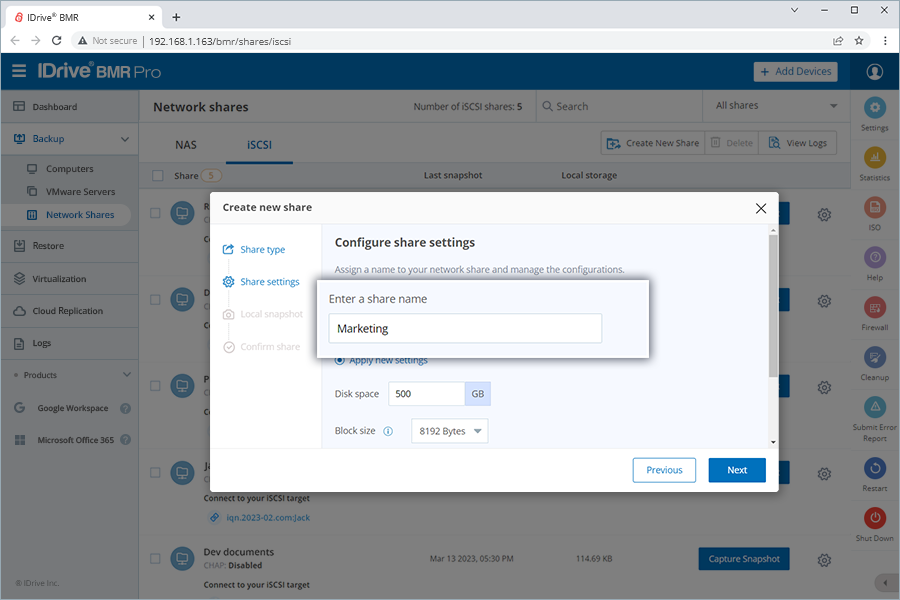
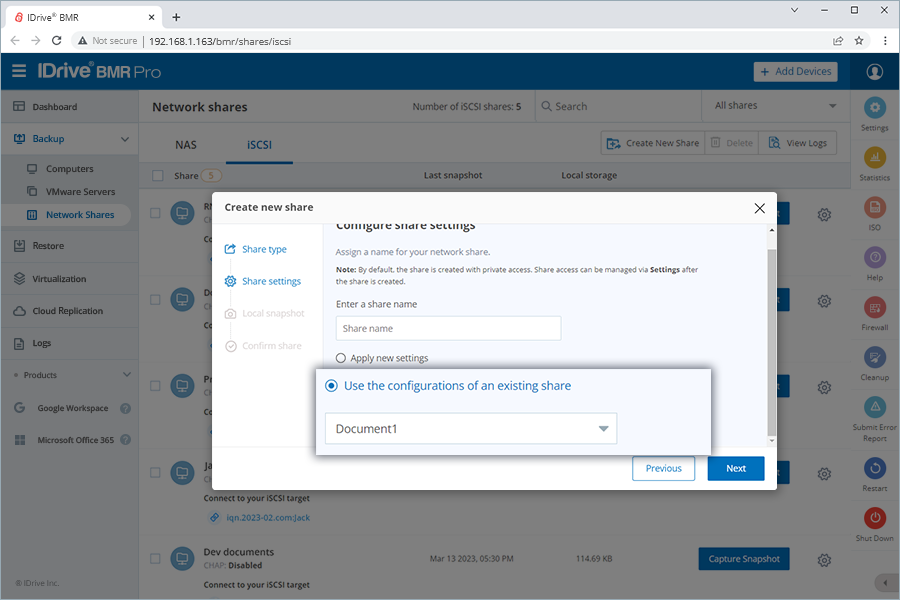
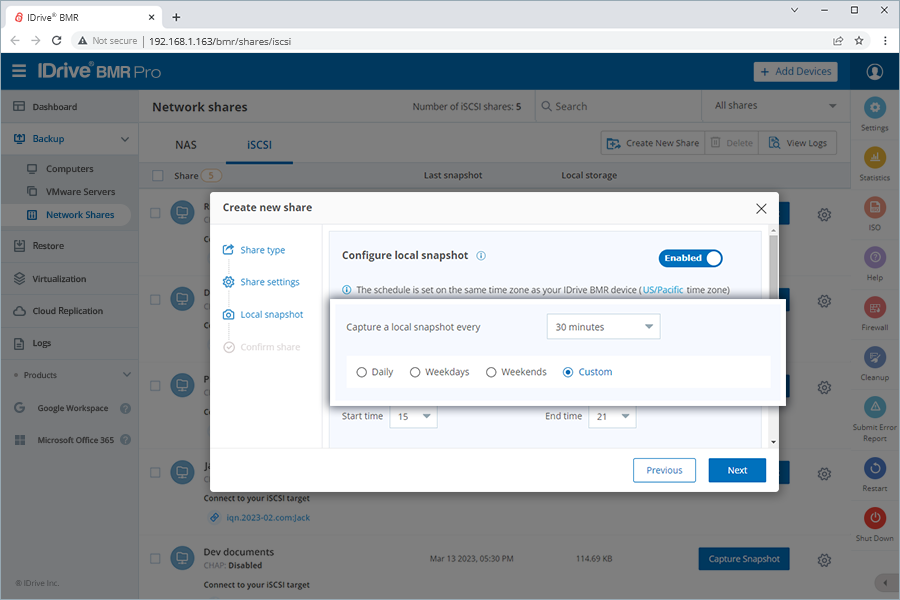
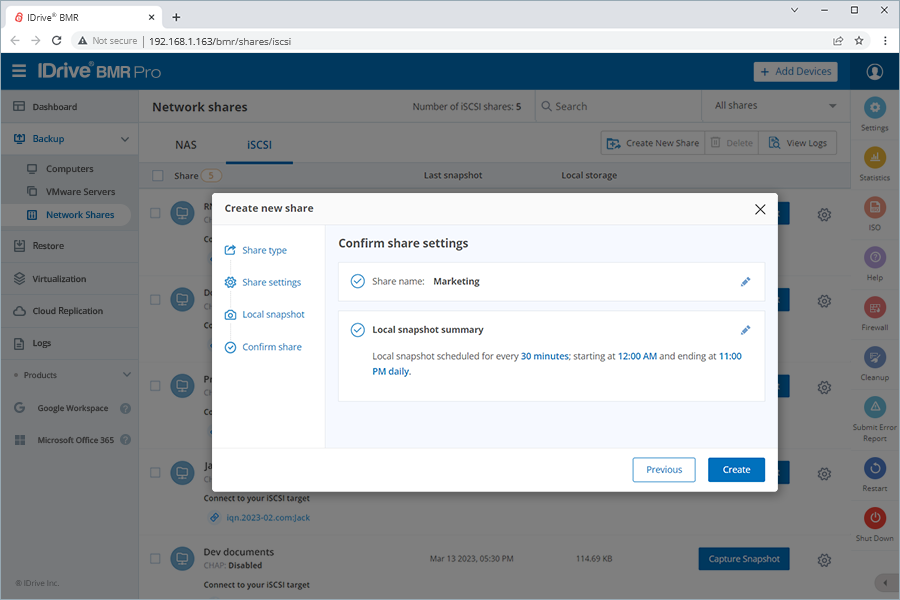
Perform full, incremental, and manual backup of entire computers and VMware systems — including multiple hard drives, partitions, and operating systems — using IDrive BMR. The initial backup is a full image backup and subsequent backups are full or incremental as per the schedule. Backup data even when your machine is up and running with minimal resources. You can also create NAS and iSCSI shares within the local device storage and schedule local snapshots.
| Backup your computers | |
| Backup your VMware machines | |
| IDrive® BMR Network shares |
Backup your computers
Add your computers for backup via a simple agent installation and manage the backup schedule and settings from anywhere. Check system requirements.
To add computers for backup,
- Sign in to the IDrive BMR device interface.
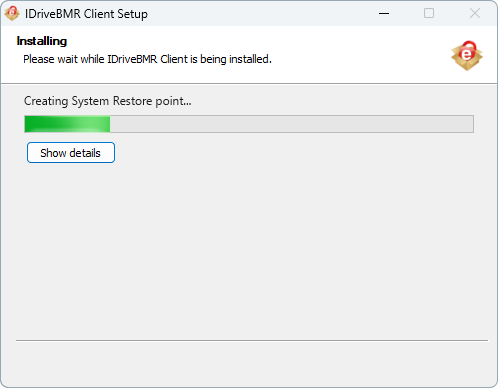
- Click the Add Devices button on the top-right corner and download the backup agent from under the Windows tab.
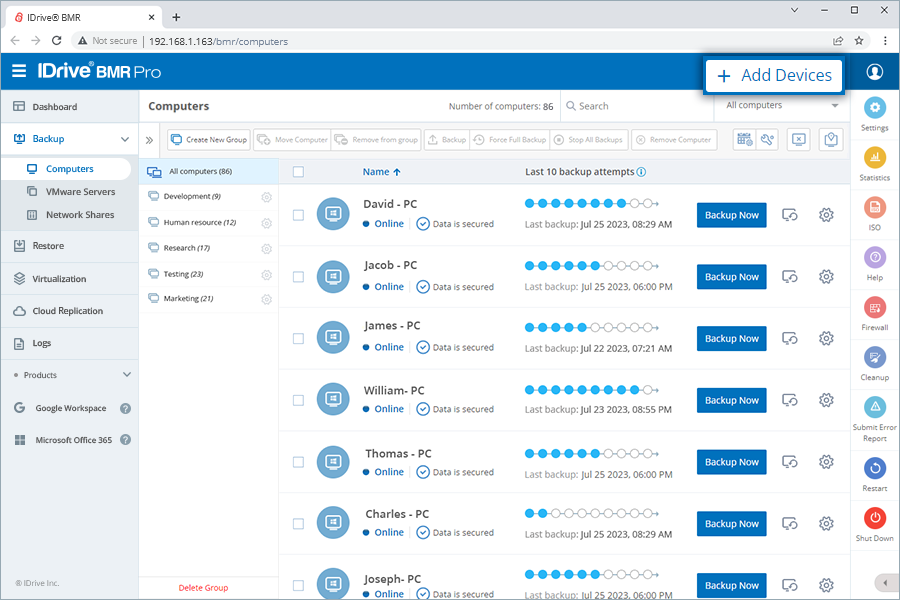
- Once the agent is installed on your computer, the IDrive BMR device will detect the agent and add the Computer for scheduled backup.
 Note: By default, the global backup schedule is set from 6:00 PM to 7:00 AM. You can edit this schedule as required.
To execute a manual backup, click the Backup Now button corresponding to the required computer.
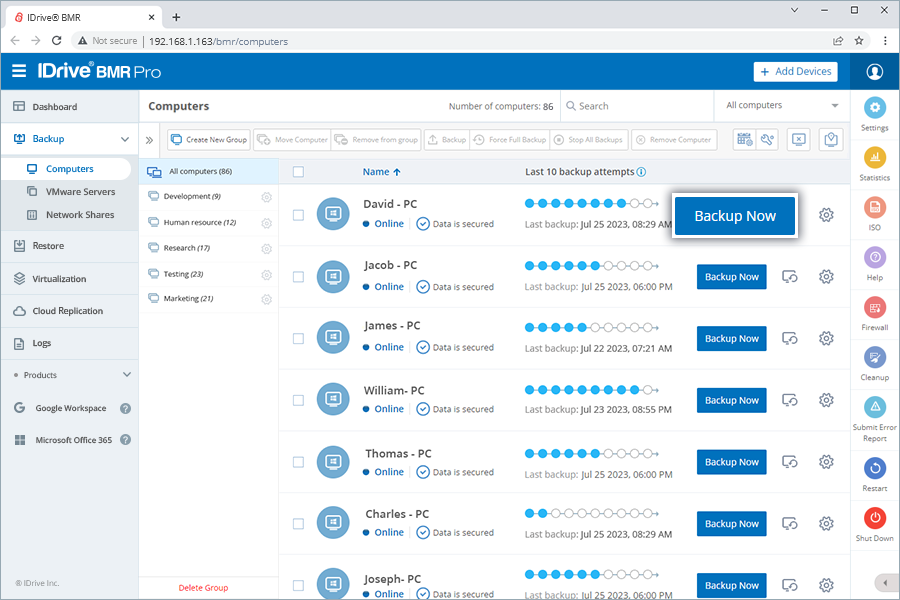
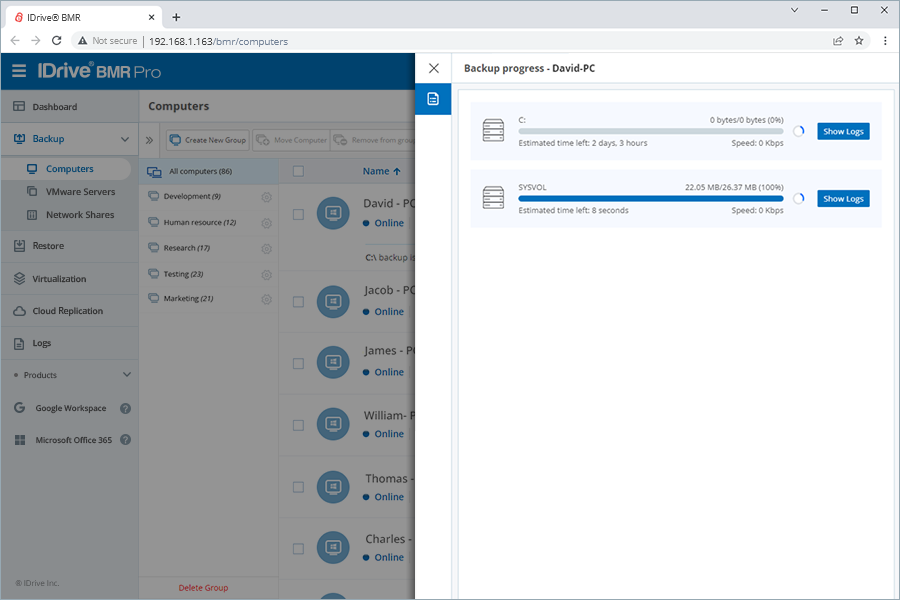
Click View details to track the backup progress.
Refer to this FAQ for details on how to install the backup agent on multiple PCs.
Backup your VMware machines
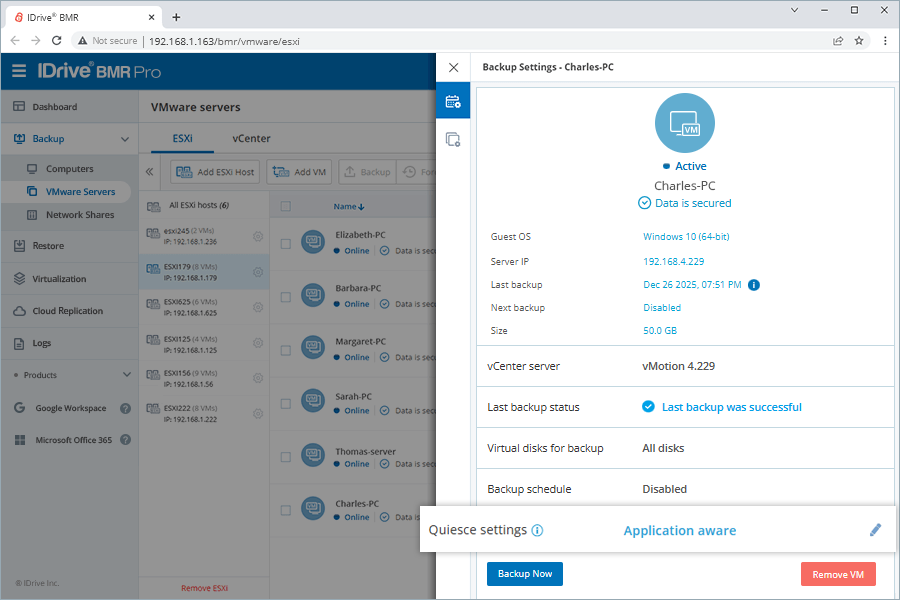
Connect to your ESXi hosts and vCenter servers and add the required virtual machines to the IDrive BMR device for backup. Remotely manage the backup settings/schedule from anywhere.
To add virtual machines from VMware ESXi host and vCenter server for backup,
- Sign in to the IDrive BMR device interface.
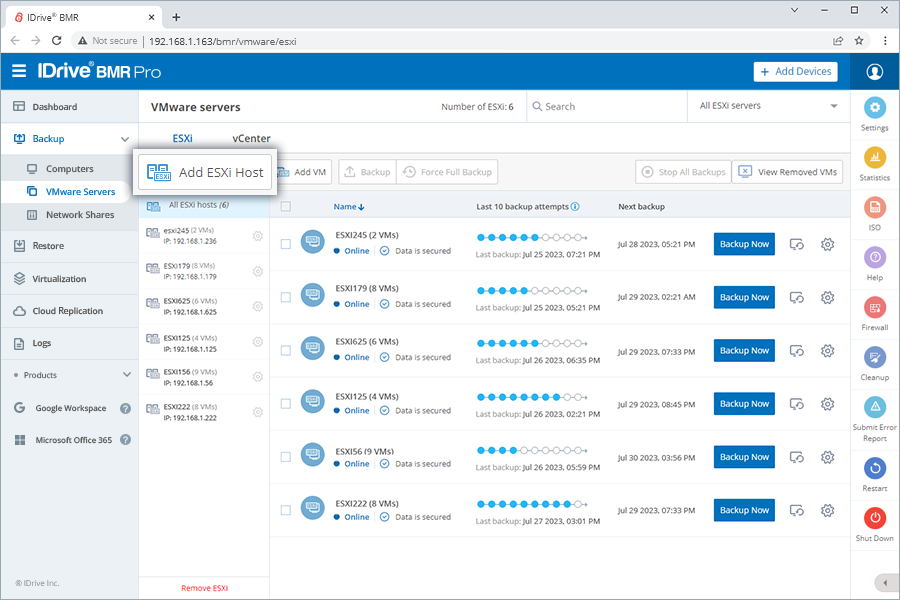
- Navigate to the VMware Servers tab and click Add vCenter Server/Add ESXi Host. This will open a pop-up wizard for adding VMware machines.
- Provide server details such as ESXi host/vCenter name, IP address, username, and password and click Next to connect to the server.

- Select the required virtual machines and click Next.
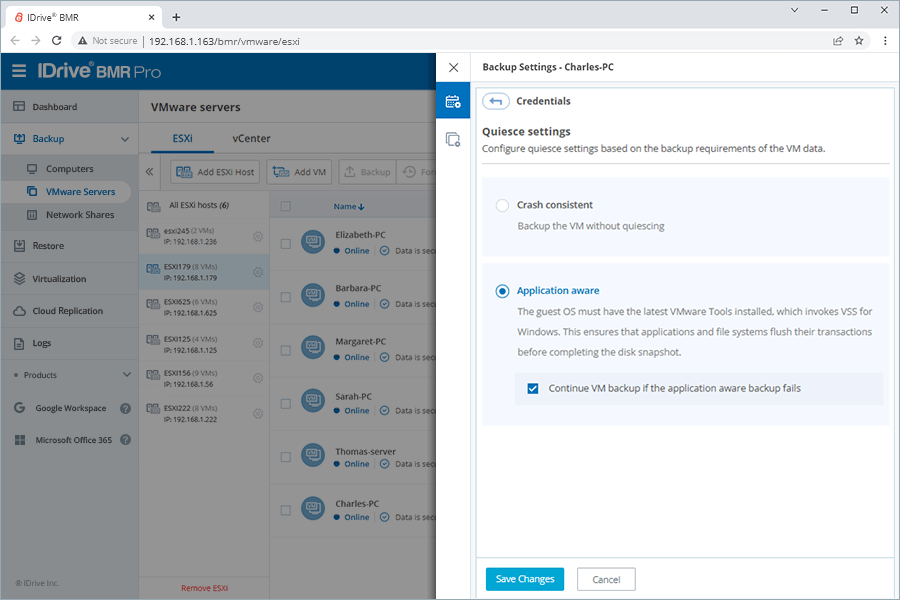
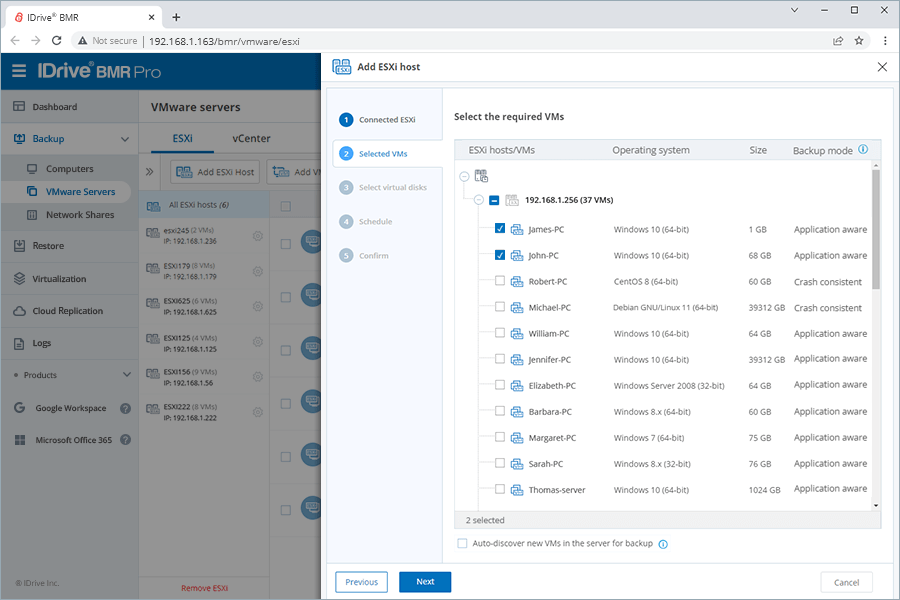 Note: IDrive BMR follows VMware's naming conventions and restrictions for virtual machines. Hence names with the special characters colon, quotation marks, and slash (:, ", \, and /) are not supported.
 - Enable Auto-discover new VMs in the server for backup to automatically detect and include any newly added VMs in the IDrive BMR backup list.
Note: You can manually remove any VMs from the backup list via Settings.
- Click Next.
- Choose the required virtual disks for backup. You can either select all disks associated with your system or customize the backup by choosing specific disks.
Note: Include the OS disk for backup to ensure VM system recovery. Typically, the first drive listed is the OS drive.
- Click Next.
- Set the backup schedule parameters and click Next.
Verify the details and click Confirm to add.
Once an ESXi host/vCenter server is added to the IDrive BMR device, backups will occur for the running VMs as per the schedule.
Refer to this FAQ to add new VMs to the added VMware ESXi/vCenter.
To perform an immediate backup of virtual machines, navigate to VMware Servers > ESXi/vCenter and click Backup Now corresponding to the required VMware server.
Click View details to track the backup progress.