Single-Sign-on
Single Sign-on (SSO) is a one-step user authentication process. If you are the admin of an IDrive® e2 account, you can enable your users to access IDrive® e2 by signing in to a central identity provider.
You can use any IdP of your choice to process all user authentications. This simplifies the sign-in experience by allowing users to log in to multiple systems with just one set of credentials.
IDrive® e2 currently supports the following features for SSO:
- SP-initiated SSO
- IdP-initiated SSO
- SCIM User provisioning
As an admin, you can enable your users to access IDrive® e2 by having them sign in to a central identity provider. To set up SSO with IDrive® e2, you first need to configure your identity provider and then configure SSO in IDrive® e2.
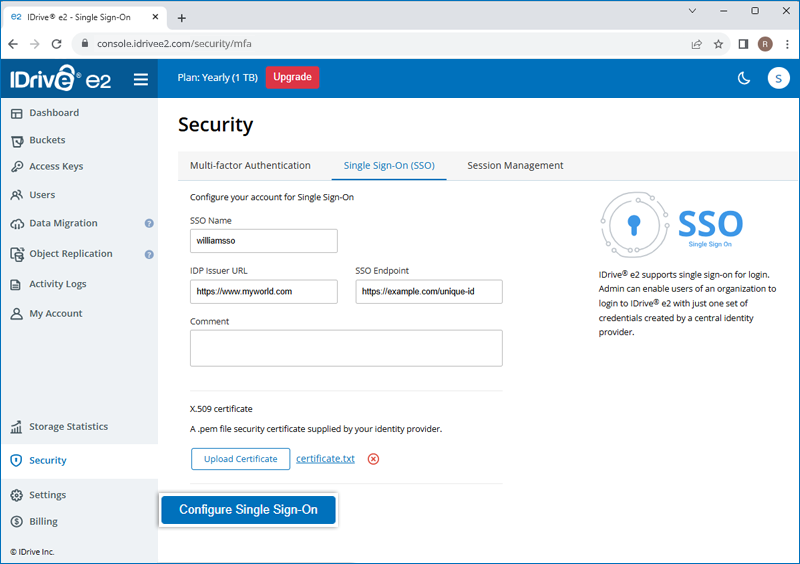
To configure SSO,
- Sign in to your IDrive® e2 account with your email address and password.
- Navigate to the Security and click the Single Sign-On (SSO) tab.
- Enter a name for your SSO profile.
- Enter the Issuer URL and SSO Endpoint.
-
Upload the X.509 certificate received from your IDP.
Note: The X.509 certificate should be in .pem, .txt, .cer, or .cert format only. -
Click Configure Single Sign-On.
You will receive an email when SSO is enabled.
Yes, you can configure your own identity provider for SSO along with a set of parameters as described below:
- IDrive® e2 uses SAML 2.0 with the HTTP Redirect binding for IDrive®e2 to the IdP and expects the HTTP Post binding from the IdP to IDrive® e2.
- While configuring with SAML, use the two following URLs and save the changes.
- Single sign-on URL: https://api.idrivee2.com/api/sso/samlassert
- Audience URL (SP Entity ID): https://api.idrivee2.com/api/sso/metadata.xml
- Your identity provider may ask whether you want to sign the SAML assertion, the SAML response, or both. IDrive® e2 requires the SAML response to be signed.
You can choose a signed or unsigned SAML assertion.
Admin of the IDrive® e2 account can enable SSO while inviting users. Alternatively, the admin can enable SSO for the existing users.
To enable SSO for new users,
- Sign in to IDrive® e2 with your email address and password.
- Go to Users > Invite User.
- Enter the email addresses of the users you want to invite. You can invite up to 10 users at a time.
Note: An invite will be sent to these email addresses for creating an account. - Select the Make as admin checkbox to grant users administrative privileges. All users with admin permissions can manage buckets, access keys, and users
- Select the Enable SSO checkbox.
Note: If you select the checkbox, you won't be able to set the password.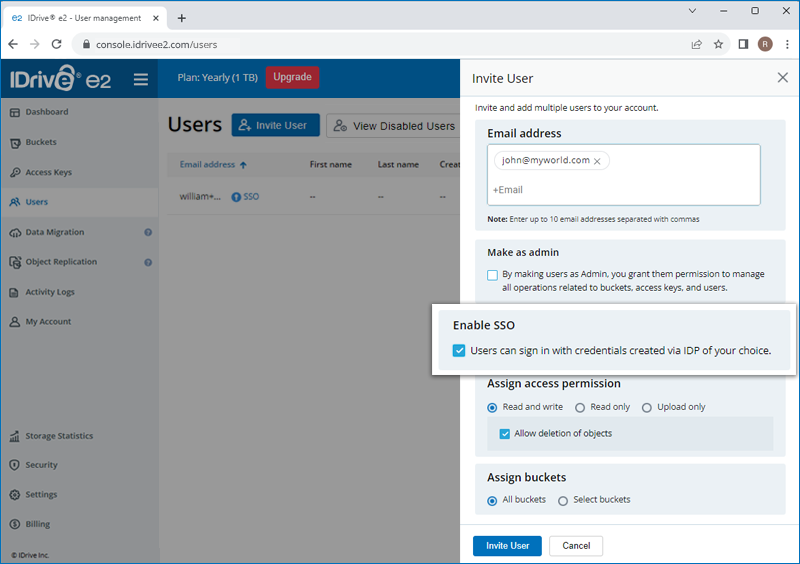
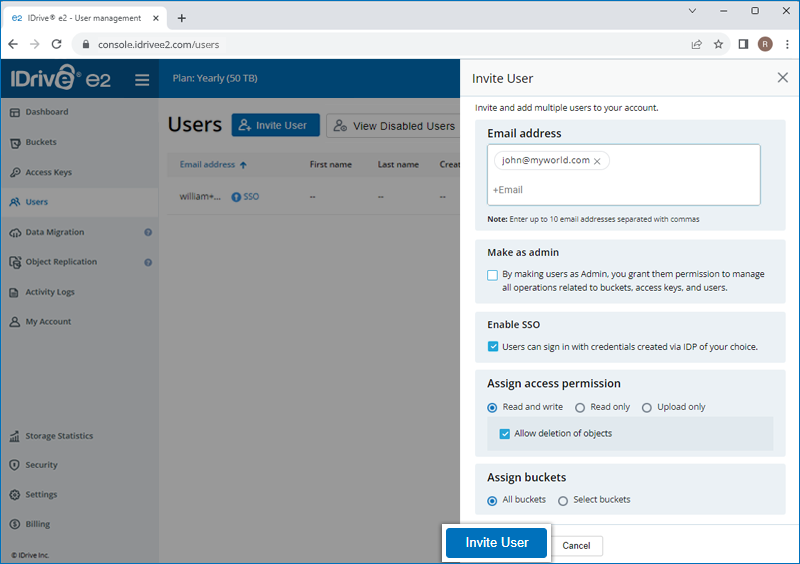
- Select access permission for the users, i.e. Read and write, Read only, or Upload only.
- Allow access to all buckets or select the buckets to allow access.
- Click Invite User.
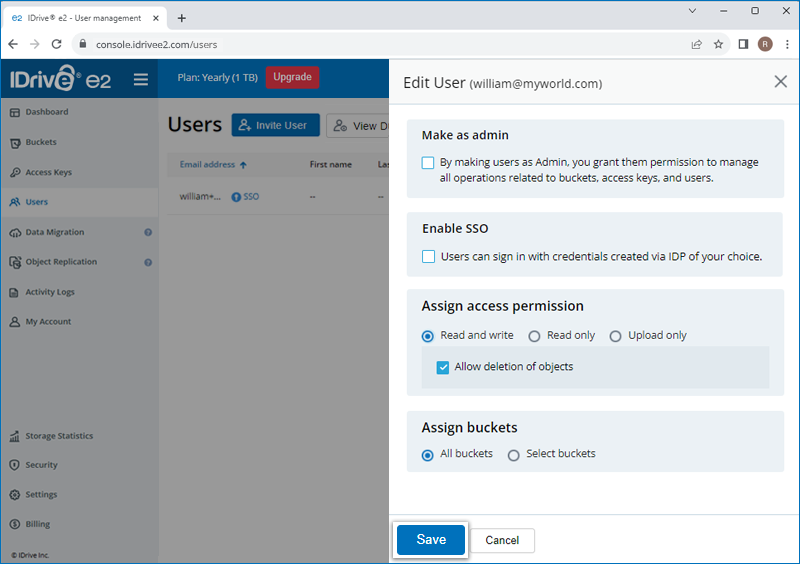
To enable SSO for existing users,
- Sign in to IDrive® e2 and go to Users.
- Hover over the user you want to enable SSO for, then click
 .
. - Select the Enable SSO checkbox.
- Click Save.

To disable SSO for users,
- Sign in to IDrive® e2 and go to Users.
- Hover over the user you want to enable SSO for, then click .
- Deselect the Enable SSO checkbox.
- Click Save.
A user will be intimated by an email informing that SSO for their account has been disabled. Now they must sign in to IDrive® e2 using their email address and password.
To delete an SSO profile,
- Sign in to IDrive® e2.
- Navigate to Security and click the Single Sign-On (SSO) tab.
- Click
 corresponding to the SSO profile you wish to delete.
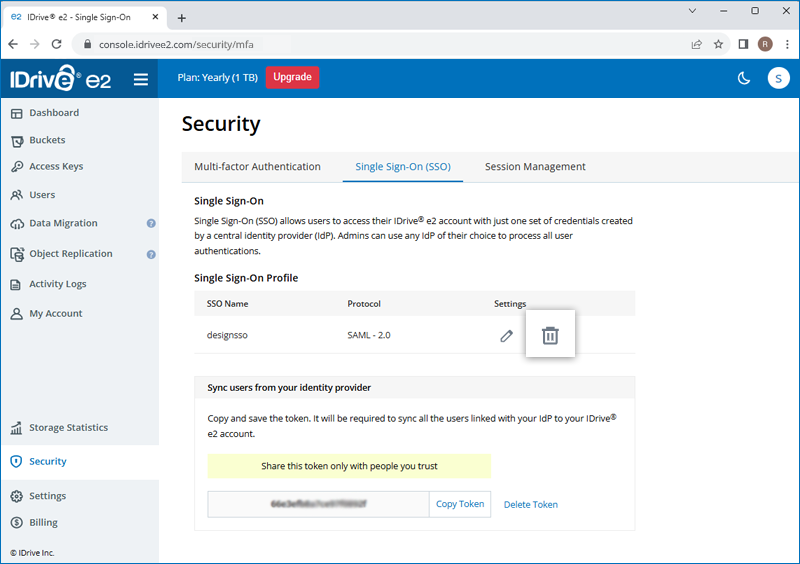
To generate a token for syncing contacts,
- Sign in to IDrive® e2 via a web browser.
- Navigate to Security and click the Single Sign-On (SSO) tab.
- In the SSO section, click the Generate Token button under Sync users from your identity provider to generate a token.
- Click the Copy Token button to copy and save the token for future reference.
The token will be required to sync all users linked to your IdP to your IDrive® e2 account.
- Configure the following SCIM User provisioning URL in your IdP:
https://api.idrivee2.com/api/sso/user_provisioning
To login via SP-initiated SSO,
- Go to IDrive® e2 sign in and click Sign in to SSO account.
Alternatively you can go to https://console.idrivee2.com/sso/login. - Enter your email address and click Sign in.
To log in via IdP-initiated SSO, you must log in to your IdP dashboard and select IDrive® e2.
Yes, you can use Identity Providers (IdPs) like OneLogin and Okta to configure Single Sign-On (SSO).
Yes, you can set an idle session timeout to enforce automatic sign-out of IDrive® e2 if users are inactive for the specified duration.
To enable idle session timeout for your account,
- Sign in to your IDrive® e2 account.
- Go to Security > Session Management > Your account.
- Under Session control, set the duration for the Idle session timeout.
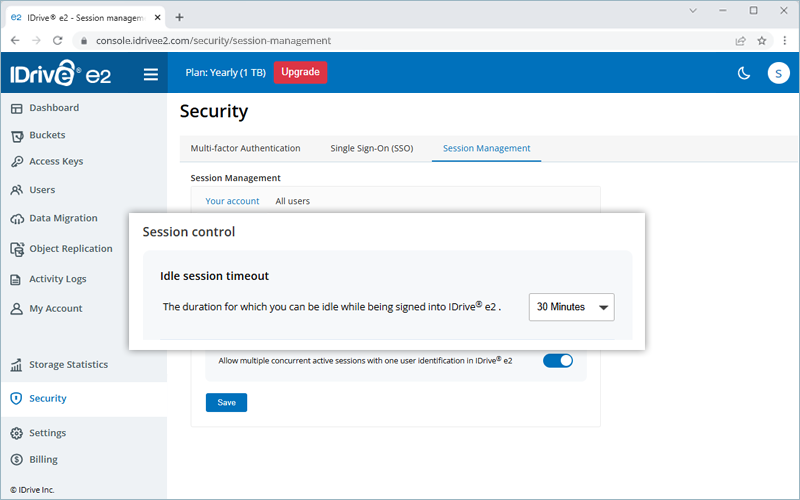
- Click Save.
To enable idle session timeout for users' accounts,
- Go to Security > Session Management > All users.
- Under Session control choose the required option:
- Allow users to set timeout duration: Users can set their own session timeout
duration.
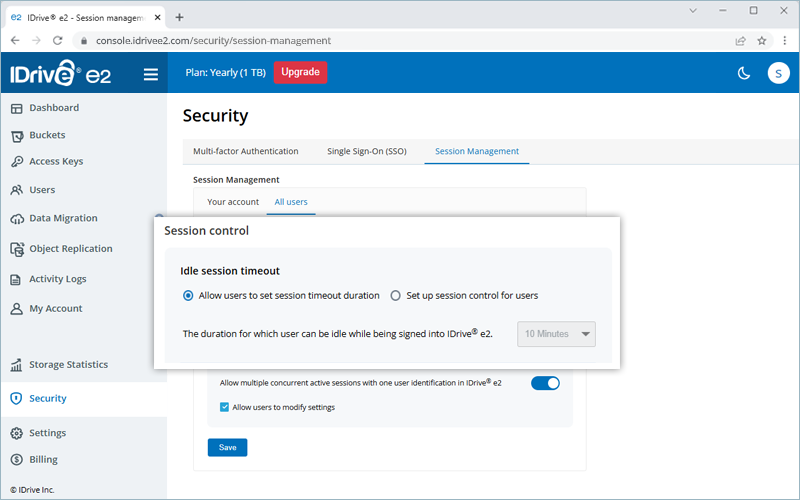
- Set up session controls for users: Set idle session timeout duration for all users.
- Allow users to set timeout duration: Users can set their own session timeout
duration.
- Click Save.
Note: You can also set up an idle session timeout while adding new users.
Is it possible for multiple users to be signed in to IDrive® e2 simultaneously with one user identification?
Yes, you can enable concurrent sessions to allow multiple users to sign with one user identification.
To enable concurrent session, go to Settings > Preferences and enable Concurrent sessions. You can enable it just for your account or all users account.
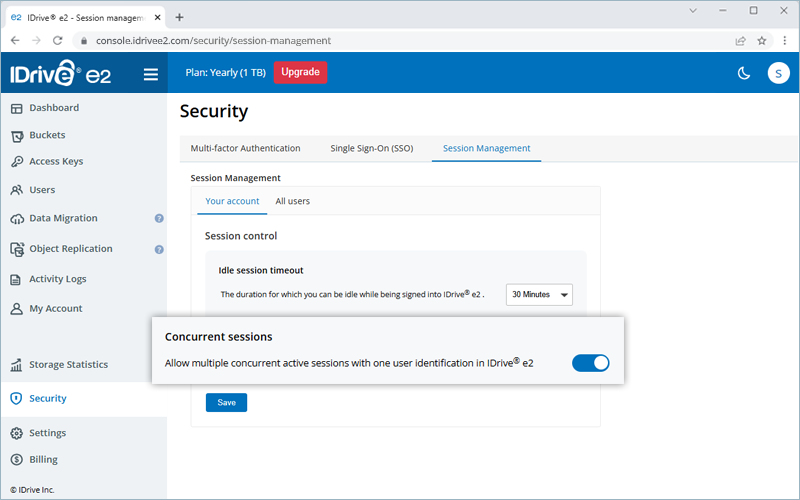
Note: You can allow users to modify this setting by selecting the checkbox.