IDrive® e2 Express™
I have several TBs of data. How can I quickly upload this to my cloud storage without clogging up Internet bandwidth?
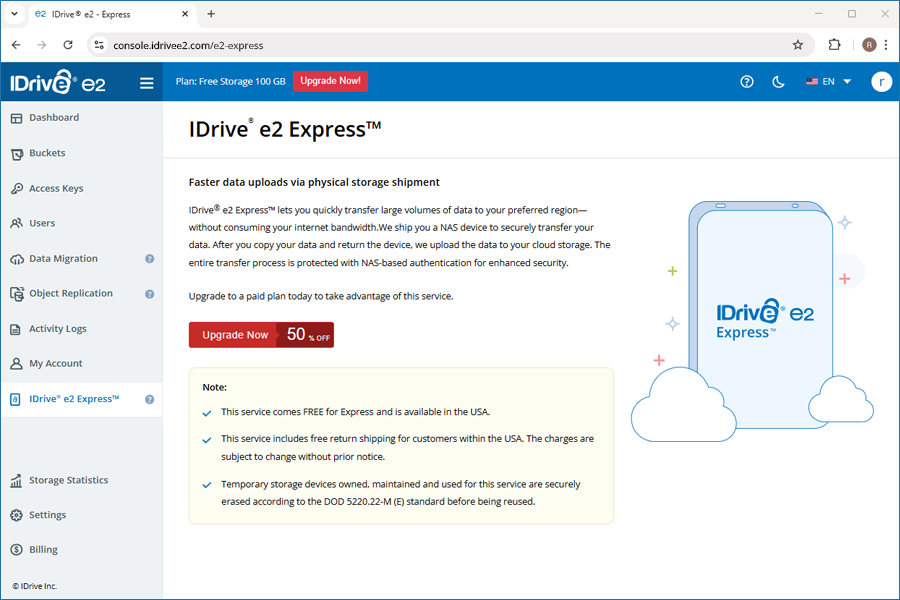
Backing up large amounts of data can be done online, but may take several days, often weeks. Use IDrive® e2 Express™ device to transfer bulk data physically. Know more.
IDrive® e2 Express™ allows quick data uploads via a temporary physical storage device.
You need an active paid IDrive® e2 subscription to avail the IDrive® e2 Express™ service. This service comes FREE and is available in the USA. This service includes free return shipping for customers within the USA. The charges are subject to change without prior notice.
Benefits
- You can quickly upload several TBs of data to your IDrive® e2 cloud storage.
- Your data is secured with NAS-based authentication throughout the process.
- Temporary storage devices owned, maintained, and used for this service are securely erased according to the DOD 5220.22-M (E) standard before reusing.
- No bandwidth usage during the data transfers.
To start using IDrive® e2 Express™, you must have a paid subscription.
- Sign in to the IDrive® e2 web console.
- Navigate to the IDrive® e2 Express™ tab.
- Click the Upgrade Now button.
- Select a paid plan that fits your storage needs.
- Fill in your payment and billing information (choose a payment method such as credit card, PayPal, or Razorpay, then enter the required details).
- Check the box to agree to the pricing terms and IDrive® e2 service terms.
- Click Subscribe.
- Click Continue for payment confirmation.
To place an order for IDrive® e2 Express™ drive,
- Sign in to the IDrive® e2 web console.
- Navigate to the IDrive® e2 Express™ tab.
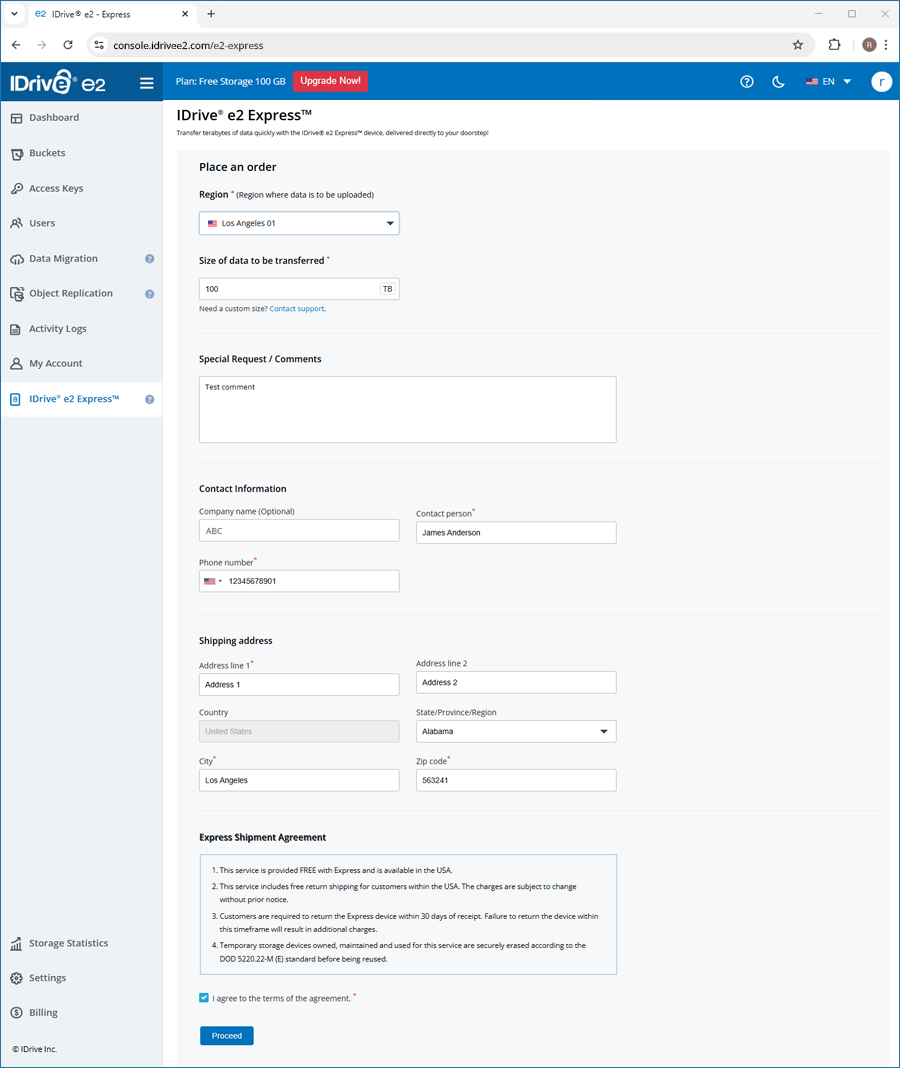
- Click Place an Order and fill up the form.
- Select the Region and enter the Size of data to be transferred.
- Add special requests or comments.
- Provide your contact details like Company name, Contact person, and phone number.
- Enter shipping address, Address line, Country, State/Province/Region, City, and Zip code.
- Review the Express Shipment Agreement and select the checkbox to accept the terms.
- Click Proceed.
- Click Place an order to confirm your order.
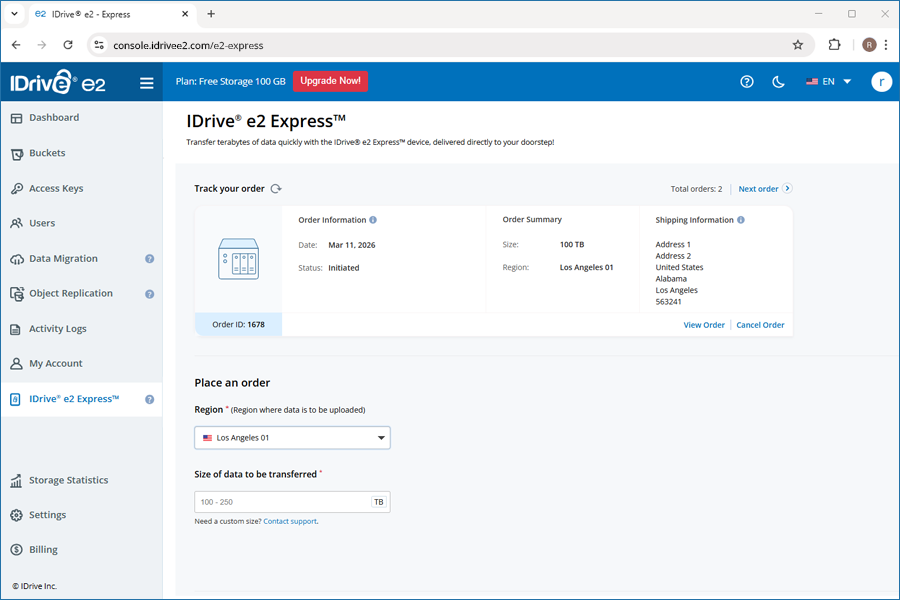
Once the order is placed, you will receive a confirmation email with order details such as order ID, job status, region, size, and contact information. The order status will appear as Initiated.
Once a NAS device is assigned, the status will change to In Progress.
You can edit contact, order, and shipping details while the status is Initiated. To make changes, click Order Information. To cancel the order, click Cancel Order.
Note:- Billing address can be edited while the status is In Progress.
- Order can be canceled while the status is Initiated or In Progress.
I had placed an order for IDrive® e2 Express™ device to upload my data. How can I track my shipment?
To know the status of your IDrive® e2 Express™ order,
- Sign in to your IDrive®e2 account.
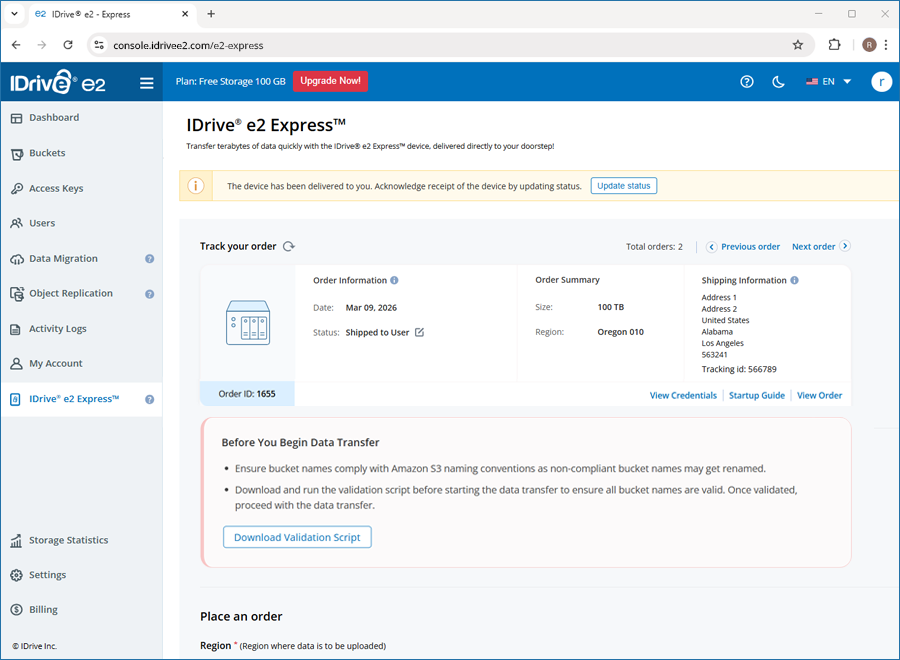
- From the IDrive® e2 Express™ tab, you can get your order details under the Track your order section.
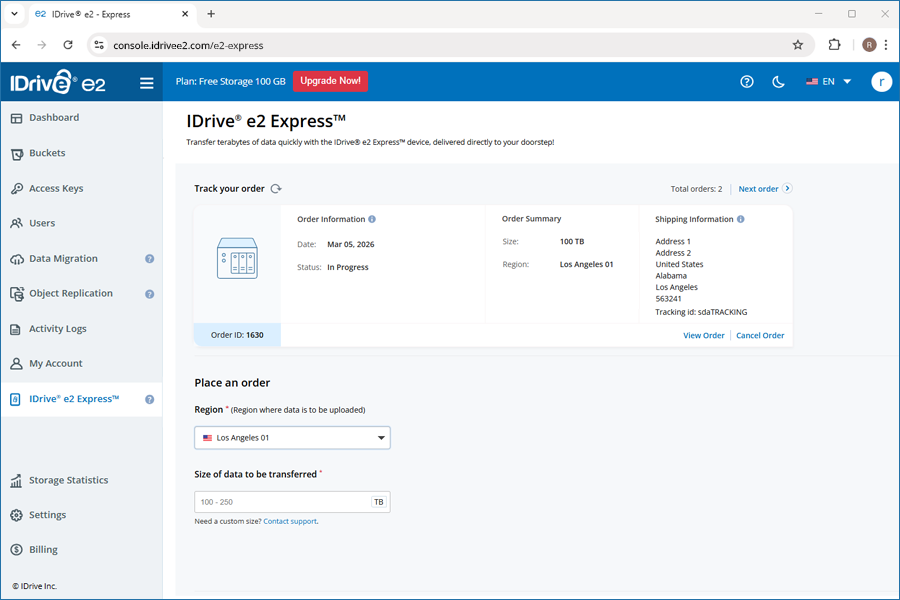
You will also receive an email with shipment details once the order is shipped.
To update the status once you receive the Express device,
- Sign in to the IDrive® e2 web console.
- Navigate to the IDrive® e2 Express™ tab.
- You will be prompted to confirm the delivery of the device.
- Click the Update status button to acknowledge receipt.
- Select the Update status checkbox in the confirmation popup.
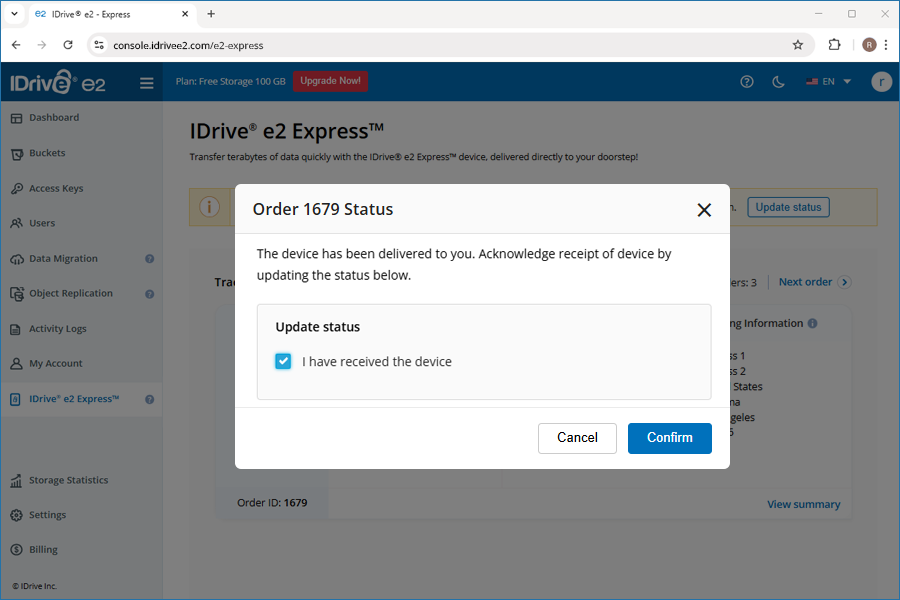
- Click Confirm.
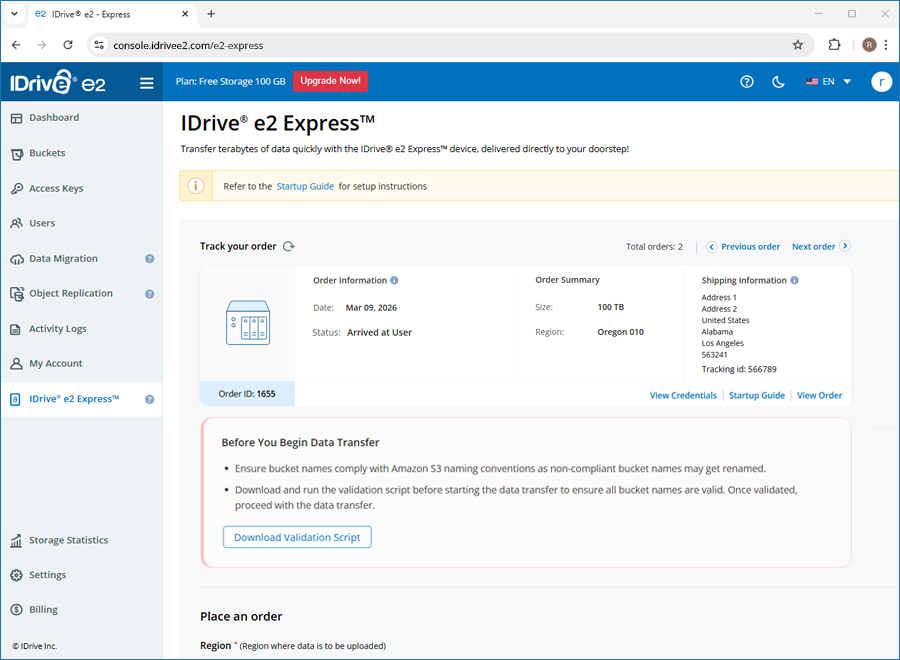
Once the device receipt is confirmed, the order status will change to Arrived at User.
You can view the NAS credentials under View Credentials. Connect the NAS device to your network and copy the data to it.
Alternatively, to confirm that you have received the device,
- Navigate to the Track Your Order section.
- Locate the required order.
- Under Order Information, click
 next to the status.
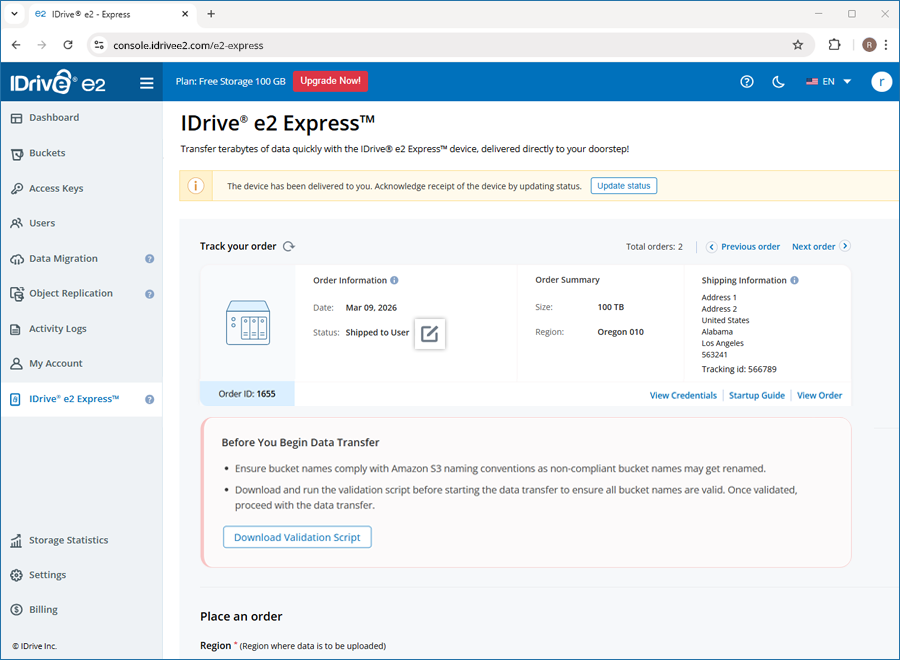
- Click Update status in the confirmation popup.
- Select the checkbox and click Confirm.
A NAS endpoint is the IP address assigned to your NAS device on the local network.
For example: 192.168.1.50
You will use this IP address to:
- Access the NAS web interface
- Map network drives
- Connect via Rclone or other data transfer tools
Troubleshooting Tips
- Make sure both your computer and NAS device are connected to the same network.
- Disable VPN temporarily if the NAS does not appear.
- Check that the NAS device is powered on and properly connected to the router or switch.
It is recommended to use QNAP Qfinder Pro to locate the NAS device endpoint (IP address).
To find the endpoint,
- Download QNAP Qfinder Pro from the official website.
- Install and launch QNAP Qfinder Pro on your computer.
- Ensure that your computer is connected to the same local network as the NAS device.
- Qfinder Pro will automatically scan the network and list the available NAS devices.
- Locate your NAS device in the list. The endpoint (IP address) will appear next to the device name.
Your data is backed up to the buckets that correspond to the folders on your NAS device.
Important:
To enable features such as Object Lock, Versioning, or Encryption, you must first create buckets in IDrive® e2 and configure required settings before transferring data.
To prepare your buckets,
- Sign in to your IDrive® e2 account.
- Create buckets as required.
- Configure necessary settings for the buckets, such as Object Lock, Versioning, or Encryption.
- Ensure that the bucket names:
- Exactly match the NAS device folder names. The names are case-sensitive.
- Follow AWS S3 naming standards using only lowercase letters, with no spaces or special characters.
Note:
If the buckets are not pre-created, they will be automatically created using the NAS folder names during the transfer. In this case, only the default bucket configuration will be applied. Object Lock, Versioning, or custom Encryption features will not be enabled.
A validation script checks your buckets to ensure that the bucket names comply with AWS S3 naming standards.
To validate your bucket names,
- Download the validation script from your IDrive® e2 dashboard.
- Connect to the NAS device using the provided credentials.
- Create folders on the NAS device. These folders map to buckets.
Note: Ensure that the folder names follow AWS S3 naming standards using only lowercase letters, with no spaces or special characters. - Run the validation script to verify that all bucket names are valid.
Important:
Bucket names must strictly comply with AWS S3 naming standards to avoid migration failures. Proceed with the data transfer only after all bucket names pass validation.
Once you receive the Express device, connect it to your network and upload your data to it.
You can use any s3 compatible tools such as:
- S3 browser - https://www.idrive.com/s3-storage-e2/s3-browser
- Cyberduck - https://www.idrive.com/s3-storage-e2/cyberduck
- Rclone
to securely transfer data from your local system to the IDrive® e2 Express™ device.
Steps to transfer data from Local to NAS using Rclone:
Rclone:
- Install Rclone.
- For Linux, run the following command:
curl https://rclone.org/install.sh | sudo bash - For macOS, run the following command:
brew install rclone - For Windows, download it from:
https://rclone.org/downloads/
- For Linux, run the following command:
- Configure the NAS (S3-compatible storage).
- Run the following command:
rclone config -
Follow the prompts to create a new remote.
- Select S3.
- Choose Other (S3 Compatible).
- Enter the Access Key, Secret Key, and Endpoint.
For example: http://your-nas-endpoint:8010.
- Run the following command:
- Create a bucket.
Run the following command:
rclone mkdir nas:mybucketNote:
- Bucket names must follow S3 naming conventions using 3–63 characters, lowercase letters only, with no underscores.
- Global uniqueness is required only for AWS S3 and not for most private NAS deployments.
- Run the standard copy command as below:
rclone copy <source_path> nas:mybucket -P - Run the performance-optimized command (recommended starting point)
nohup rclone copy <source_path> nas:mybucket \

  --transfers 16 --checkers 16 --fast-list --progress --no-traverse --stats=1s \

  --no-check-certificate --stats-log-level=INFO --log-level=INFO --log-file=transfer.log \

  --ignore-size --check-first --local-no-check-updated --local-no-set-modtime --inplace \

--s3-chunk-size 64M --s3-upload-concurrency 4 --multi-thread-streams 4 -P > transfer.out 2>&1 &Note:
- nohup keeps the transfer running even if the session disconnects.
- Logs are saved in transfer.log and transfer.out.
- The flags optimize concurrency, chunk size, and stream handling for large datasets.
- Adjust concurrency values gradually based on CPU, memory, disk, and network capacity, as high concurrency may significantly increase resource usage.
-
Monitor the transfer.
tail -f transfer.out

tail -f transfer.log -
Verify the transfer after completion.
rclone check <source_path> nas:mybucket - Resume interrupted transfers.
Note: If a transfer is interrupted, re-run the same command. Rclone automatically skips files that have already been transferred and resumes incomplete transfers.
Verify bucket names using the provided script and ensure all data transfers are complete before returning the Express device to IDrive® e2.
To return the device,
- Place the NAS device and all cables securely back into the original packaging.
- Attach the provided return shipping label to the box.
- Ship the device back to IDrive® e2.
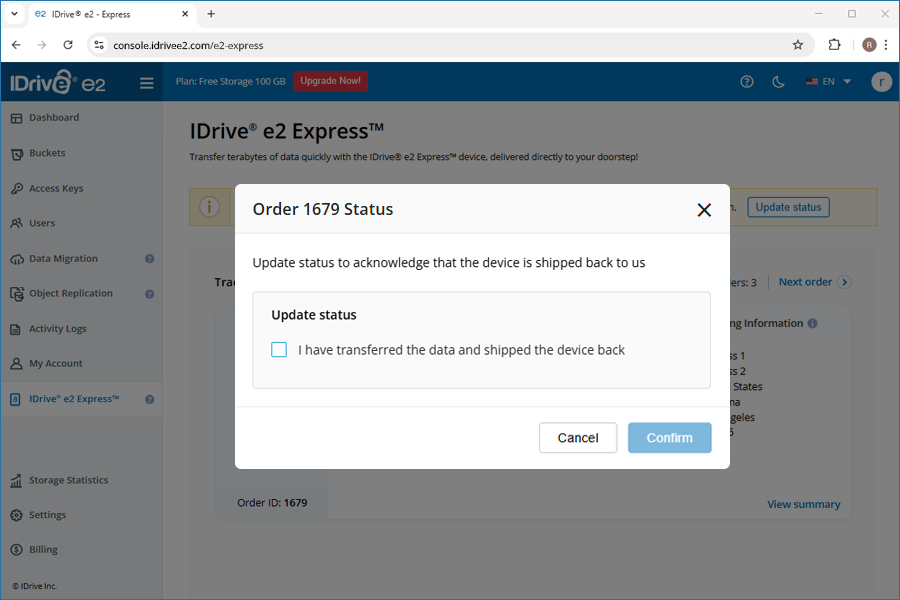
- Sign in to your IDrive® e2 account and click Update status in the dashboard prompt.
- Acknowledge that the device has been shipped back to us by selecting the checkbox under Update status in the confirmation popup.
- Click Confirm.
Alternatively, navigate to the Track Your Order section, locate the required order from the displayed list. Under Order Information, click ![]() next to the status and acknowledge that the device has been shipped back to us. The status will be updated accordingly.
next to the status and acknowledge that the device has been shipped back to us. The status will be updated accordingly.
Once we receive your device, the data on the Express device will be uploaded to your buckets. You can track the progress of data upload. You will be notified to verify the data once it is uploaded to the buckets.
Once the device is received, you will receive an email notification stating Your IDrive® e2 Express™ drive has arrived at our data center.
The data from the Express device will then be transferred into your IDrive® e2 buckets.
You will receive an email notification confirming the successful copying of data to your IDrive® e2 account. A dashboard notification will also appear, prompting you to verify the accuracy of the data transfers.
Before proceeding, complete the following steps,
- Verify the integrity and completeness of the data uploaded to your IDrive® e2 account.
- Once everything is verified, update the status to Verified by User via the Update Status button in the dashboard notification, or locate your order in the Track Your Order section and click next to the status under Order Information.

After your confirmation, we will proceed with secure cleanup of your NAS device. All temporary storage devices used for this service are securely erased according to the DOD 5220.22-M (E) standard before being reused.
Once we receive the IDrive® e2 Express™ device with your data, it typically takes 2 to 5 business days to transfer the data to your IDrive® e2 account. Occasionally, it may take longer than 10 days due to high volume.
Yes, you can upload data from multiple devices using the IDrive® e2 Express™ device.
IDrive® e2 Express™ device is protected using NAS-based authentication. This means no one can access your files, even if the hard drive is lost or stolen. Additionally, the device is securely erased before reuse according to DoD 5220.22-M (E) standards.
If no update is received from the customer within 30 days after the status changes to Completed, the device will be automatically unassigned by the admin, and all data on the device will be permanently wiped.
To avoid this, once the status changes to Completed, it is strongly recommended that you verify your data and update the status to Data Verified by User as soon as possible.