User management
From Users and Control you can do the following operations:
- add, edit, deactivate, and delete users
- create, add, and manage users, and delete groups
- create and clone profiles to enable module and application access
Yes, Super Administrators can add users with Administrator and Standard profiles.
To add users,
- Sign in to your IDrive® CRM account.
- Navigate to Settings and click Users and Control.
- Click Users.
- Click Add User.
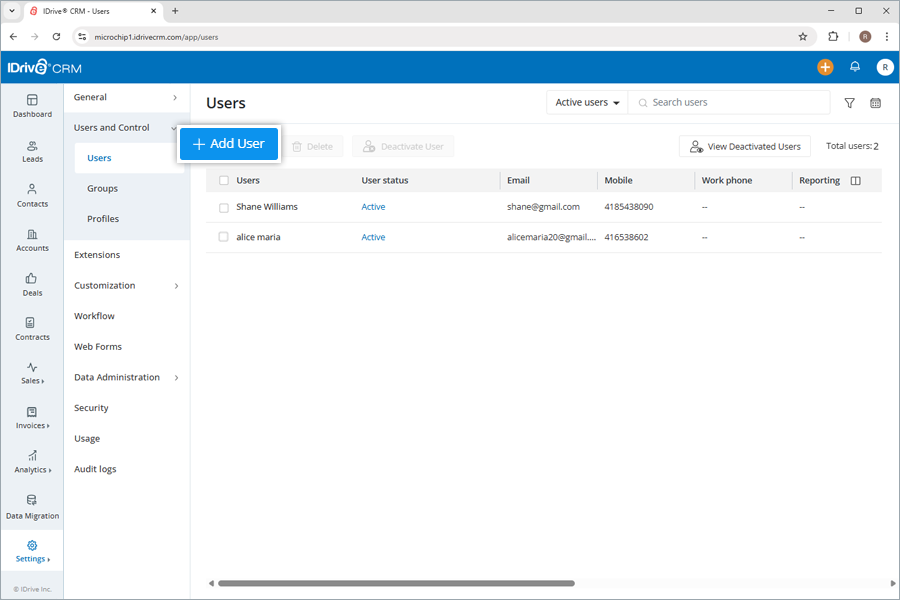
- Enter first name, last name, email, date of birth, mobile number, work phone number, job role, reporting to, and alias.
- Select a profile and user group.
- Add Address information.
- Click Save to add the user.

The user will receive an email with an activation link to create an IDrive® CRM account. Once the user creates an account, they will be listed as an active user on the Users page.
Yes, you can edit a user. However, the First Name, Last Name, Email Address, and Profile of a Super Administrator cannot be edited.
To edit a user,
- Sign in to your IDrive® CRM account.
- Navigate to Settings and click Users and Control.
- Click Users. A list of all your users will be displayed on the screen.
- Hover on the user you want to edit and click
 .
.
The edit user screen will appear. - Modify the details as required.
- Click Save to save changes.

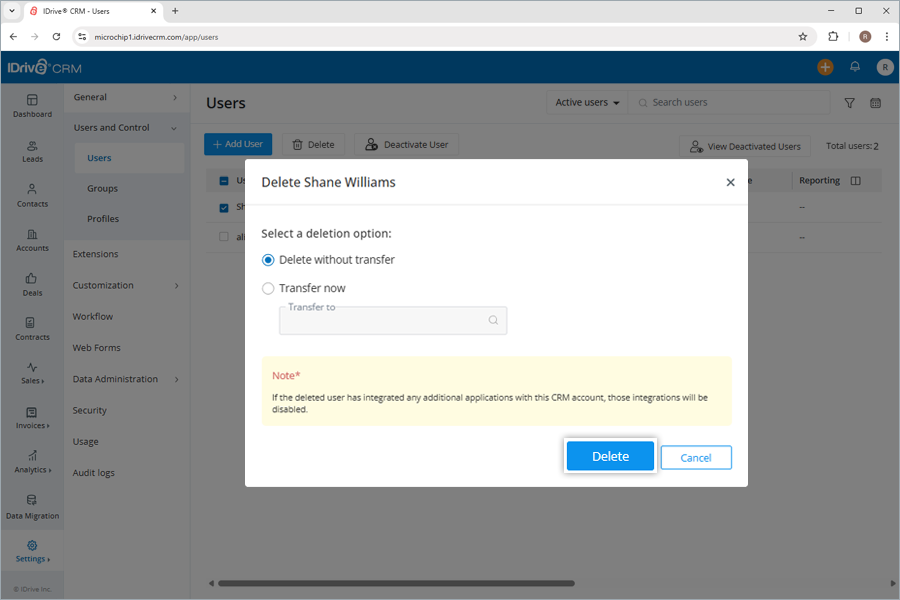
To delete a user,
- Sign in to your IDrive® CRM account.
- Navigate to Settings and click Users and Control.
- Click Users.
- Select the user that you want to delete.
- Click
 . A confirmation popup will appear.
 - Select Delete without transfer if you do not want to transfer the records associated with the user account before deletion.
Note: Deleting a user will permanently delete the user account. It will also disable the applications and integrations associated with the account. - Alternatively, select Transfer Now to transfer the records associated with the selected user account to another user account before deletion.
- Select the user account where you want to transfer the records.
- Click Delete.
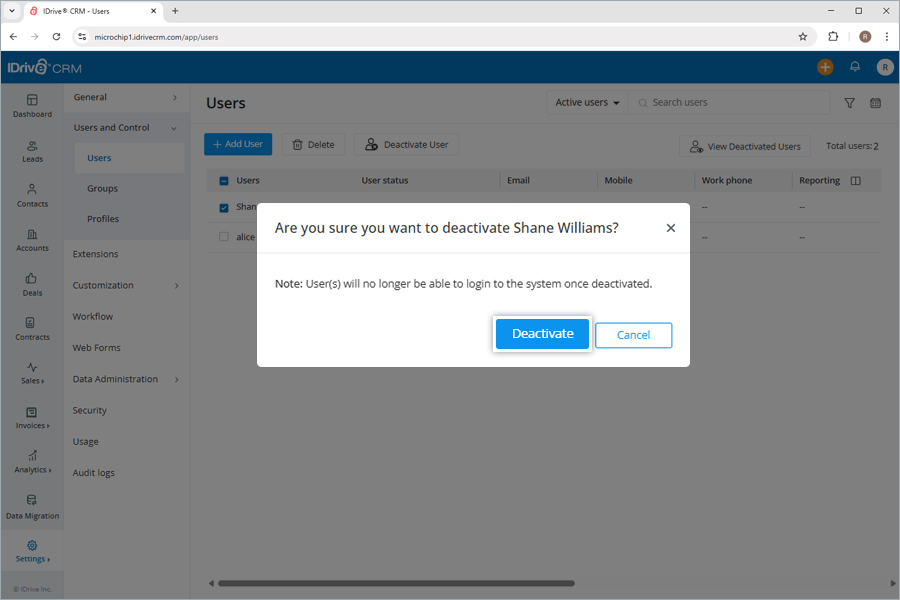
When you deactivate an active user, the user will no longer be able to access their IDrive® CRM account and perform any operation. However, you cannot deactivate a Super Administrator.
To deactivate a user,
- Sign in to your IDrive® CRM account.
- Navigate to Settings and click Users and Control
- Click Users.
- Select the user that you want to deactivate.
- Click
 .
. - Click Deactivate in the confirmation popup.
You can reactivate a user account to enable them to regain access to their existing account.
To reactivate a user,
- Sign in to your IDrive® CRM account.
- Navigate to Settings and click Users and Control
- Click Users.
- Click
 . A list of all the deactivated users will appear.
 - Click Reactivate under Reactivate Action corresponding to the user you want to reactivate.

The user will receive an email with a reactivation link for their IDrive® CRM account. Once the user resets the password, their account will be reactivated.
To reactivate multiple users simultaneously, select the required users and click  .
.
If you want to permanently delete the deactivated user, click ![]() .
.
To see all your users,
- Sign in to your IDrive® CRM account.
- Navigate to Settings and click Users and Control.
- Click Users.
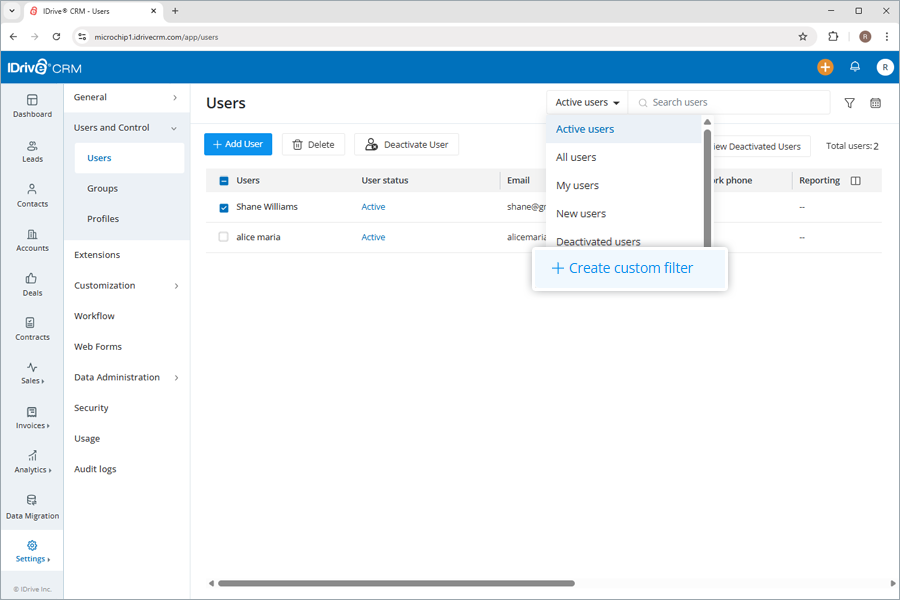
- Click the dropdown button.
- Select My users from the dropdown menu. A list of all your users will be displayed on the screen.
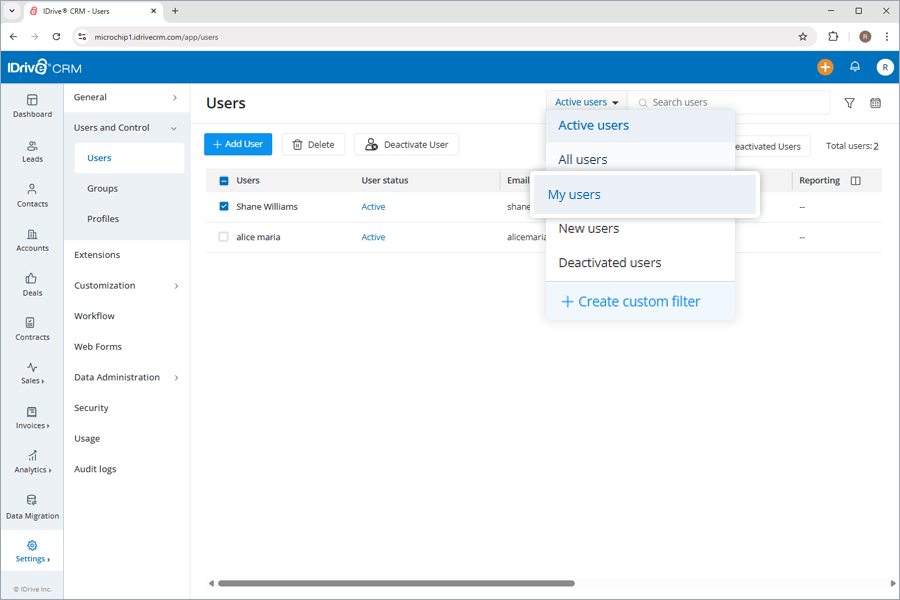
Alternatively, you can also view active users, all users, new users, and deactivated users from the same dropdown menu.
Yes, you can search for a specific user in your account.
To search a user,
- Sign in to your IDrive® CRM account.
- Navigate to Settings and click Users and Control.
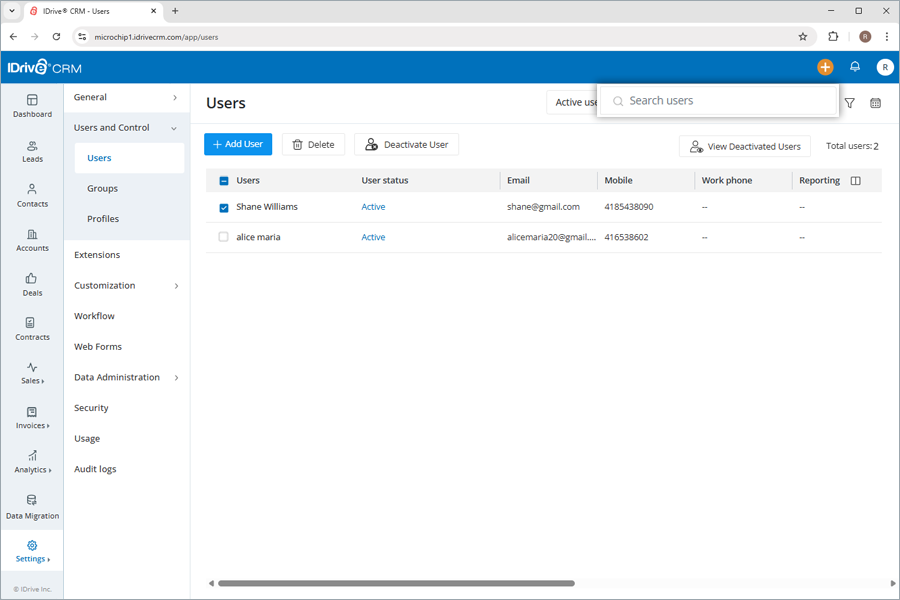
- Click Users.
- Enter the user name in the Search users field. All the users matching the search term will be displayed on the screen.
To filter users by fields such as name, email, or any other column heads,
- Sign in to your IDrive® CRM account.
- Navigate to Settings and click Users and Control.
- Click Users.
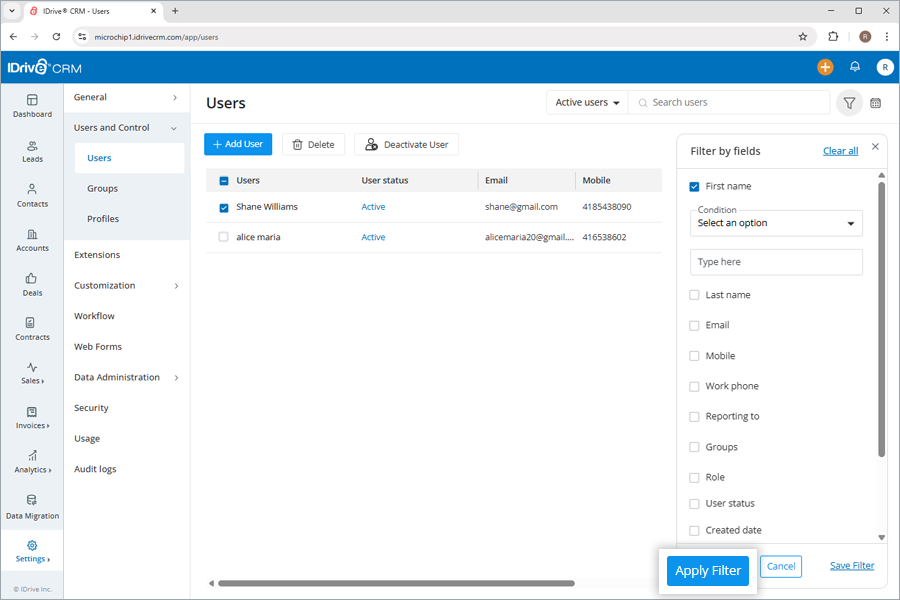
- Click Custom filters.
- Select the filter that you want to apply from the Filter by fields dropdown list and set the attribute values.
- Click Apply Filter. Click Clear all to remove all the selected filters.
To filter users by time,
- Click Date filter.
- Select the filter that you want to apply from the dropdown menu.
- If you wish to customize the time period for search, click Custom range and set a specific date and time on the calendar.
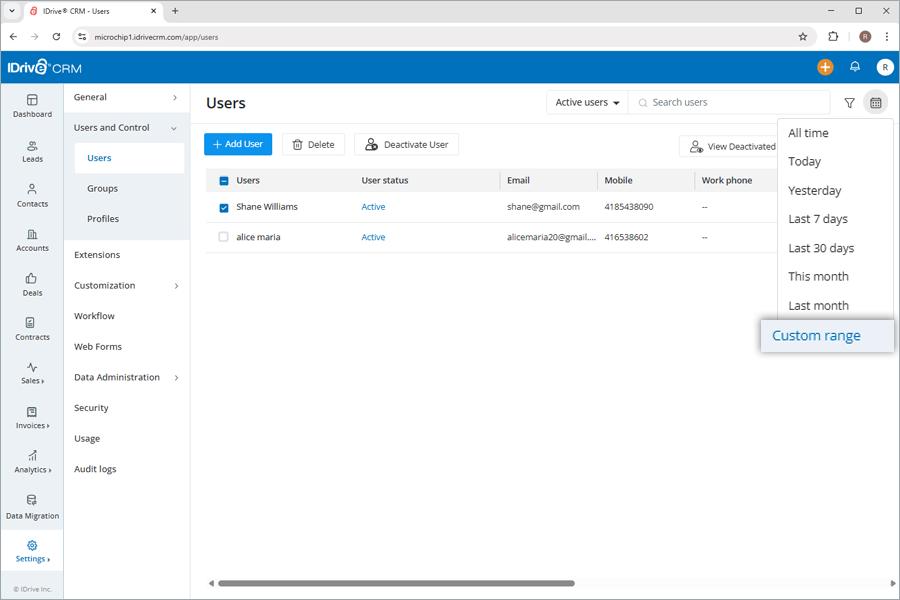
- Click Apply. A list of all the users created within that specific time period will be displayed on the screen.
Yes, you can create custom filters for users.
To create a custom filter,
- Sign in to your IDrive® CRM account.
- Navigate to Settings and click Users and Control.
- Click Users.
- Click the dropdown button and then click Create custom filter.
- Select the filter that you want to apply from the Filter by fields dropdown list and set the attribute values.
- Click Apply Filter.
To save the filter,
- Click Save Filter to add the filter to your list of custom filters.
- Enter a name for the filter and click Save.
The filter will be added to the list of custom filters.
Yes, you can organize the users into groups.
To create a group,
- Sign in to your IDrive® CRM account.
- Navigate to Settings and click Users and Control.
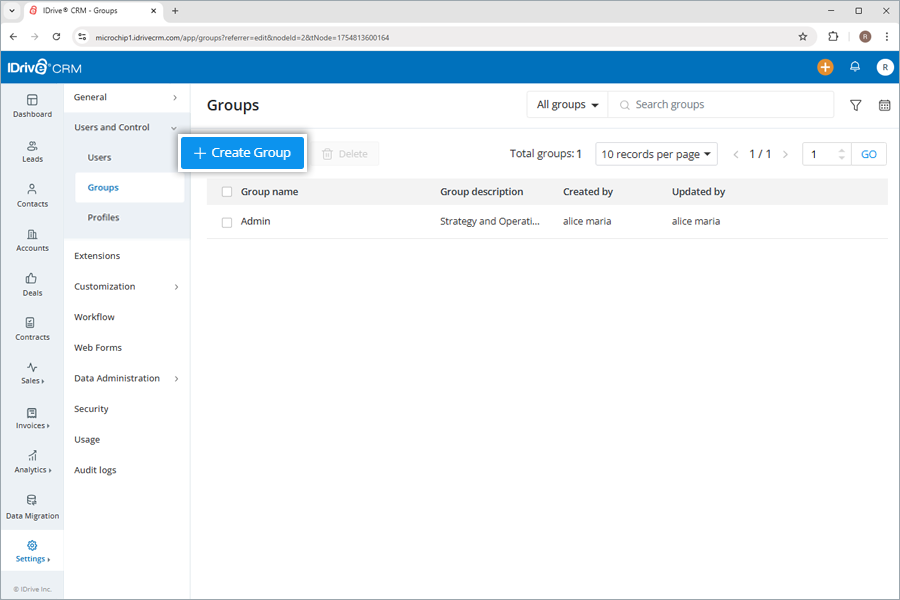
- Click Groups.
- Click Create Group.
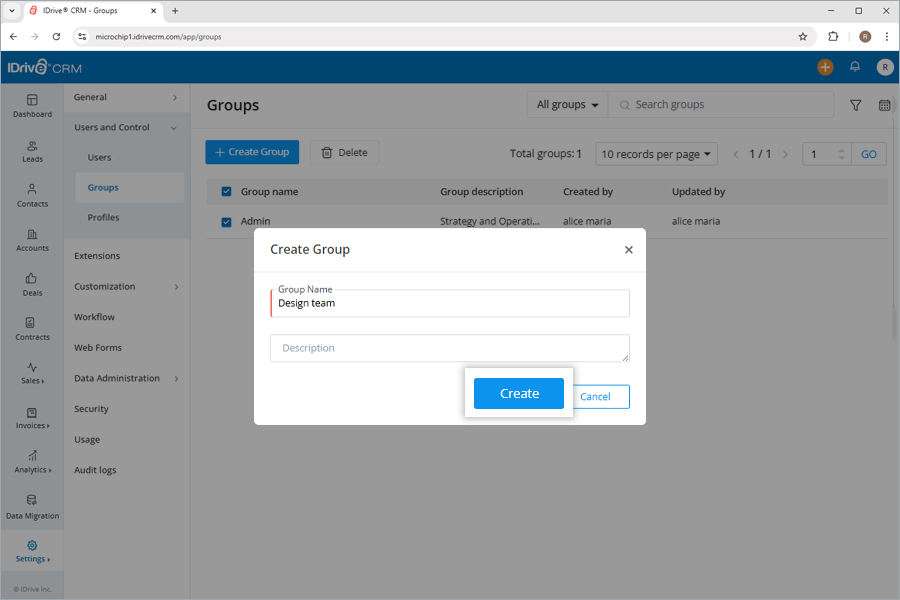
- Enter the group name. Add any extra information under Description
- Select the users you want to add or search for a specific user.
- Click Create to create the group.
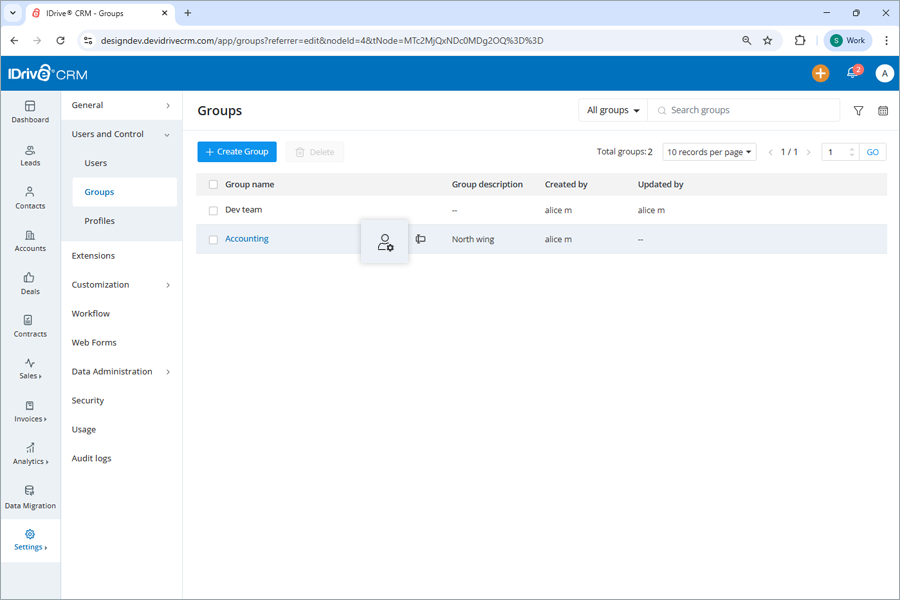
To change a group name, click ![]() , enter the new name, and click Save.
, enter the new name, and click Save.
To add or remove users,
- Sign in to your IDrive® CRM account.
- Navigate to Settings and click Users and Control.
- Click Groups.
- Select the group for which you want to add or remove users.
- Click
 . The Add/Manage Users in Group screen will open.
- Search and select the users you want to add to the group.
- Click Save.
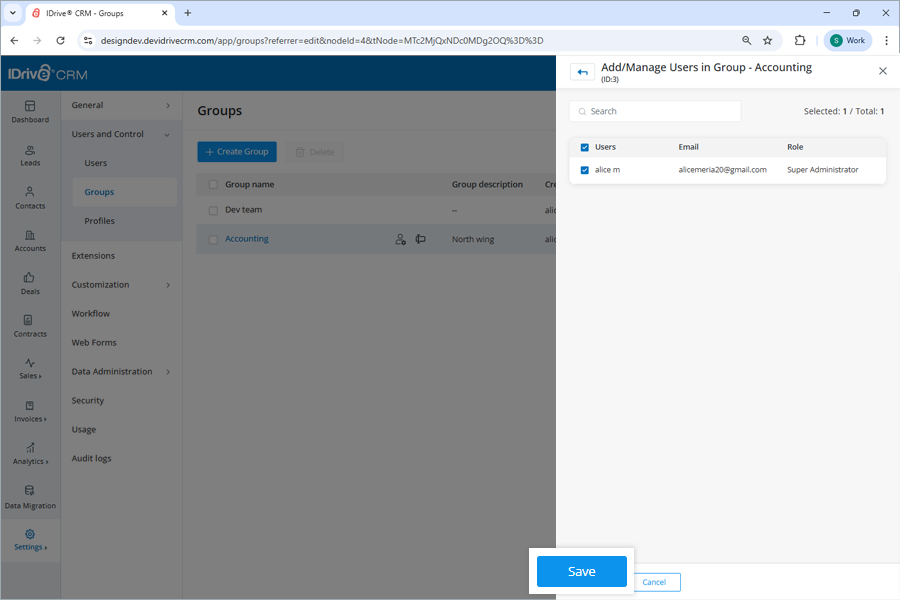
To remove a user from the group, deselect the user and click Save.
To delete a group,
- Sign in to your IDrive® CRM account.
- Navigate to Settings and click Users and Control.
- Click Groups.
- Select the group you want to delete.
- Click .
- Click Delete in the confirmation popup.
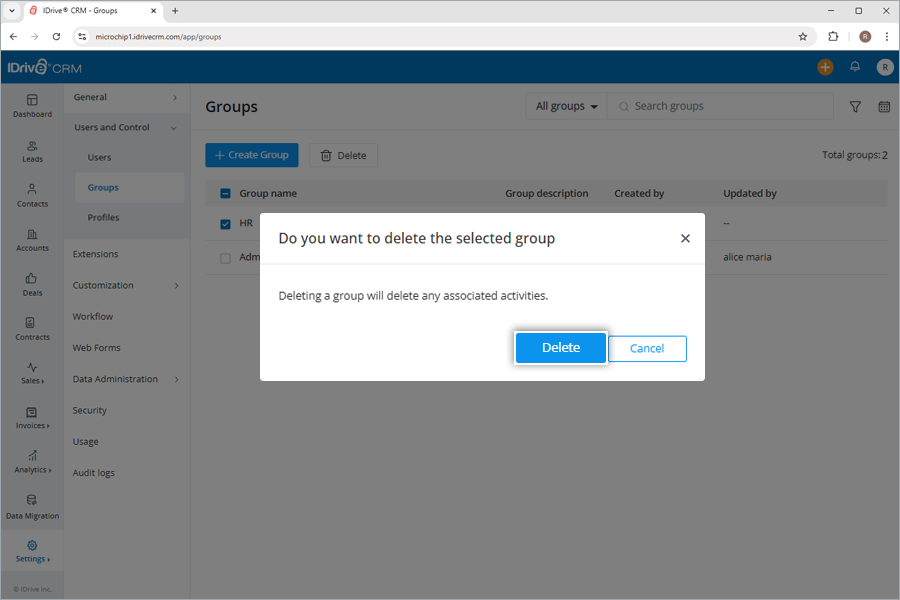
Note: Deleting a group will also permanently delete the associated activities.
To see all your groups,
- Sign in to your IDrive® CRM account.
- Navigate to Settings and click Users and Control.
- Click Groups.
- Click the dropdown button.
- Select My groups from the dropdown menu. A list of all your groups will be displayed on the screen.
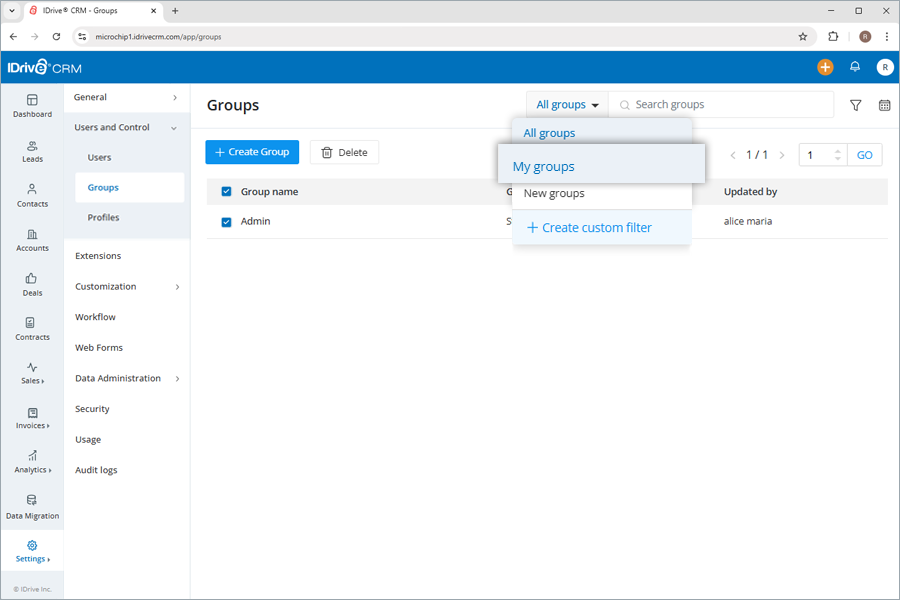
Alternatively, you can also view all groups and new groups from the same dropdown menu.
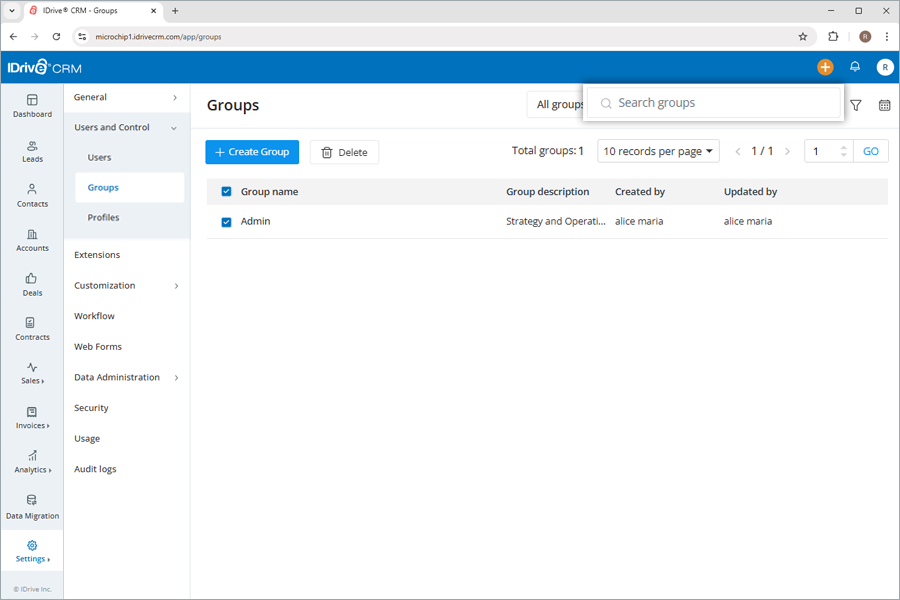
Yes, you can search for a specific group in your account.
To search a group,
- Sign in to your IDrive® CRM account.
- Navigate to Settings and click Users and Control.
- Click Groups.
- Enter the group name in the Search groups field. All the groups matching the search term will be displayed on the screen.
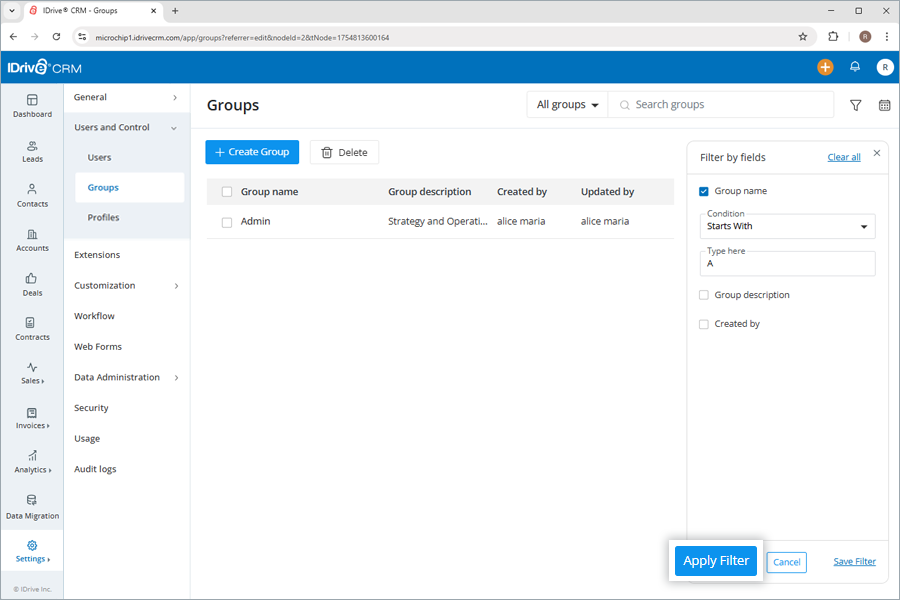
To filter groups by name,
- Sign in to your IDrive® CRM account.
- Navigate to Settings and click Users and Control.
- Click Groups.
- Click Custom filters.
- Select the filter that you want to apply from the Filter by fields dropdown list and set the attribute values.
- Click Apply Filter. Click Clear all to remove all the selected filters.
To filter groups by time,
- Click the Date filter.
- Select the filter that you want to apply from the dropdown menu.
- If you wish to customize the time period for search, click Custom range and set a specific date and time on the calendar.
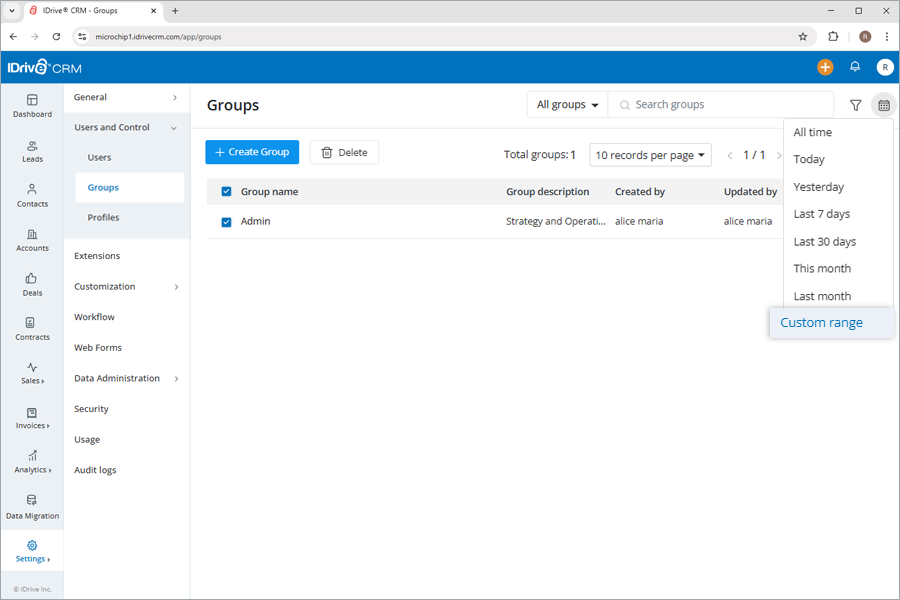
- Click Apply. A list of all the groups created within that specific time period will be displayed on the screen.
You can also filter the number of records to be displayed on the page by selecting the desired option from the records per page dropdown.
Yes, you can create custom filters for groups.
- Sign in to your IDrive® CRM account.
- Navigate to Settings and click Users and Control.
- Click the dropdown button and then click Create custom filter.
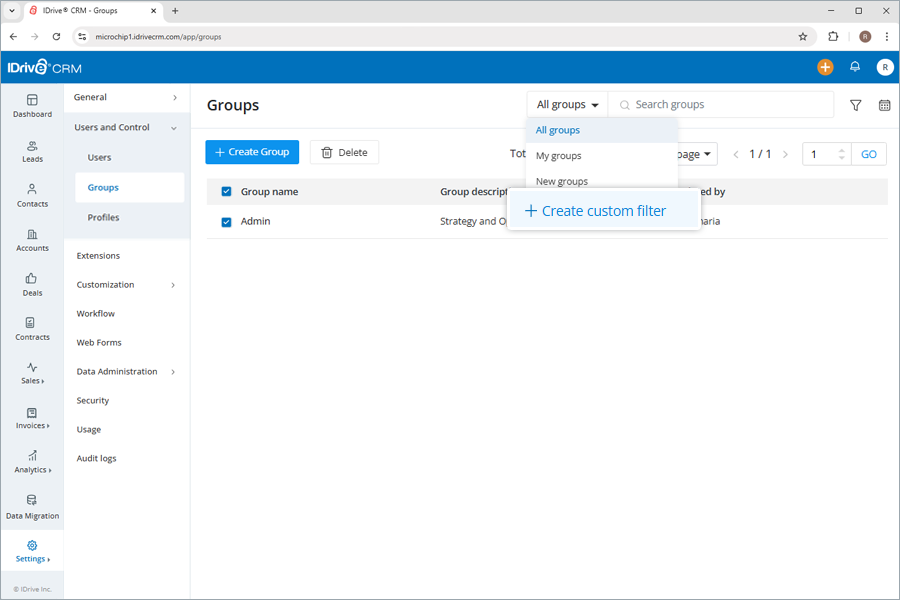
- Select the filter you want to apply from the Filter by fields dropdown list and set the attribute values.
- Click Apply Filter.
To save the filter:
- Click Save Filter to add the filter to your list of custom filters.
- Enter a name for the filter and click Save.
The filter will be added to the list of custom filters.
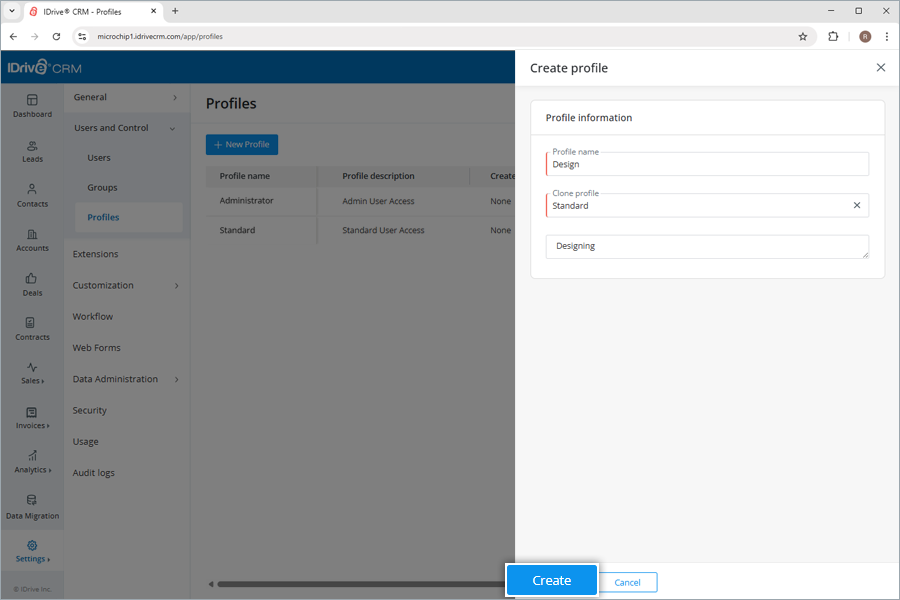
To create a profile,
- Sign in to your IDrive® CRM account.
- Navigate to Settings and click Users and Control.
- Click Profiles.
- Click New Profile.
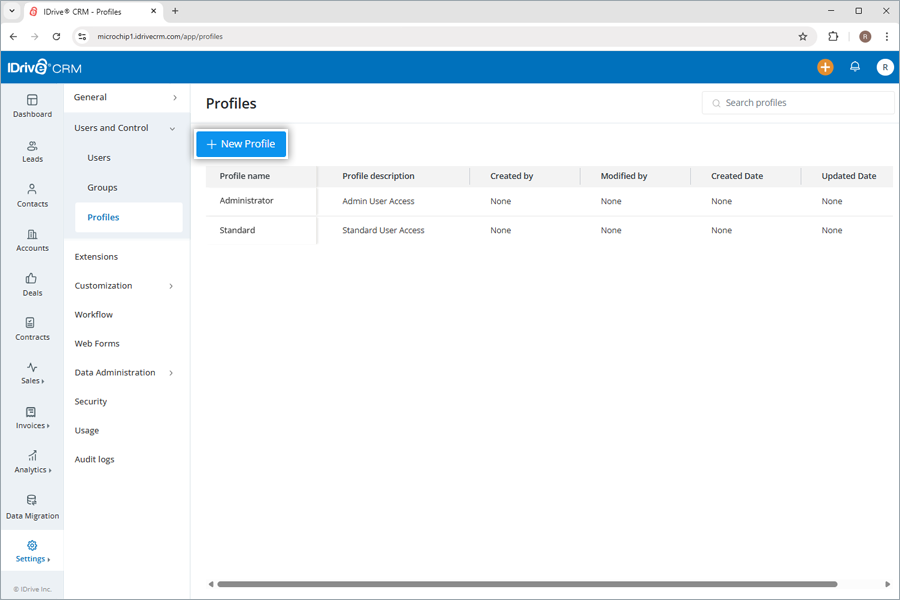
- Enter a Profile name.
- Choose a profile to clone from the dropdown list.
- Add a Profile description.
- Click Create to add the profile.
In IDrive® CRM, users can be categorized into Administrator and Standard profiles. Each profile has different access and control levels, as described below:
| Features | Administrator | Standard |
| Full control over all modules | ||
| Management of users and roles | - | |
| Customization of CRM settings | - | |
| Creating automation and workflows | - | |
| Import and export of data | ||
| Migration of existing CRM data | - | |
| Access to reports and dashboards |
To clone a profile,
- Sign in to your IDrive® CRM account.
- Navigate to Settings and click Users and Control.
- Click Profiles.
- Hover on the profile that you want to clone and click
 .
. - Enter a Profile name.
- By default, the current profile will be selected for cloning. To change the default profile, choose a profile from the dropdown list or create a new profile.
- Add a Profile description.
- Click Create to clone the profile.
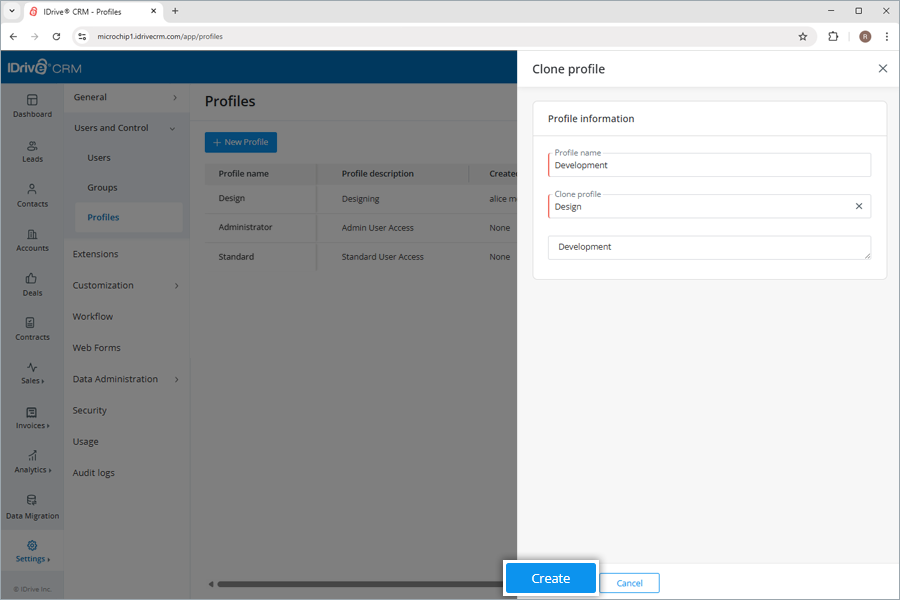
Note: The 'Standard' and 'Administrator' profiles are default system profiles that cannot be edited, deleted, or renamed. However, you can create custom profiles by cloning a default profile.
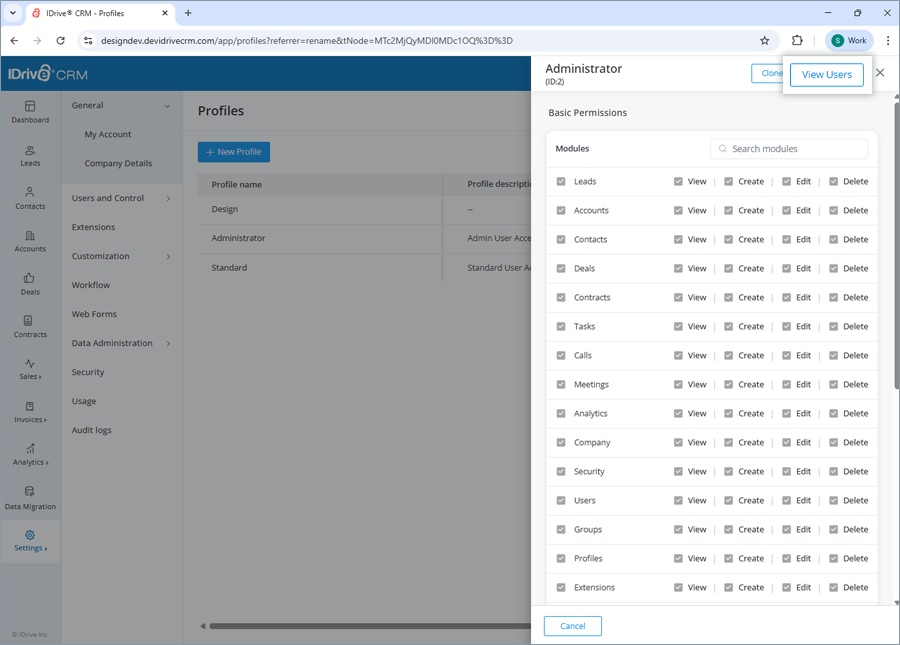
You can view the profile information, edit the basic permissions granted in the profile, and clone the profile information from the view pane. You can also view the users associated with the profile by clicking the View Users button.
To open the view pane for a particular profile, click anywhere on the profile row.
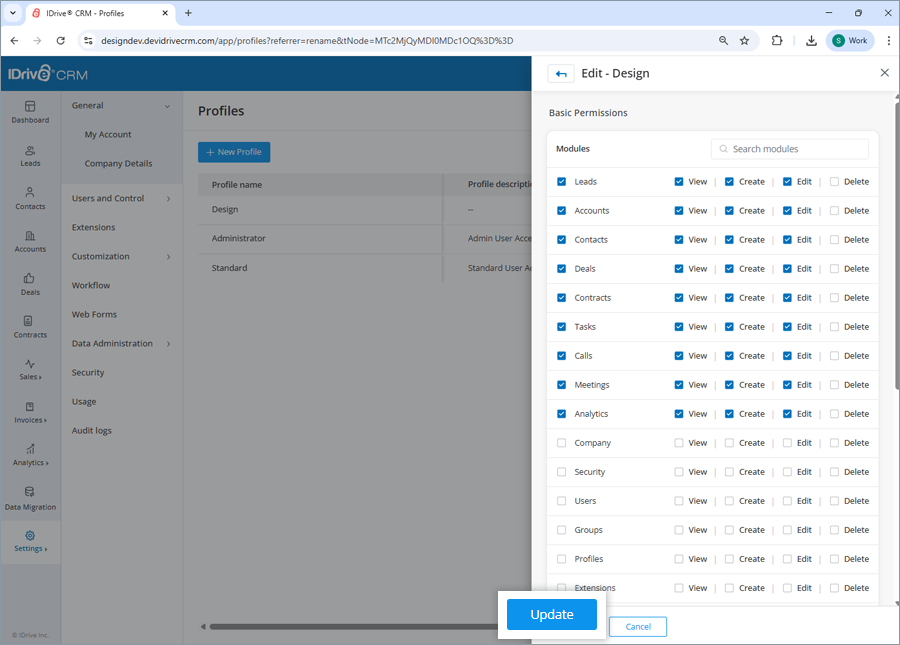
Yes, you can edit the basic permissions granted in the profile that you have created.
To edit a profile,
- Sign in to your IDrive® CRM account.
- Navigate to Settings and click Users and Control.
- Click Profiles.
- Hover on the profile that you want to edit and click
 .
.
All the modules will be selected for edit by default. - Uncheck the modules you do not want to modify.
- Click the View, Create, Edit, and Delete buttons to deselect the permissions you want to remove.
- Click Update to save the changes.
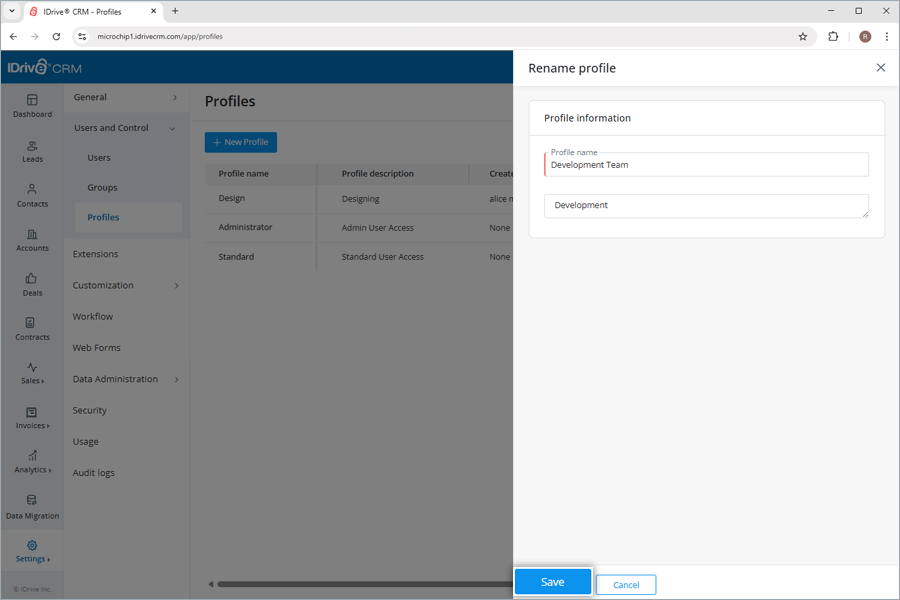
To rename a profile,
- Sign in to your IDrive® CRM account.
- Navigate to Settings and click Users and Control.
- Click Profiles.
- Hover on the profile that you want to rename and click
 .
.
The Rename profile screen will appear. - Enter a new Profile name.
- Add a profile description.
- Click Save to save the changes.
Yes, you can delete a profile that you have created. You cannot delete a Standard and Administrator profile.
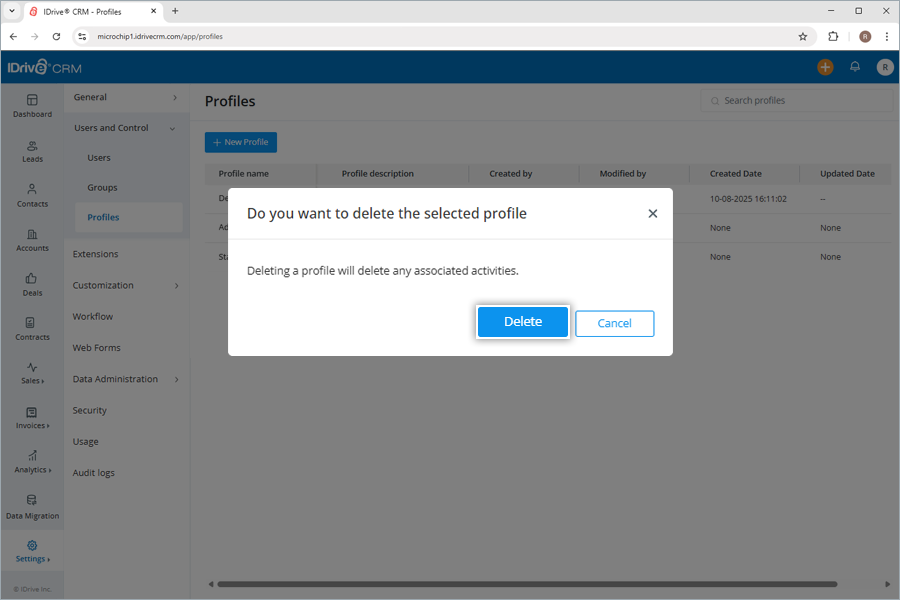
To delete a profile,
- Sign in to your IDrive® CRM account.
- Navigate to Settings and click Users and Control.
- Click Profiles.
- Hover on the profile that you want to delete and click
 .
A confirmation popup will appear.
.
A confirmation popup will appear. - Select Transfer Now to transfer the records associated with the selected profile to another profile before deletion.
Select a default profile where you want to transfer the records.
- Click Delete.