Data migration
While you are switching from an existing CRM platform to IDrive® CRM, the automatic migration is a fast and easy way to migrate your existing CRM data with minimal downtime. The simplified migration tool enables you to migrate or move the existing CRM data without any file upload and download hassle, and size limitations. Your existing data is migrated seamlessly with minimal manual effort.
This will automatically map the imported files to the appropriate modules and pair data columns with the corresponding fields. In cases where modules are not readily available to map the imported data, this tool will create modules for mapping the relevant data.
IDrive® CRM currently supports the following platforms for automatic migration:
- Zoho CRM
- Freshsales
- Pipedrive
- HubSpot
- Capsule
- Insightly
- Bitrix24
The following platforms can be migrated manually:
- Salesforce
- Microsoft Dynamics CRM
- SugarCRM
- Act!
- Maximizer CRM
- Highrise

To migrate data automatically,
- Sign in to your IDrive® CRM account.
- Navigate to Settings and click Data Migration.
- Click Import .
- Select the CRM platform from which you want to migrate data.

- Use the following parameters for authorization, as applicable:
- API Endpoint or URL - Enter the API Endpoint or URL from your CRM service provider.
- Client ID - Enter the Client ID of your CRM service provider.
- Client Secret - Enter the Client Secret of your CRM service provider.
- API Token - Enter the API Token from your CRM service provider.
- Click Migrate Now.

You will receive a notification on the registered email address once migration is complete.
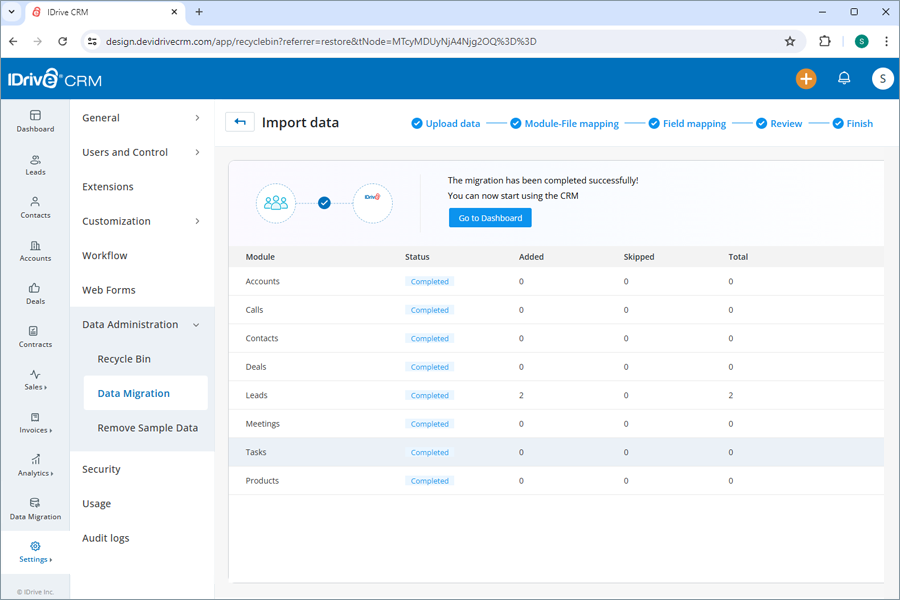
On successful completion of the migration, the migrated data will be displayed under the specific module in your IDrive® CRM account.
Note: In IDrive® CRM, amount fields defined within a module allow up to 10 digits before and 3 digits after the decimal point. Therefore, records in the migrated module with values exceeding this limit will be skipped during data migration.
You may need to provide API access and secret keys from the CRM provider you are trying to migrate your data. Refer below links to learn how to obtain the API access and secret keys for other CRM providers:
Yes, manual data migration have the following limitations:
- Existing CRM data backup can be transferred to the new CRM only in CSV format.
- Only up to 1,00,000 records can be migrated for each module at a time through a CSV file.
- Manual migration may take relatively longer duration to complete resulting business downtime.
- Manual migration requires the user to perform each step manually - data exporting importing, mapping, and verification.
- Manual data mapping involves self-operated mapping of the imported files to respective modules, pairing of data columns with appropriate fields, and creating new fields as needed.
For an effortless migration of your old CRM data, ensure to follow the below prerequisites:
- Save the data backup file from your existing CRM platform in CSV format on your computer.
- Customize your IDrive® CRM account by adding the required number of fields according to your existing CRM.
You can migrate data from your existing CRM platform manually using the ® CRM migration tool. It enables you to map the imported files to appropriate modules and pair data columns with the respective fields. You can also view the mapped, unmapped, and non-supported files during the migration process.
To migrate your data manually,
- Sign in to your IDrive® CRM account.
- Navigate to Settings and click Data Migration.
- Click Import.
- Select the CRM platform from which you want to migrate data, or go to Other CRM.

- Upload or simply drag and drop the CSV files from your computer that you want to migrate. Click
 to delete the uploaded files.
Note: You can only upload files with .csv, .xlsx, .xls, or .zip extensions, up to 25 MB in size.
to delete the uploaded files.
Note: You can only upload files with .csv, .xlsx, .xls, or .zip extensions, up to 25 MB in size.
- Click Next. The uploaded files will be displayed under the Unmapped Files section.

- Drag and drop the uploaded data into the appropriate default or custom module for automatic mapping. Map any remaining unmapped files to the respective fields in the modules manually.
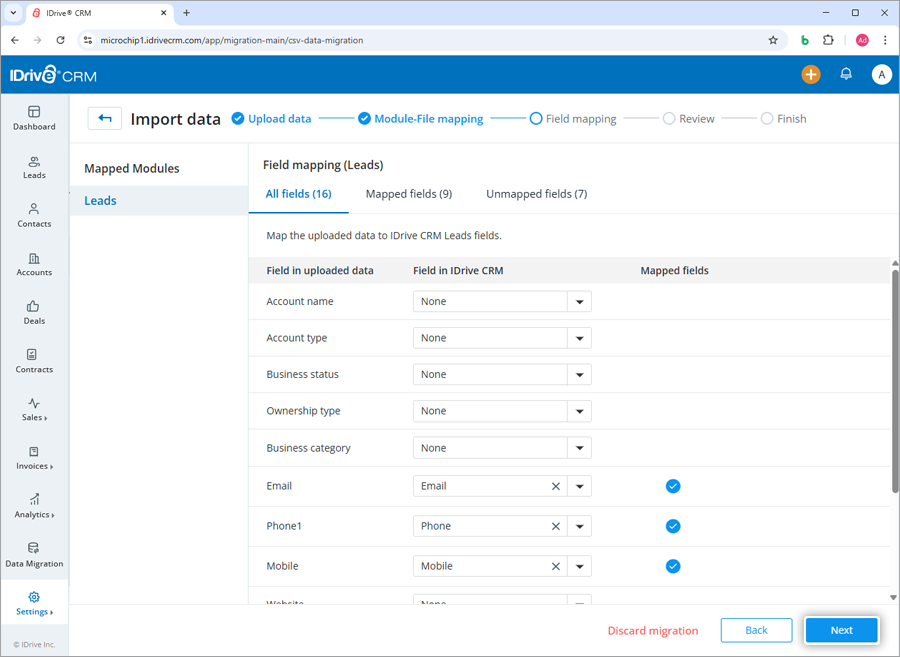
- Click Next to view the file mapping and pre-migration status.
Note:- You can download the mapping error logs by clicking Download Logs.
- Review the logs. If the migrated data fields contain new values that do not match existing fields, go to the Customization tab to create custom modules.
- Once all the data is mapped, click Start Migration. To cancel, click Discard migration > Discard. To return to the previous screen, click Back to Field Mapping.

On successful migration, the status of the migrated data will be displayed on screen. Click Go to Dashboard to view the data under respective modules in your IDrive CRM account.
You can track the migrated data by viewing the logs for records that failed to migrate. Identify any errors and re-upload the data, ensuring no records are lost.
Yes, you can revert the migrated data to its source.
To revert migrated data,
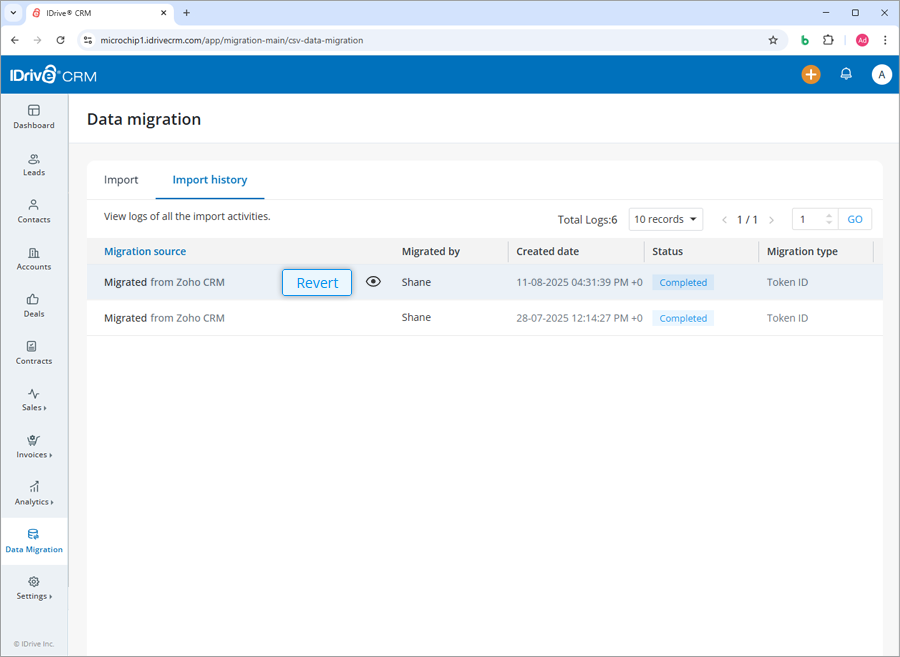
- Go to the Import History tab under Data Migration.
- Hover over the migrated record you want to revert.
- Click Revert.
- Click Revert in the confirmation popup.
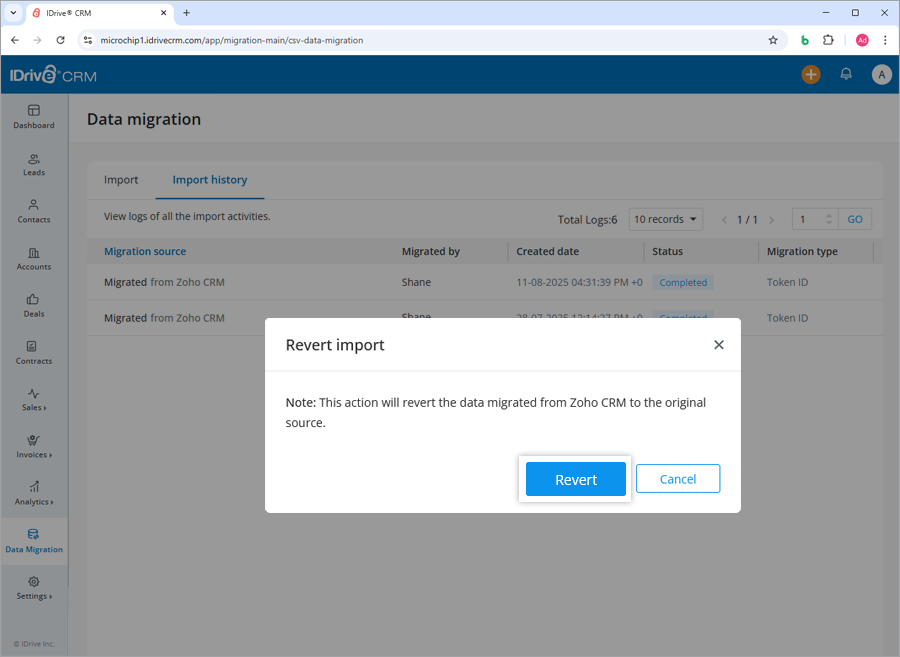
Note: Migration can only be reverted within 48 hours of its completion.
Yes, the Administrators and Super administrators can migrate their existing CRM data to IDrive® CRM using developer APIs.
To apply migration via APIs,
- Sign in to your IDrive® CRM account.
- Navigate to Settings and click Company Details under General.

- Click Download API Collection to download the Developer APIs.
- Use the access token as bearer token to perform data migration.
This method imposes no limit on the number of records that can be migrated at one go.
Yes, each time you run a migration with the IDrive® CRM migration tool, a log is created. You can view the status and information of all the migration activities in your IDrive® CRM account under the Import history tab.
To view the logs of your migration activities,
- Sign in to your IDrive® CRM account.
- Navigate to Settings and click Data Migration.
- Click Import Data.
- Click Import history. .

A list of all the automatic, manual, and API-based migration activities including the source of migration, migrated by, created date, migration status, and the type will be displayed on the screen.