Restore your entire computer including the OS or restore individual files as required. You can also restore data to multiple computers at the same time.
| File Restore Instructions | |
| WinRE Restore Instructions | |
| VMware Restore Instructions |
Restore your entire computer including the OS or restore individual files as required. You can also restore data to multiple computers at the same time.
| File Restore Instructions | |
| WinRE Restore Instructions | |
| VMware Restore Instructions |
You can restore individual files and folders by creating a network file share. BMR will allow you to select the machine and recovery points to share on your network. These recovery points are time and date based.
To create a mount path for the recovery points,
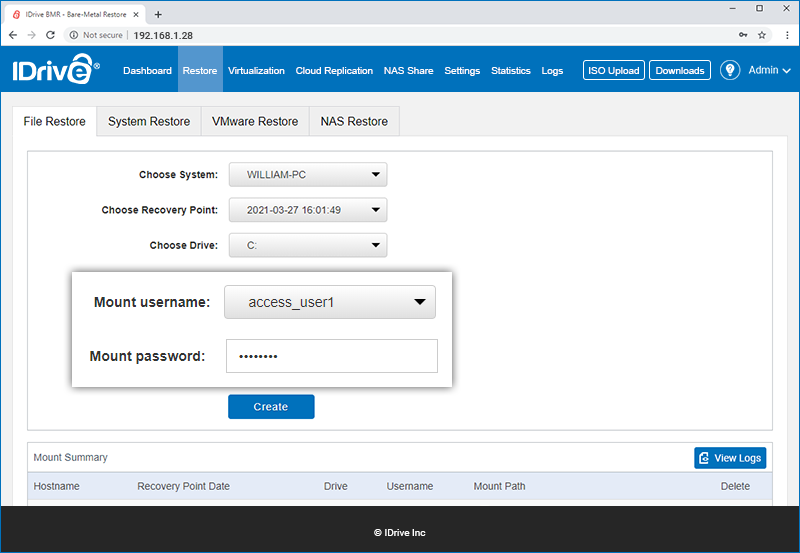
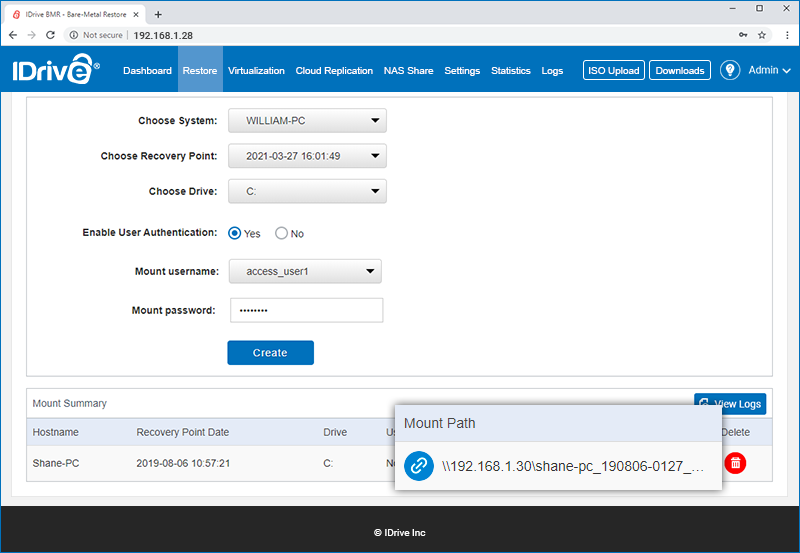
A summary for the selected computer will be created in the 'Mount Path Summary' table. To access your backed up data, copy and paste the path displayed under 'Mount Path' into Windows File Explorer.
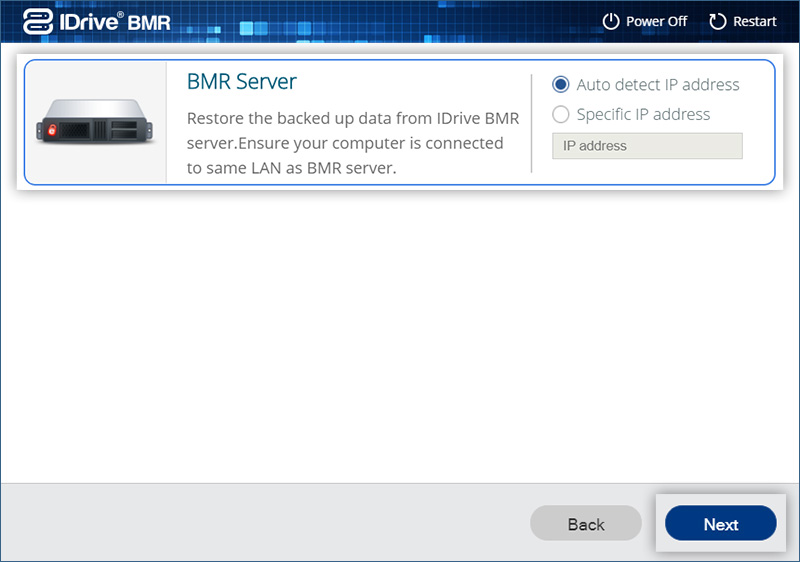
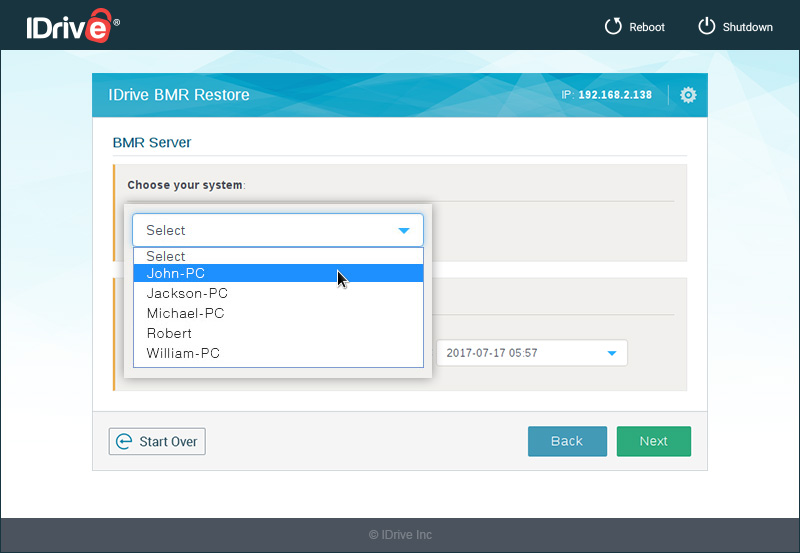
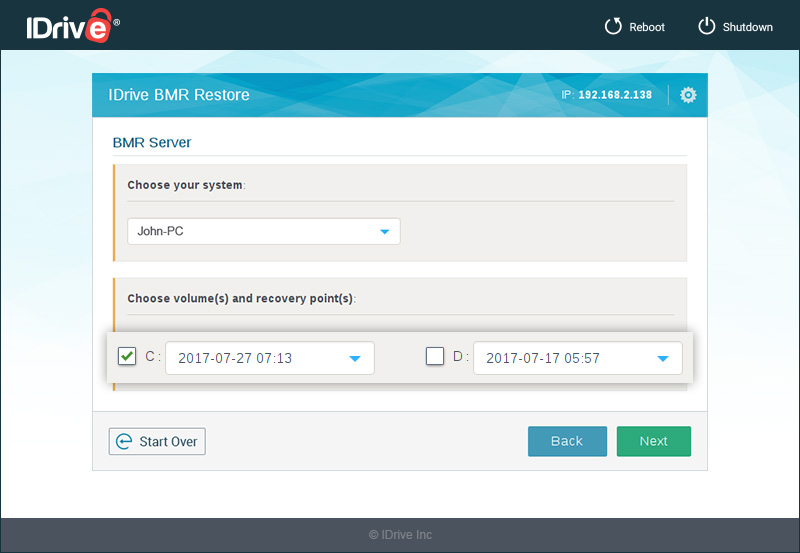
You can restore data to a target machine that is connected to the same network as that of your BMR device. Create a bootable USB or media device using the WinRE builder app. Then boot your target replacement machine using the USB or media device.
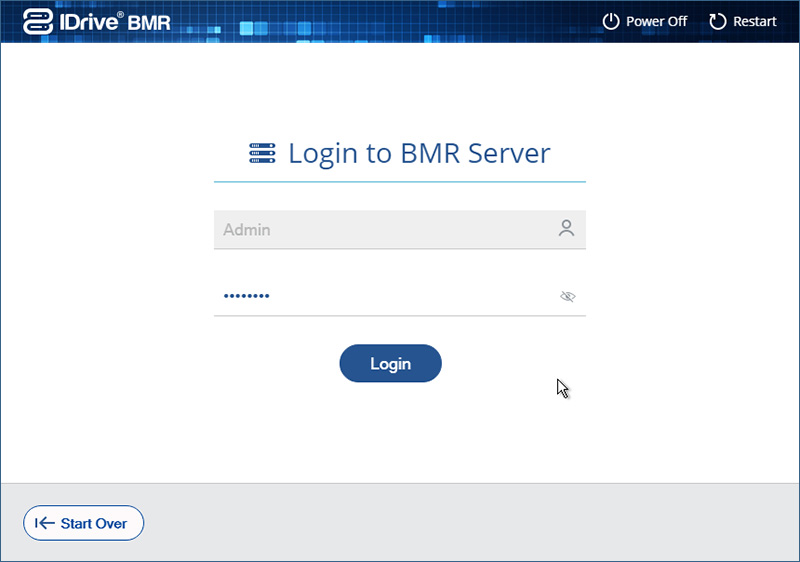
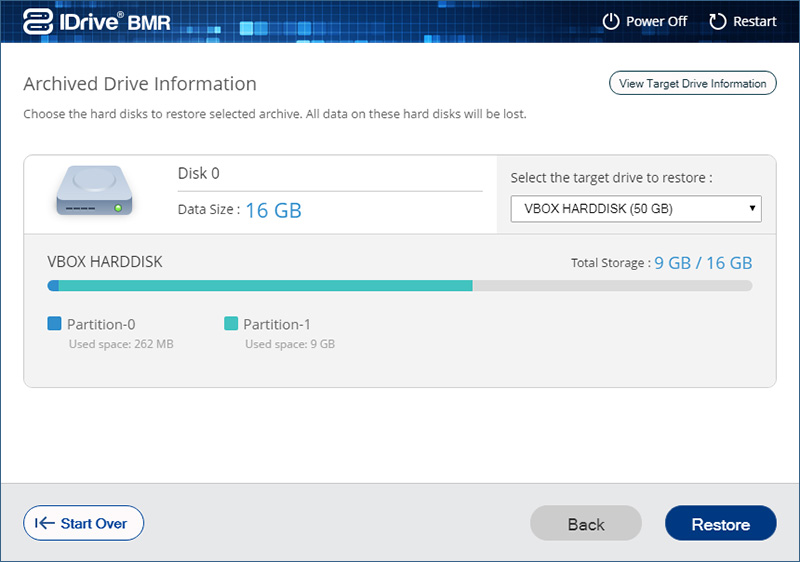
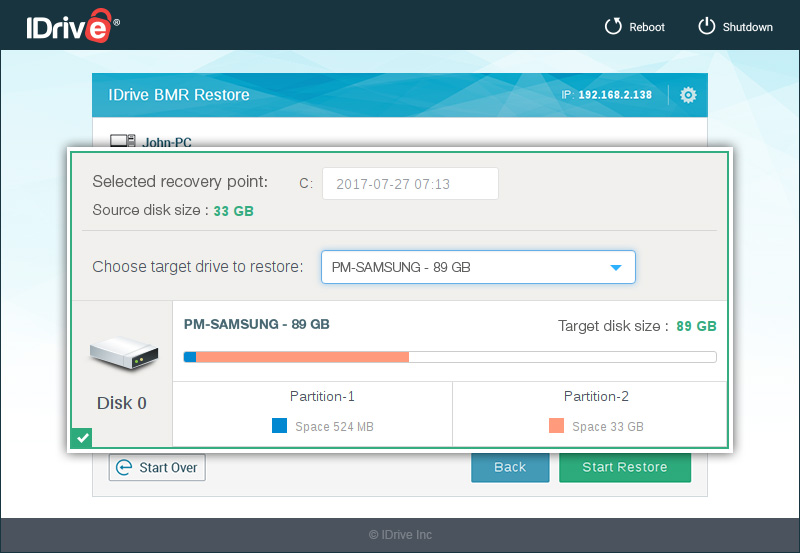
To initiate restore,
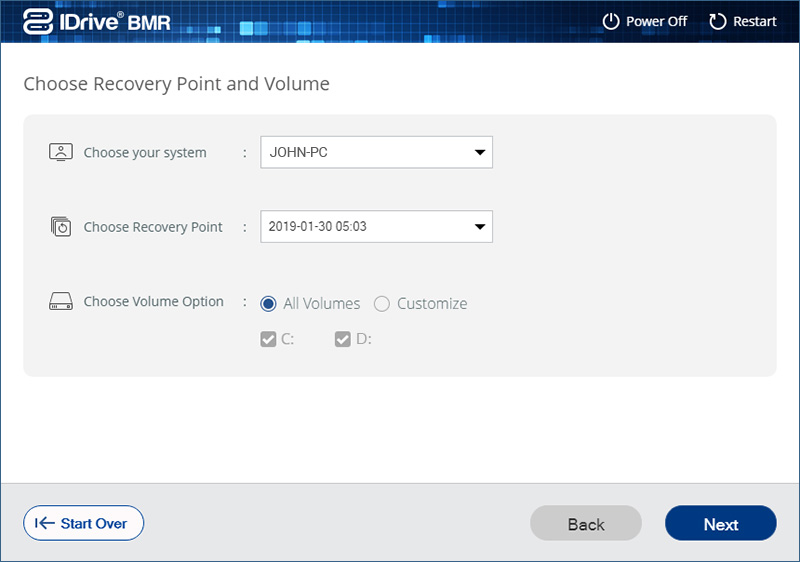
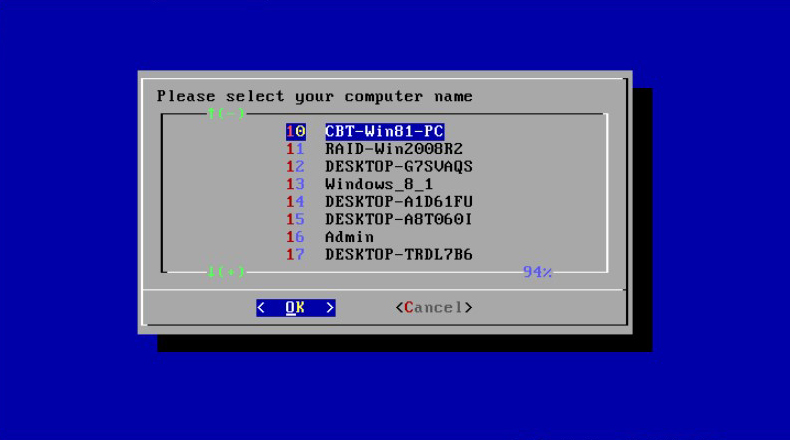
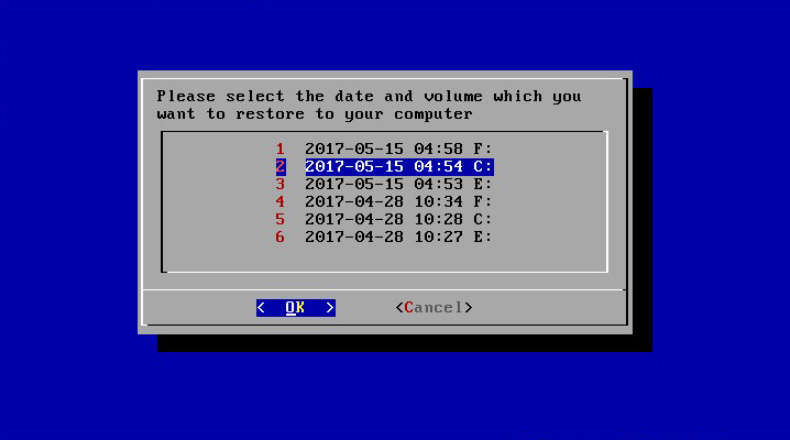
Before proceeding with system restore, you need to create a bootable CD or a bootable USB thumb drive using an ISO file and boot your computer.
The required ISO file and related information for creating bootable CD or a bootable USB thumb drive is available on the shipped device.
Perform the following steps to boot your computer:
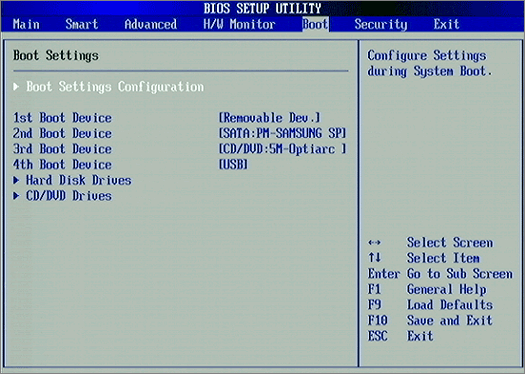
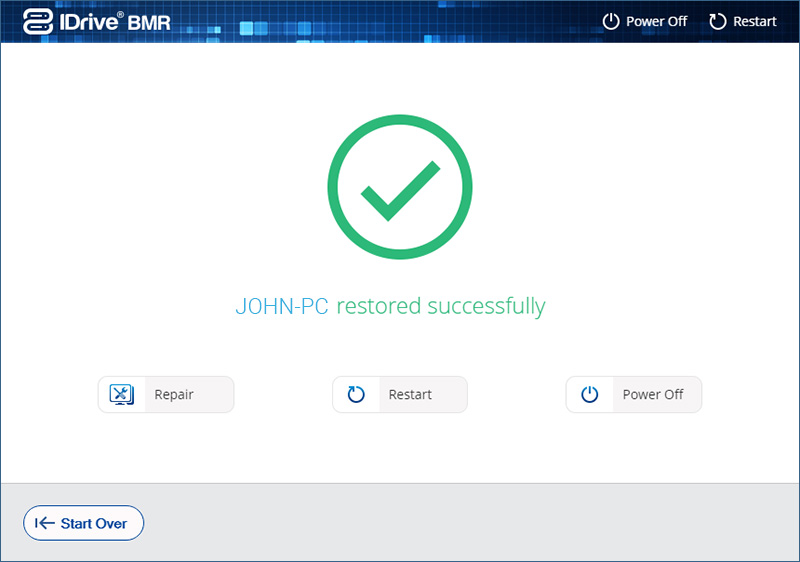
You can now proceed with the restore process.
To perform VM restore of virtual machines running on ESXi host,
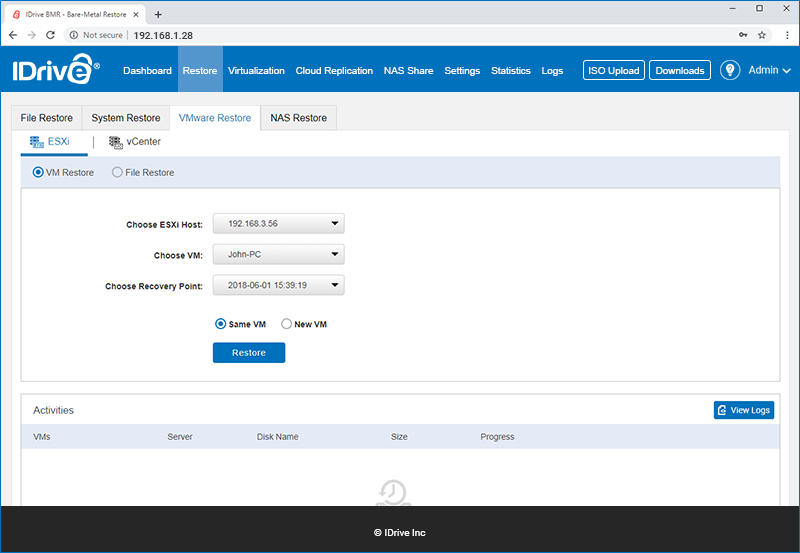

Once the restore starts, you can see the progress of the restore in the 'Activities' section displayed on the bottom-right corner.
Note: We only support 4 VMs to be restored simultaneously.
To perform file-level restore of virtual machines running on ESXi host,
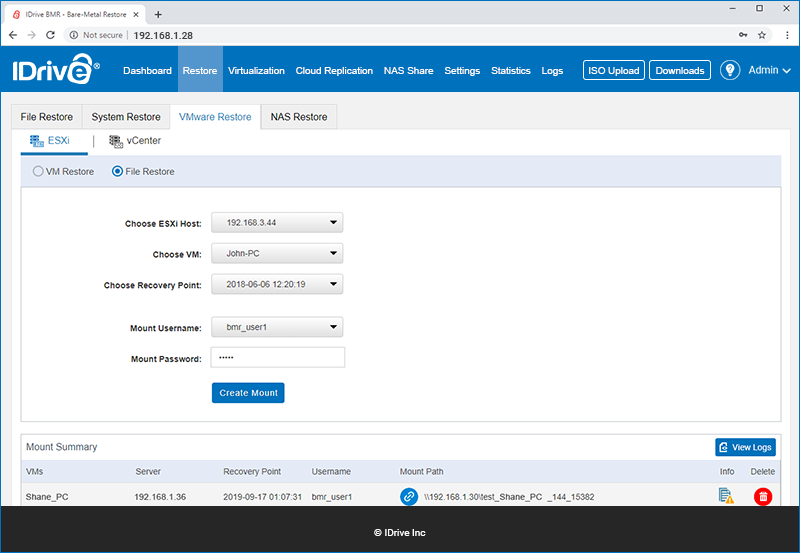
A summary for the selected VM will be created in the 'Mount Path Summary' table. To access your backed up data, copy and paste the path displayed under 'Mount Path' into Windows File Explorer.
To perform VM restore of virtual machines running on vCenter server,

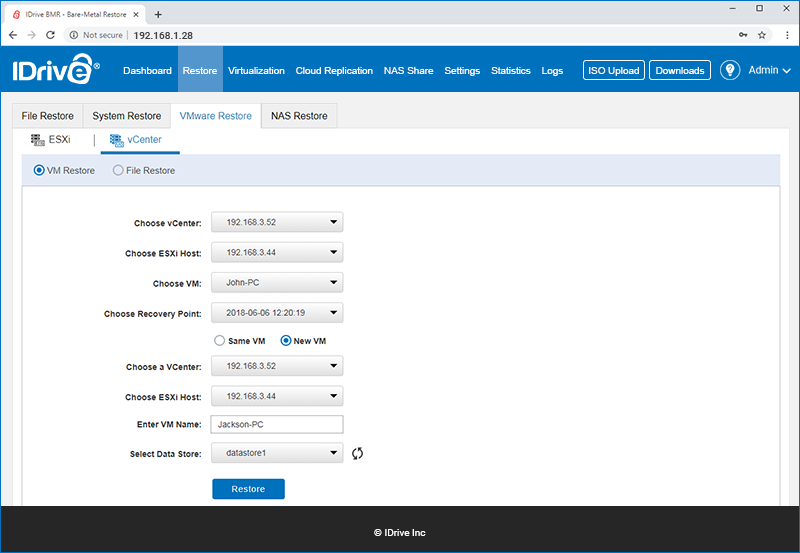
Once the restore starts you can see the progress of the restore in the 'Activities' section.
To perform file-level restore of virtual machines running on vCenter server,
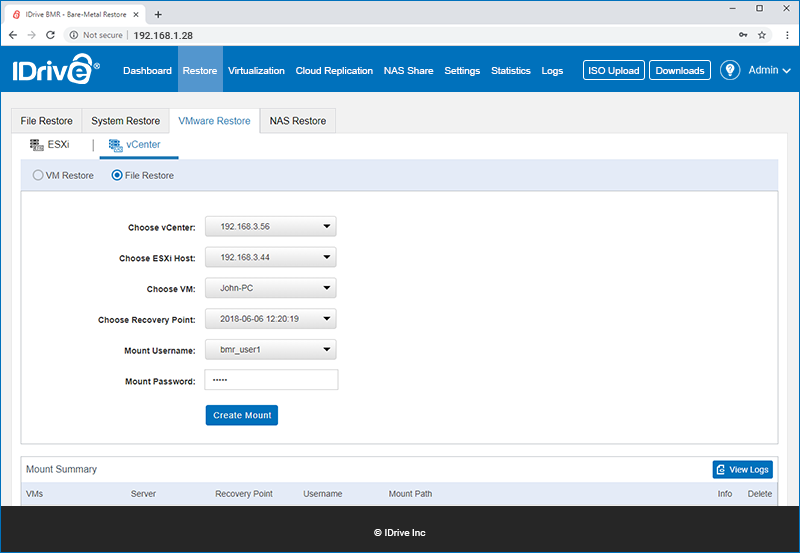
A summary for the selected VM will be created in the 'Mount Path Summary' table. To access your backed up data, copy and paste the path displayed under 'Mount Path' into Windows File Explorer.
Note: We only allow 4 concurrent file restore mounts.
