Single Sign-On with Microsoft Azure Entra
IDrive® e2 users can access their accounts using Single Sign-On (SSO). Administrators can choose a SAML 2.0 identity provider (IdP) to enable login to IDrive® e2 without the need to remember an additional password.
To set up Single Sign-On (SSO) with Microsoft Azure Entra, the admin needs to:
- Create an app on Microsoft Azure Entra
- Assign users
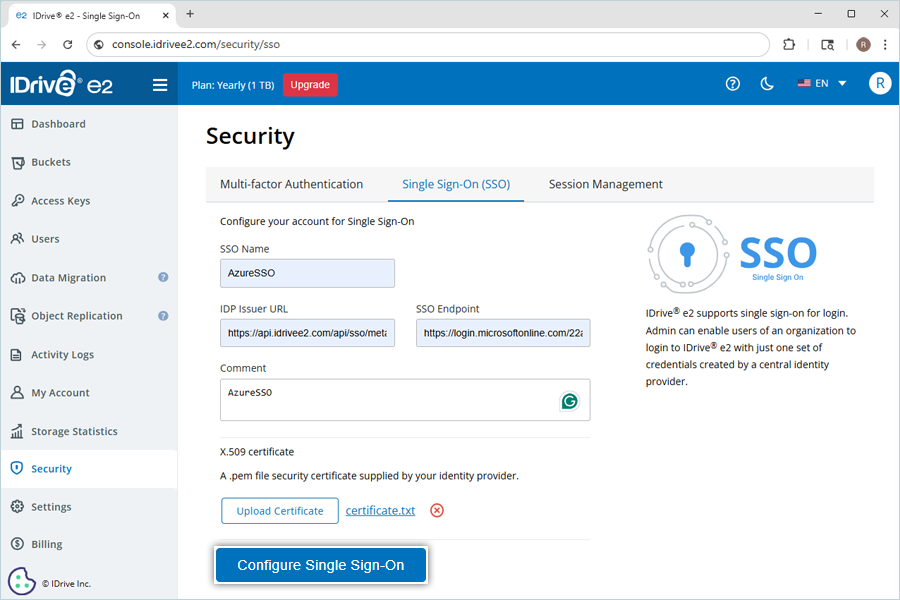
- Configure IDrive® e2 account for Single Sign-On (SSO)
Create an app on Microsoft Azure Entra Console
Create an app on the Microsoft Azure Entra console and use it as an identity provider for SSO.
To create the app,
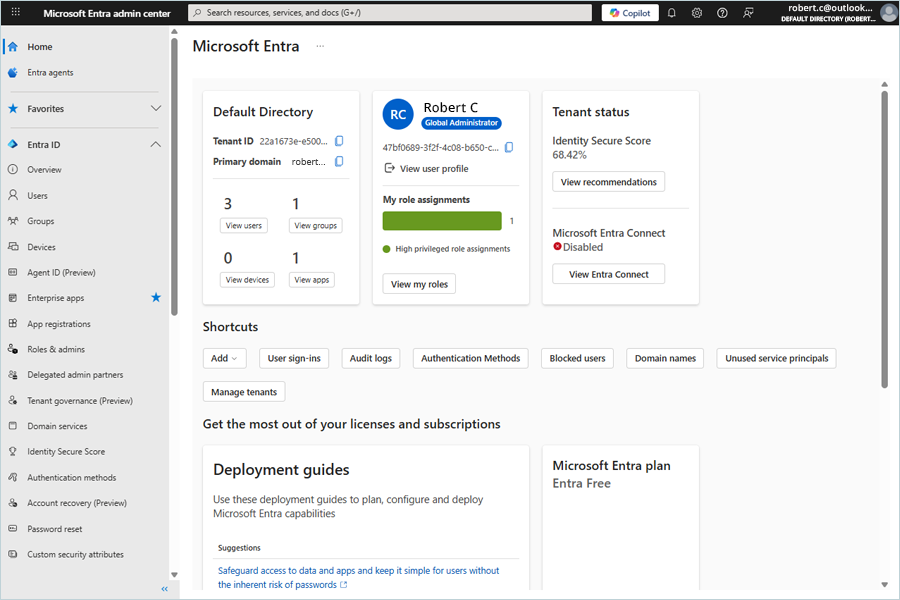
- Log in to Microsoft Azure Entra.
- On the Home page, on the left-hand side, click Enterprise apps, then click + New Application.
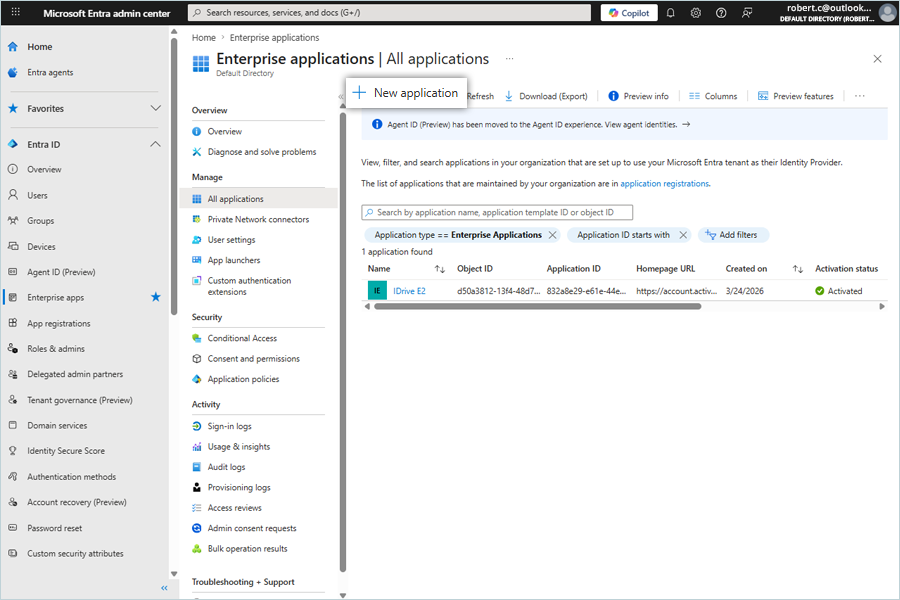
- Click Create your own application. In the Create your own application sidebar, enter IDrive E2 as the name of your app.
- Select the Integrate any other application you don't find in the gallery (Non-gallery) radio button.

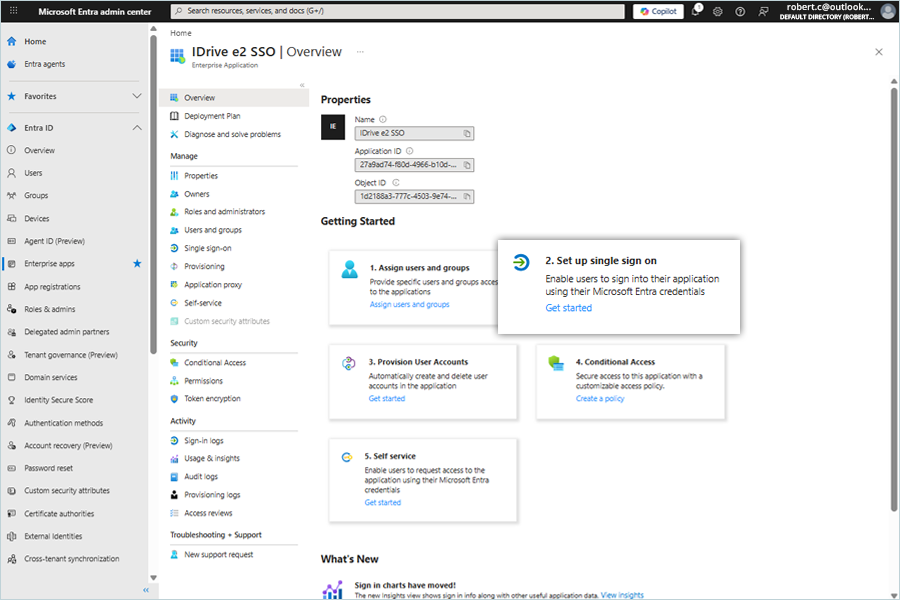
- Once added, you will see a success message.
- Click Set up Single Sign-On.
- Choose the SAML option under Select a single sign-on method.
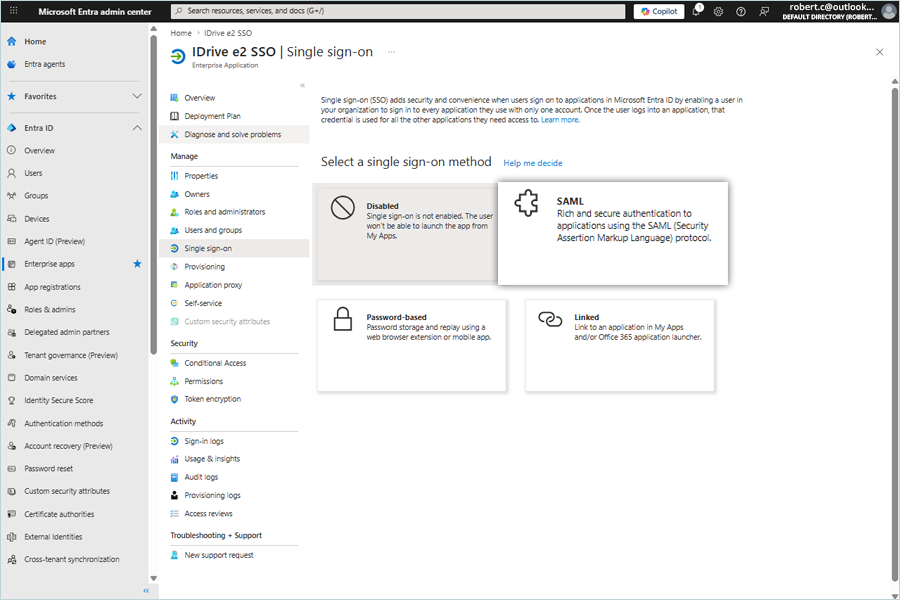
- Click Edit.

- In the Basic SAML Configuration sidebar, under Identifier (Entity ID), enter:
https://api.idrivee2.com/api/sso/metadata.xml - Under Reply URL (Assertion Consumer Service URL), enter:
https://api.idrivee2.com/api/sso/samlassertSave the changes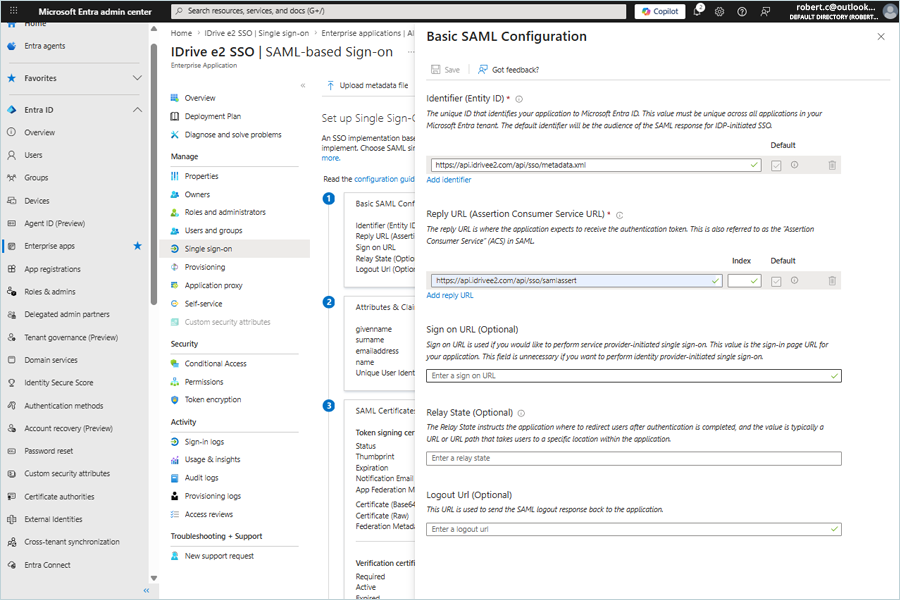
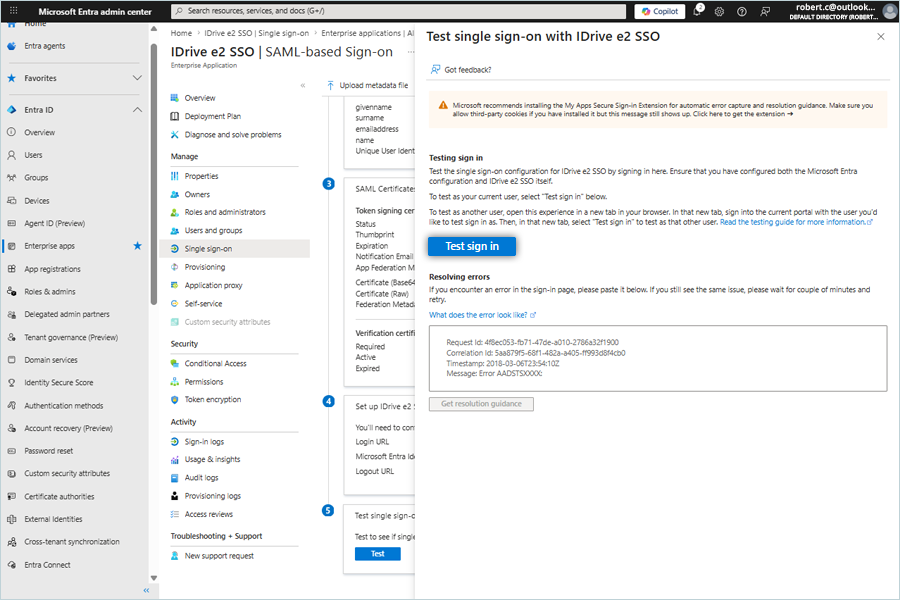
- Once done, test the connection.
- The SSO login page opens up.
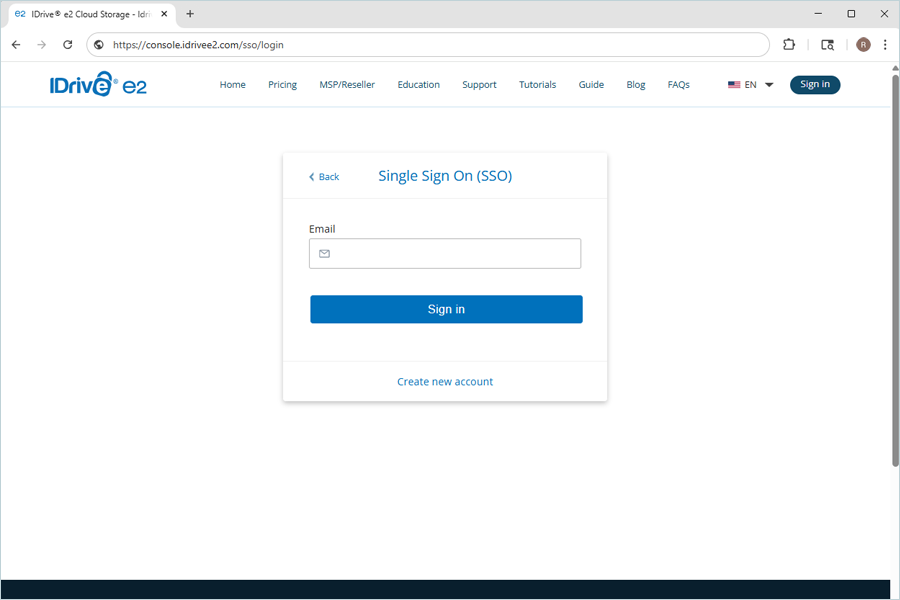
- Log in to your SSO-enabled account.