Settings
Settings
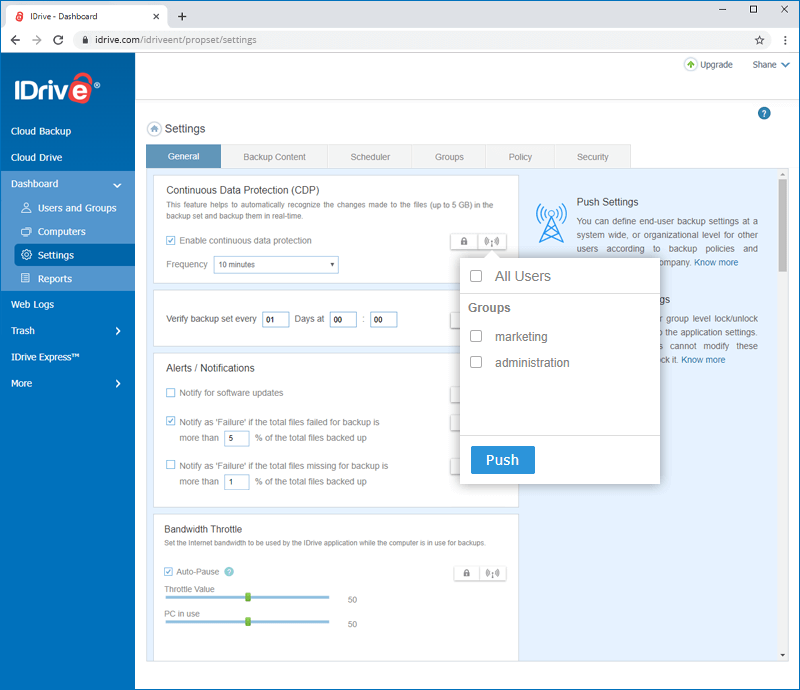
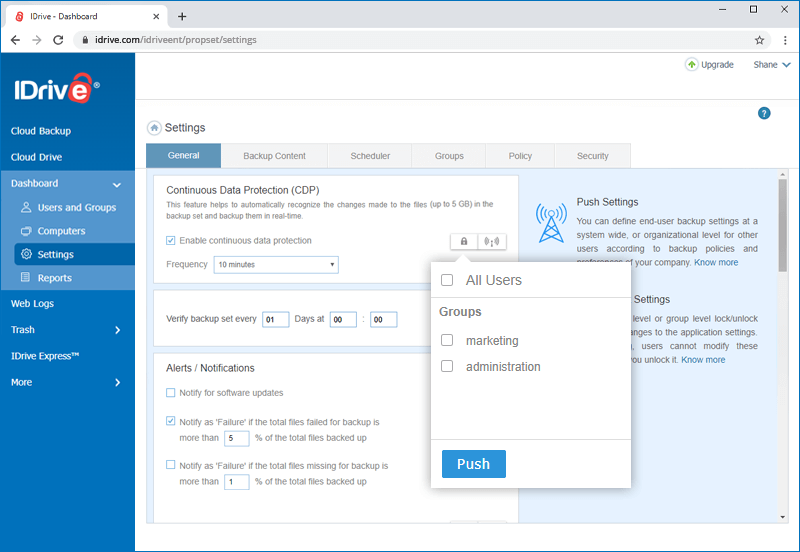
You can configure your IDrive settings and push changes to all the connected computers with ease using this option.
How can settings be pushed across all the users/groups?
- Go to the 'Settings' tab and change the settings as required.
- Click
 against the setting you wish to push and select 'All Users' or particular groups to push the settings.
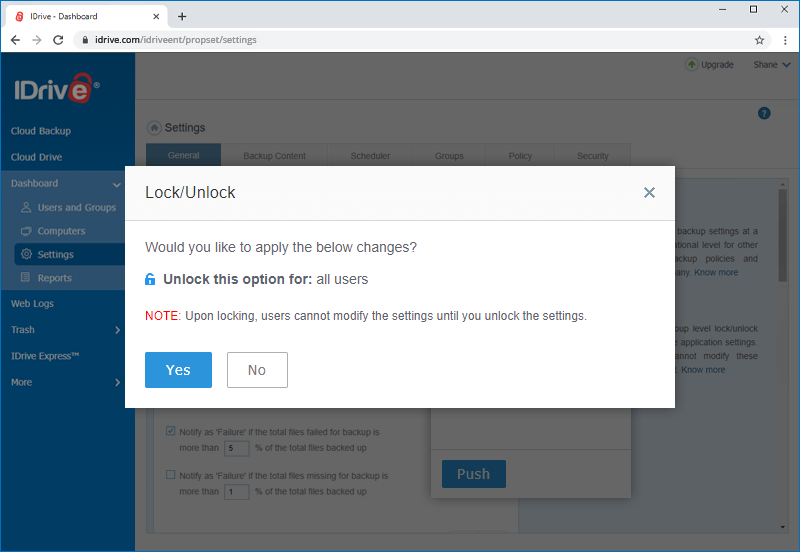
 - Click 'Push'. A confirmation window would appear.
- Click 'Yes' to push the setting.
General
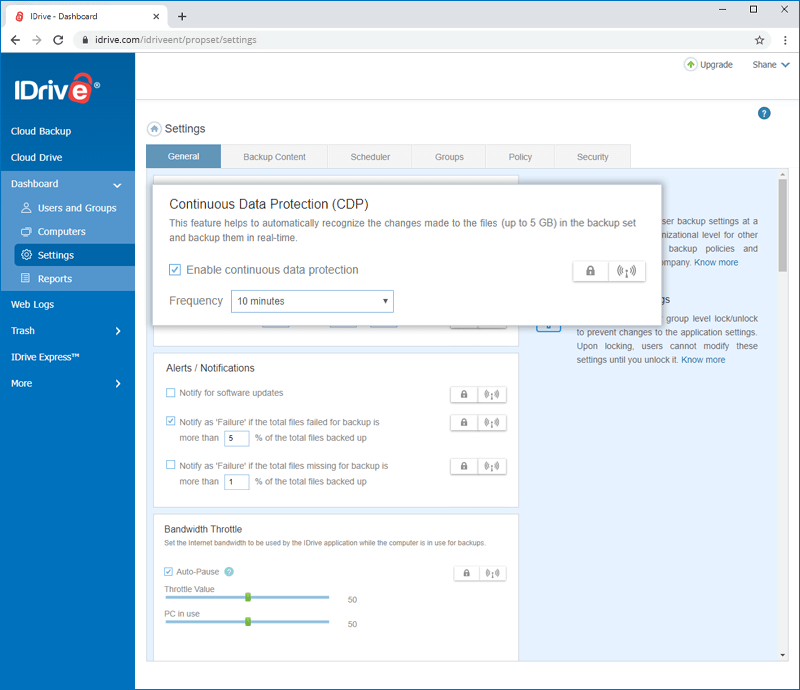
Continuous Data Protection (CDP)
IDrive automatically recognizes the changes made to the files present in your backup set and backs them up in real-time.
To enable CDP,
- Sign in to IDrive and click the 'Dashboard' tab.
- From the 'Settings' tab, select 'Enable continuous data protection'.
- Click to push the settings to all the users/groups.
Note:
- Temporary files and system files are exempted from Continuous Data Protection.
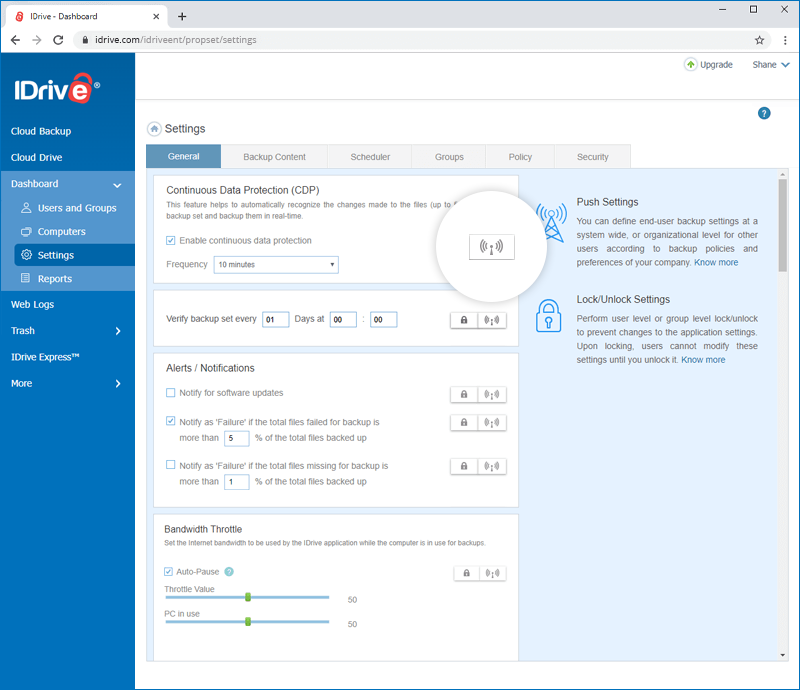
Alerts/Notifications
You can set the following options from the 'Settings' section:
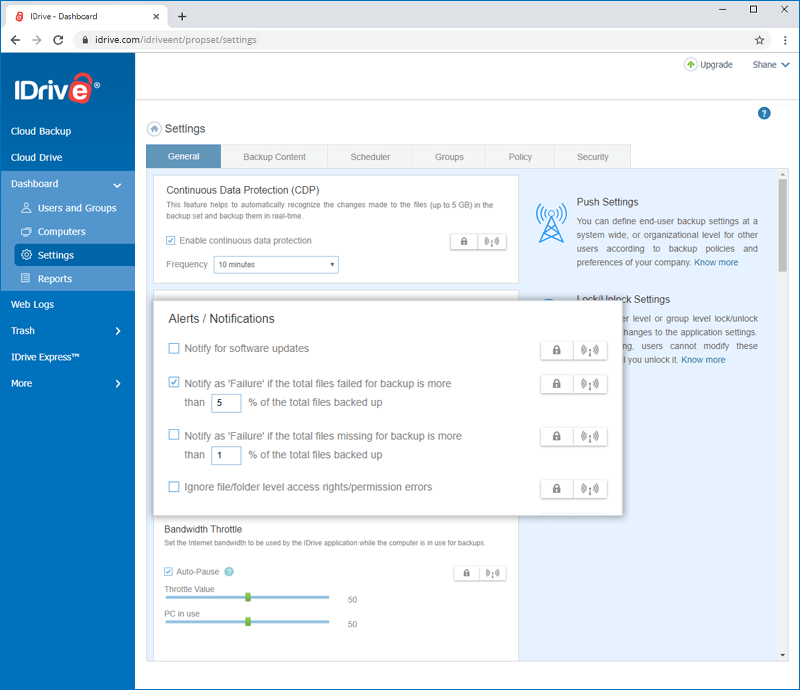
Notify for software updates: You will be notified whenever a newer version of the desktop application is available.
Notify as 'Failure' if the total files failed for backup is more than '-' % of the total files backed up: You can select this option to receive notifications of the same from IDrive. You can set the number of days using the drop-down list. By default, it is set to 5 percent.
Notify as 'Failure' if the total files missing for backup is more than '-' % of the total files backed up: You can select this option to receive notifications of the same from IDrive. You can set the number of days using the drop-down list. By default, it is set to 5 percent.
Ignore file/folder level access rights/permission errors: You can enable this option to ignore file/folder level access rights errors. If enabled, IDrive will not consider your backup as failure, in case the selected backup set contains any file/folder with insufficient access permissions.
Ask where to save files/folders before restore: IDrive will prompt you for a restore location on your computer, while restoring your files and folders.
Alert me if the scheduled backup fails for '-' days: IDrive will notify you on the desktop if the scheduled backup fails for a given number of days. You can set the number of days using the drop-down list. By default, it is set to 1 day.
Automatic power off after the completion of the scheduled jobs: Your computer will be powered off automatically after the completion of the scheduled backup job.
Wake up the computer from Hibernate / Sleep mode: IDrive will wake up the computer from Hibernate/Sleep mode and then perform the scheduled backup job.
Upload multiple file chunks simultaneously: You can enable this option to upload a large number of file chunks to your IDrive account at a time.
Start IDrive monitor on system startup: IDrive monitor will launch immediately after you startup your computer.
Use black and white menu bar icon: You can enable this option to activate the black and white menu bar icon on the IDrive interface.
Show hidden files/folders: You can choose this option to make IDrive show up the hidden files and folders on your computers.
Open file backup: You can backup open files like Outlook files (.pst), QuickBooks, Quicken, ACT, MS Word, MS Excel, MS Money, MS Access, and MS FoxPro.
Stop scheduled backup when battery falls to ‘-’ percent: You can select this option to receive notifications of the same from IDrive. You can set the percentage using the drop-down list. By default, it is set to 20 percent.
Disable Notification
You can stop receiving notifications from the IDrive desktop application by selecting the small check box against ‘Disable Notification’.
Update/Reinstall Application
You can remotely update/reinstall the IDrive monitor for all users or particular groups by pushing this setting.
Bandwidth Throttle
Bandwidth Throttle lets you set the Internet bandwidth to be used by the IDrive monitor for backups. By default, the bandwidth throttle value is set at 100%.
You can set the Auto-Pause option during backup operations to enable optimum desktop experience with the following options:
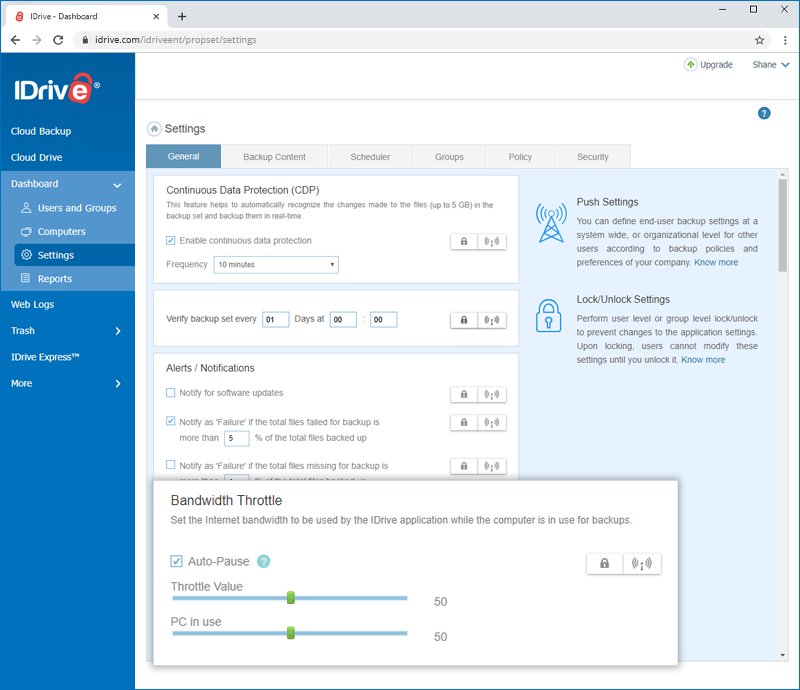
PC in use: This option lets you set the bandwidth to be used by IDrive for backups when it is in use. By default, it is set to 25%. This allows other applications to run without hindrance.
PC not in use: This option lets you set the bandwidth to be used by IDrive for backups when it is not in use. By default, it is set to 100%.
To enable Auto-Pause and change the bandwidth settings,
- Sign in to IDrive and click the 'Dashboard' tab.
- From the 'Settings' tab, select 'Auto-Pause' to set the 'PC in use' and 'PC not in use' options.
- Use the sliders to set the bandwidth to be used.
Archive Cleanup
The Archive Cleanup feature permanently deletes data from your account, by matching them to the data in your current backup set. It is useful as it deletes data from your account that no longer exists on your computer.
Periodic Cleanup: You can set up automated cleanup periodically by enabling Periodic Cleanup. Periodic Cleanup gives you more control by allowing you to set the frequency as well as the percentage of files to be considered.
To enable Periodic Cleanup,
- Sign in to IDrive and click the 'Dashboard' tab.
- From the 'Settings' tab, select 'General'.
- In the 'Archive Cleanup' section select 'Periodic Cleanup' by using the check box.
- Set the number of days and percentage of data to be considered for cleanup.
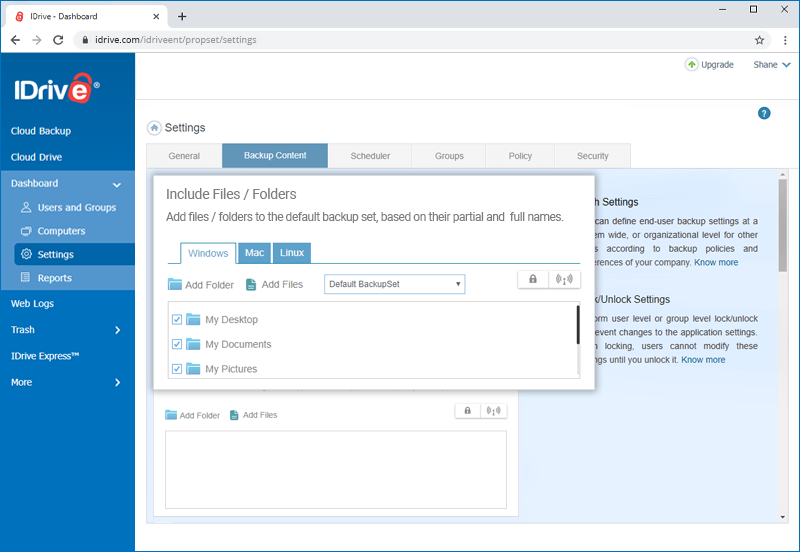
Backup Content
Include Files/Folders
You can add files/folders to your default backup set.
To include files/folders, click 'Add Folder' or 'Add Files', and enter the names of files/folders that you want to include.
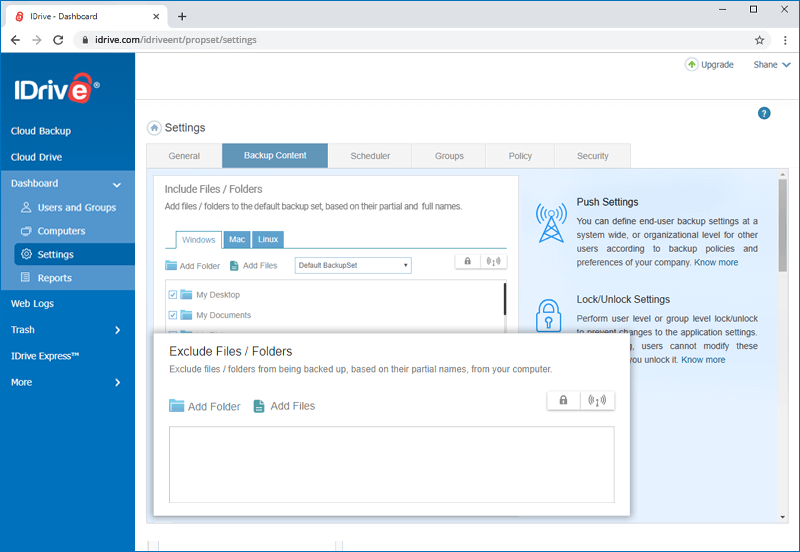
Exclude Files/Folders
You can exclude files/folders from being backed up, based on their partial names, from your computer.
To exclude files/folders, click 'Add Folder' or 'Add Files', and enter the partial names of the files/folders that you want to exclude.
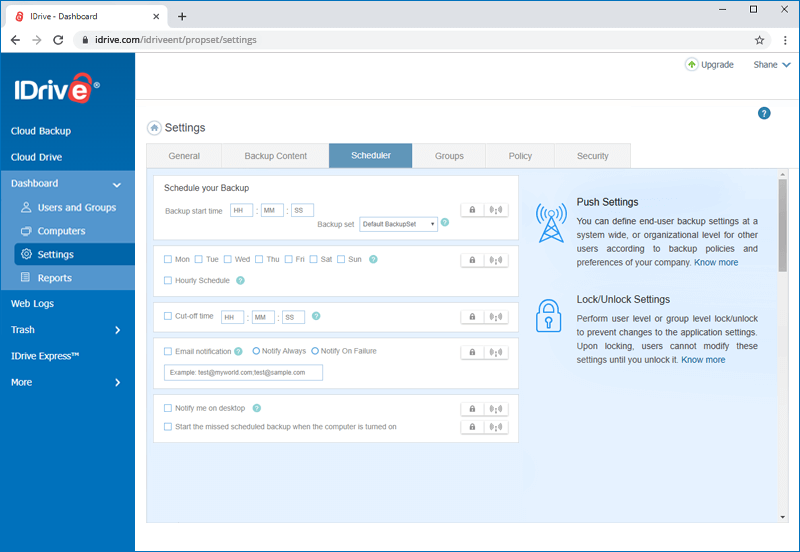
Scheduler
Schedule automated backups; set the day, time, and notification options for your backup operations using this option.
To schedule automated backups, set the following options under the 'Scheduler' tab:
- Backup start time - Set the time at which your scheduled backup should start.
- Backup set - Select the backup set you want to schedule for backup.
- Daily Schedule - To run your backup jobs daily, select this option.
- Week-Day(s) - Select the days of the week on which you want to run your backup jobs.
- Hourly Schedule - Select this option to configure hourly backup operations.
- Cut-off Time - Set the time at which your scheduled backup should stop. This is helpful if you want to hard stop the backup progress at a specific time.
- Email notification - Enter your email address to receive backup status notifications. 'Notify Always' and 'Notify On Failure' are the two notification options that you can select.
- Notify me on desktop - To receive backup notifications on your desktop.
- Start the missed scheduled backup when the computer is turned on - Your missed scheduled backups will start automatically once you turn on your computer.
To change and push Scheduler settings,
- Sign in to IDrive and click the 'Dashboard' tab.
- Click 'Settings' and go to the 'Scheduler' tab.
- Make the changes to the scheduler options, such as 'Backup start time', backup frequency, 'Email notification' etc.
- Click to push the settings to all the users/groups.
Groups
A group is a list of users whom you can organize for a variety of purposes such as to push settings, monitor backups, etc. Up to 200 groups can be created with any number of users and a user can be a part of multiple groups.
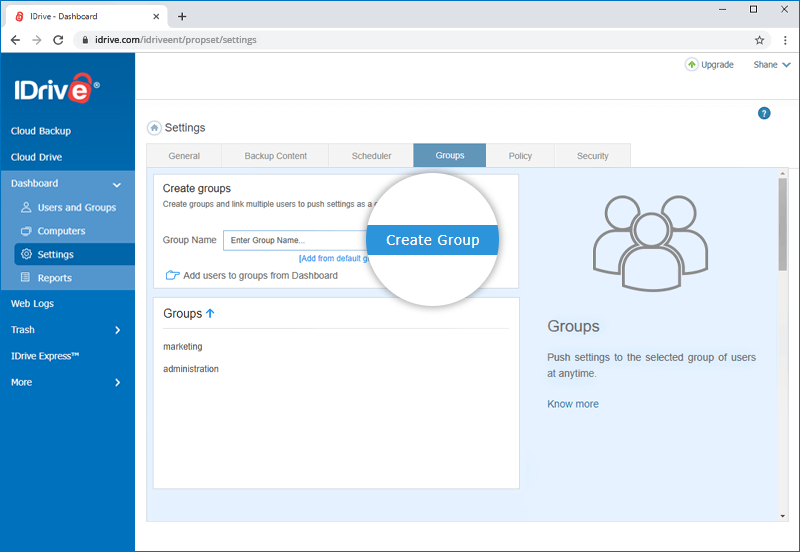
Create Groups
Create a group of users and push settings in a simple way.
To create a group,
- Sign in to IDrive and click the 'Dashboard' tab.
- Click 'Settings' and go to the 'Groups' tab.
- Provide the group name and click 'Create Group'.
Note: IDrive monitor has a few predefined groups. You can add these groups to your list.
You can see the newly created group under the 'Groups' list.
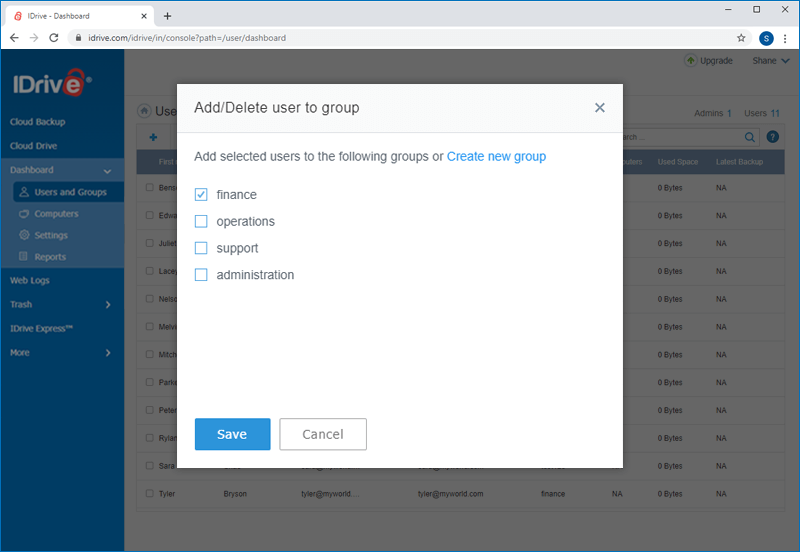
Add users to the group
You can add any number of users to the group.
To add users,
- Sign in to IDrive and click the 'Dashboard' tab.
- Select the users to add and click
 .
. - Select the group you want to add the users to and click 'Save'.
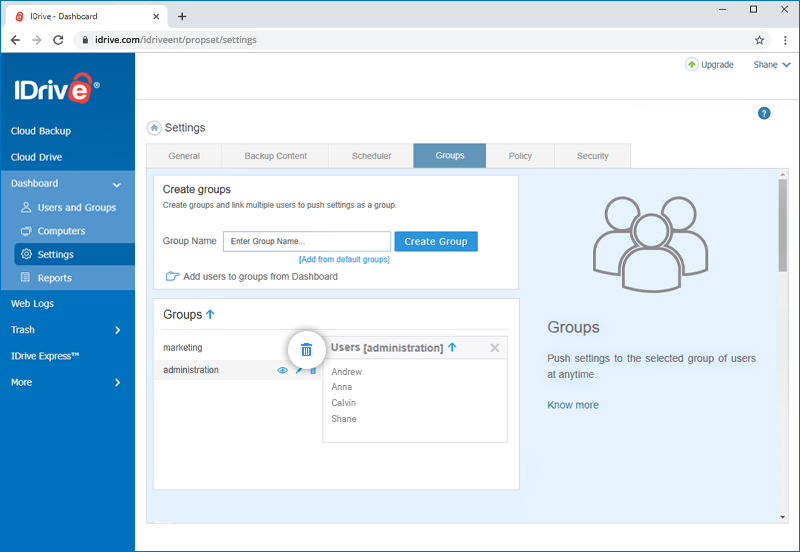
Groups
The Groups section displays the list of created groups. You can view users, edit the name of the group and delete the group from the list.
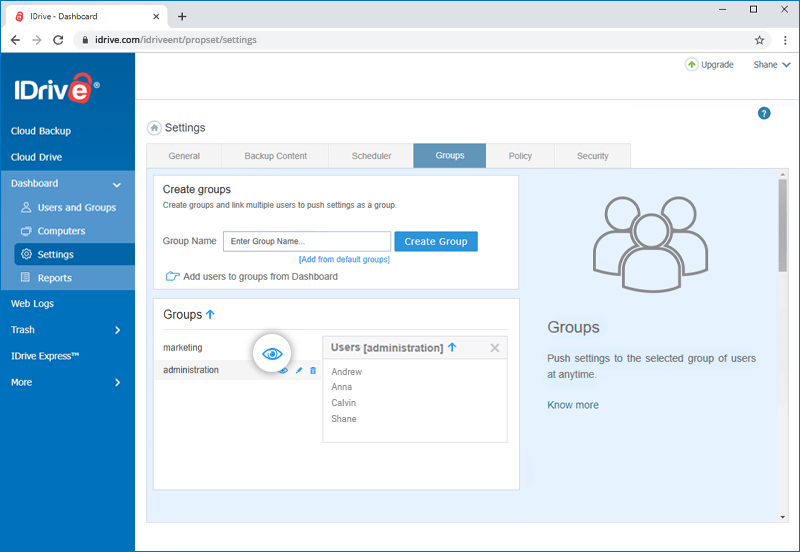
View users
You can view the users in the group from the 'Groups' section.
To view users,
- Sign in to IDrive and click the 'Dashboard' tab.
- Click 'Settings' and go to the 'Groups' tab.
- Move the mouse pointer on the particular group name and click
 .
.
The users in the group are displayed in the 'Username(s)' section.
Edit group name
You can edit the name of the group in the list.
To edit the group name,
- Sign in to IDrive and click the 'Dashboard' tab.
- Click 'Settings' and go to the 'Groups' tab.
- Mouse hover on the particular group name and click
 .
. - Edit the group name and press enter.
A success message would appear on the bottom-left side of the screen.

Delete group
Delete unwanted groups from the list in the 'Groups' section.
To delete a group,
- Sign in to IDrive and click the 'Dashboard' tab.
- Click 'Settings' and go to the 'Groups' tab.
- Mouse hover on the particular group name and click
 .
. - Click 'Yes' in the confirmation window.
A success message would appear on the bottom-left side of the screen.
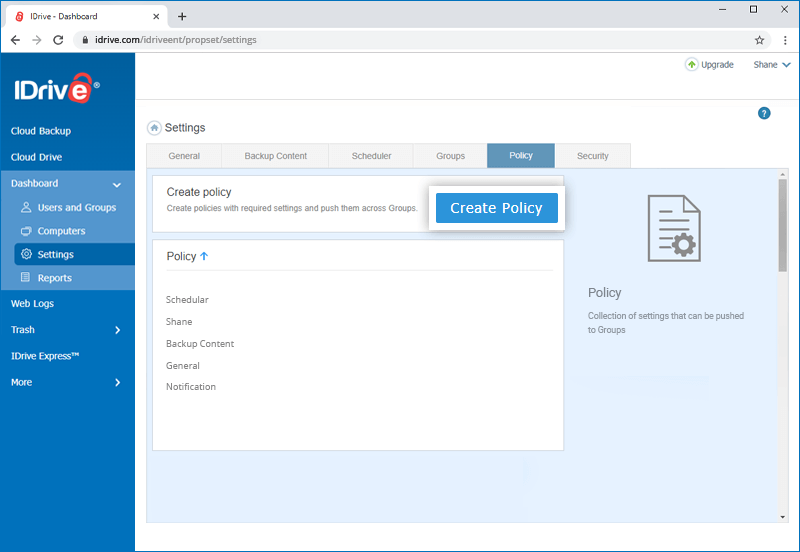
Policy
A policy is a group of settings. You can push these policies to a group of users to push the settings to them. Also you can edit and delete policies as required.
Create Policy
- Sign in to IDrive and click the 'Dashboard' tab.
- Click 'Settings' and go to the 'Policy' tab.
- Click 'Create Policy' and enter the 'Policy Name'.
- Select the required settings and click 'Save' to create a policy.
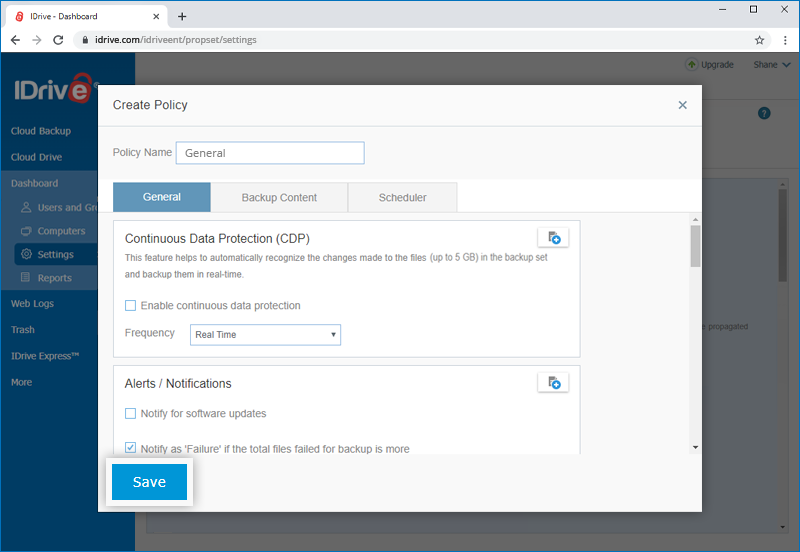
A confirmation message will appear.
Policy
The created policy appears under the 'Policy' list.
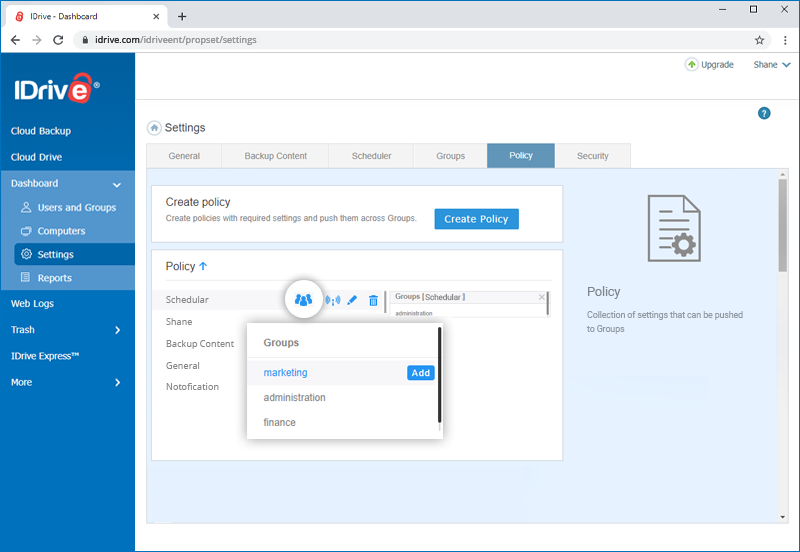
Add Groups to a Policy
You need to add groups to a Policy before pushing it.
To add groups to a Policy,
- Sign in to IDrive and click the 'Dashboard' tab.
- Click 'Settings' and go to the 'Policy' tab.
- Hover over the policy you want to add groups to and click
 .
. - Click 'Add' next to the group you want to add the policy to.
Push Policy
You can associate groups with a Policy and push it to them.
To push a policy,
- Sign in to IDrive and click the 'Dashboard' tab.
- Click 'Settings' and go to the 'Policy' tab.
- Hover over the policy you want to push and click
 .
. - Click 'Yes' in the confirmation pop up to push the policy.
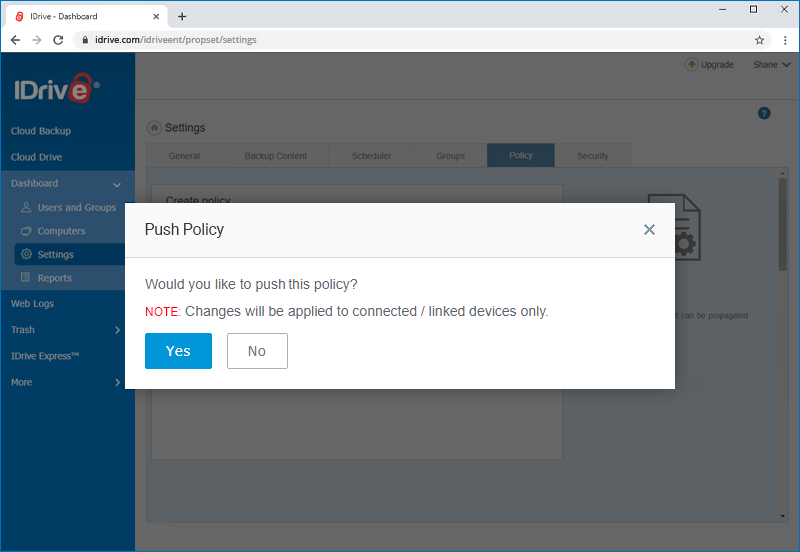
Note: Changes will be applied to connected and linked devices only.
Edit Policy
You can edit and modify a policy.
To edit,
- Sign in to IDrive and click the 'Dashboard' tab.
- Click 'Settings' and go to the 'Policy' tab.
- Hover over the policy you want to edit and click
 .
. - Edit the required settings and click 'Save'.
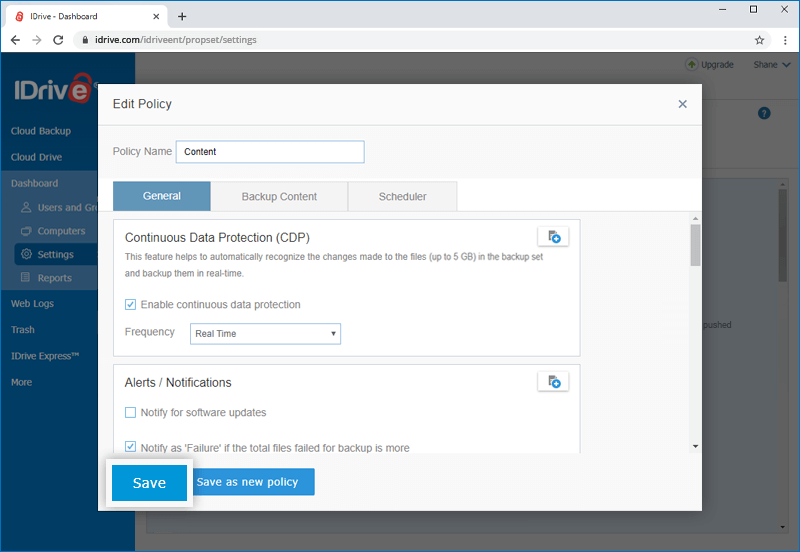
You can also save it as a new policy by clicking 'Save as new policy'.
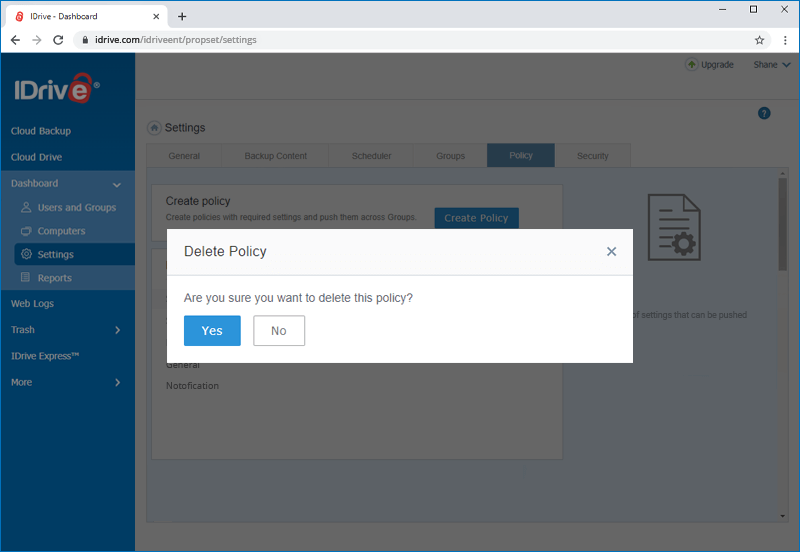
Delete Policy
To delete a Policy,
- Sign in to IDrive and click the 'Dashboard' tab.
- Click 'Settings' and go to the 'Policy' tab.
- Hover over the policy you want to delete and click
 .
. - Click 'Yes' in the confirmation pop up.
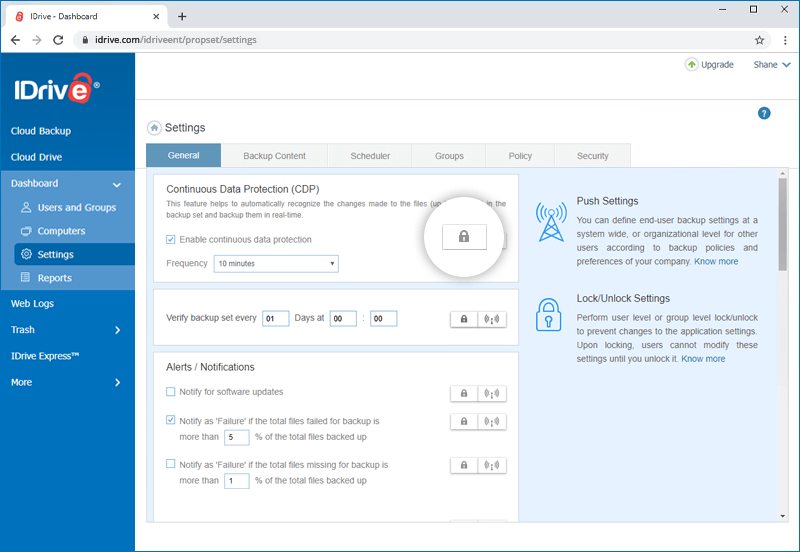
Lock Settings
This feature allows an Admin to prevent users from changing the application settings which are locked. Once the Admin has 'locked' certain settings, users cannot change them. Users must approach Admin to unlock any settings.
Lock settings for users or groups
Admin can lock the settings for groups or users.
To lock the settings,
- Sign in to IDrive and click the 'Dashboard' tab.
- Go to the 'Settings' tab and click
 against the particular settings you wish to lock.
 - Select 'All Users' or particular groups to lock the settings for the selected users/groups, and click 'Push'.
- Click 'Yes' in the confirmation window.
Disable Notification
Enable and push this setting to stop notifications from the desktop application.

As an Admin can I view notifications from the desktop application that are disabled for user accounts?
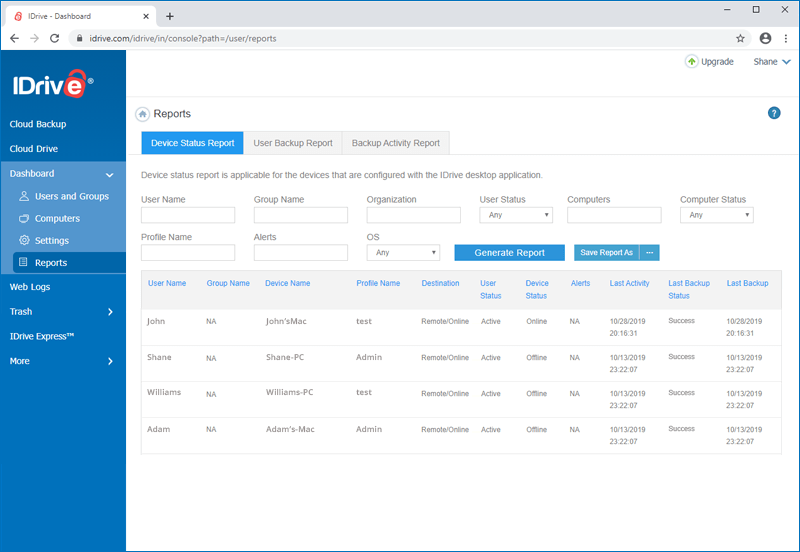
Yes, Admin can view all the notifications from the desktop application under the ‘Reports’ section.