Integrate Proxmox Backup Server with IDrive e2
Proxmox Backup Server is an open-source, enterprise-grade backup solution designed for reliable and efficient protection of virtual machines, containers, and physical hosts. It delivers deduplicated and incremental backups that minimize storage and bandwidth usage, while built-in encryption ensures data security, and with its intuitive web interface and deep integration with Proxmox VE, it streamlines backup management and enables rapid recovery to maintain business continuity. Integrating Proxmox Backup Server with IDrive® e2 extends these capabilities with a scalable, secure, and cost-effective cloud object storage solution, enabling systematic data protection and recovery across environments.
Prerequisites
Before you begin, ensure the following:
- An active IDrive® e2 account. Sign up here if you do not have one.
- A bucket in IDrive® e2. See how to create a bucket.
- Valid Access Key ID and Secret Access Key. Learn how to create an access key.
- Proxmox Backup Server and Virtual Environment should be installed and running with the latest version of Proxmox.
The integration of Proxmox Backup Server with IDrive e2 can be performed following the below 5 steps.
Add User in the Backup Server
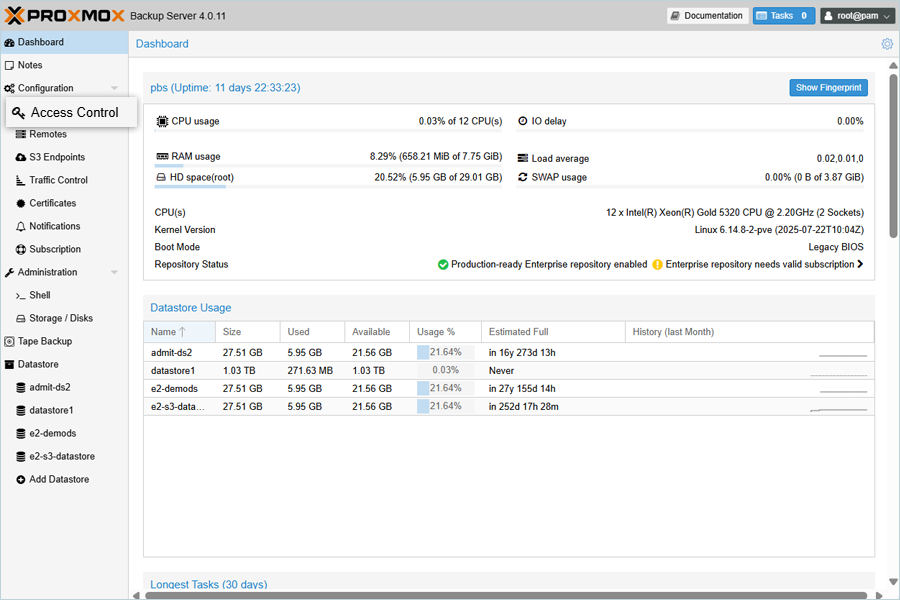
- Log in to ProxMox Backup Server.
- Click Configuration and select Access Control under the Dashboard in the left-side menu.
- Click Add under User Management.
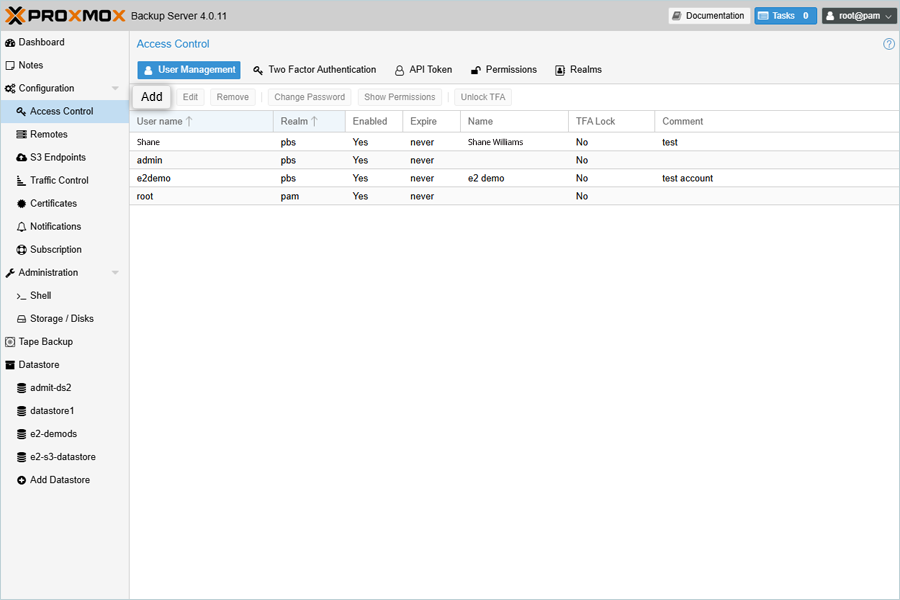
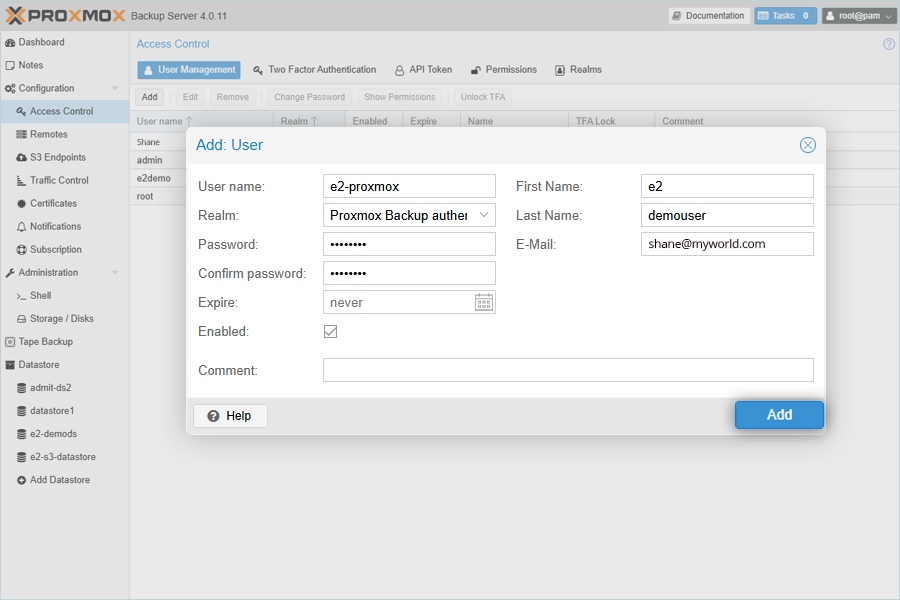
- In the Add: User popup, enter the following details.
- Enter the User name for the user.
- Enter the Password and Confirm password in a valid format.
- Enter First Name, Last Name, and a valid email ID.
- Click Add.
- After adding, select the user from the list and click Permissions.

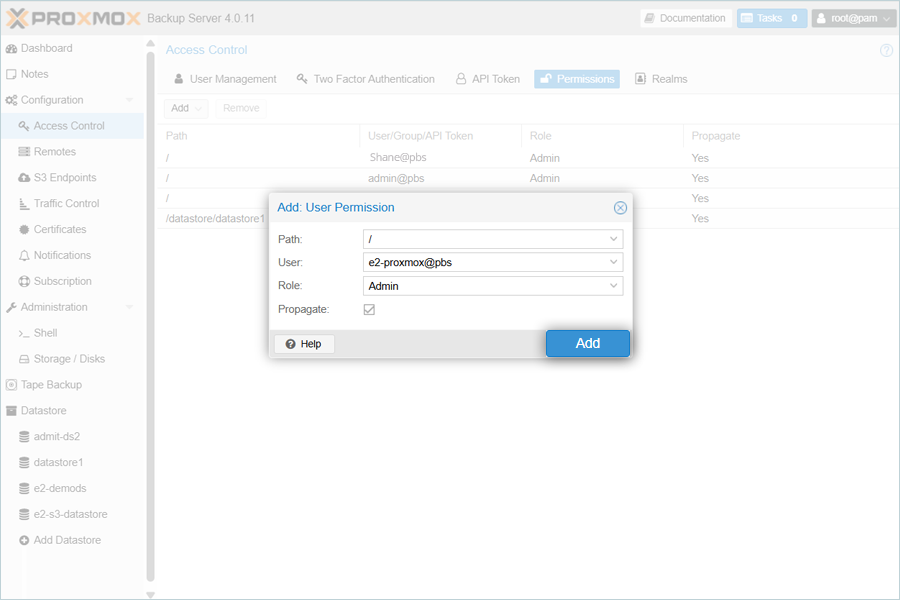
- Click Add and select User Permission in the Permissions tab.
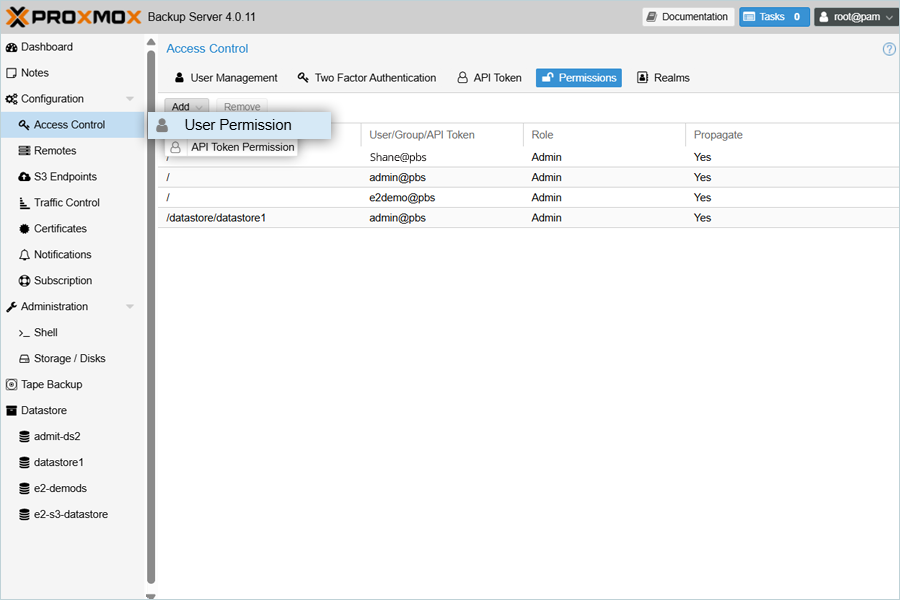
- In the Add: User Permission window,
- Select the
 as the Path for full access.
 - Select your user from the User list.
- Select Admin as Role.
- Click Add.
- Select the
The newly added user now has Admin Permissions.
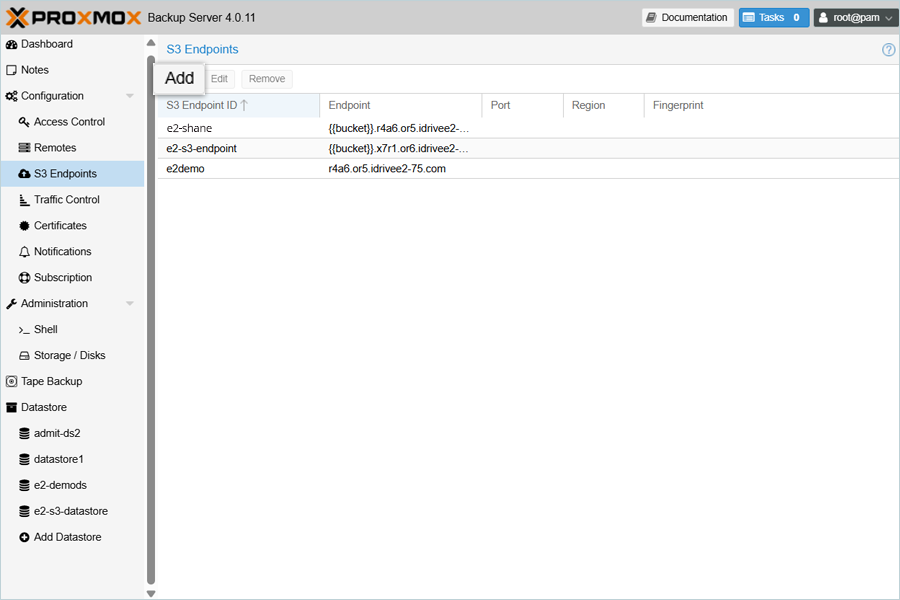
Add S3 Endpoint in the Backup Server
- Select S3 Endpoints under Configuration and then click Add to add your IDrive e2 cloud as a new S3 Endpoint.
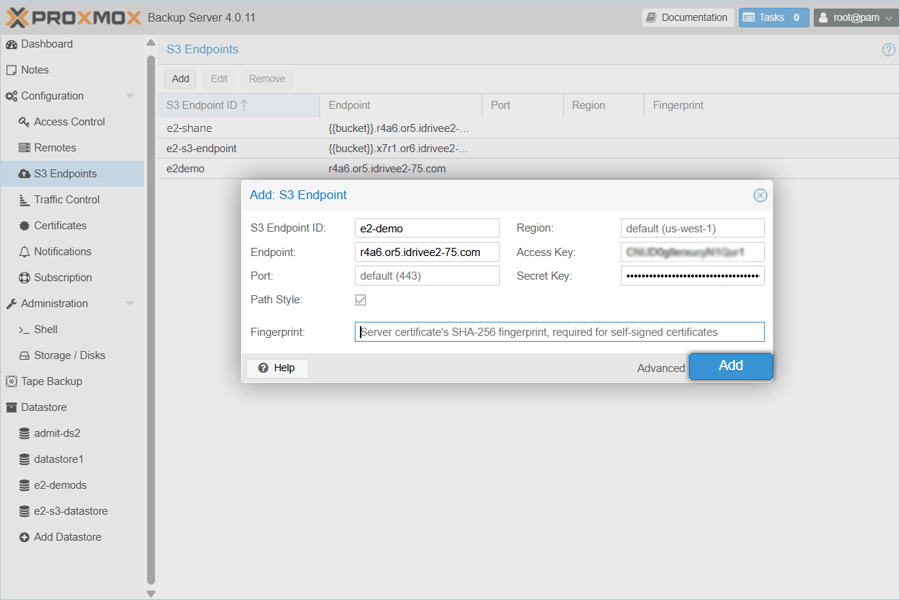
- In the Add: S3 Endpoint popup, enter the details as mentioned below.
- Enter a name for your S3 Endpoint ID.
- Enter your IDrive e2 S3 endpoint as Endpoint.
- Enter your IDrive e2 Access Key as Access Key.
- Enter your IDrive e2 Secret Key as Secret Key.
- Select the Path Style check box.
- Click Add.
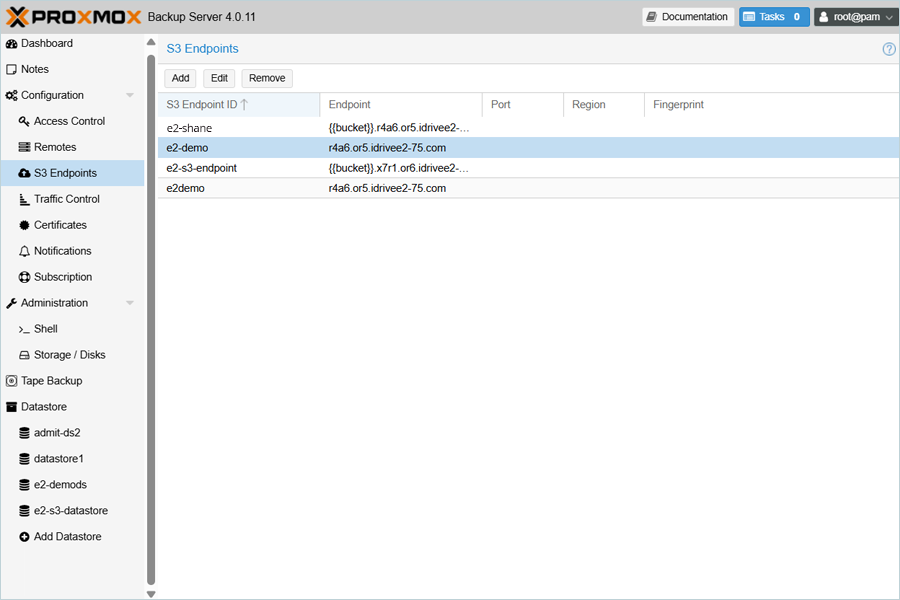
- IDrive e2 cloud is now added and listed as an S3 Endpoint.
Add Datastore in the Backup Server
- Select Datastore in the Dashboard on the left-side menu and click Add Datastore.
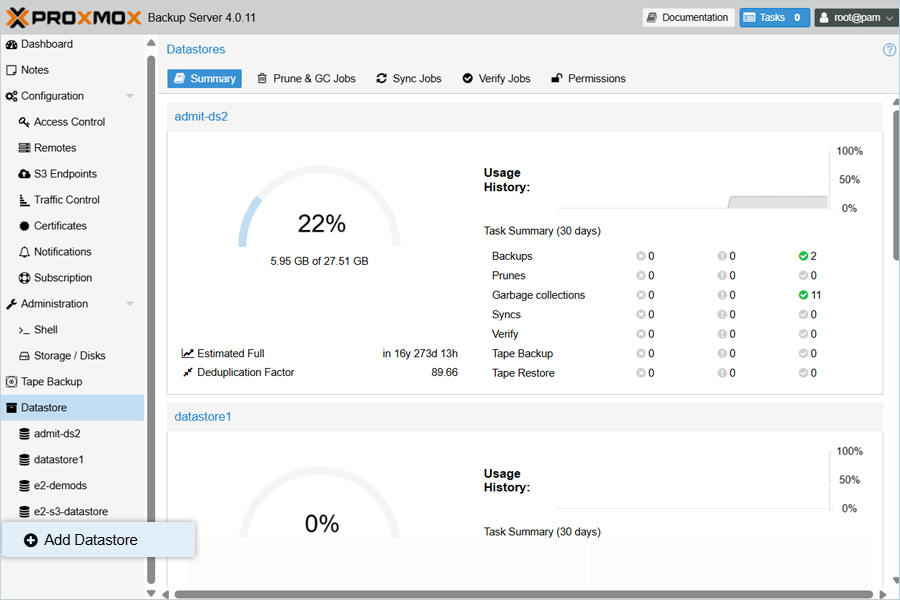
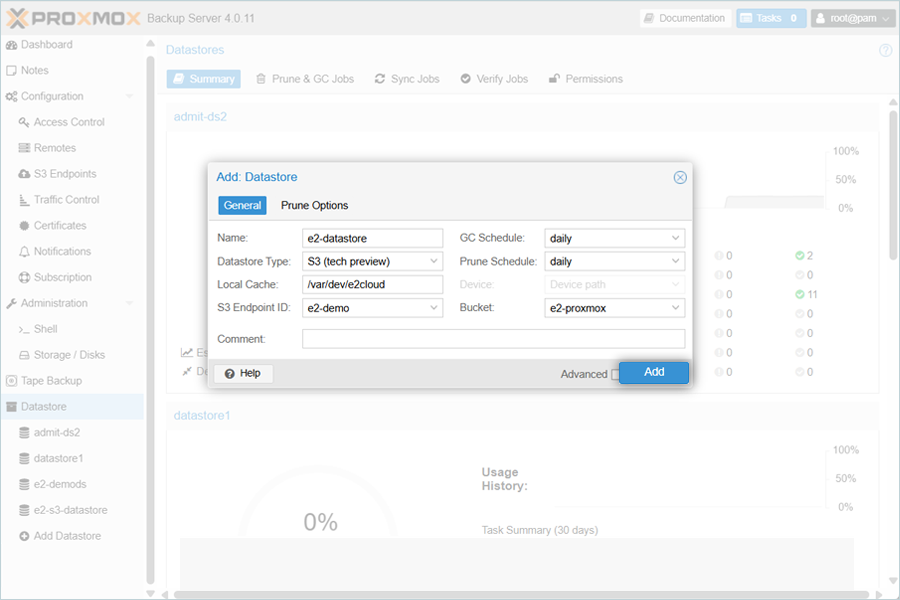
- In the Add Datastore popup, enter the details as mentioned below.
- Enter a name for the Datastore.
- Select S3 (tech preview) as the Datastore Type.
- Enter the path for Local Cache.
- Select your added e2 endpoint as S3 Endpoint ID.
- Select your e2 bucket as the Bucket from the list.
- Click Add.
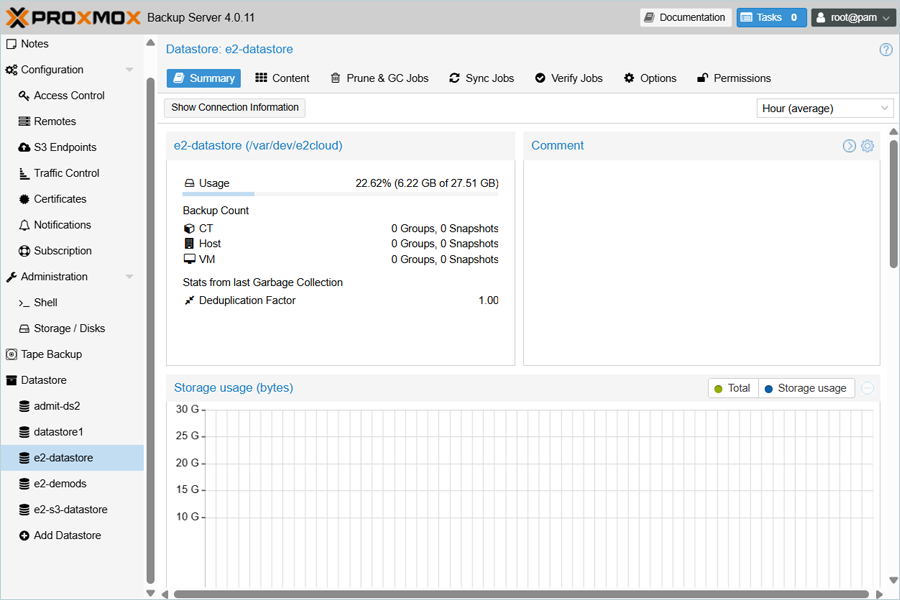
- The Datastore is now added and listed successfully.
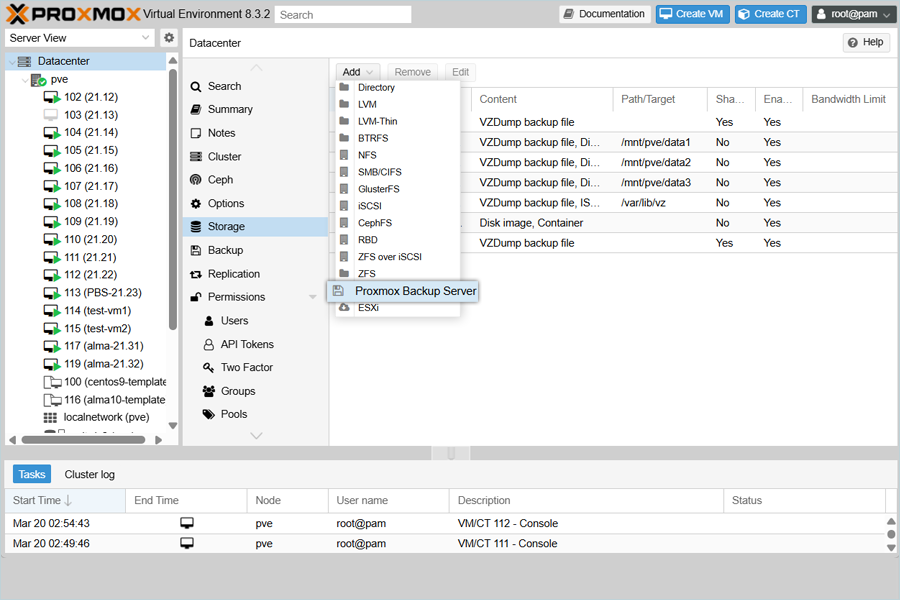
Add Data Center in ProxMox Virtual Environment
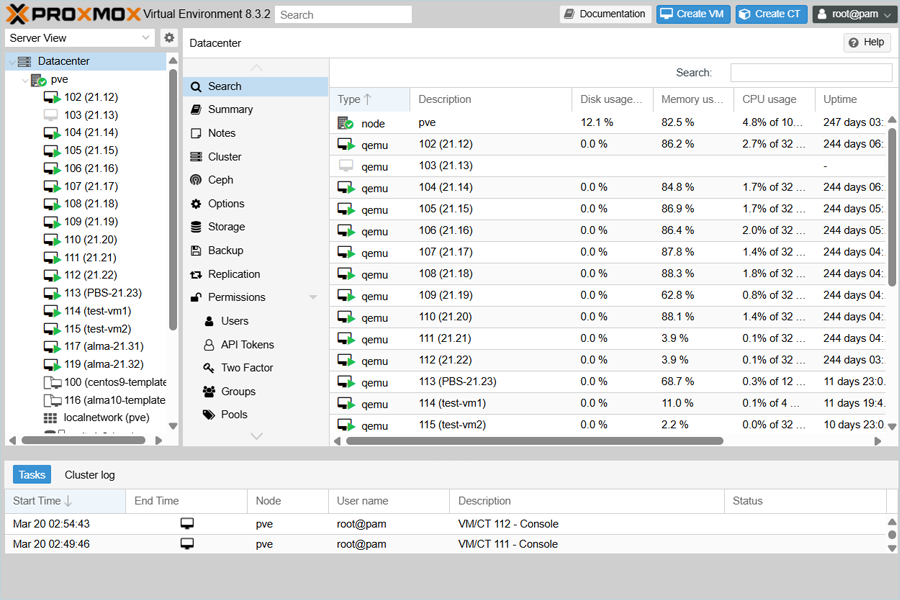
- Log in to your Proxmox Virtual Environment and click Datacenter in the Dashboard.
- Click Add and select Proxmox Backup Server from the list to add a new data center.
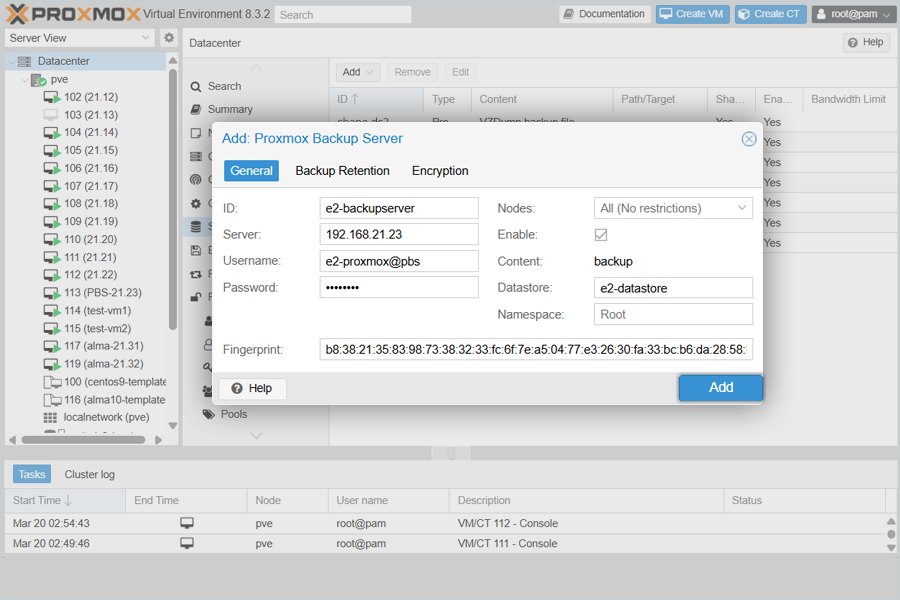
- In the Add: Proxmox Backup Server popup, enter details as mentioned below.
- Enter the ID of your Datacenter.
- Enter your Proxmox Backup server IP as Server.
- Enter your Username and Password of the user created in the Backup server
(Step 1).
(Note: The Username should be the same as mentioned when adding a new user and include @pbs as an extension, as per Proxmox policy. Ex: user@pbs) - Enter your Datastore name as Datastore from the Backup Server (Created in the previous step).
- Enter your Proxmox Fingerprint as Fingerprint.
(Note: The Fingerprint will be available in your Proxmox Backup server under Certificates. Double-click on the listed certificate, and in the Certificate Details window, the Fingerprint will be displayed.) - Click Add.
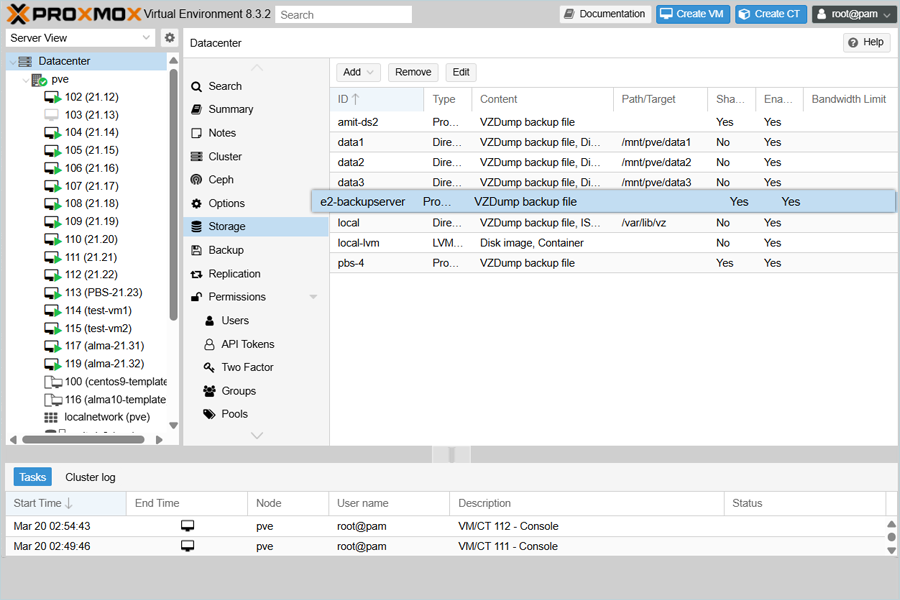
- The newly added datacenter will be listed under Datacenter.
Add the Backup and Run
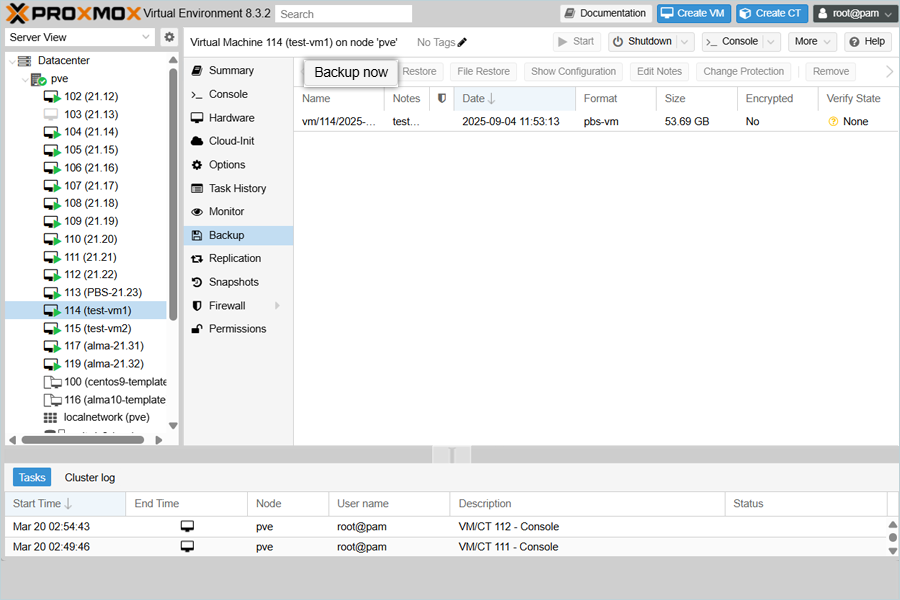
- In the Proxmox Virtual Environment, select the Virtual Machine that you want to back up.
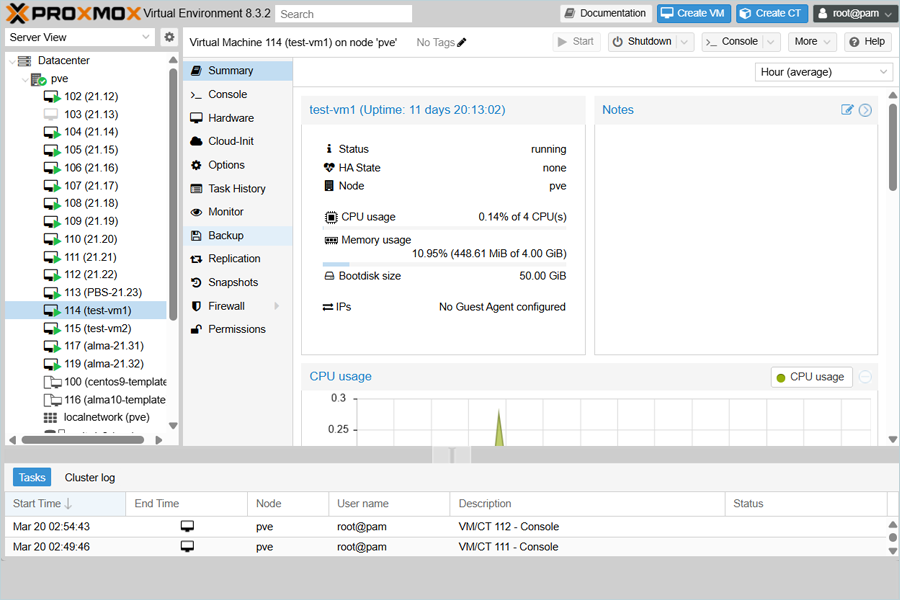
- Click Backup under the selected Virtual Machine Summary tab.
- Click Backup now.
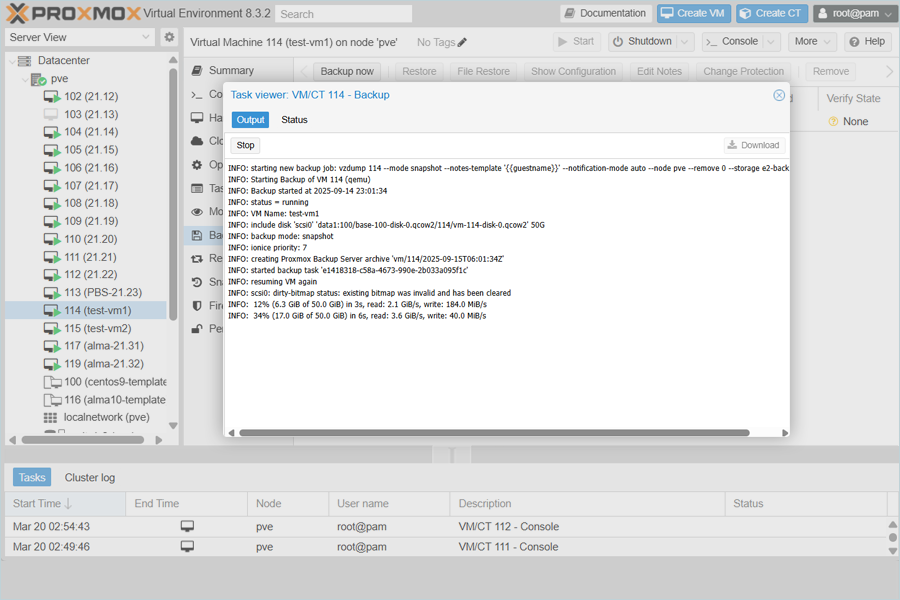
- In the Backup VM popup,
- Select your IDrive e2 backup server from the list as Storage (Created Datacenter in the Previous step)
- Select Snapshot as Mode.
- Enter Notes if required.
- Click Backup.

- The Backup of the VM starts. You can observe backup progress and summary in the Task viewer.
Note: Data restoration is handled by your specific backup solution provider and is affected by multiple variables that are unique to your environment. For application-related enquiries/support, it is strongly recommended you seek guidance from the technical team of your backup solution provider.