Integrate Peer Global File Service with IDrive e2
Peer Global File Service (PeerGFS) is an enterprise file management and replication platform designed for real-time synchronization across multi-site, multi-cloud, and hybrid environments. It enables seamless file sharing and active-active replication across NAS, Windows, and cloud storage systems while maintaining local performance and data consistency. Integrating PeerGFS with IDrive® e2 adds a capable and scalable cloud object storage solution that facilitates systematic integration for secure, efficient, and high-availability data management.
Prerequisites
Before you begin, ensure the following:
- An active IDrive® e2 account. Sign up here if you do not have one.
- A bucket in IDrive® e2. See how to create a bucket.
- Valid Access Key ID and Secret Access Key. Learn how to create an access key.
- Peer Global File Service v5.1.0.20230105 and newer.
- License for Peer Global File Service v5.1 or newer required.
- Contact your Peer Software Support representative to enable the S3 Compatible destination.
- Microsoft SQL Server or SQL Server Express database.
Configure Peer Global File Service with IDrive e2
- Open the Peer Management Center.
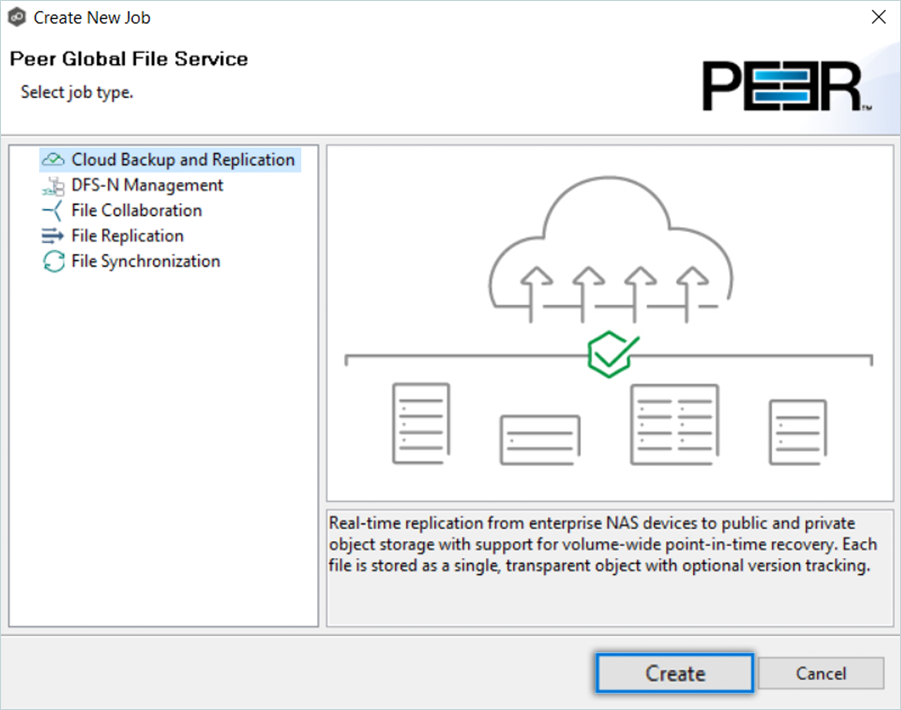
- Click New Job from the File Menu (or click New Job on the toolbar).
- In the Create New Job window, select Cloud Backup & Replication and then click Create.
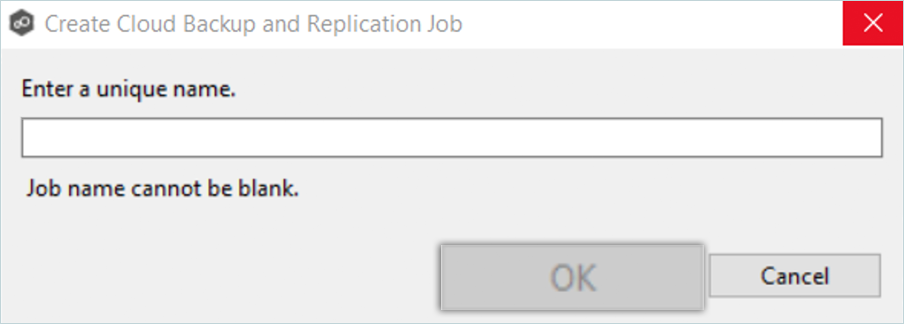
- Enter a name for the job in the dialog that appears and click OK.
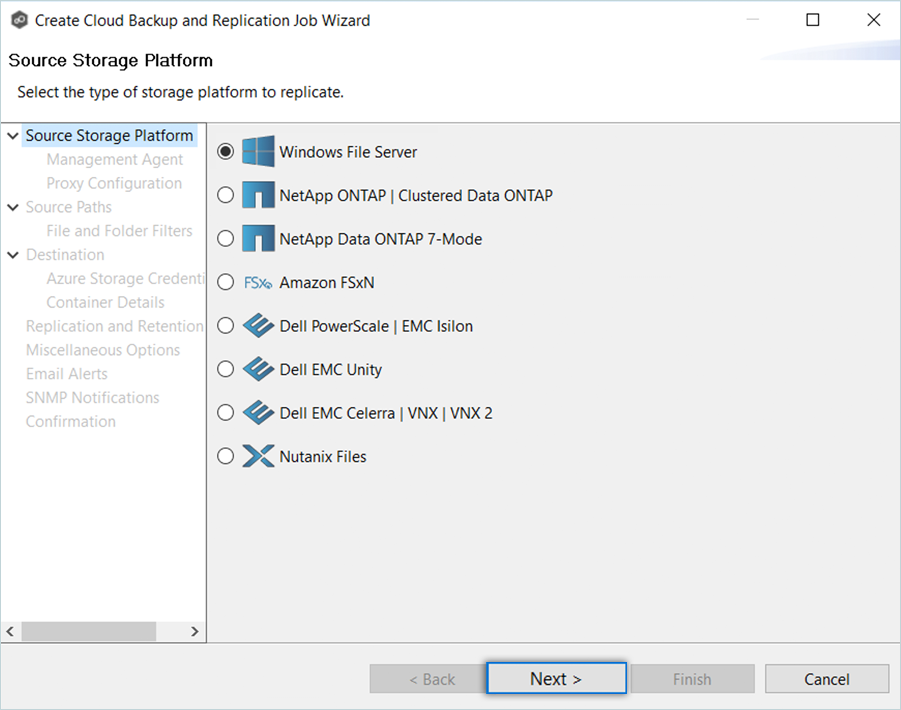
- On the Source Storage Platform page, select the type of storage platform you want to back up or replicate. Click Next to continue.
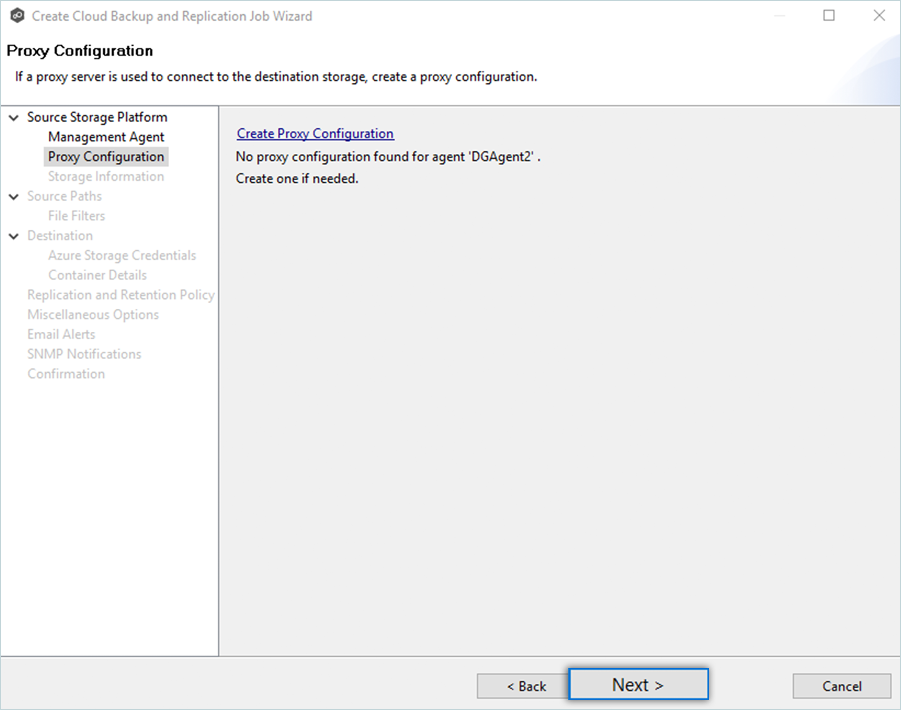
- Select the Management Agent from the list for the volume/share/folder you want replicated and click Next.
Note: Each storage device that you want to replicate must have a Peer Agent that manages that device. The Peer Agent that manages a device is known as its Management Agent.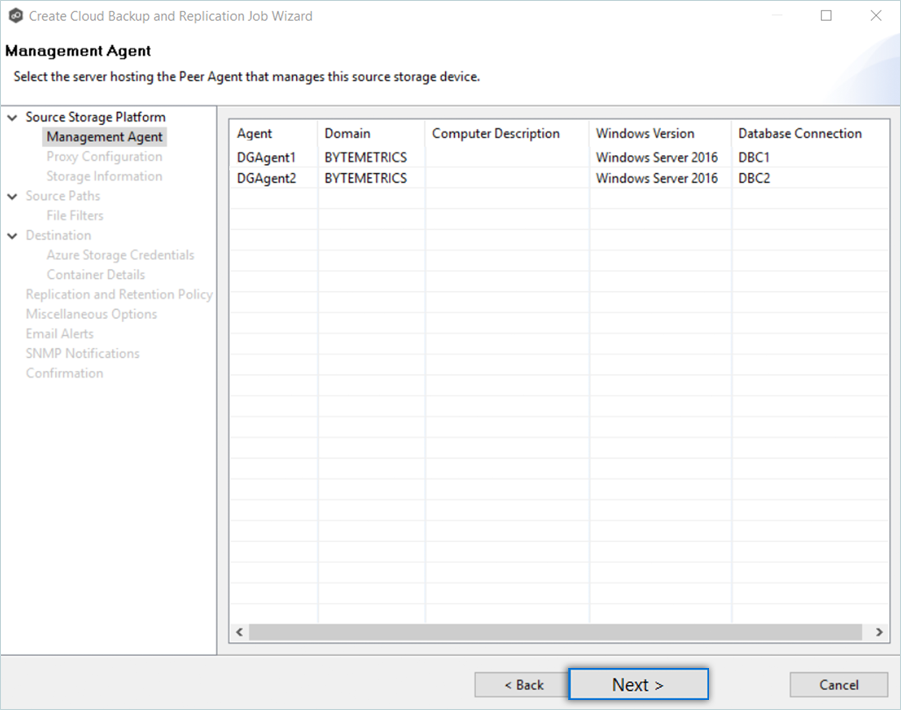
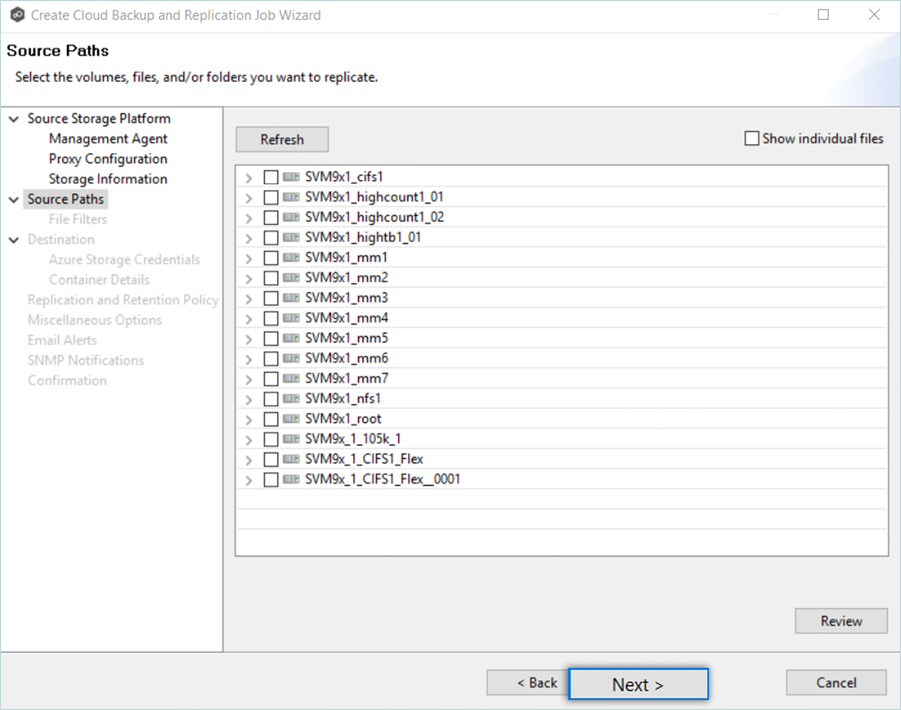
- Select the paths to the files/folders/volumes you want to replicate. Click Review to review your selections, and then click Next.
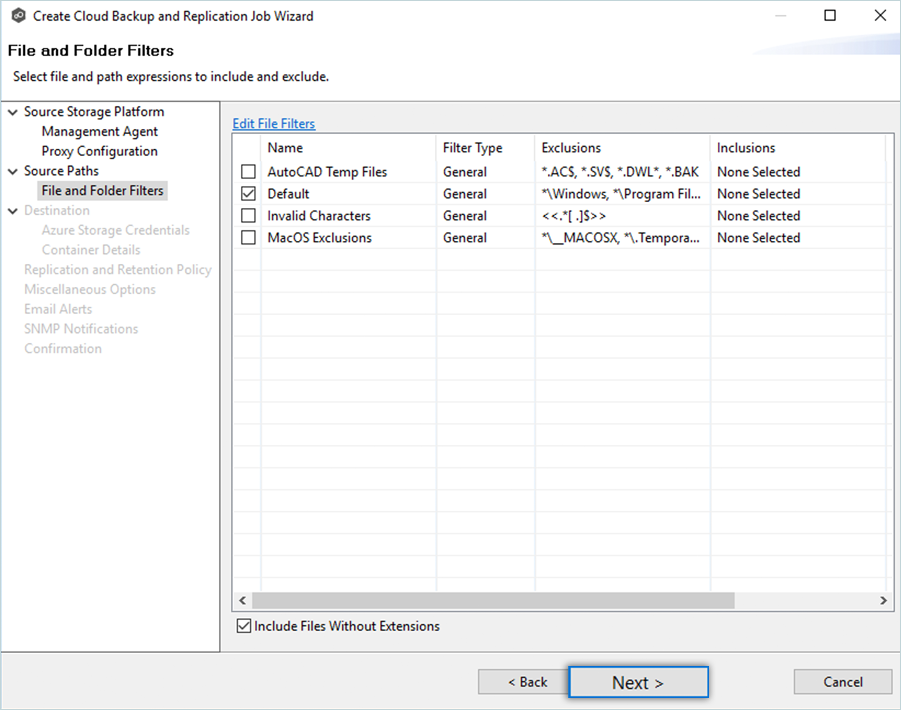
- Select the file and folder filters you want to apply to the job. Select the Include Files Without Extensions checkbox if you want to replicate files that do not have extensions. Click Next to continue.
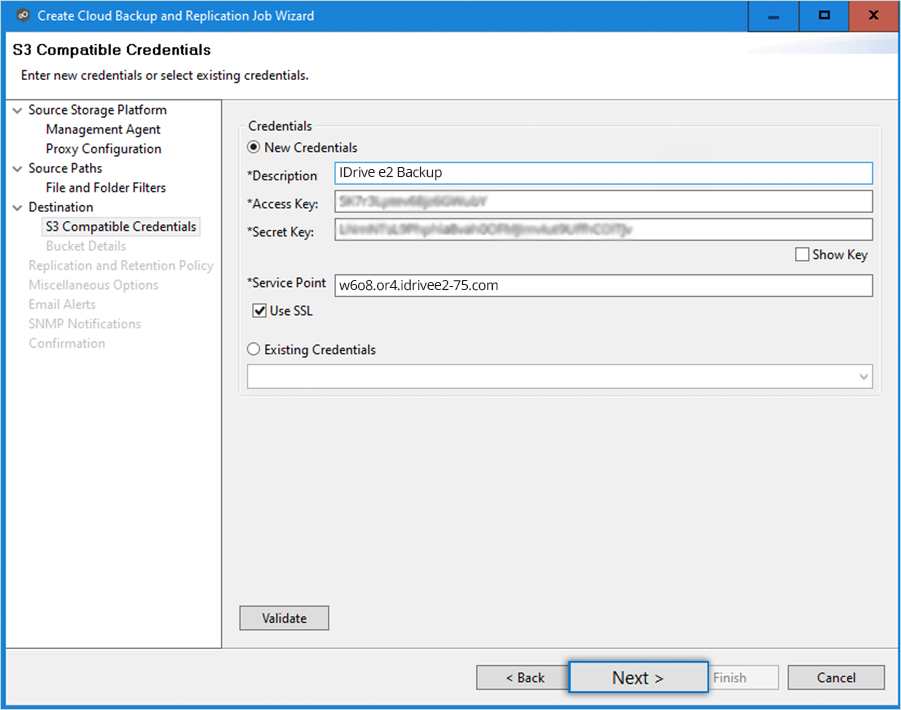
- On the Destination page, select S3 Compatible as the destination and click Next.

- Enter your IDrive e2 details as mentioned below.
- Enter a Description such as IDrive e2 cloud.
- Enter your IDrive e2 Access Key as Access Key.
- Enter your IDrive e2 Secret Key as Secret Key.
- Enter your IDrive e2 S3 endpoint as the Service Point.
- Select the Use SSL checkbox.
- Click Validate and then click Next.
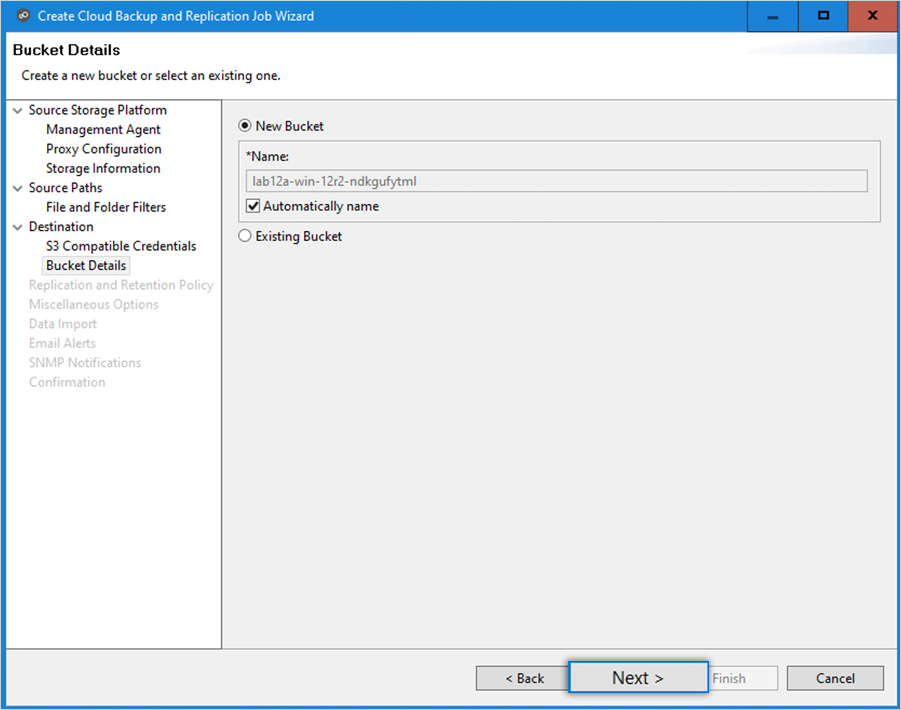
- In the Bucket Details window, select an existing bucket or create a new one by entering a name. Then click Next.
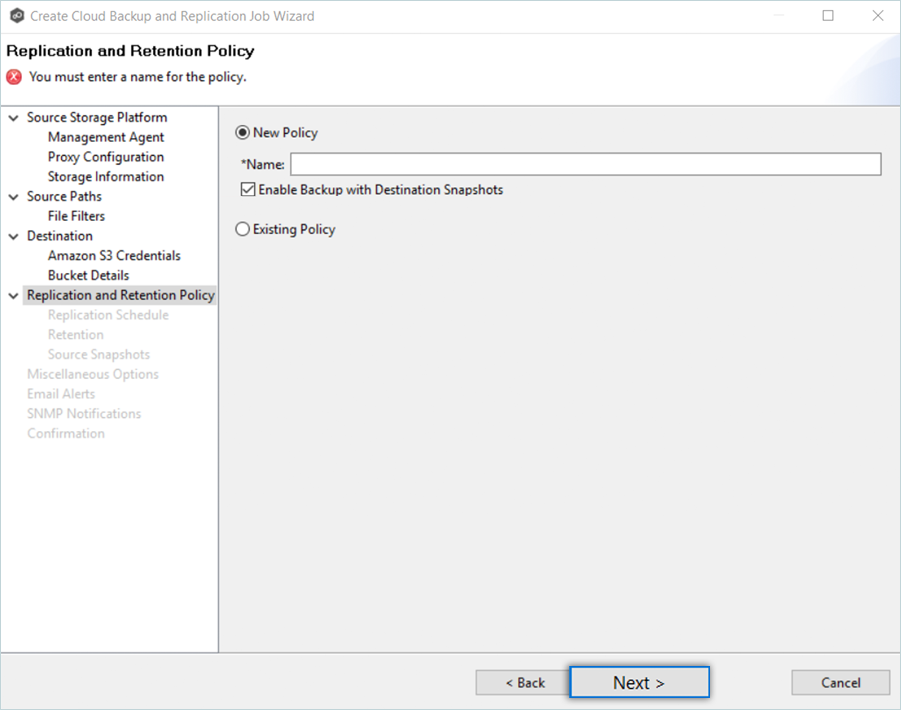
- On the Replication & Retention Policy window,
- Enter the Name for the New Policy.
- Select the Enable Backup with Destination Snapshot checkbox.
- Click Next.
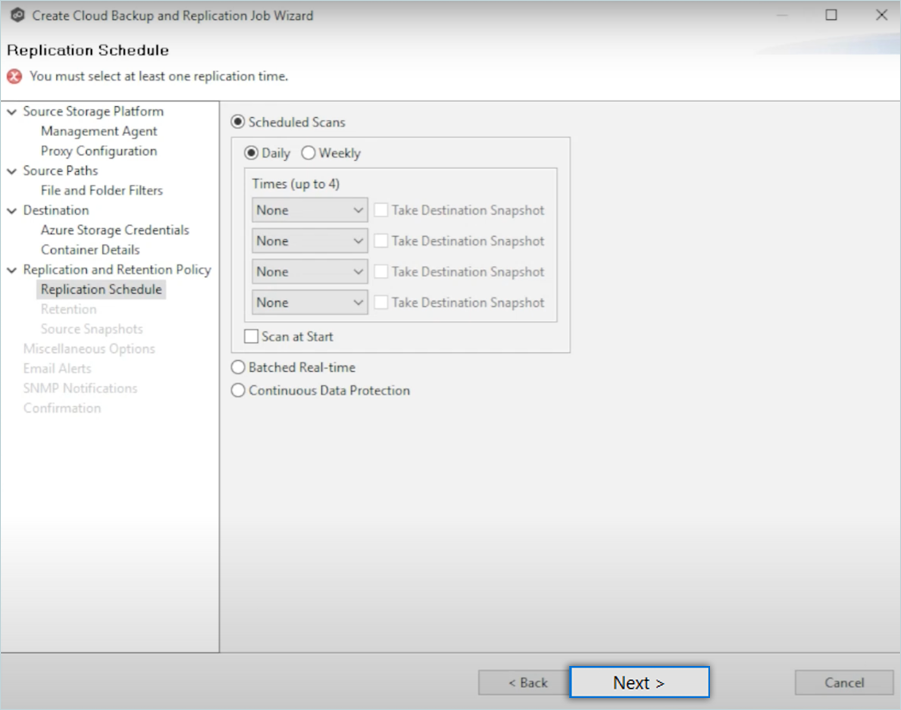
- On the Replication Schedule page, select the frequency of the replication. Click Next to continue.
- Select the retention options. Then click Next.

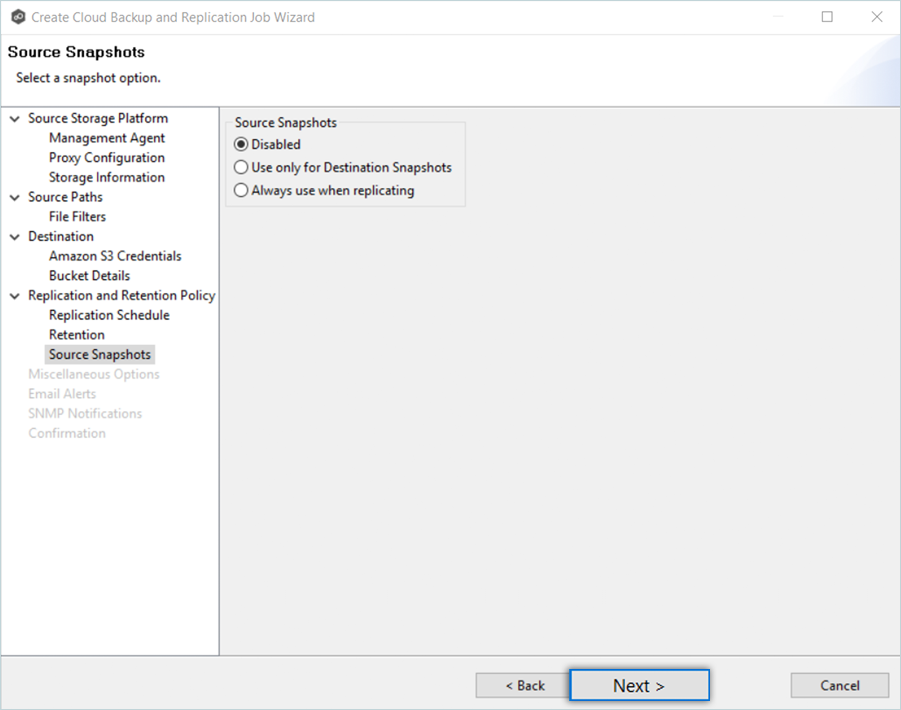
- Select the specific Source Snapshots option and click Next to continue.
- Select the Disabled option if you do not want to take source snapshots.
- Select the Use only for Destination Snapshots option when you want the source snapshot to be stored on the destination storage as the destination snapshot rather than an actual destination snapshot.
- Select the Miscellaneous Options and click Next.
- Owner – The NTFS Creator-Owner who owns the object (which is, by default, whoever created it).
- DACL – A Discretionary Access Control List identifies the users and groups that are assigned or denied access permissions on a file or folder.
- SACL - A System Access Control List enables administrators to log attempts to access a secured file or folder. It is used for auditing.

- On the Email Alerts window, click Select to select existing email alerts from the drop-down list. Click Ok and then click Next.
- Select an SNMP notification (optional) from the drop-down list. To disable, select None - Disabled. Click Next.

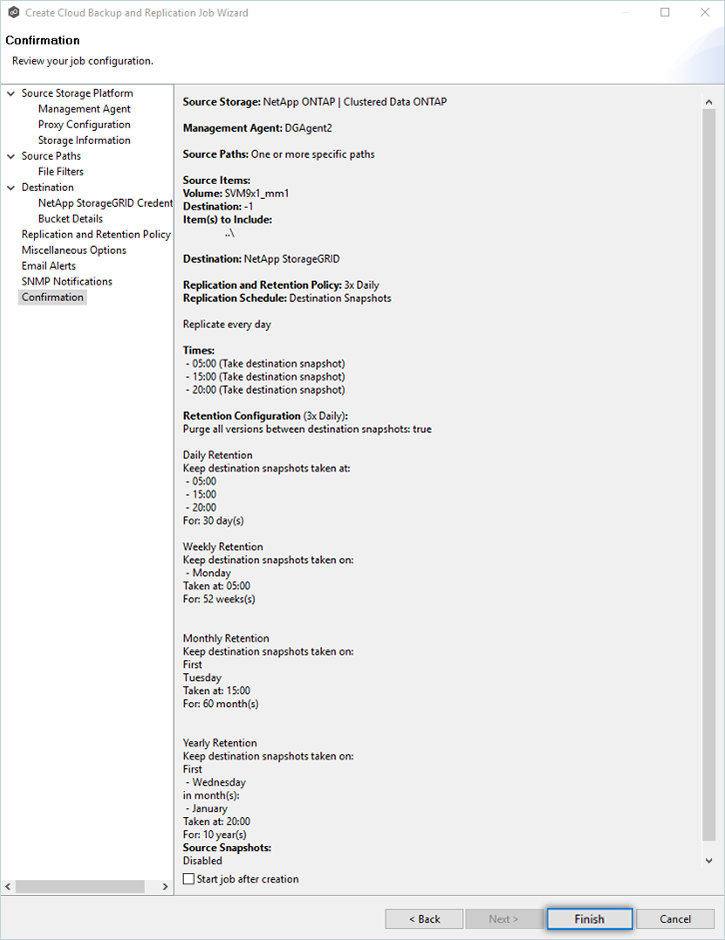
- Review the job configuration on the Confirmation page and select the Start job after creation checkbox. Then click Finish.
The job has now been started and is running successfully. The Summary tab in the Cloud Backup and Replication Job runtime view displays the status of the job.
Note: The data restoration process is managed by your backup software, which helps recover lost or compromised data. Each computing environment is unique, and factors such as data type, software settings, and system performance can impact the restoration process. If you encounter issues or have application-specific questions, please contact your backup software's technical support team for expert assistance.