Integrate Couchdrop with IDrive® e2, and Migrate Data from AWS S3 using Movebot
Couchdrop is a cloud-native platform that facilitates secure B2B file transfers and file-based automation, supporting a wide range of transfer protocols and cloud storage services without the need for infrastructure management. It offers compliance-ready security, no-code workflows, and scalable automation, making it an efficient solution for modern businesses to exchange and manage files. Integrating Couchdrop with IDrive® e2 provides a scalable, secure, and cost-effective cloud object storage solution for file management and automation, while Movebot enables smooth and reliable data migration from AWS S3 to IDrive® e2.
Prerequisites
Before you begin, ensure the following:
- An active IDrive® e2 account. Sign up here if you do not have one.
- A bucket in IDrive® e2. See how to create a bucket.
- Valid Access Key ID and Secret Access Key. Learn how to create an access key.
- A valid Couchdrop account and Movebot console.
Configure Couchdrop with IDrive® e2 using Movebot
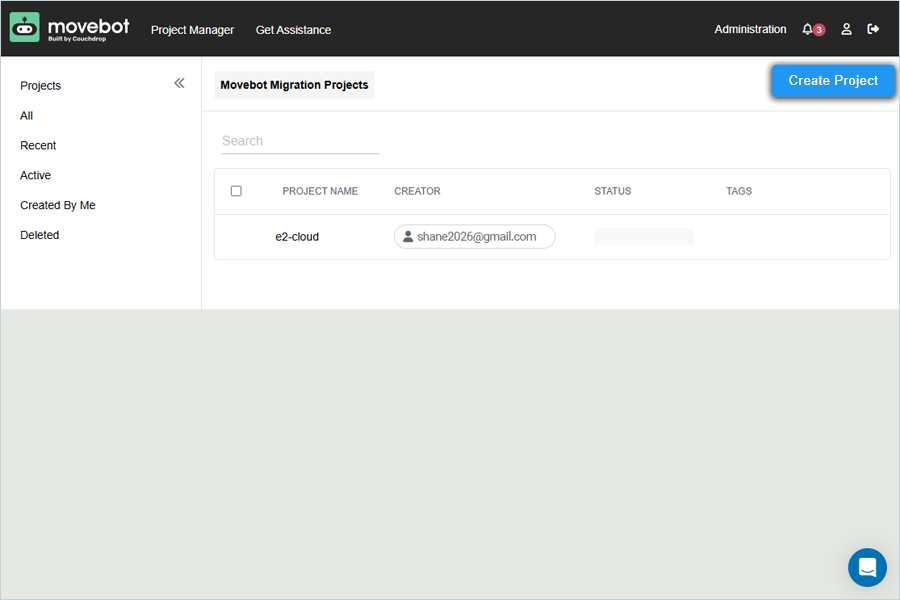
- Log in to the Movebot web console and click Project Manager.
- In the Projects screen, click Create Project.
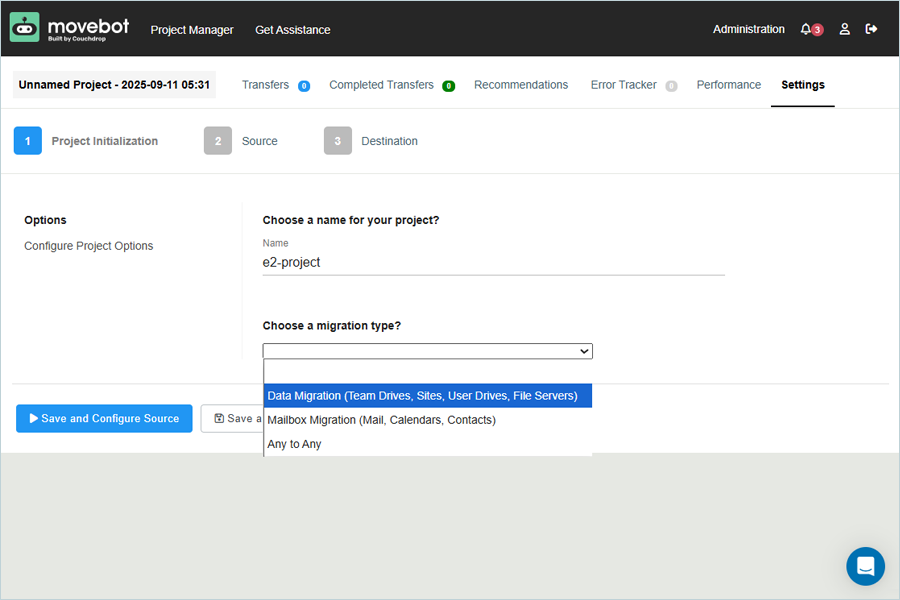
- In the Project creation window, enter a name for the project and select a migration type from the list. Click Save and Configure Source.
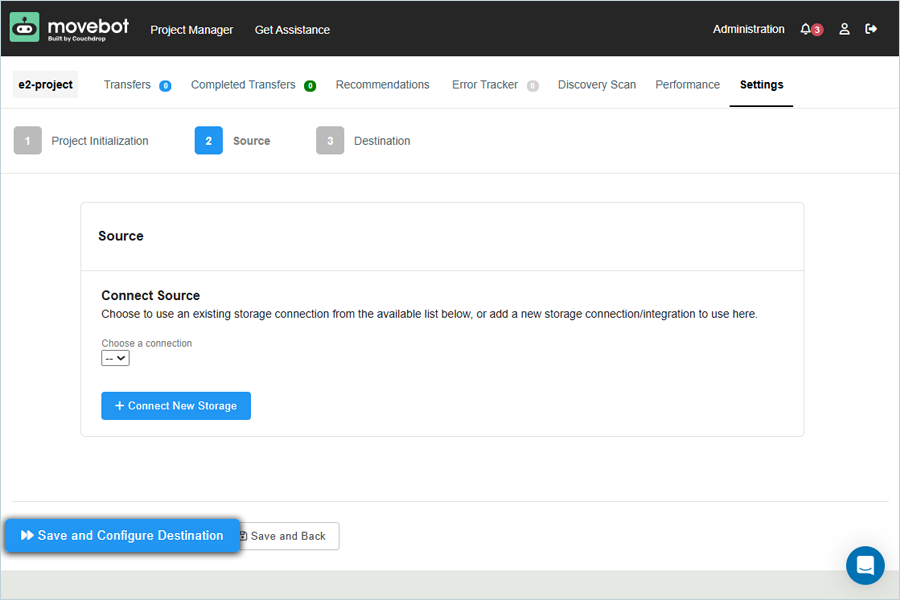
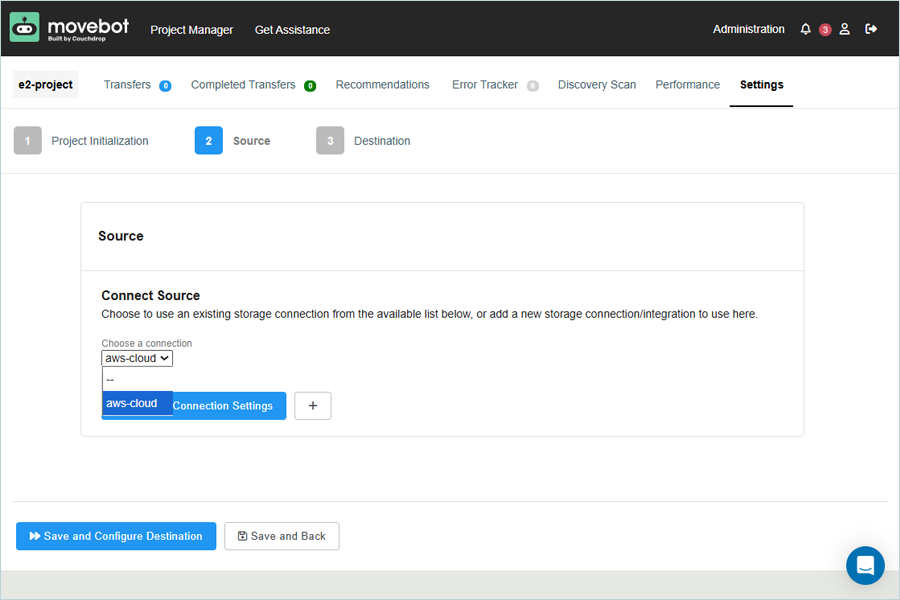
- In the Source tab, select your AWS S3 account as Source, then click Save and Configure Destination.
- In the Destination tab, select S3 Compatible as Connection Type.
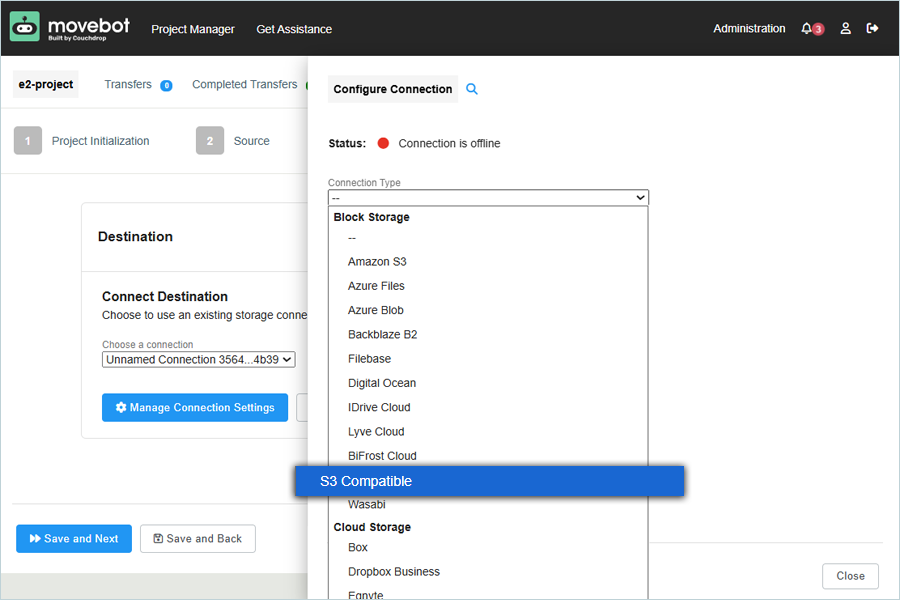
- After selecting S3 Compatible, enter your IDrive® e2 details as mentioned below.
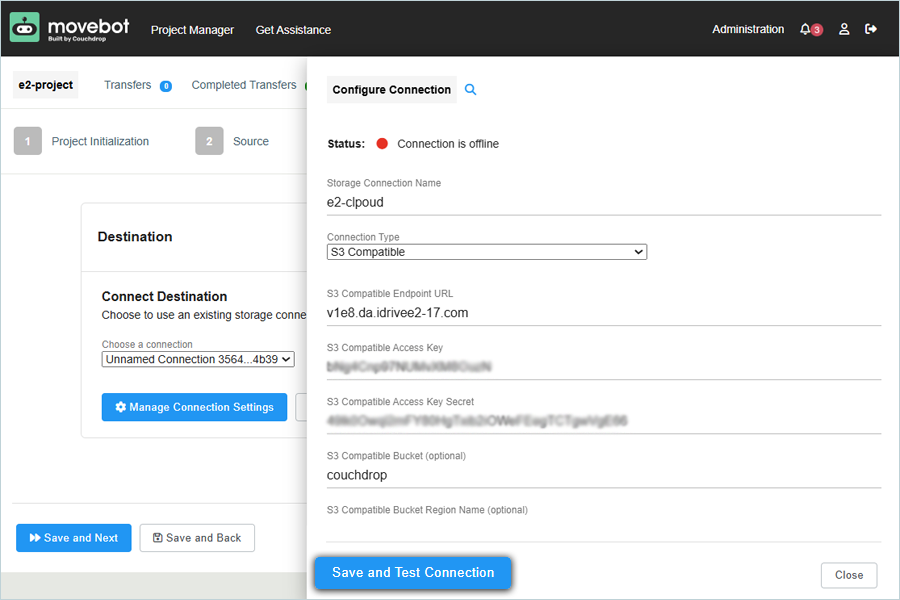
- nter a name for Storage Connection.
- Enter your IDrive® e2 S3 endpoint as S3 Compatible Endpoint URL.
- Enter your IDrive® e2 Access Key as S3 Compatible Access Key.
- Enter your IDrive® e2 Secret Key as S3 Compatible Access Key Secret.
- Enter your IDrive® e2 Bucket as S3 Compatible Bucket (Optional)
- Click Save and Test Connection.
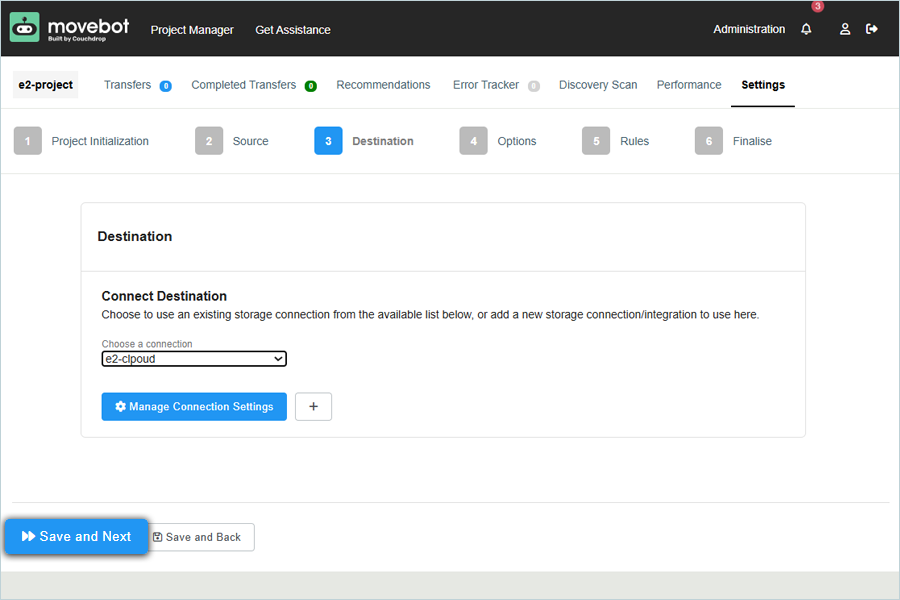
- Click Close once connected successfully.
- Select the added connection as the Destination from the list. Click Save and Next.
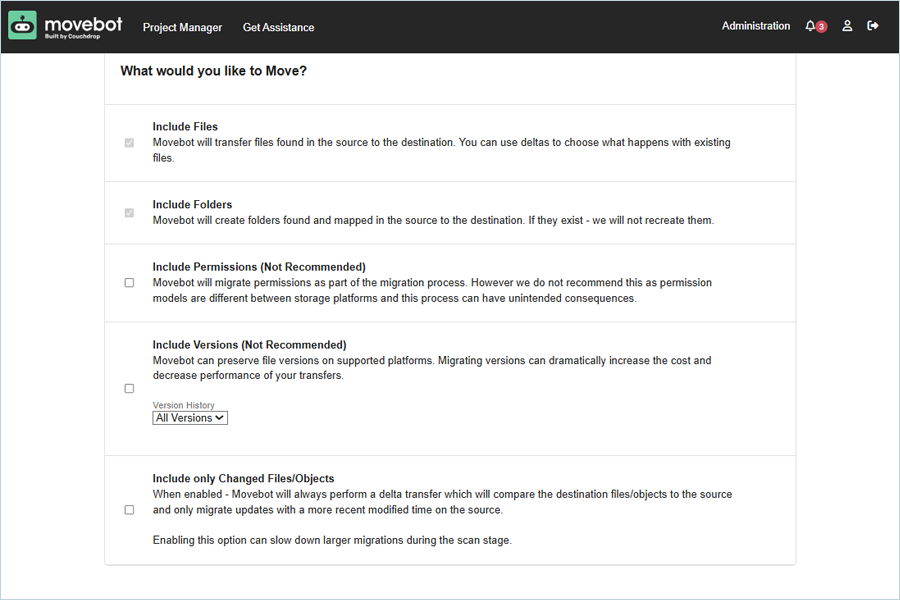
- Select what you would like to migrate and click Save and Continue.
- Set Rules as per the requirement and click Save and Finalize.
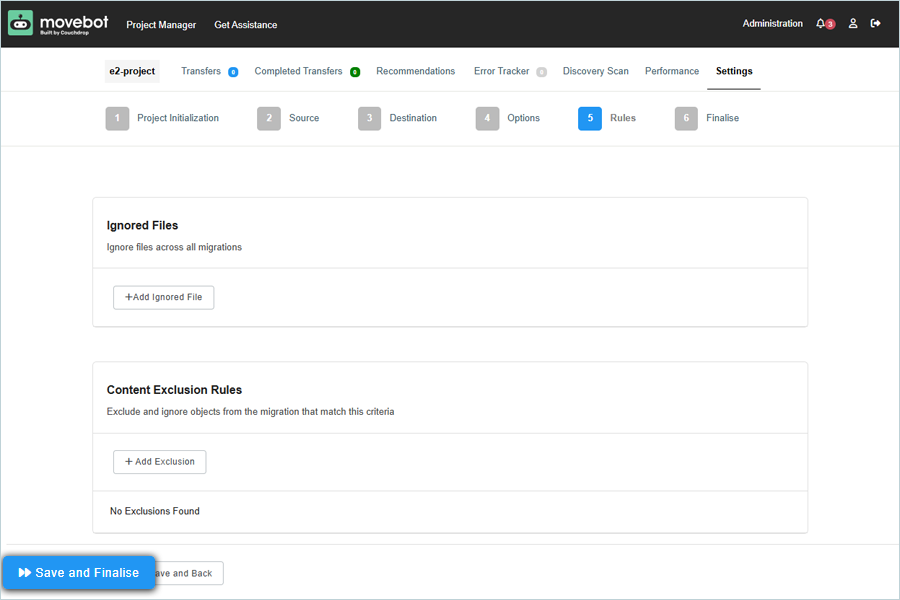
- Click Save and Exit.

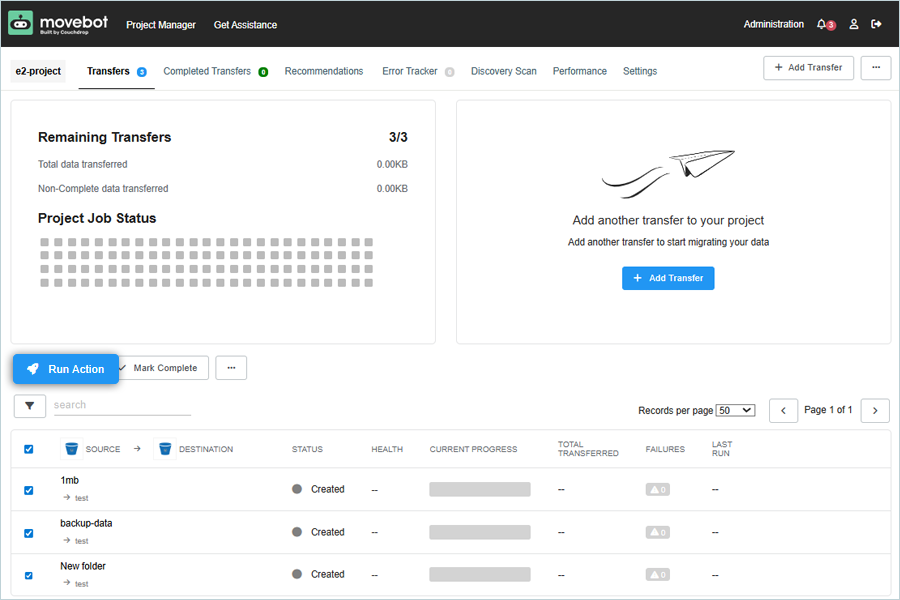
Add Transfer and Migrate Data from AWS S3
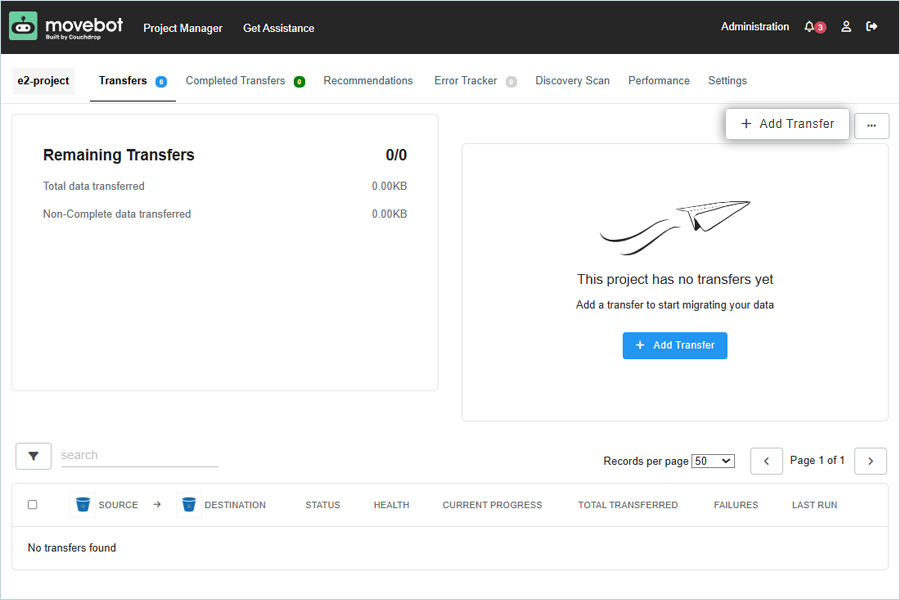
- Select Project and click Transfers in the menu.
- Click + Add Transfer.
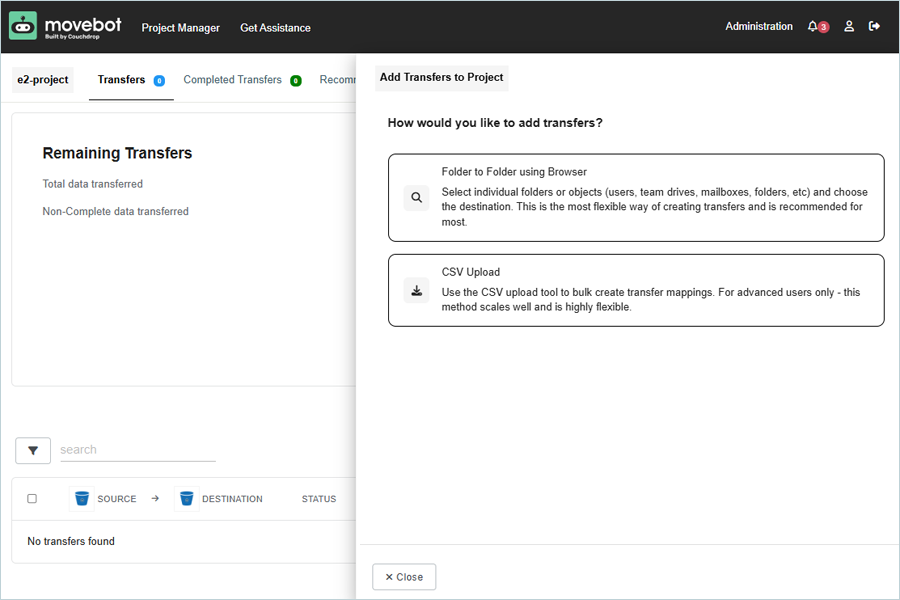
- Select the corresponding transfer type from the list.
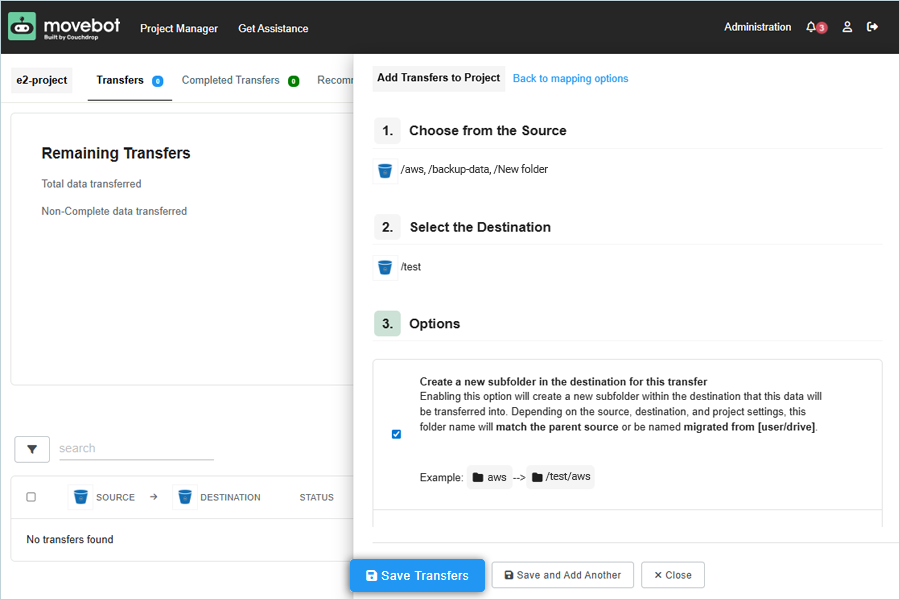
- Select Source and folder from AWS S3, then click Choose Destination.
- Select the Destination and folder from IDrive® e2, then select Options.
- Click Save Transfers.
- Select Transfer from the list after it has been added successfully by clicking the check box.
- Click Run Action to start Migration. The migration will begin. You can verify migrated data in your IDrive® e2 bucket, which is added as the destination.
Note: Data restoration is handled by your specific backup solution provider and is affected by multiple variables that are unique to your environment. For application-related enquiries/support, it is strongly recommended you seek guidance from the technical team of your backup solution provider.