Integrate Mediaflex with IDrive® e2
Mediaflex from TransMedia Dynamics (TMD) enables broadcasters, archives, and media organizations to manage digital and physical assets across acquisition, production, and delivery. Its modular, cloud-agnostic architecture supports automation, orchestration, and hybrid deployments. Integrating Mediaflex with IDrive® e2 adds a capable and scalable cloud object storage solution for efficient and secure content management.
Prerequisites:
Before you begin, ensure the following:
- An active IDrive® e2 account. Sign up here if you do not have one.
- A bucket in IDrive® e2. Learn how to create a bucket.
- Valid Access Key ID and Secret Access Key. Learn how to create an access key.
- Mediaflex release Q1 2024 and later.
- S3 compatible File Transfer Service.
The following steps can help you successfully integrate Mediaflex with IDrive® e2 cloud object storage.
Configure Mediaflex with IDrive® e2
- Log in to the Mediaflex workstation client.
- Click Tools in the header menu and then select Area / Device Configuration.

- Under Area/Device Configuration, select Cloud, right-click on an area, and then click Add New > Device.
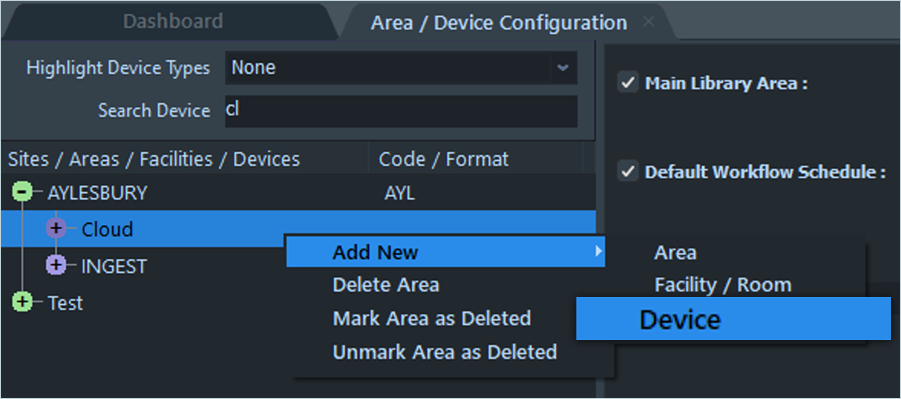
- Select S3 Compatible Storage as the Type and enter the following details.
- Provide a name for the device.
- Enter your IDrive® e2 Access Key as Access Key ID.
- Enter your IDrive® e2 Secret Key as Secret Access Key.
- Enter your IDrive® e2 S3 endpoint as the Service URL.
- Enter your IDrive® e2 bucket name as Bucket.
- Select Generic as Vendor.
- Click Save.
Now, your IDrive® e2 storage has been added as a Cloud Device

Add the Transfer.S3 Compatible Service
- Log in to UMS Manager in your preferred browser.
- Click the 3-dots (...) on the controller and select Add Service.
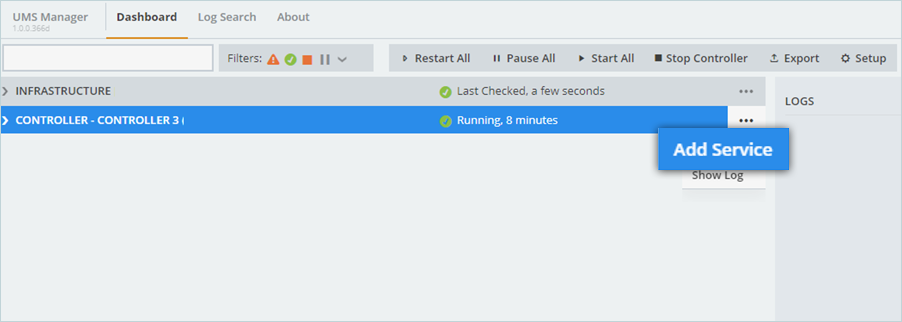
- Search for S3 Com and select Transfer.S3 Compatible from the list.

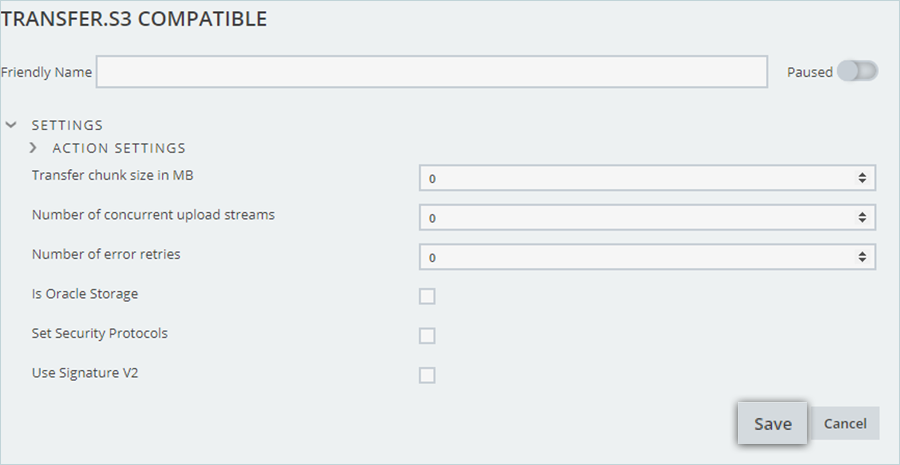
- Fill in the settings as required (you can leave them to use the default values). Click Save when done.
Configure a Data Move task in a Preset
- Log in to the Mediaflex workstation client.
- Select Workflow, then click on Workflow Designer.
- Add a Data Move task to the designer.
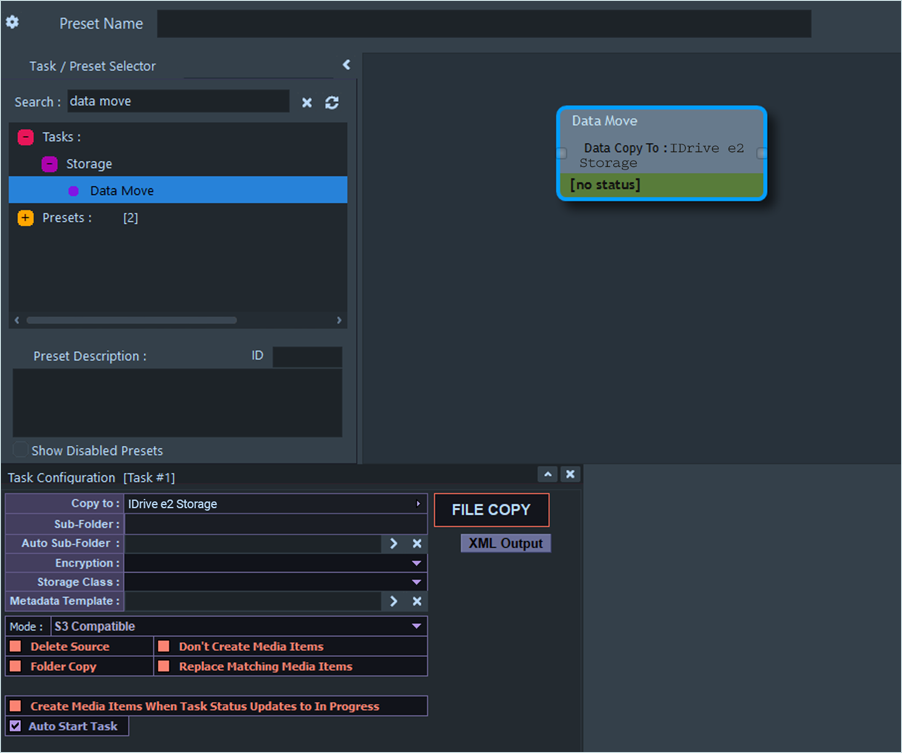
- Configure the task, selecting the IDrive® e2 Storage device created in Step 1 in the Copy To section.
- Save the preset.
Note: Data restoration is handled by your specific backup solution provider and is affected by multiple variables that are unique to your environment. For application-related enquiries/support, it is strongly recommended you seek guidance from the technical team of your backup solution provider.