Integrate FalconStor with IDrive® e2
FalconStor is a data management platform that delivers enterprise-grade backup, disaster recovery, and hybrid cloud data protection through its StorSafe, StorGuard, and StorSight solutions. It provides secure, high-performance backup, deduplication, and centralized management across diverse IT environments. Integrating FalconStor with IDrive® e2 extends these capabilities with a capable, scalable cloud object storage solution that facilitates systematic integration, cost optimization, and improved ransomware resilience.
Prerequisites
Before you begin, ensure the following:
- An active IDrive® e2 account. Sign up here if you do not have one.
- A bucket in IDrive® e2. See how to create a bucket.
- Valid Access Key ID and Secret Access Key. Learn how to create an access key.
- A valid FalconStor account.
Configure FalconStor with IDrive® e2
- Launch FolconStor.
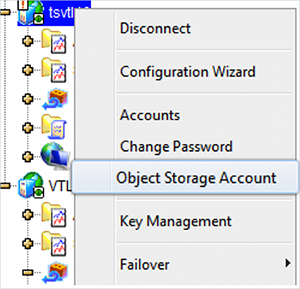
- Right-click on the VTL server and select Object Storage Account.
- In the Object Storage Account Management window, select Generic S3 as the Provider.

- To add cloud storage, enter the following details.
- Enter Account Name (e.g., IDrive® e2)
- Enter your IDrive® e2 Access Key as the Access Key.
- Enter your IDrive® e2 Secret Key as the Secret Key.
- Enter your IDrive® e2 S3 endpoint as Endpoint.
- Enter your preconfigured IDrive® e2 bucket as the Bucket Name.
- Optionally enable End-to-End Encryption.
- Click OK.

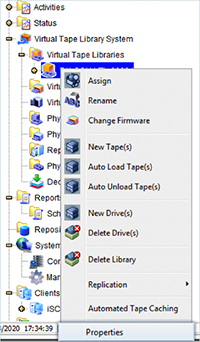
- From the VTL console, right-click a Virtual Tape Library and select the Properties option.
- Enable the Auto Archive/Replication/Migration option under the Auto Archive/Replication/Migration Tab.
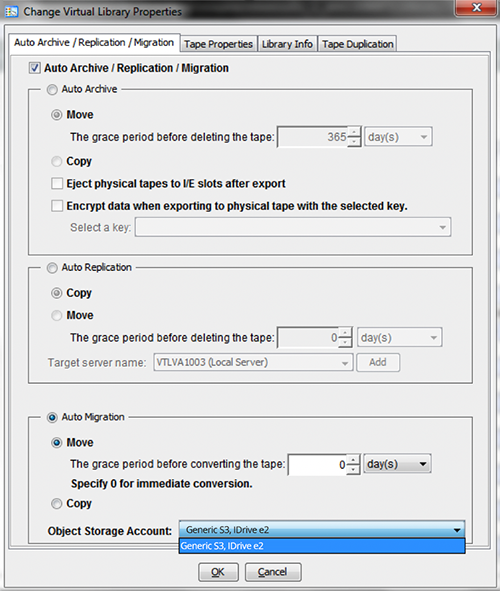
- Select your IDrive® e2 storage as Object Storage Account (Option: adjust the settings for the Auto Migration).

- Migrate Virtual Tape Data to Object Storage.
- Migration is automatically triggered when a virtual tape is ejected to the virtual vault.
- To manually migrate virtual tape data to object storage, right-click a virtual tape in the virtual vault and select the Migrate to Object Storage option.
- Tape Migration can be configured in Copy Mode or Move Mode.
- In Move Mode, a source tape will be converted to stubs after the migration job has completed successfully and the grace period has been reached. A grace period from 1 to 30 days can be specified. To convert tape to stub tape immediately, set the grace period to 0.
- In Copy Mode, the source tapes stay as migrated tapes. It has the option to manually convert to stub tape.
Note: Data restoration is handled by your specific backup solution provider and is affected by multiple variables that are unique to your environment. For application-related enquiries/support, it is strongly recommended you seek guidance from the technical team of your backup solution provider.