Integrate eMAM with IDrive® e2
eMAM is a media asset management platform that helps organizations organize, manage, and share digital media across local, cloud, and hybrid environments. It provides an intuitive web interface, integrations with popular editing tools, metadata-driven search, collaborative review workflows, and archive management to speed production and remote collaboration. Integrating eMAM with IDrive® e2 extends those capabilities with a capable, scalable cloud object storage solution that facilitates systematic integration, secure archiving, and efficient sharing of media assets.
Prerequisites
Before you begin, ensure the following:
- An active IDrive® e2 account. Sign up here if you do not have one.
- A bucket in IDrive® e2. See how to create a bucket.
- Valid Access Key ID and Secret Access Key. Learn how to create an access key.
- eMAM version 5.1
- eMAM super admin console access
The following steps can help you successfully integrate eMAM with IDrive® e2 cloud storage.
Configure eMAM with IDrive® e2
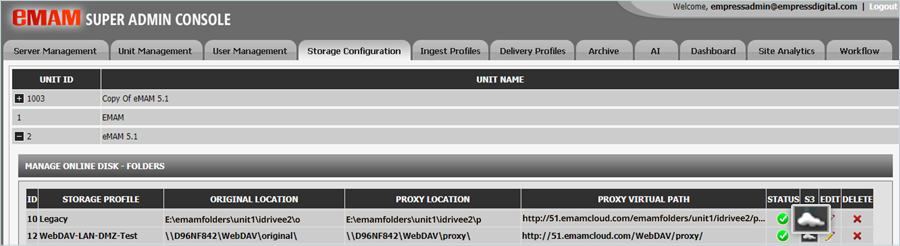
- Log in to the eMAM Super admin console.
- Navigate to Storage Configuration. Under MANAGE ONLINE DISK - FOLDERS, click the S3 cloud icon (as shown below) to enter IDrive® e2 configurations.
- In the MANAGE CLOUD STORAGE FOR ORIGINAL window, enter the following IDrive® e2 storage details.
- Select the Cloud Storage Type as Others.
- Enter your IDrive® e2 S3 endpoint as the Service URL
(https://v1e8.da.idrivee2-17.com). - Enter your IDrive® e2 Access Key as the Access Key.
- Enter your IDrive® e2 Secret Key as the Secret Key.
- Select your IDrive® e2 bucket from the Bucket Name list and click CONNECT (Bucket for Storage).
After connecting, the Cloud URL will be displayed with a valid E2 bucket.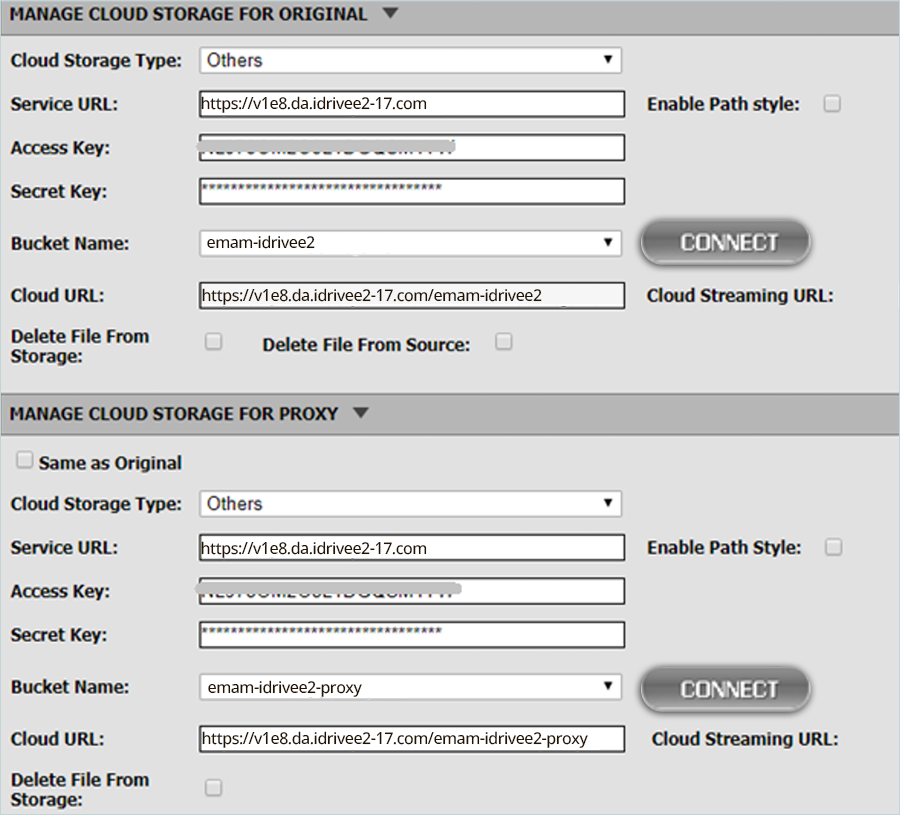
- In the Manage Cloud Storage window Proxy, enter the following IDrive® e2 storage details,
- Select Cloud Storage Type as Others.
- Enter your IDrive® e2 S3 endpoint as Service URL
(https://v1e8.da.idrivee2-17.com). - Enter your IDrive® e2 Access Key as Access Key.
- Enter your IDrive® e2 Secret Key as Secret Key.
- Select your IDrive® e2 bucket from the Bucket Name dropdown and click CONNECT (Bucket for Proxy).
After connecting, the Cloud URL will be visible with a valid e2 bucket.
Add IDrive® e2 as an Archive Platform in eMAM
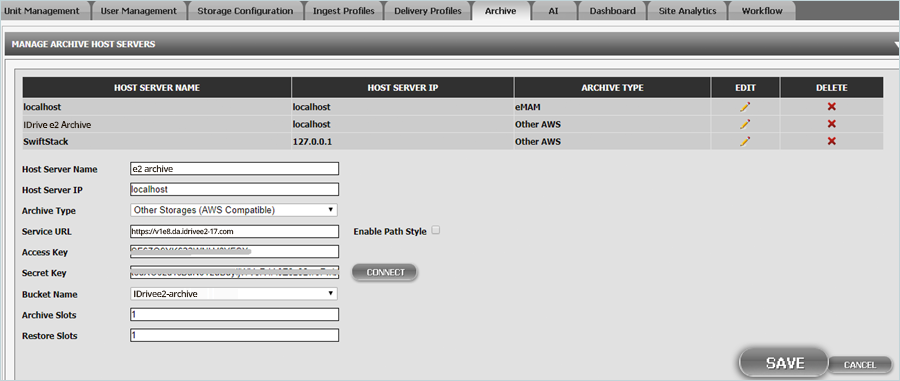
- Navigate to the Archive tab, under MANAGE ARCHIVE HOST SERVERS.
- To add IDrive® e2 as an Archive platform in the eMAM system, enter the following details.
- Enter the HOST SERVER NAME (e.g., e2 archive).
- Enter the HOST SERVER IP.
- Select Other Storage Type (AWS Compatible) as ARCHIVE TYPE.
- Enter your IDrive® e2 S3 endpoint as the Service URL.
- Enter your IDrive® e2 Access Key as Access Key.
- Enter your IDrive® e2 Secret Key as Secret Key and click CONNECT (Bucket for Archive).
- Select your IDrive® e2 bucket from the Bucket Name dropdown.
- Keep the default value for Archive Slots and Restore Slots as 1.
- Click SAVE.
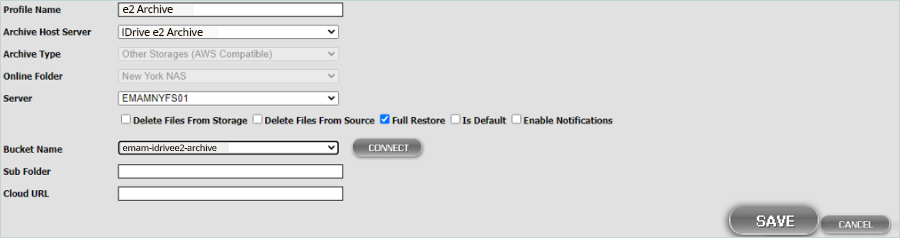
- Under Manage Archive profiles, enter the following details to create the IDrive® e2 Archive Profile.
- Enter the Profile Name for your IDrive® e2 Archive.
- Select your IDrive® e2 Archive Host as the Archive Host Server (Created in the previous Step).
- Select the eMAM Server that will process the archive request.
- Select your IDrive® e2 bucket created for the Archive.
- Enter the Sub Folder name, which is inside your e2 bucket.
- Click SAVE.
- Delete Files From Storage – Checkbox: If enabled, files from the storage will be deleted upon archive.
- Delete Files From Source (Check box): If enabled, files from the source will be deleted upon archive.
- Full Restore (Check box): If enabled, files can be fully restored.
- Is Default (Checkbox): Enable this checkbox if this profile is the default archive profile for the original folder. There will be multiple archive profiles for the original folder. Default profile will be used to archive the asset if there is no profile selection option, like immediate archive.
- Enable Notifications (Checkbox): If enabled, a notification email will be sent to the email address entered in the text box.
Note:
Note: IDrive® e2 Super Admin configurations are now complete and ready for use in your storage and archive workflows.
Note: Data restoration is handled by your specific backup solution provider and is affected by multiple variables that are unique to your environment. For application-related enquiries/support, it is strongly recommended you seek guidance from the technical team of your backup solution provider.