Integrate Dropzone with IDrive® e2
Dropzone is a productivity app for Mac that sits in the menu bar, helping users streamline tasks like file transfers, app launching, and content sharing with its customizable drag-and-drop grid and Drop Bar for temporary storage. It supports automation and can be extended with downloadable actions or scripts, making it a versatile tool for boosting efficiency and decluttering the desktop. Integrating Dropzone with IDrive® e2 extends these capabilities with a scalable, secure, and cost-effective cloud object storage solution, enabling systematic file transfers and efficient workflow automation directly from your device.
Prerequisites
Before you begin, ensure the following:
- An active IDrive® e2 account. Sign up here if you do not have one.
- A bucket in IDrive® e2. See how to create a bucket.
- Valid Access Key ID and Secret Access Key. Learn how to create an access key.
- A valid Dropzone account.
Configure Dropzone with IDrive® e2
- Install and launch the Dropzone application.
- Click Add Grid to add new storage.
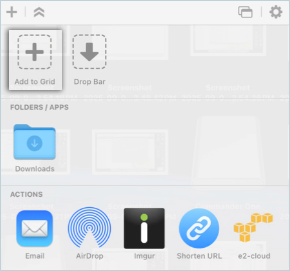
- Select Amazon S3 to add an e2 connection.

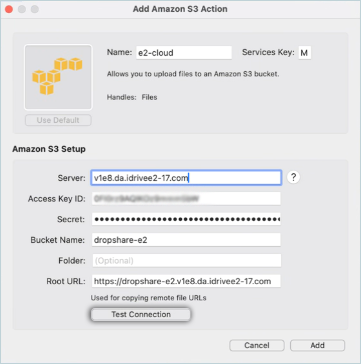
- Enter your IDrive® e2 details as mentioned below.
- Enter a name for the connection.
- Enter your IDrive® e2 S3 endpoint as Server.
- Enter your IDrive® e2 Access Key as Access key ID.
- Enter your IDrive® e2 Secret Key as Secret.
- Enter your IDrive® e2 bucket as Bucket name.
- Click Test Connection.
- Click OK. The test connection has now been added successfully.
Note: You can add multiple connections from the same bucket or choose different buckets.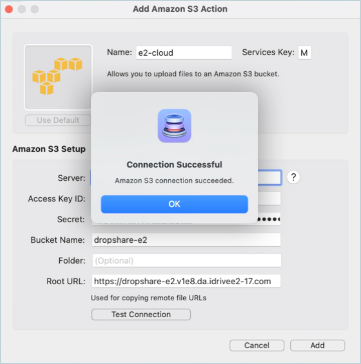
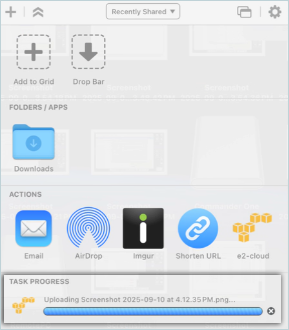
- Finally, drop and share files with DropZone. Drag a file onto the menu item and then onto the IDrive® e2 S3 destination to share it.
Note: Data restoration is handled by your specific backup solution provider and is affected by multiple variables that are unique to your environment. For application-related enquiries/support, it is strongly recommended you seek guidance from the technical team of your backup solution provider.