Configure Arctera Backup Exec with IDrive® e2
Integrate Arctera Backup Exec with IDrive® e2 to securely backup and restore data using S3-compatible cloud storage. This guide covers configuring a cloud instance, creating and running backup jobs, and restoring data, so you can easily extend your Backup Exec environment with scalable, reliable IDrive® e2 cloud storage.
Prerequisites
Before you begin, ensure the following:
- An active IDrive® e2 account. Sign up here if you do not have one.
- A bucket in IDrive® e2. See how to create a bucket.
- Valid Access Key ID and Secret Access Key. Learn how to create an access key.
- A valid Arctera Backup Exec account.
Integrate IDrive® e2 with Arctera Backup Exec
- Launch Arctera Backup Exec.
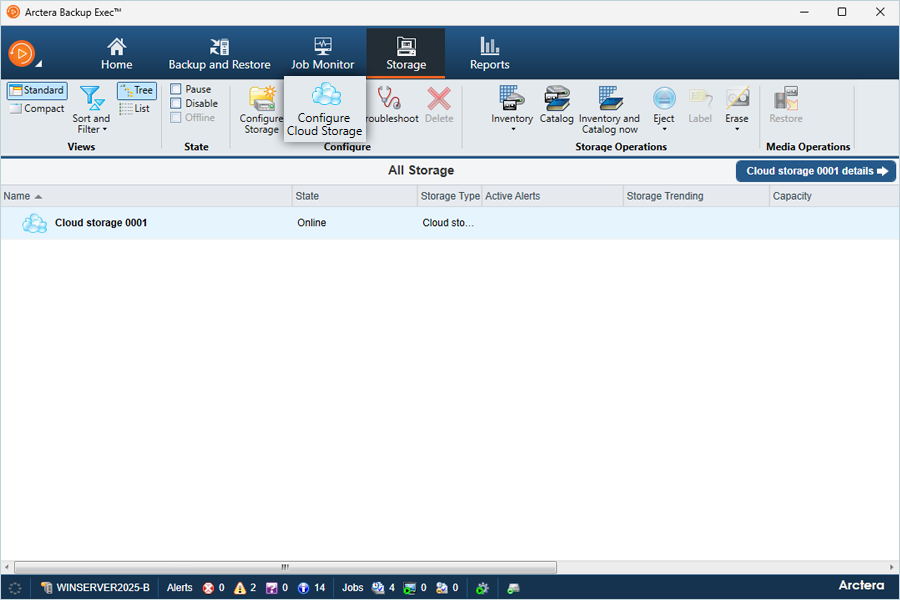
- Go to Console > Storage > Configure Cloud Storage.
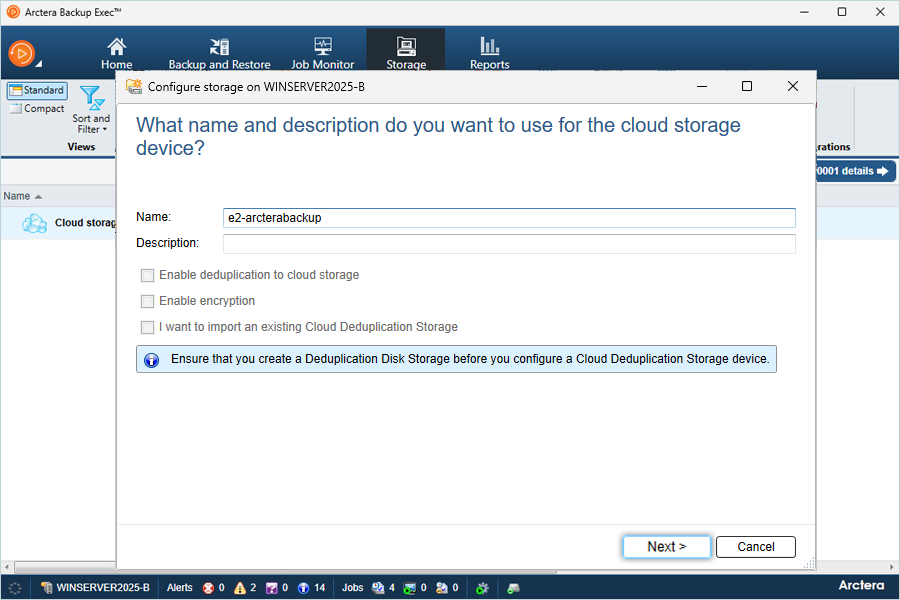
- Enter a Name and Description for the storage, then click Next.
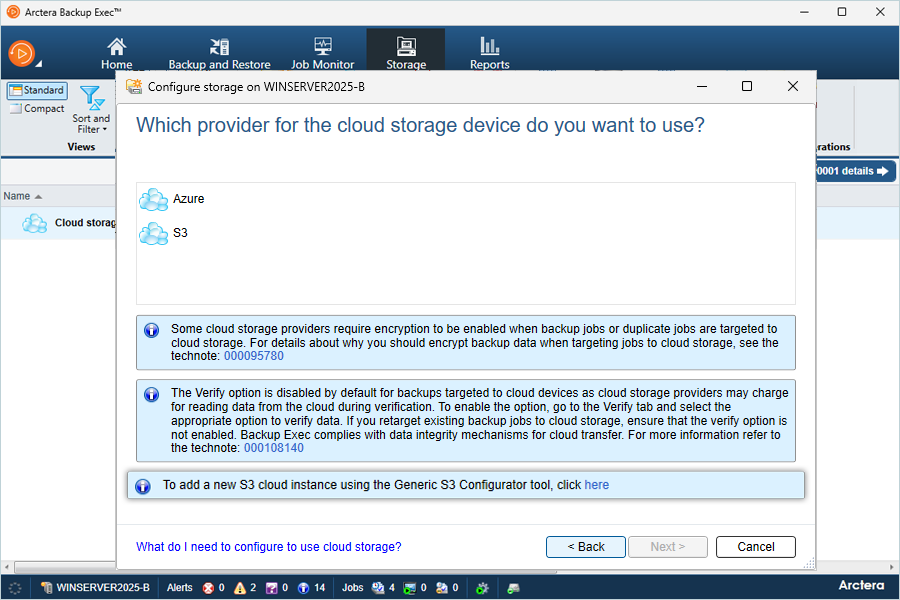
- In the Cloud Storage Configuration wizard, click the information box to configure the cloud storage provider.
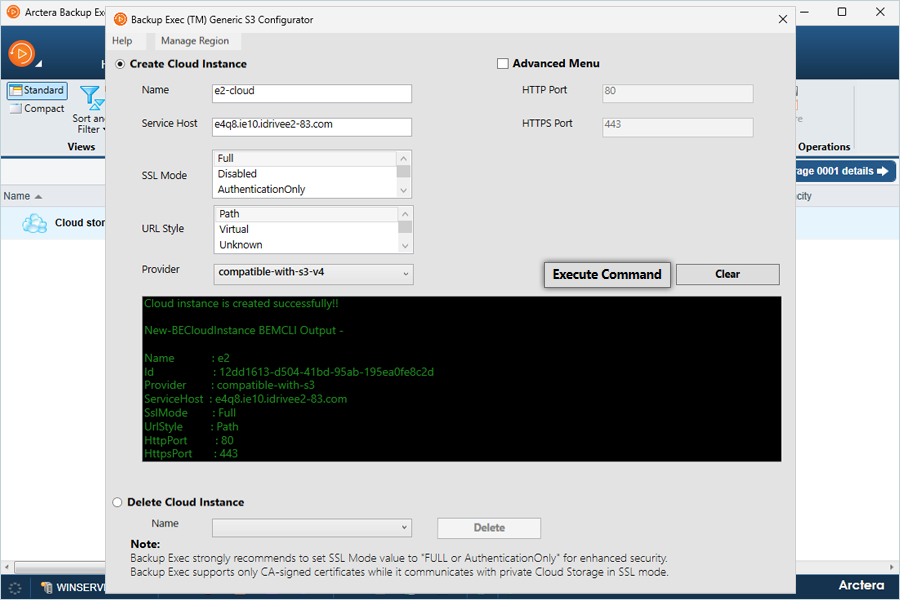
- In the Configurator, provide the following details:
- Select Create Cloud Instance.
- Enter a name for the cloud instance.
- Enter your IDrive® e2 endpoint as the Service Host.
- Set SSL Mode to Full and URL Style to Path.
- Select the provider (choose based on your requirement - IDrive® e2 supports both options).
- Click Execute Command. Once executed, close the tab.
Click here to learn about adding Root & Intermediate Certificates to Backup Exec
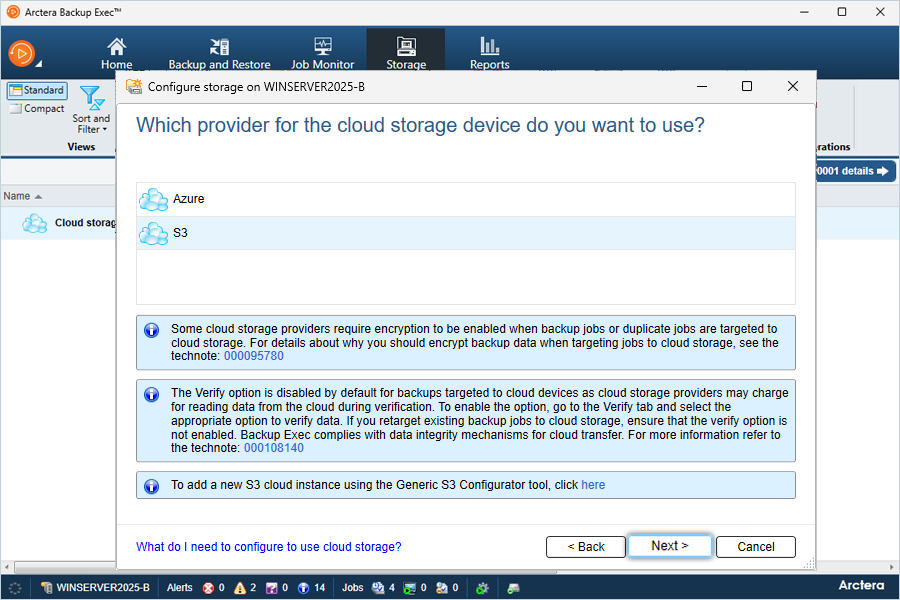
- In the Cloud Storage configuration wizard, select S3 and click Next.
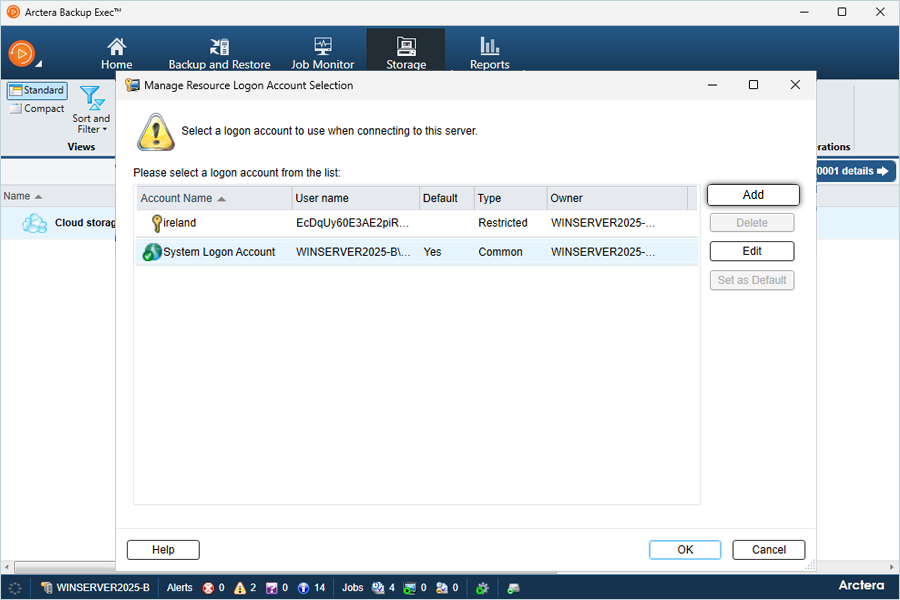
- Select the cloud storage provider you just defined and click Add/Edit.
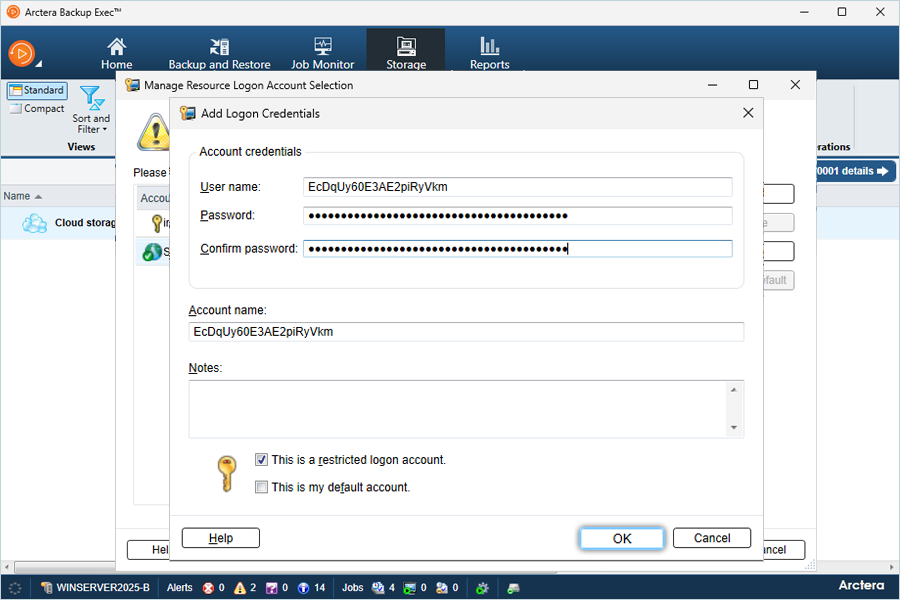
- Click Add to create a new login account, then enter:
- Username: Your IDrive® e2 Access Key
- Password / Confirm Password: Your IDrive® e2 Secret Key
- Click OK.
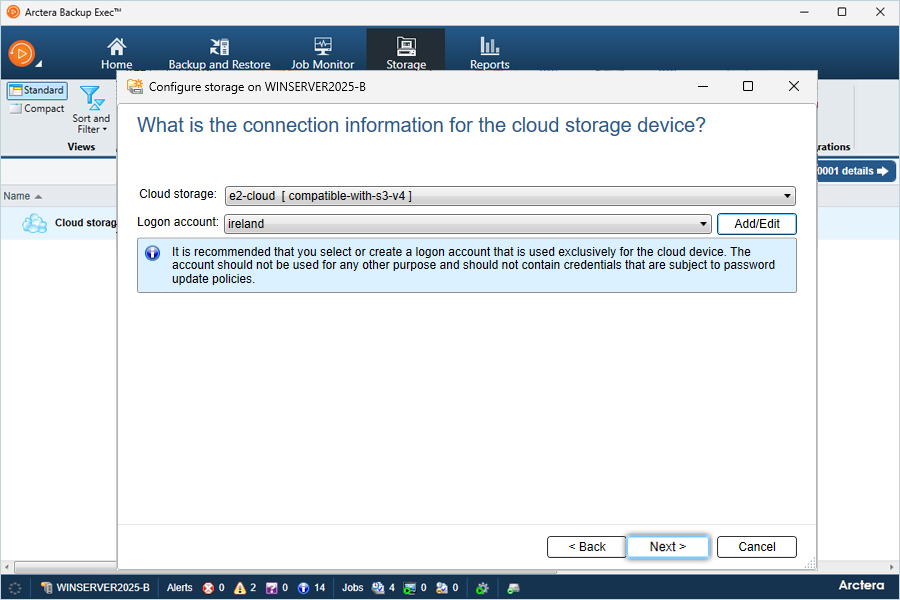
- After selecting the Cloud Storage and Logon Account, click Next.
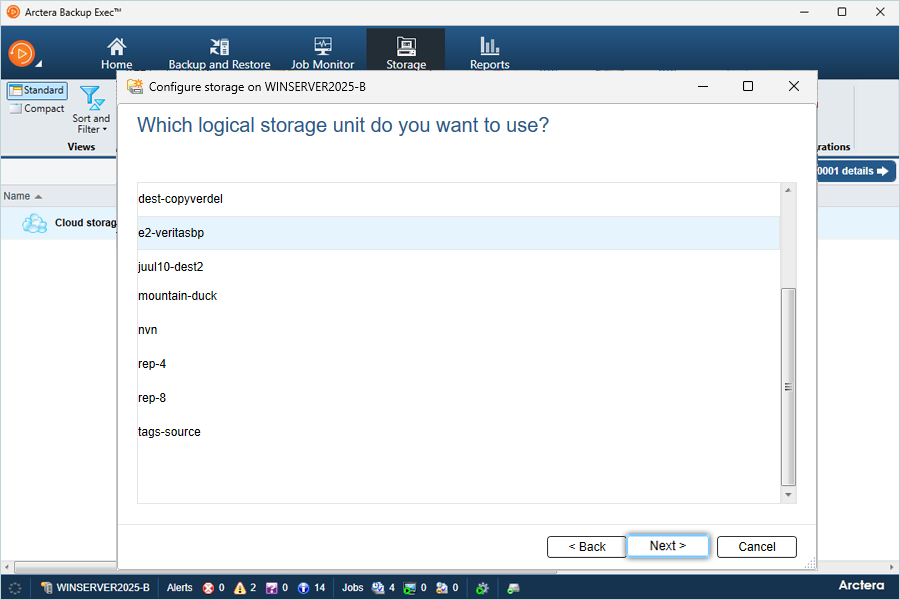
- Select your IDrive® e2 bucket as the destination and click Next.
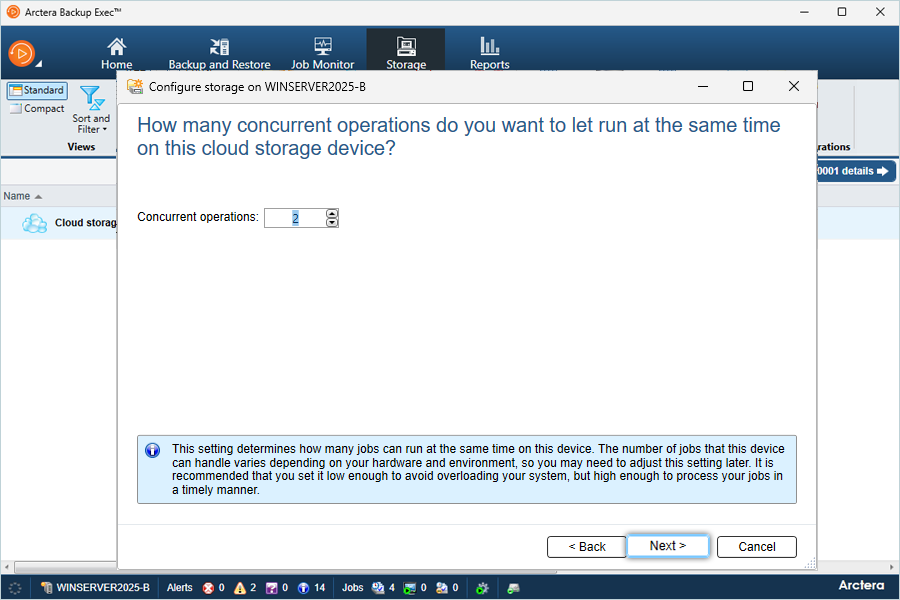
- Keep 2 as the default concurrent operations and click Next.
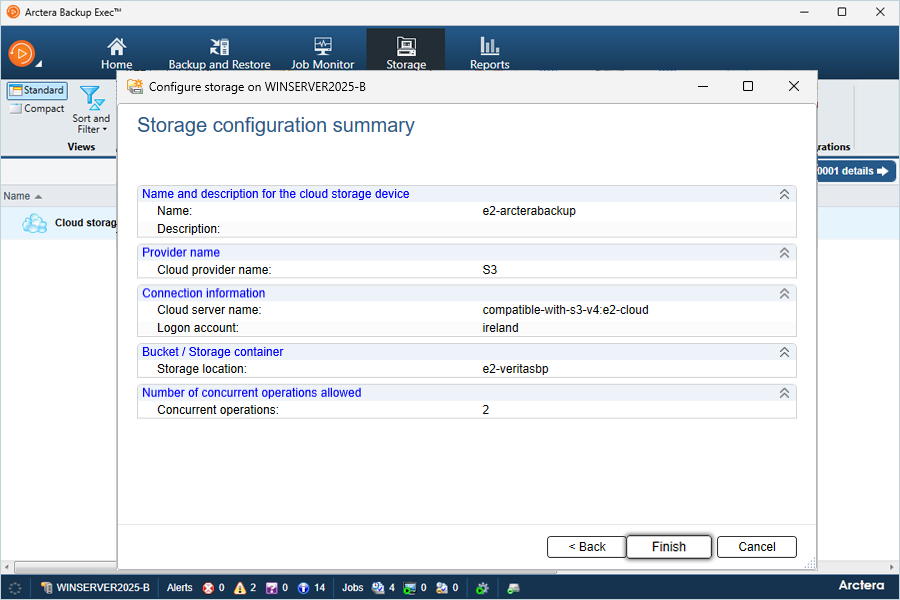
- Review the storage configuration summary, then click Finish.
- Restart your Backup Exec Services to apply the changes.

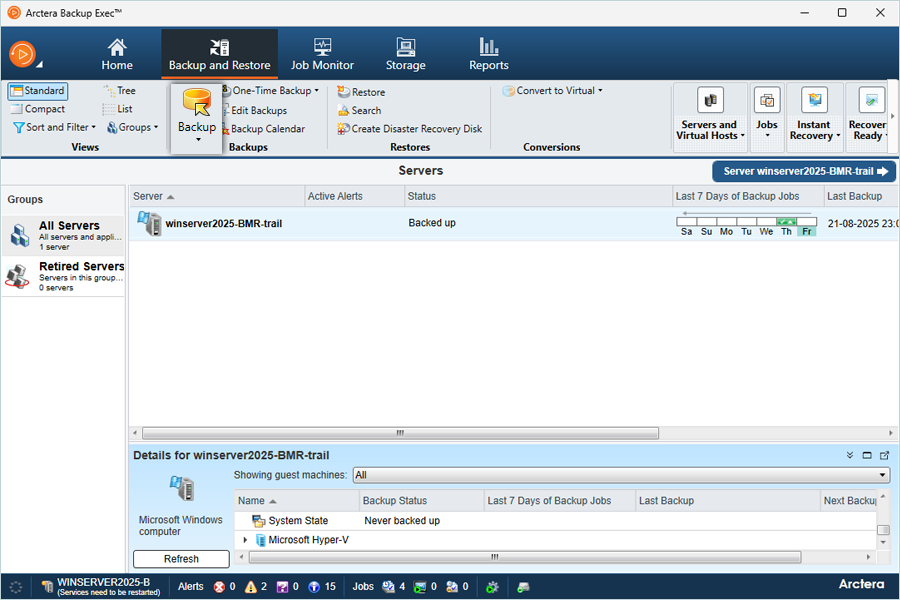
Create and run a backup job
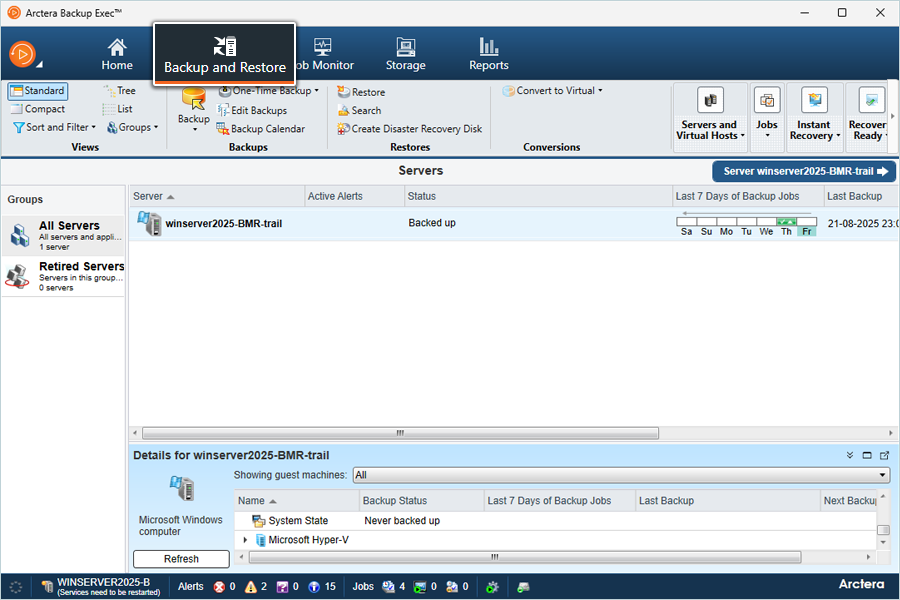
- Go to Console > Backups & Restore.
- Click Backup and select Backup to Cloud.
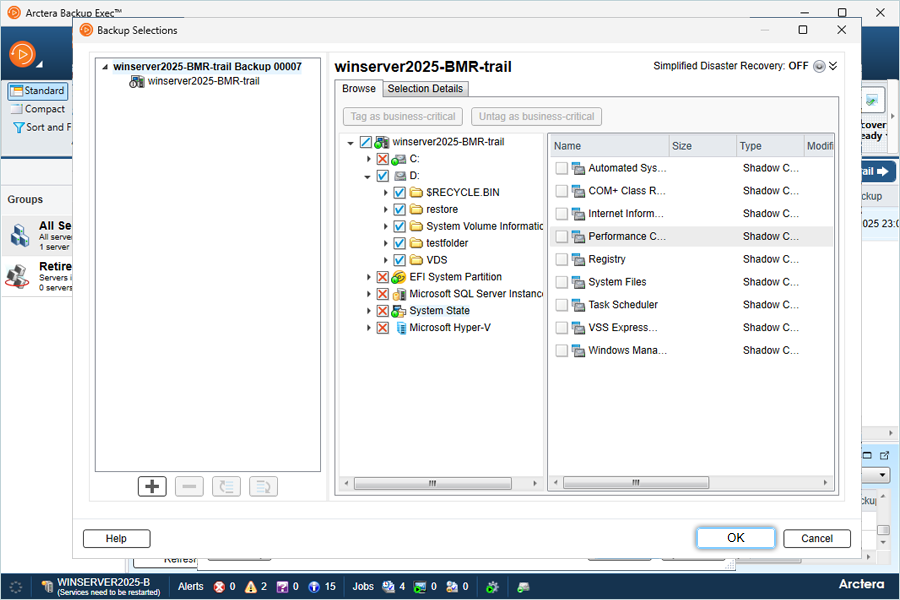
- Enter a Name for the backup, then click Edit to select the source data to backup.
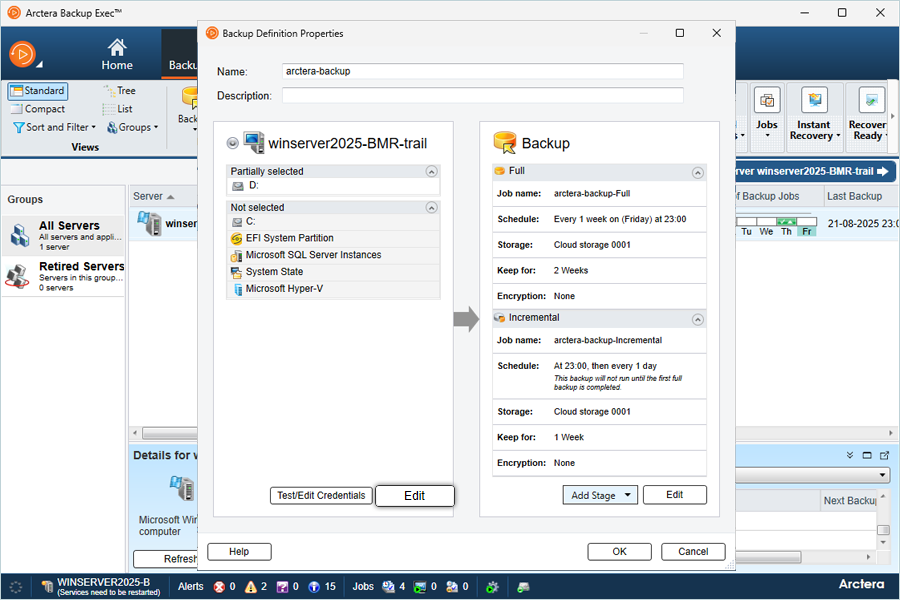
- In the Backup tab, click Edit, then:
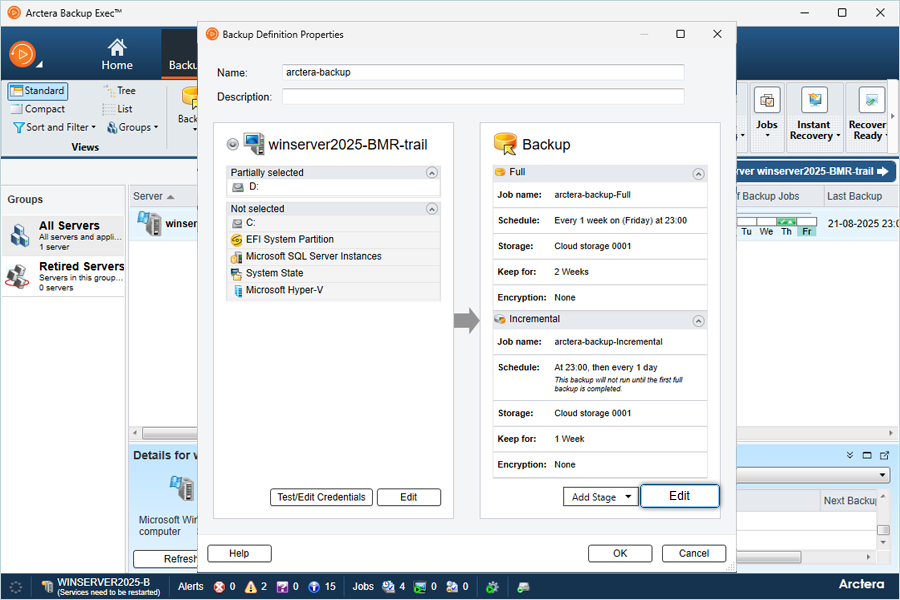
- Select the Backup Type (Full or Incremental).
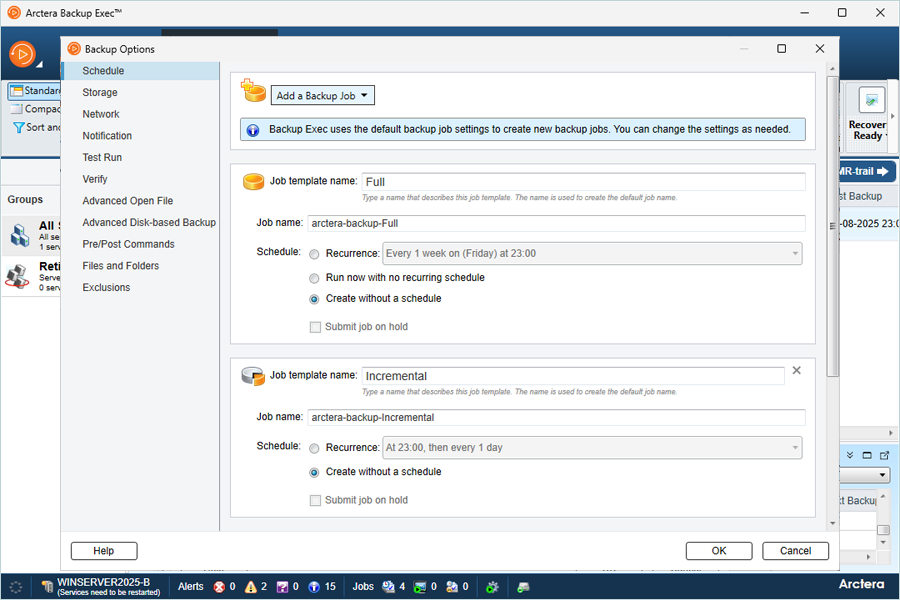
- Select your configured cloud storage by clicking Storage, then click OK.
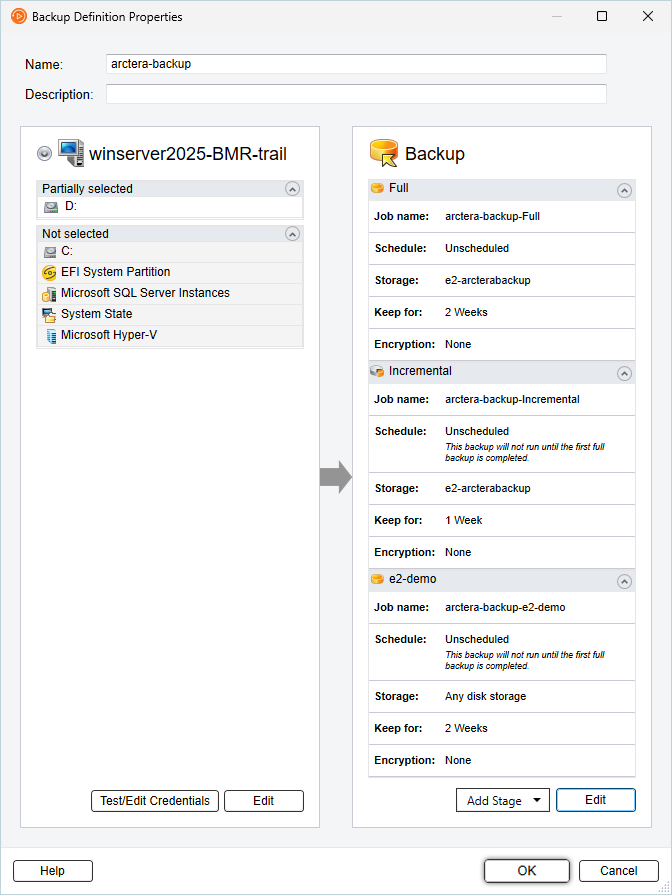
- Click OK again after confirming the source and destination.
- Select the Backup Type (Full or Incremental).
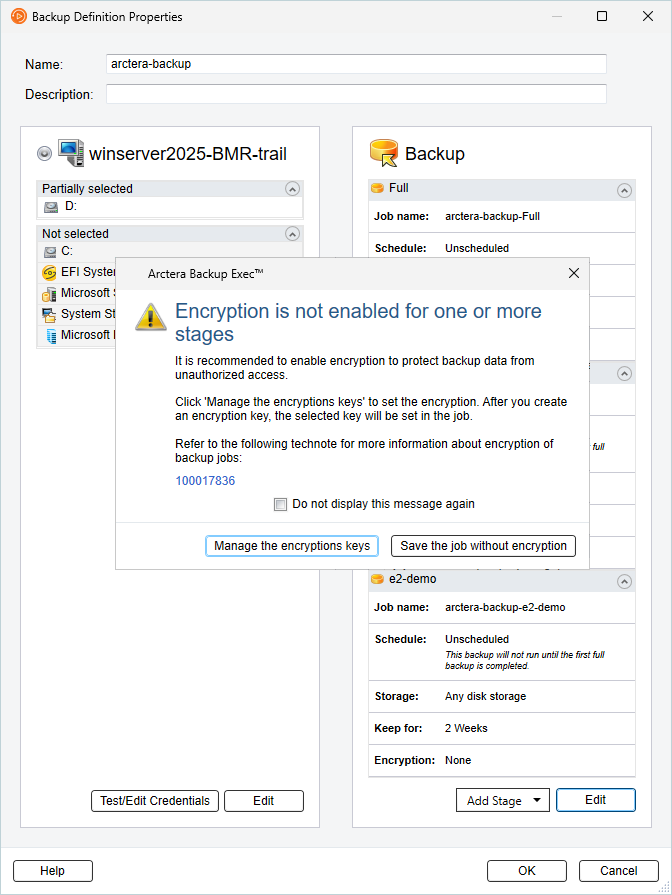
- Configure Encryption based on the requirements.
- Once the job is added, click Job Monitor.
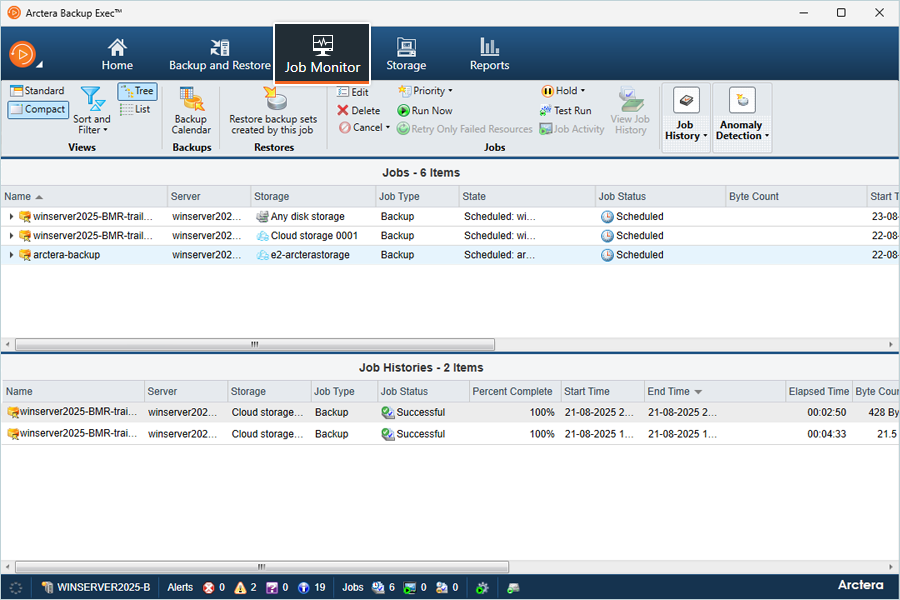
- Select the job and click Run Now to start the backup.
Note: You can configure both Full and Incremental backup jobs and schedule them to run as needed.
Restore a backup job
- Go to Console > Backup & Restore.
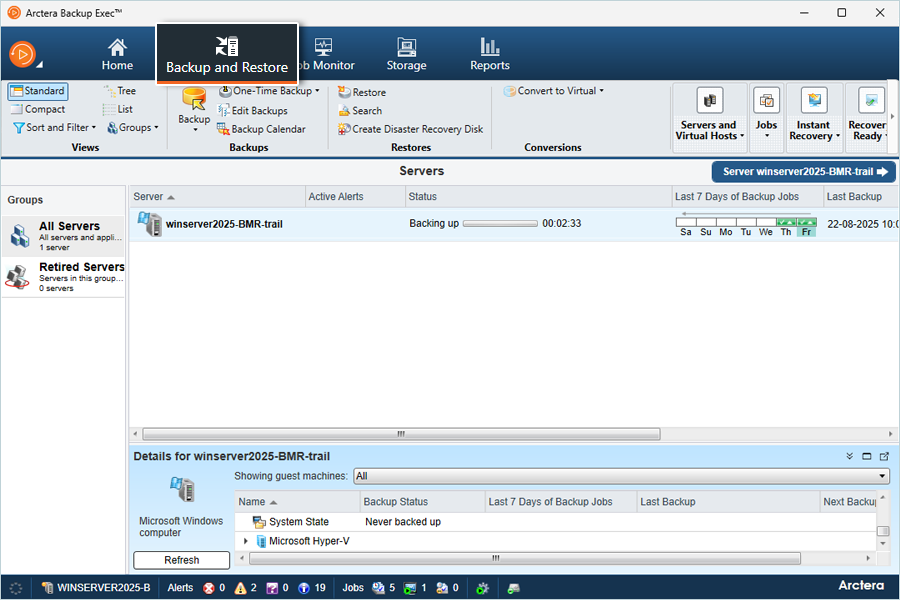
- Click Restore to create a new restore job.
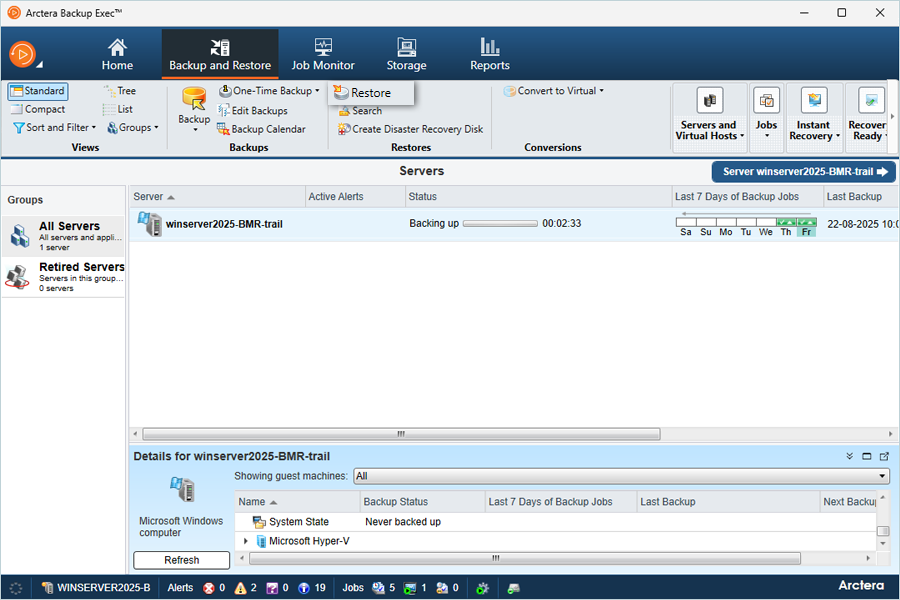
- Click Next to continue.
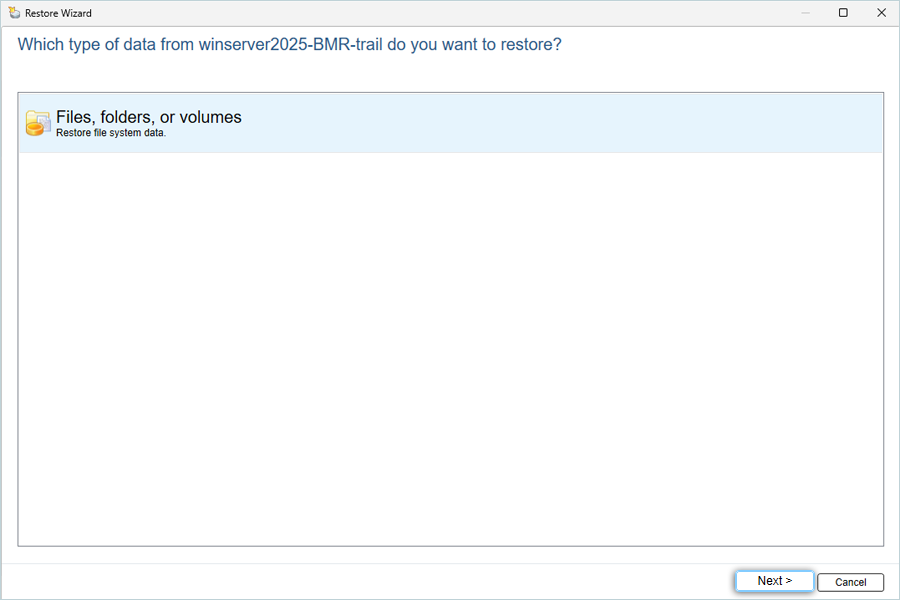
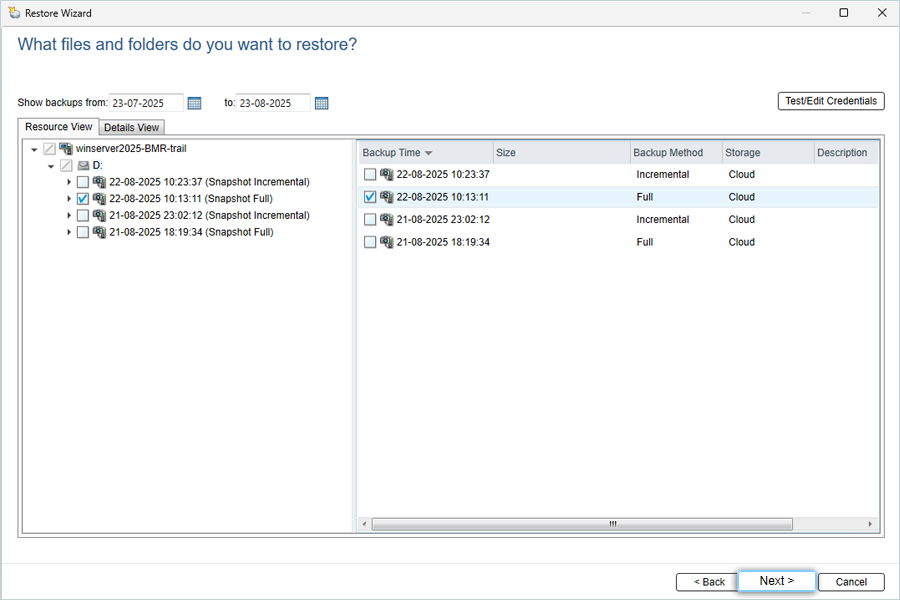
- Select the Files and Folders you want to restore from the backup set, then click Next.
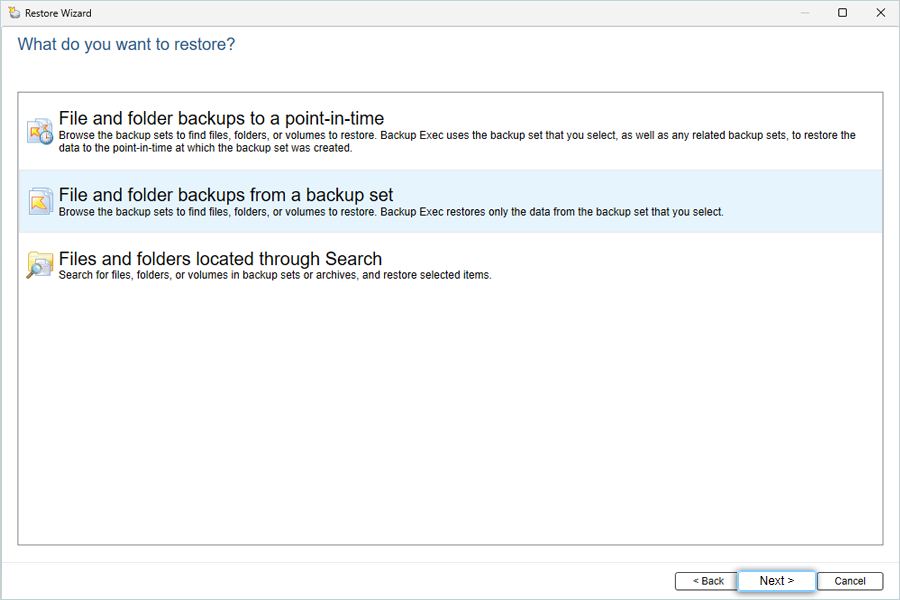
- Select the folder you want to restore from the latest backup job and click Next.
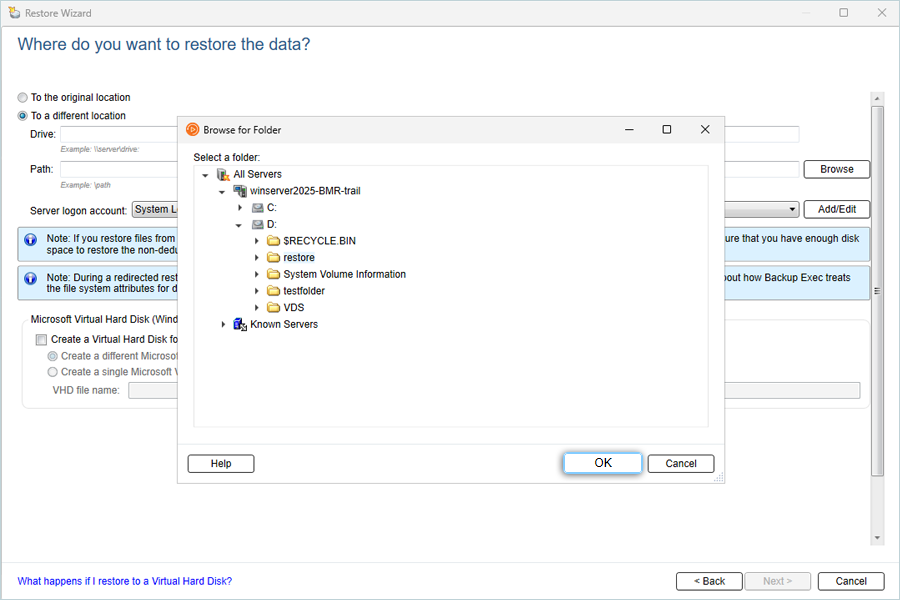
- Select To different location, then click Browse to set the restore destination:
- Choose a restore location on the local machine and click OK.
- Select the Server Logon Account (Default).
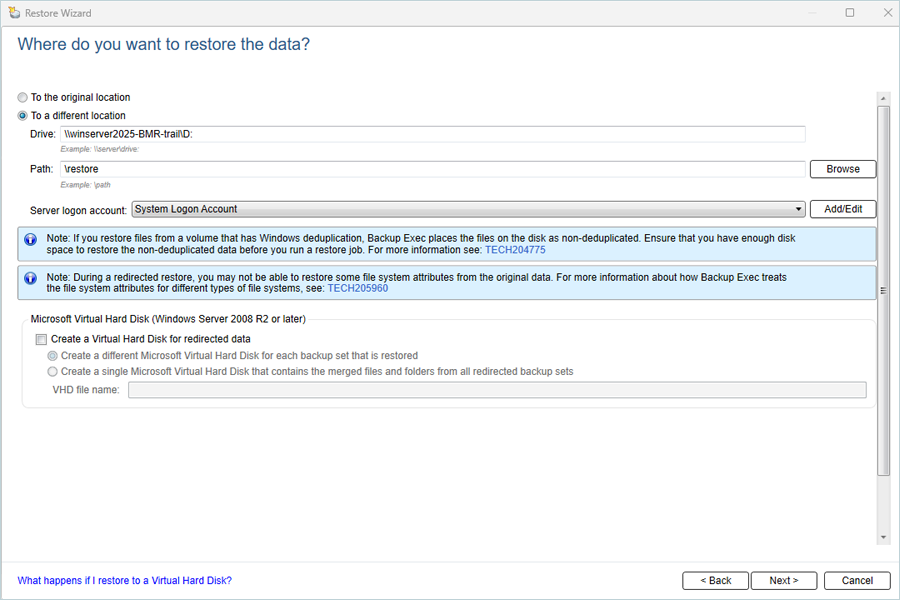
- Click Next.
- Choose a restore location on the local machine and click OK.
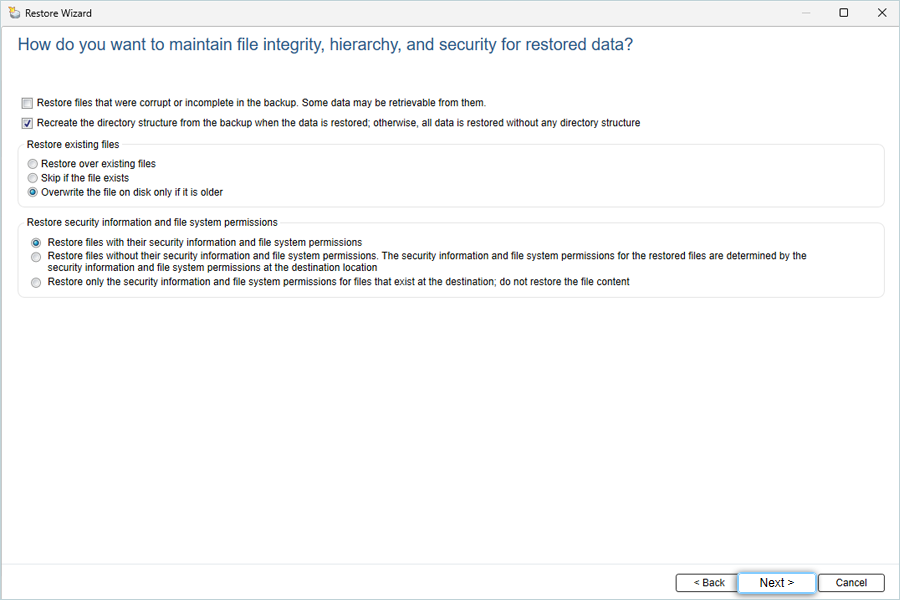
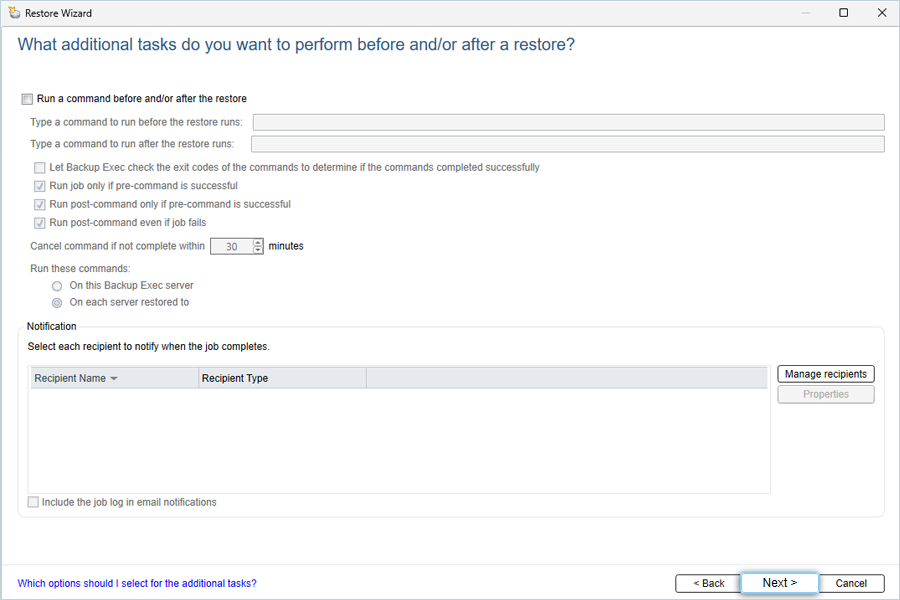
- Click Next to continue.
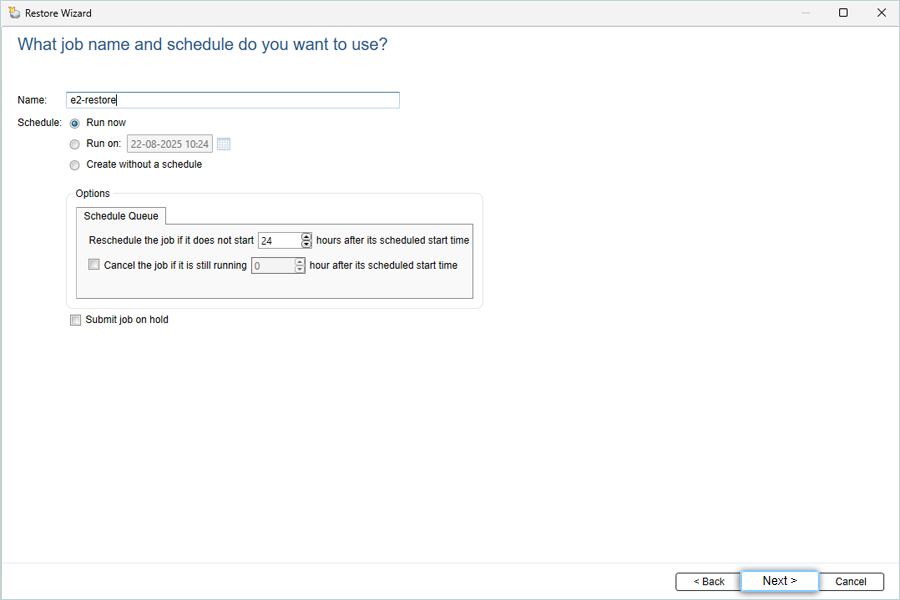
- Enter a Name for the restore job, select Run Now to restore immediately, then click Next.
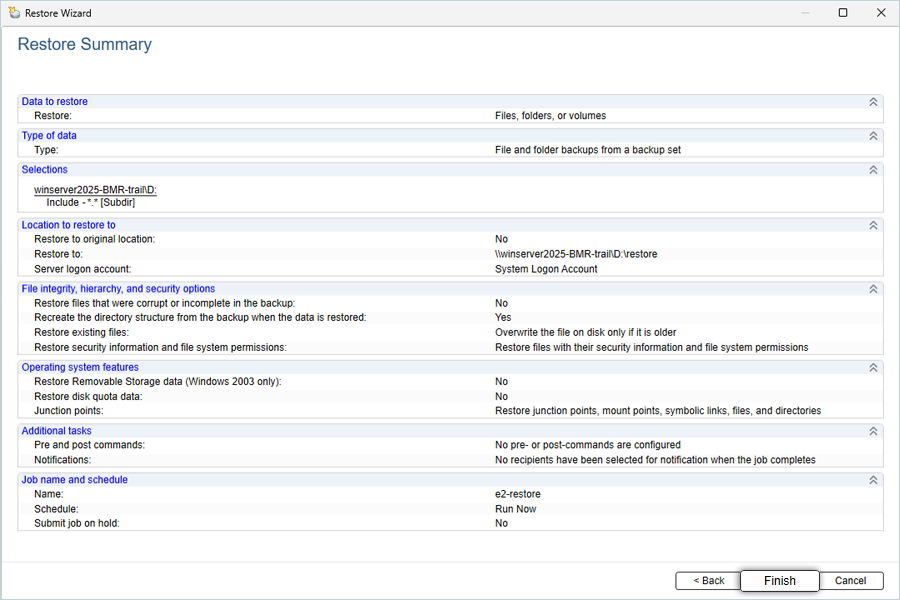
- Review the Restore Summary, then click Finish to start the restore.
Note: Data restoration is handled by your specific backup solution provider and is affected by multiple variables that are unique to your environment. For application-related enquiries/support, it is strongly recommended you seek guidance from the technical team of your backup solution provider.