Related Links
Integrate XenData Gateway with IDrive® e2
XenData Gateway is Windows-based software that lets file-based applications access cloud object storage as a local file system, using policy-driven tiering to keep hot data on local disks while archiving cold data at scale. It supports SMB, NFS, FTP, optional S3 access, Active Directory security, and large unstructured workloads such as media, surveillance, and backup. Integrating XenData Gateway with IDrive® e2 delivers a capable, scalable cloud object storage solution that integrates effortlessly for cost-efficient capacity and reliable hybrid file workflows.
Prerequisites
Before you begin, ensure the following:
- An active IDrive® e2 account. Sign up here if you do not have one.
- A bucket in IDrive® e2. Learn how to create a bucket.
- Valid Access Key ID and Secret Access Key. Learn how to create an access key.
The following steps can help you configure and integrate XenData Gateway with IDrive® e2.
Add an IDrive® e2 account to XenData Gateway Config
- Follow the steps below to launch the S3 Endpoint Configuration utility.
- Click the Windows Start icon.
- Open the XenData program group.
- Click the S3 Endpoint Configuration entry in the list.
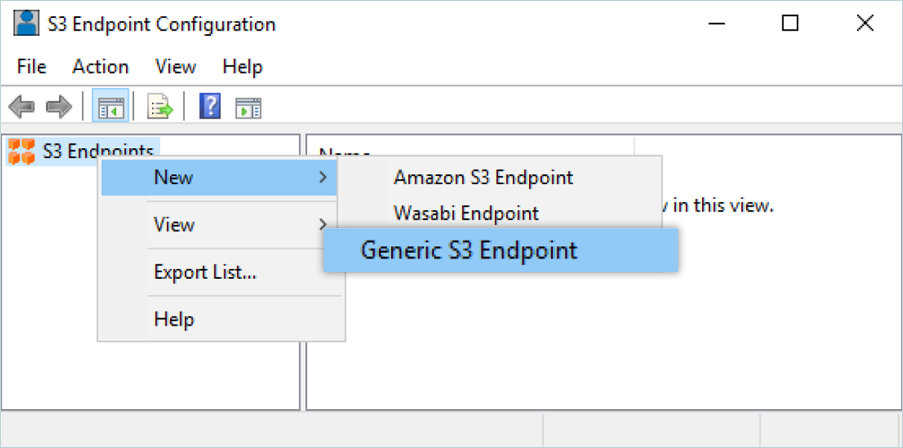
- On the S3 Endpoint Configuration screen, right-click S3 Endpoints in the left panel. Click New > [Generic S3 Endpoint].
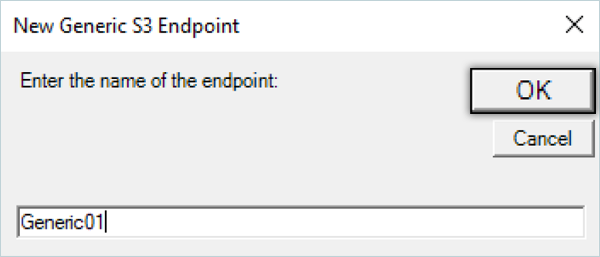
- Enter a name for your new endpoint (no spaces allowed), then click OK.
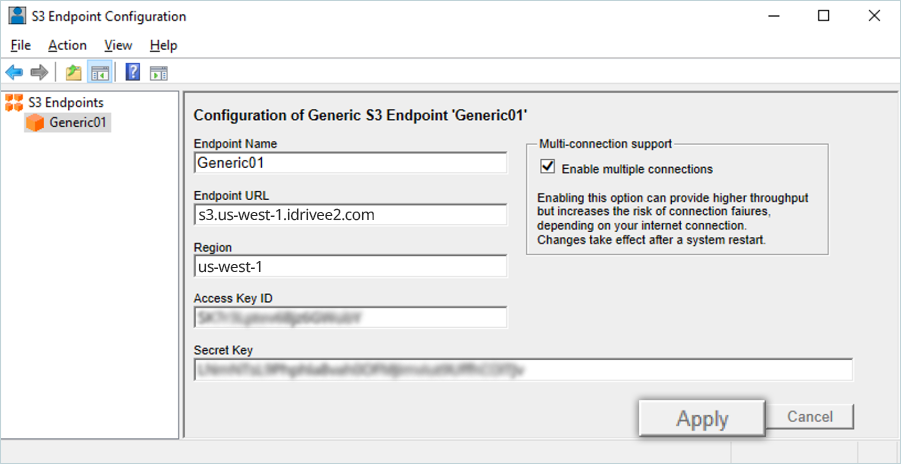
- Select your new endpoint in the left sidebar, and then fill in the fields below.
- Enter the Endpoint Name (e.g., IDrive01).
- Enter your IDrive® e2 endpoint URL as the Endpoint URL.
- Enter your IDrive® e2 region as the Region.
- Enter your IDrive® e2 Access key as the Access Key ID.
- Enter your IDrive® e2 Secret key as the Secret key.
- Click Apply.
- Reboot the computer.
- Click and expand the Diagnostics section in the left pane of the Cloud Gateway Management Console.
- Click the S3 Endpoint to be configured.
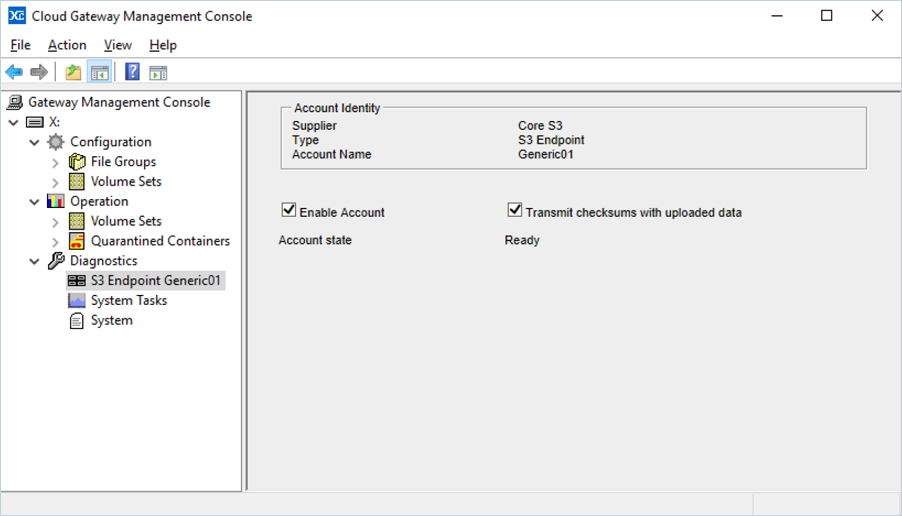
- The right-hand pane of the console displays the Account Identity, including the endpoint name. There are two configuration options:
- Enable Account: This option must be enabled to access the endpoint.
- Transmit checksums with uploaded data: By enabling this option, checksums are transmitted when data is uploaded to the endpoint and are used for data verification.