Integrate Marquis Workspace Backup with IDrive® e2
Marquis Workspace Backup is a disaster recovery tool for Avid shared storage systems, providing automated, version-controlled backups with fast restoration and user-defined retention policies. It supports incremental backups to reduce load and enables secure off-site storage with local tier 2 and cloud options. Integrating Marquis Workspace Backup with IDrive® e2 adds a capable and scalable cloud object storage solution that facilitates systematic integration for secure and efficient media continuity.
Prerequisites
Before you begin, ensure the following:
- An active IDrive® e2 account. Sign up here if you do not have one.
- A bucket in IDrive® e2. See how to create a bucket.
- Valid Access Key ID and Secret Access Key. Learn how to create an access key.
- Workspace Tools v.7 installed and licensed.
The following steps can help you successfully integrate Marquis Workspace Backup with IDrive® e2 cloud object storage.
Configure Marquis Workspace Backup with IDrive® e2
- Log in to the Workspace server at
http://MACHINENAMEorIPADDRESS/wstoolsadmin/.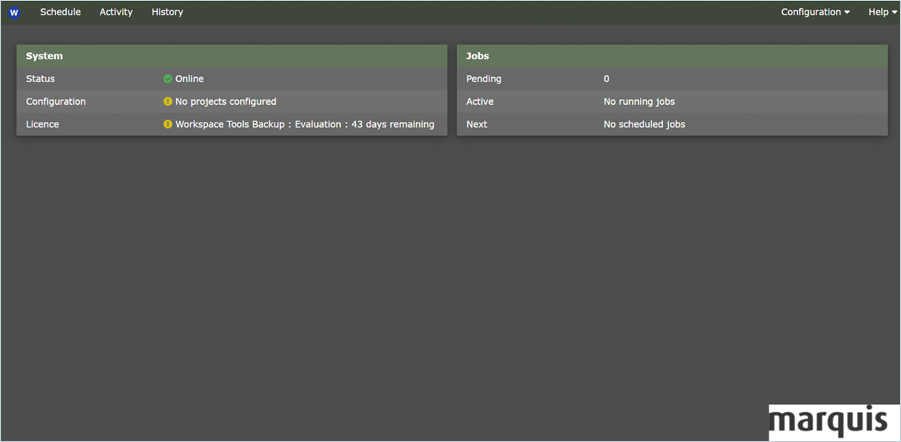
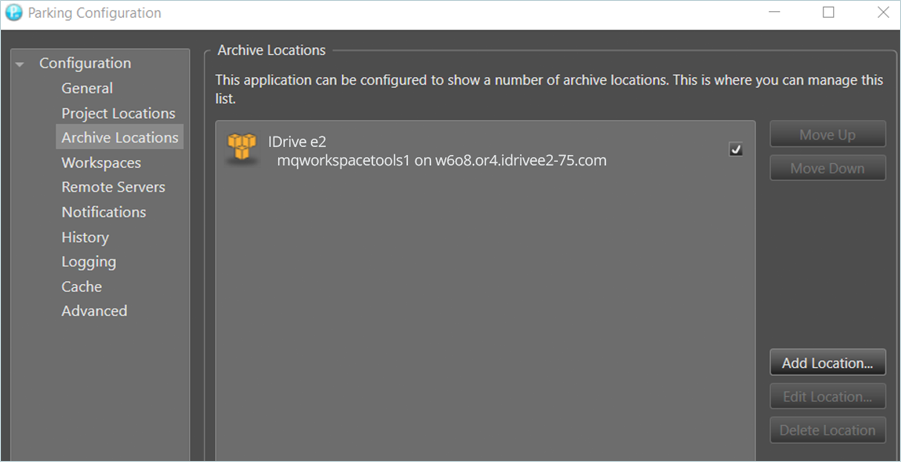
- Click Configuration in the top-right corner and select Archive Locations.
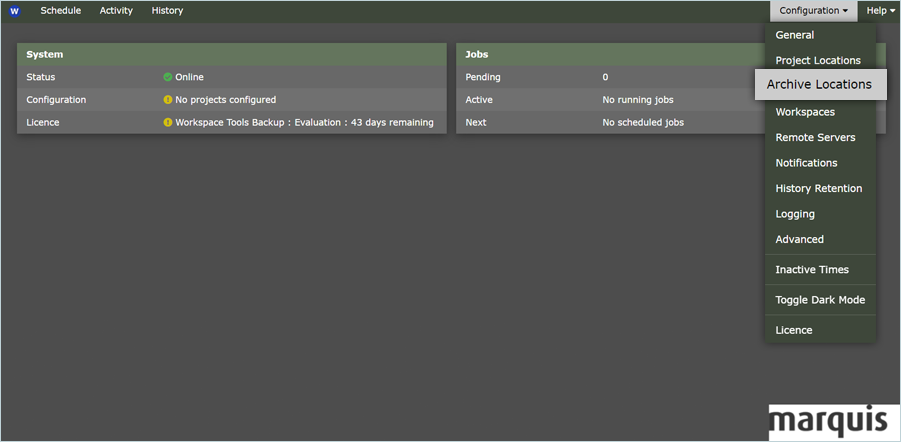
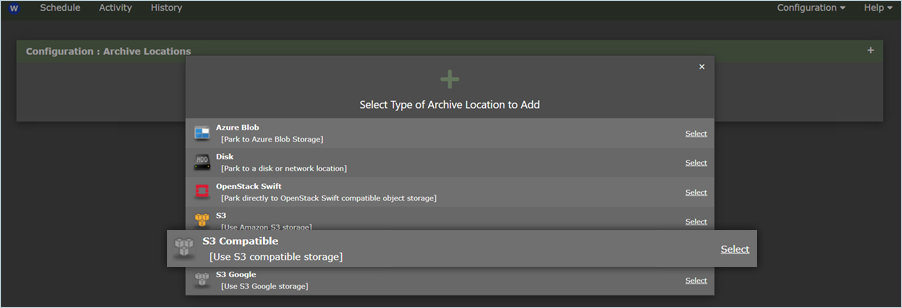
- Click
 to add your IDrive® e2 storage as a new Archive location.
 - Select S3 Compatible as the location type from the list.
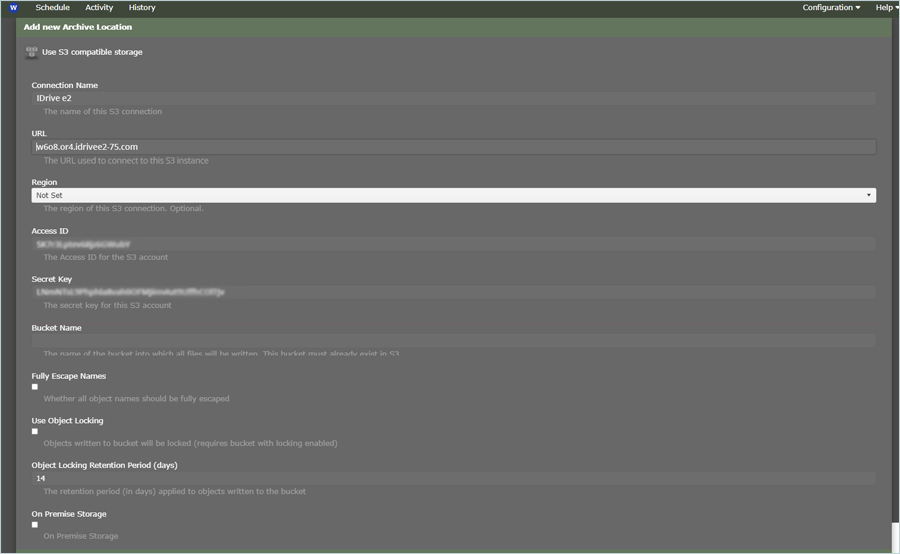
- In the Add new Archive Location, enter the following details
- Enter a Connection Name.
- Enter your IDrive® e2 S3 endpoint as URL.
- Enter your IDrive® e2 Access Key as Access Key.
- Enter your IDrive® e2 Secret Key as Secret Key.
- Enter your e2 bucket name as Bucket Name.
- To Use Object Locking, object lock should be configured on your e2 bucket in the IDrive® e2 console.
- Click Submit to save the configuration.
Configure and Run a New Workspace Backup Job
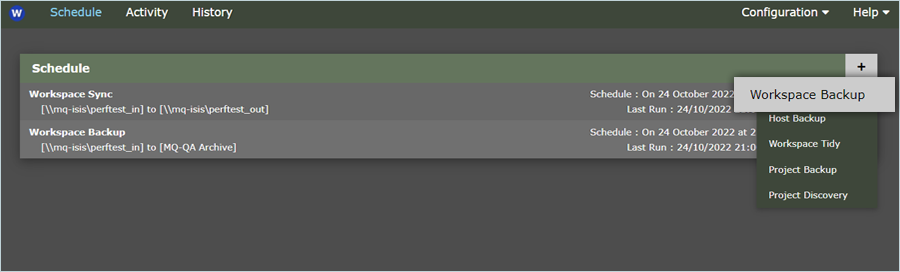
- Click Schedule in the header menu to add a new backup job.
- Click
 and select Workspace Backup.
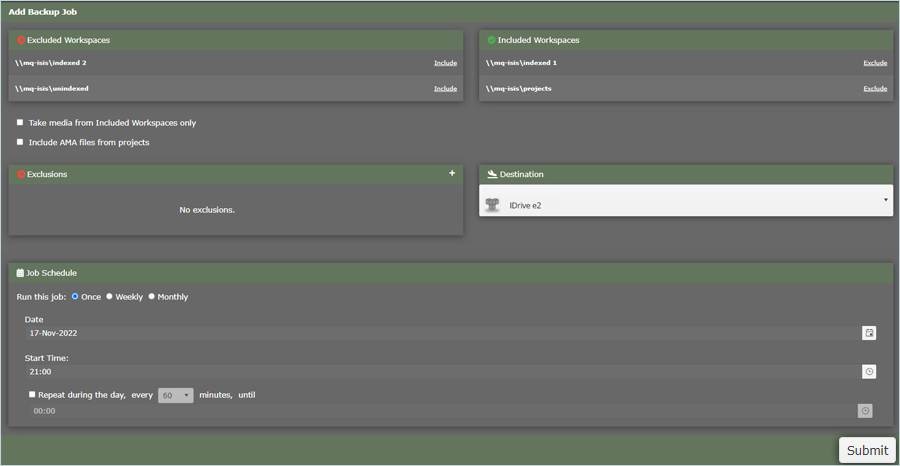
- Select the workspace to perform a backup from the Excluded Workspaces section and click Include to move the workspace to the Included Workspaces section.
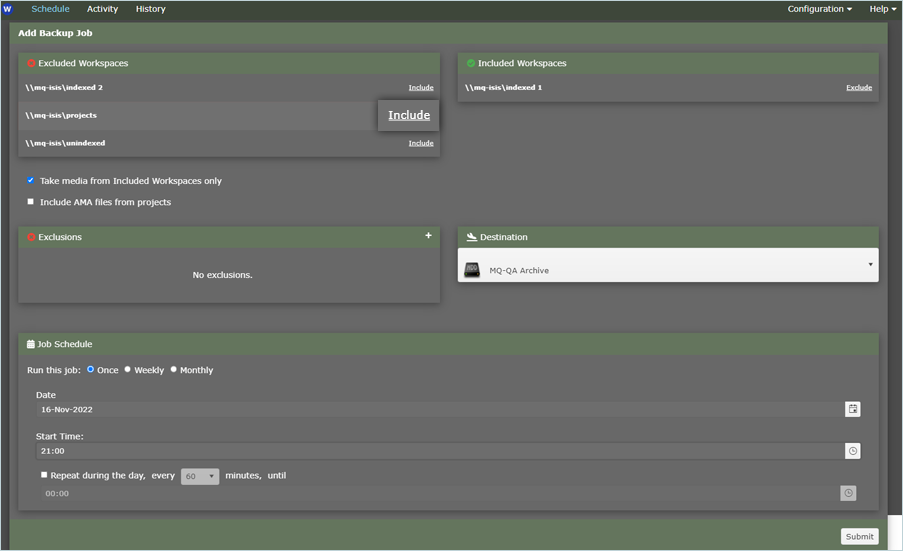
- Select your IDrive® e2 Storage as the Destination (The location was added in the previous step).
- Schedule the job as per the requirement.
- Click Submit. The backup job will now execute at the scheduled time.
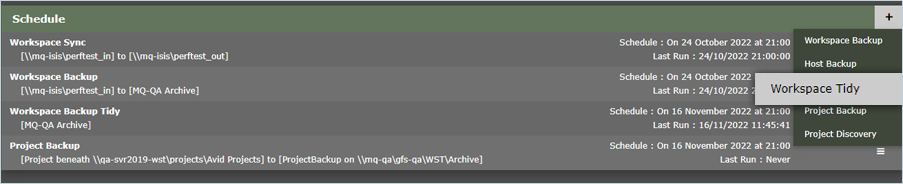
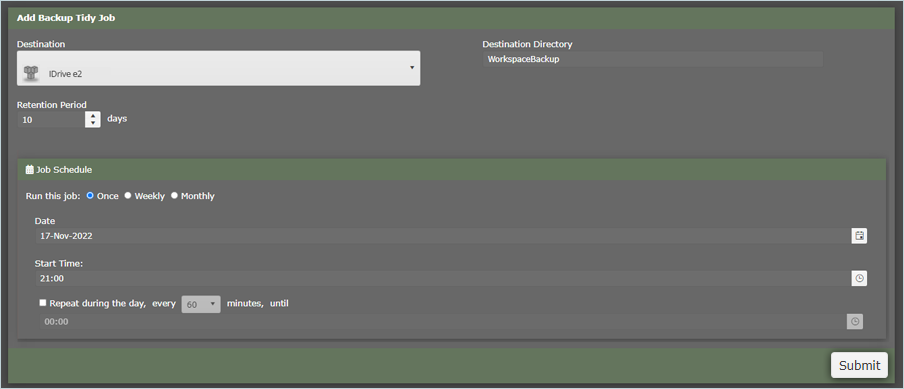
Configure and Run a New Workspace Tidy Job
- Click Schedule in the header menu to add a new backup job.
- Click and select Workspace Tidy.
- In the Add Backup Tidy Job dialog box,
- Select your IDrive® e2 storage as the Destination.
- Select your IDrive® e2 bucket as the Destination Directory.
- Set Retention Period as per the requirement (This will apply only if object lock is configured for the bucket and location).
- Schedule the job as per the requirement.
- Click Submit to add the job.
When the tidy job first runs, it will check to see if the source content has been removed. If not, it places the items on an internal processing list as candidates for deletion.
When the job runs again, it will recheck these items to confirm that the source has been removed. Once the retention period has been exceeded, it will then delete the files from the backup.
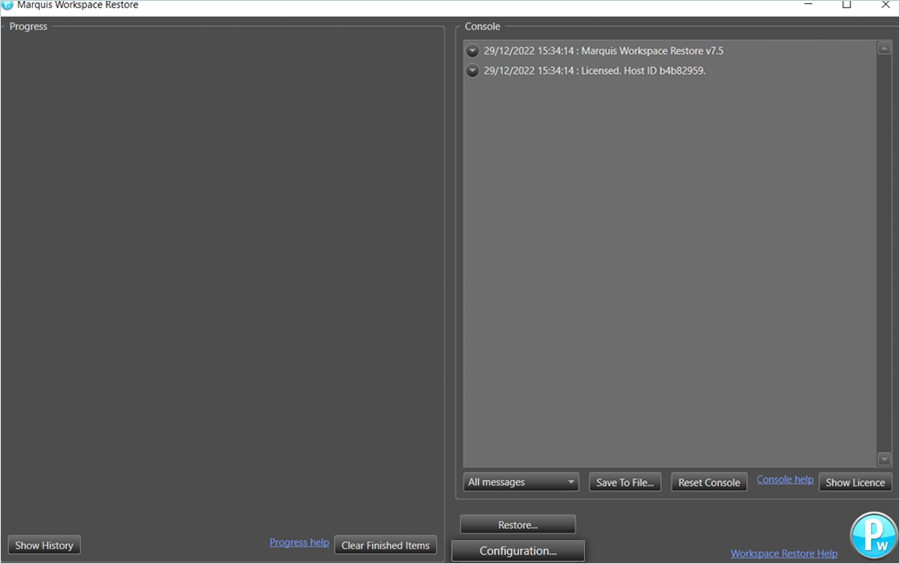
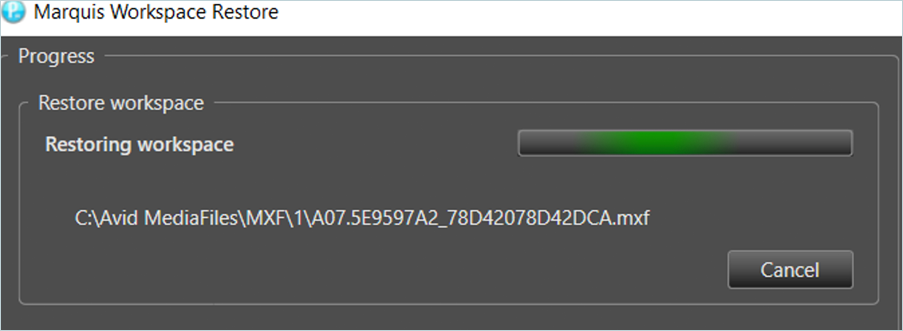
Configure and Run Restore
- Launch the Workspace Restore tool and click Configuration at the bottom.
- Select Archive Location under Configuration and click Add Location.
- Select S3 Compatible as the type of the location.
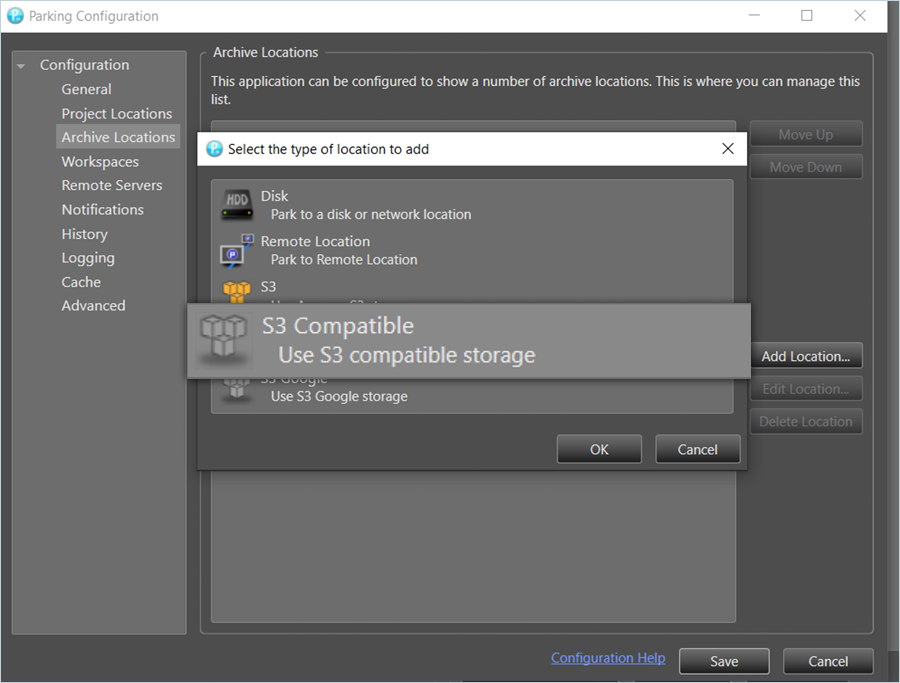
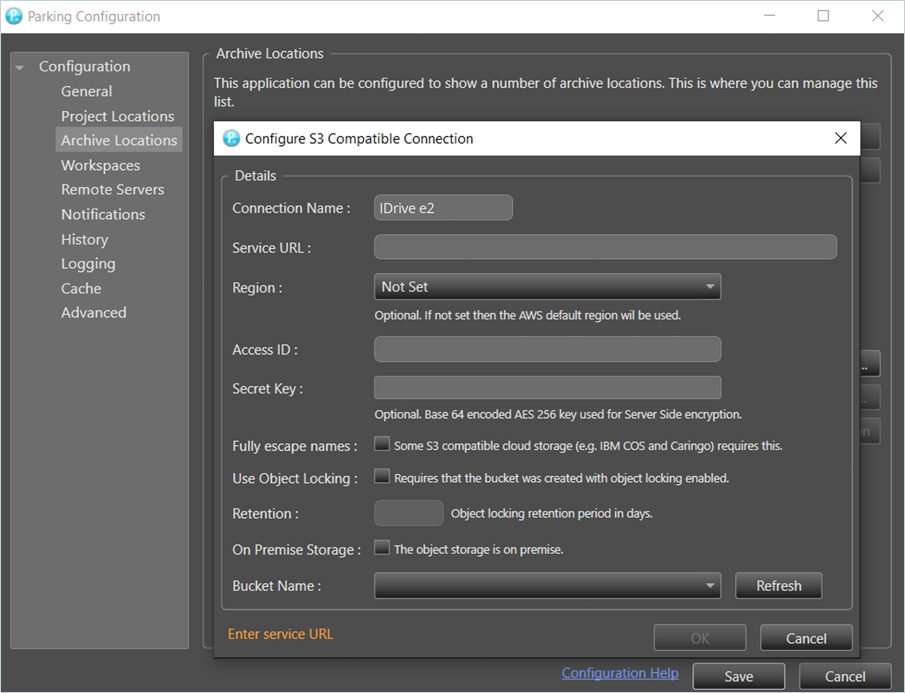
- Provide your IDrive® e2 details as mentioned below.
- Enter a Connection Name.
- Enter your IDrive® e2 S3 endpoint as the Service URL.
- Enter your IDrive® e2 Access Key as Access Key.
- Enter your IDrive® e2 Secret Key as Secret Key.
- Set Retention only if Object Lock is configured for the bucket.
- Select your IDrive® e2 bucket from the Bucket Name list.
- Click OK.
- Click Save to save the configuration.
- The IDrive® e2 location created above will be displayed in the Archive Locations tab.
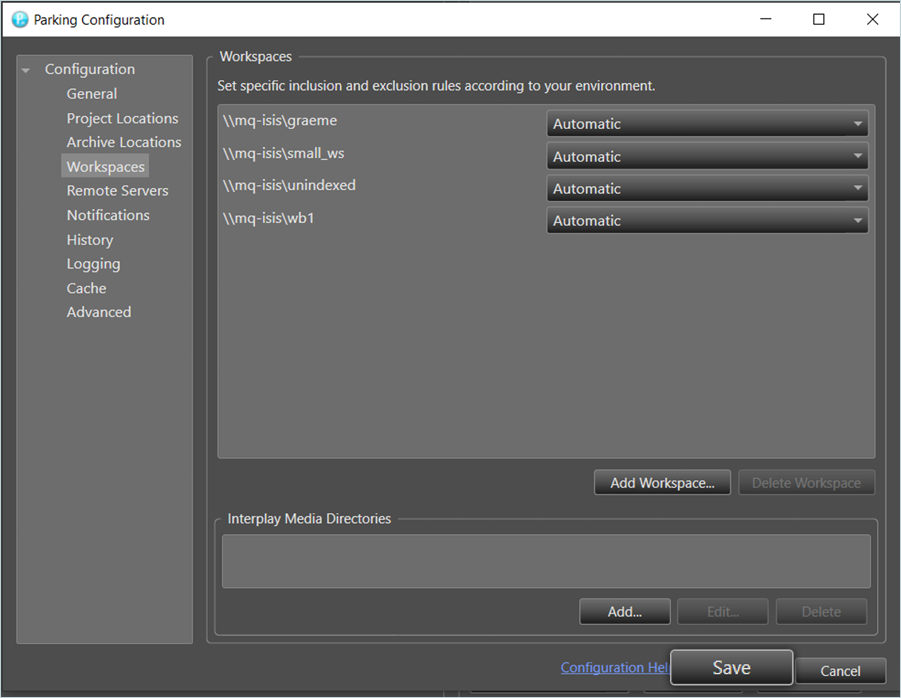
- Click Save in the Workspaces window (all workspaces will be automatically found and configured).
- Click Restore on the home screen.

- In the Workspace Restore Details window,
- Select the desired backup location from the dropdown menu.
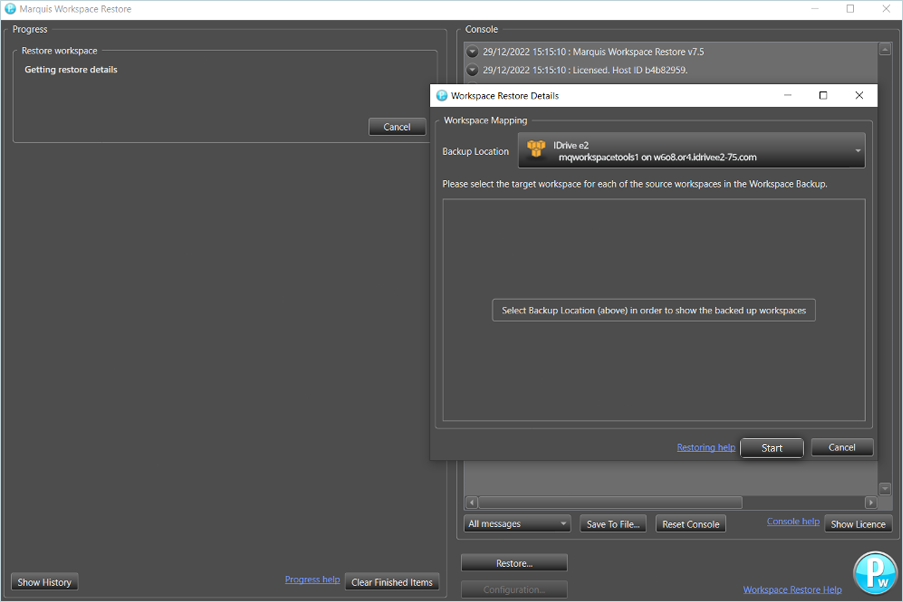
- Select the desired backup location from the dropdown menu.
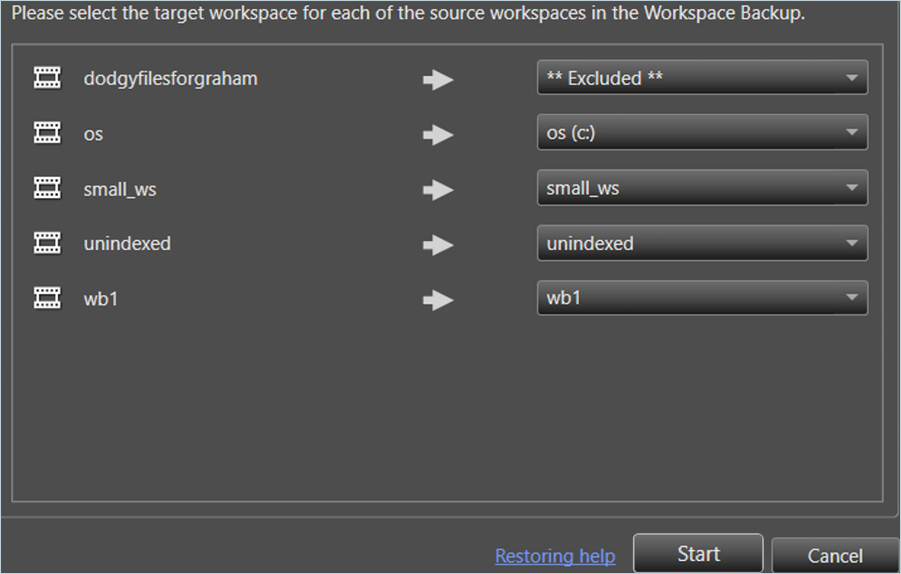
- Select target workspaces for each of the source workspaces in the backup.
- Click Start.
Note: Data restoration is handled by your specific backup solution provider and is affected by multiple variables that are unique to your environment. For application-related inquiries/support, it is strongly recommended that you seek guidance from the technical team of your backup solution provider.