Integrate Marquis Project Parking with IDrive® e2
Marquis Project Parking manages Avid Media Composer storage by analyzing, archiving, and moving projects and media across storage tiers. It reclaims expensive shared storage, detects duplicates and orphaned files, and enables secure project transfer, versioned backups, and flexible restoration. Integrating Marquis Project Parking with IDrive® e2 adds a capable and scalable cloud object storage solution that facilitates systematic integration for efficient and cost-effective project portability.
Prerequisites:
Before you begin, ensure the following:
- An active IDrive® e2 account. Sign up here if you do not have one.
- A bucket in IDrive® e2. See how to create a bucket.
- Valid Access Key ID and Secret Access Key. Learn how to create an access key.
- Project Parking v 7.5 installed and licensed.
- S3 plugin installed in Project Parking.
The following steps can help you successfully integrate Marquis Project Parking with IDrive® e2 cloud object storage.
Configure Marquis Project Parking with IDrive® e2
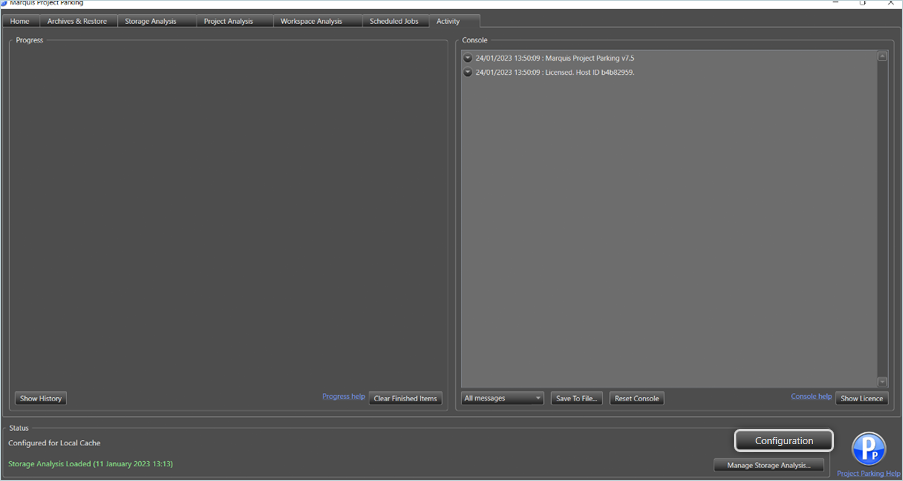
- Log in to Project Parking.
- Click Configuration at the bottom right corner.
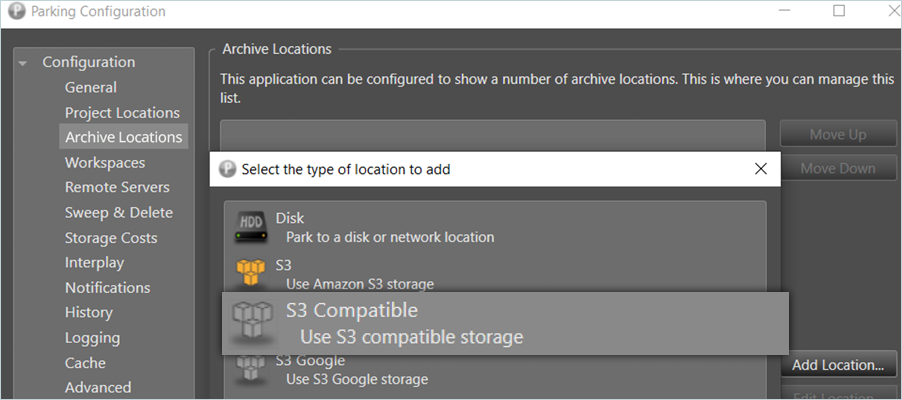
- Select Archive Location under Configuration and click Add Location.
- Select S3 Compatible as the type of location.
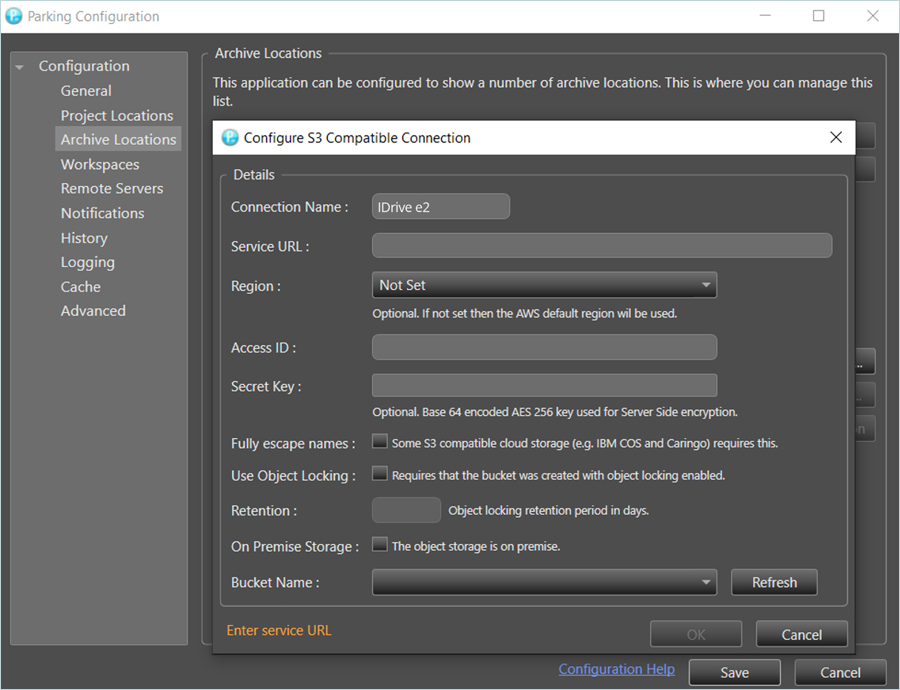
- Provide your IDrive® e2 details as mentioned below.
- Enter a Connection Name.
- Enter your IDrive® e2 S3 endpoint as the Service URL.
- Enter your IDrive® e2 Access Key as Access ID.
- Enter your IDrive® e2 Secret Key as Secret Key.
- Set Retention only if Object Lock is configured for the bucket.
- Select your IDrive® e2 bucket from the Bucket Name list.
- Click OK.
- Click SAVE to save and close the configuration menu.
Configure and Run an Archive Job
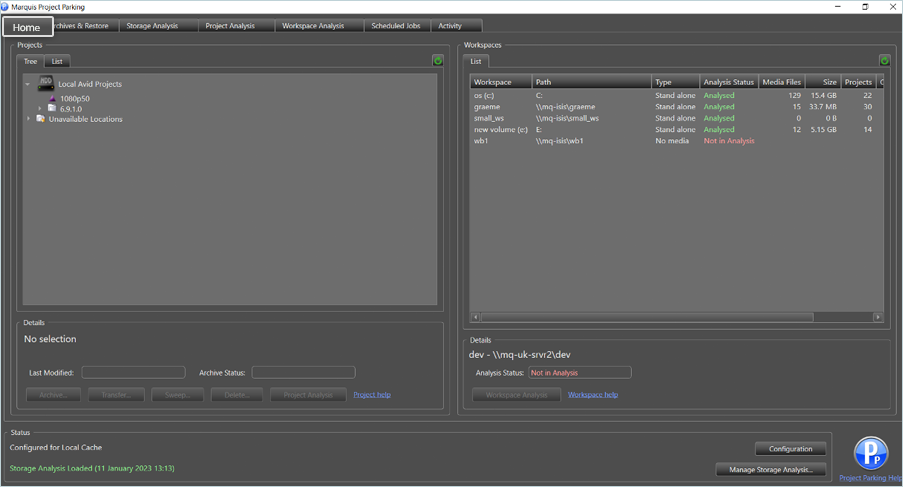
- Click Home to land on the home page. Here, you will see your Project Locations and all the projects on the left-hand side.
- Select a project and then click Archive in the bottom left corner of the Projects screen.
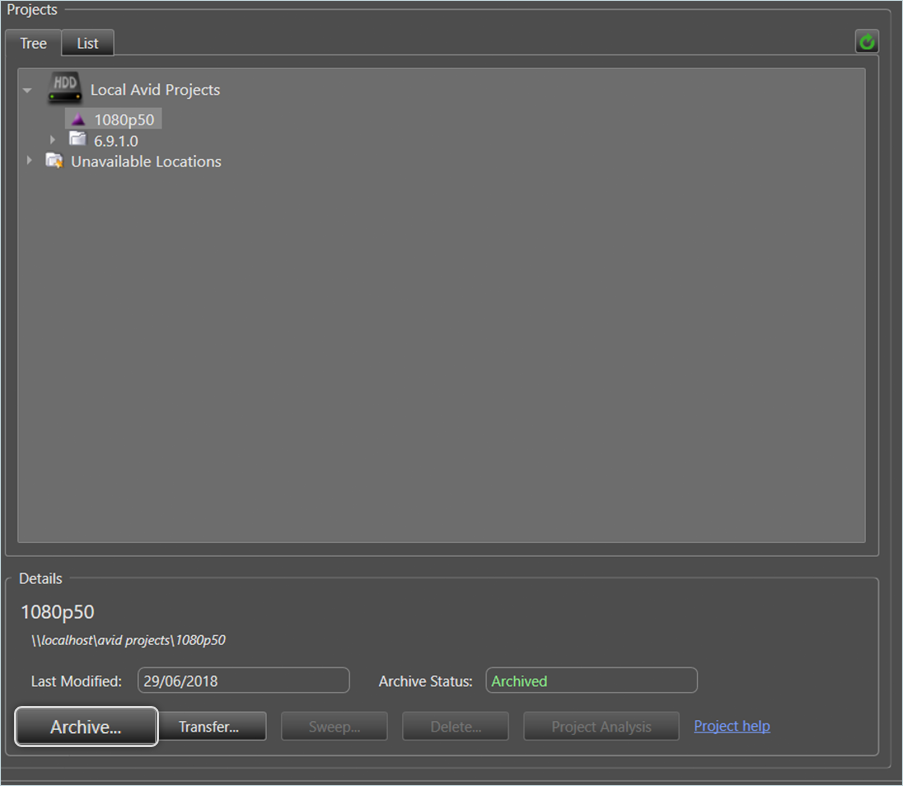
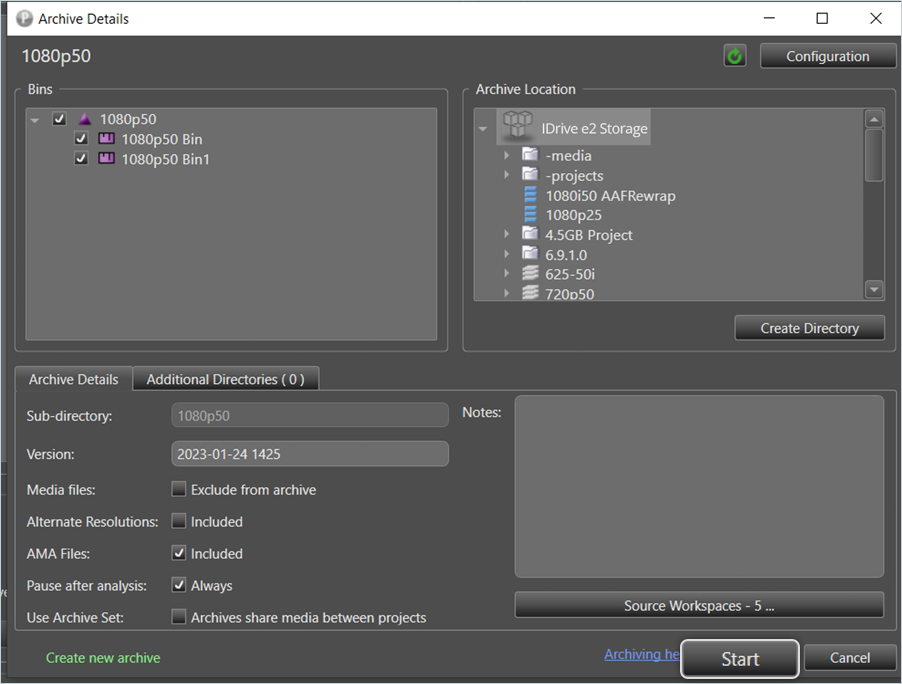
- Select/Deselect every bin in the project you wish to archive under Bins.
- Select your IDrive® e2 Storage as the destination under Archive Location.
- Click Start to start the archive.
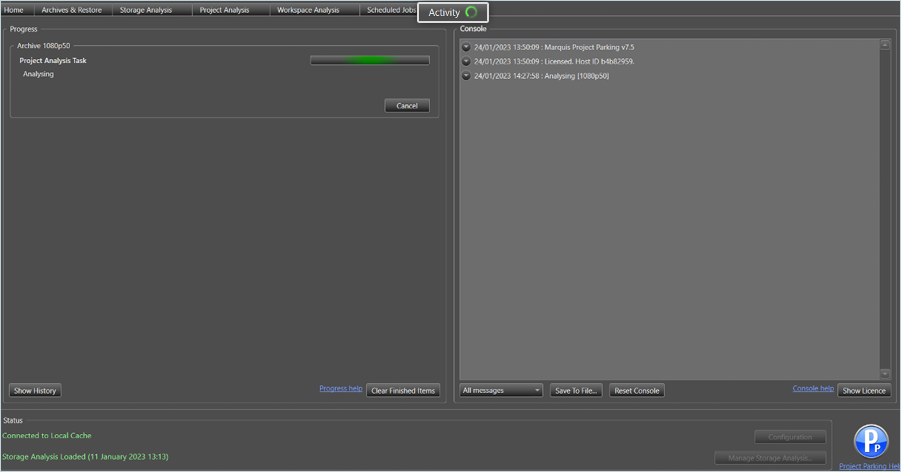
- Click the Activity tab in the header menu to monitor the archive. Here you can see the project being analyzed and then archived.
Performing an Archive Restore
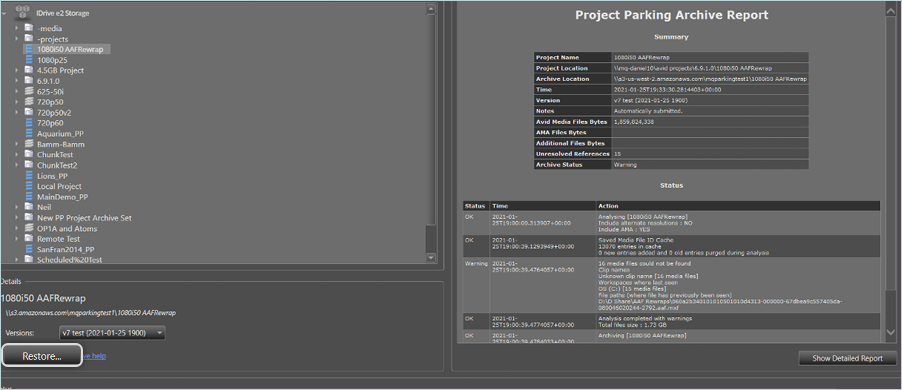
- Click the Archive & Restore tab in the header menu. Here you will see your IDrive® e2 storage and all projects you have archived here.
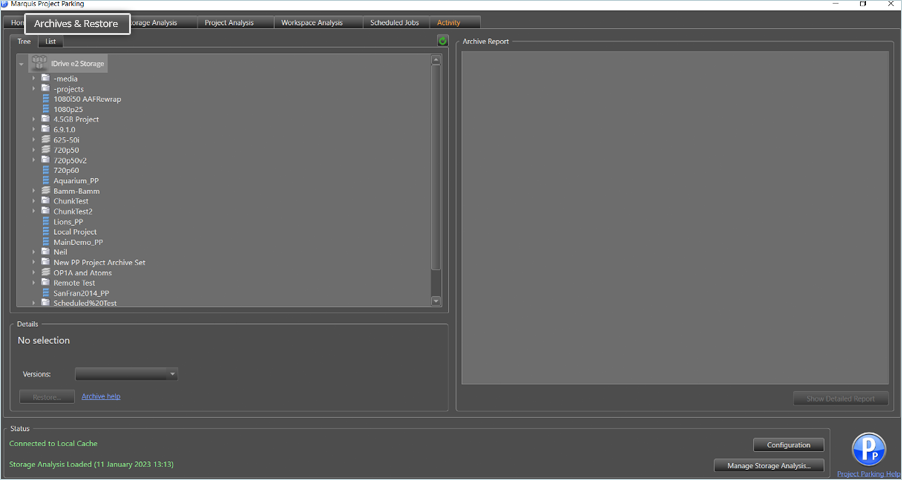
- Select the project you want to restore ( It will load the "Archive Report" on the right-hand side for that project).
- Click Restore at the bottom to initiate the restoration process.
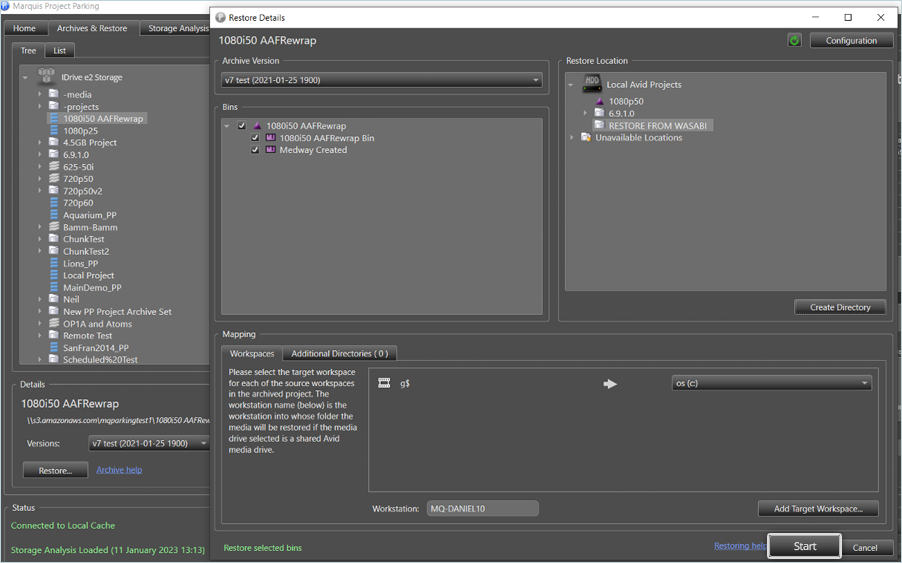
- In the Restore Details window,
- Select all bins you want to restore.
- Select Restore Location.
- Add a Target workspace for each of the source workspaces in the archived project.
- Click Start once the configuration is done.
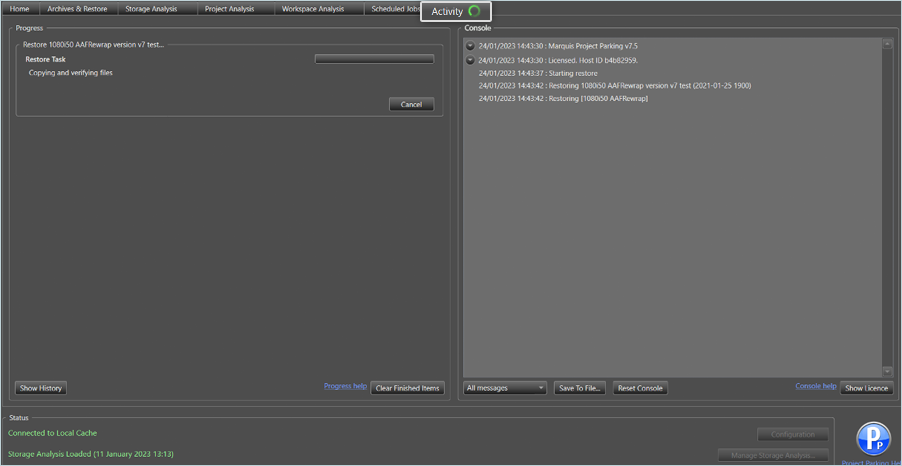
- Navigate over to the Activity tab, and you will see the restore taking place.
Note: Data restoration is handled by your specific backup solution provider and is affected by multiple variables that are unique to your environment. For application-related inquiries/support, it is strongly recommended that you seek guidance from the technical team of your backup solution provider.