Claude with IDrive® e2 MCP
IDrive® e2 MCP connects your IDrive® e2 object storage with AI assistants and applications using the open Model Context Protocol (MCP) standard. It enables compatible AI clients to securely access and work with your data using natural language, eliminating the need for custom integrations, scripts, or manual workflows. This guide explains how to connect Claude with IDrive® e2 storage.
Prerequisites
- An active IDrive® e2 account.
- Access to a Claude account.
Reference Architecture
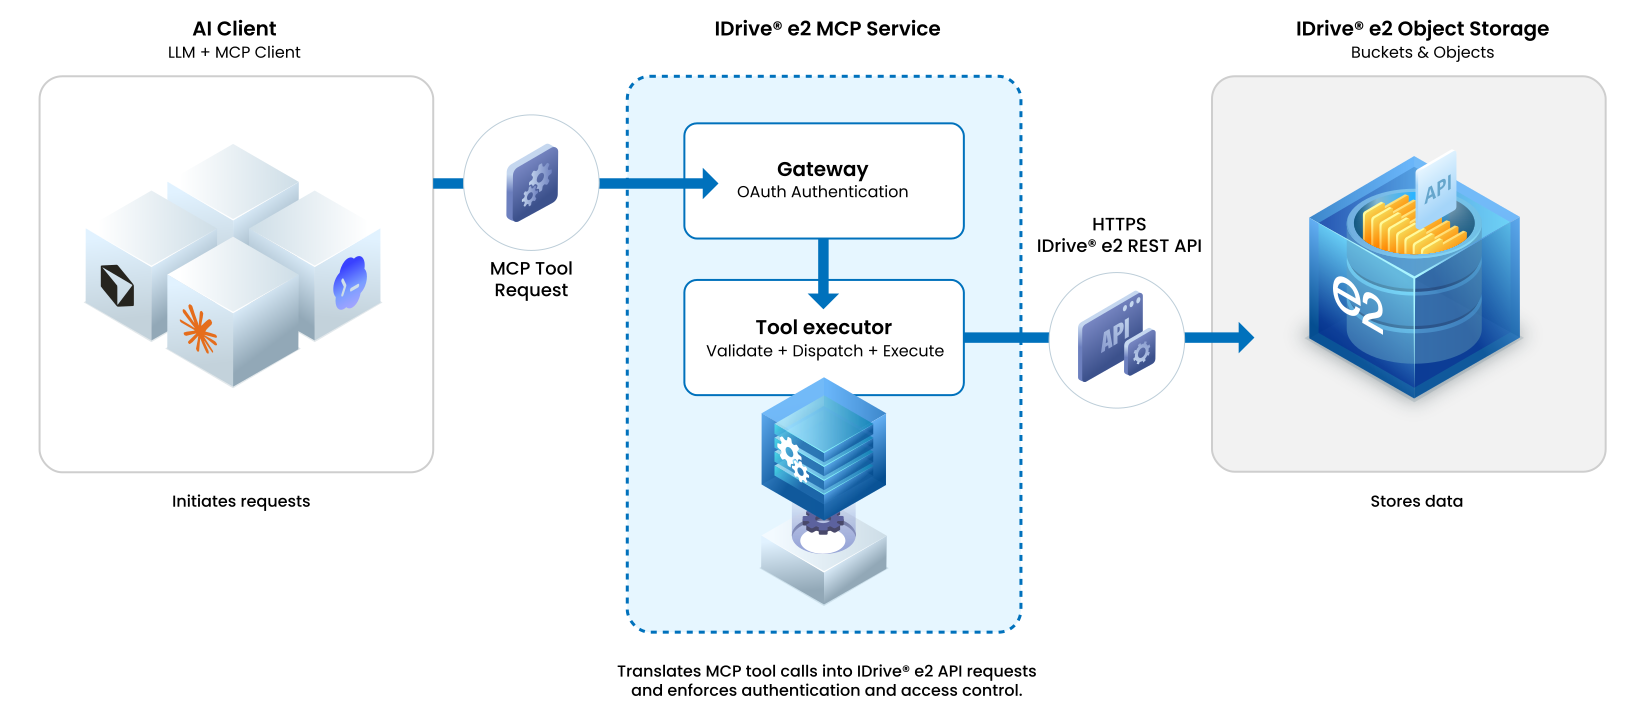
Configure Claude with IDrive® e2 MCP
- Click View Connector to open the IDrive® e2 listing in Claude.
- Click Connect to Claude.

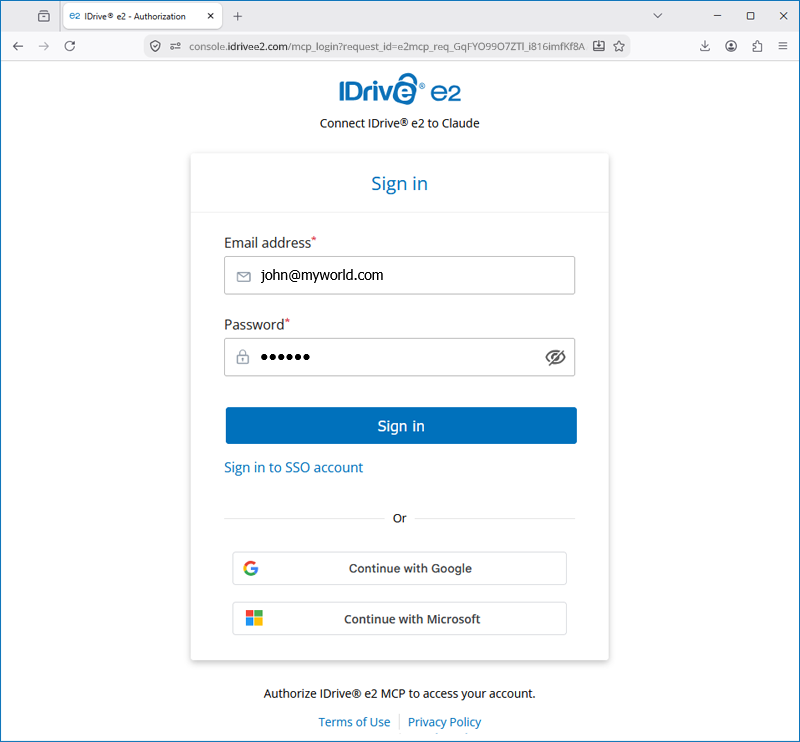
- You will be redirected to the IDrive® e2 web console. Click Sign in to IDrive® e2.
- Provide the following details and click Sign in.
- Enter your IDrive® e2 account email address and password.
- Or you can proceed with Google Sign In.
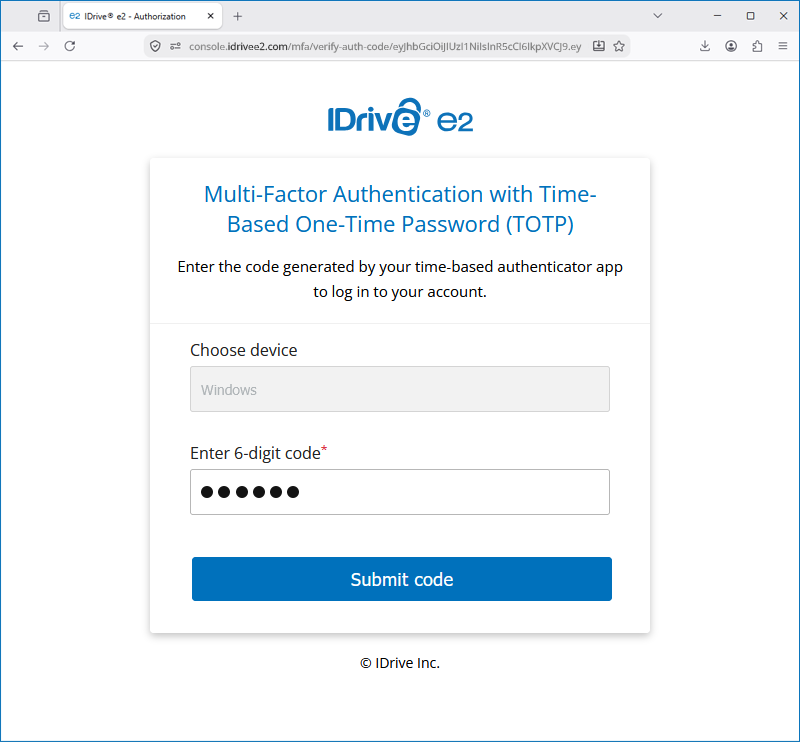
- Complete MFA if configured for your IDrive® e2 account.
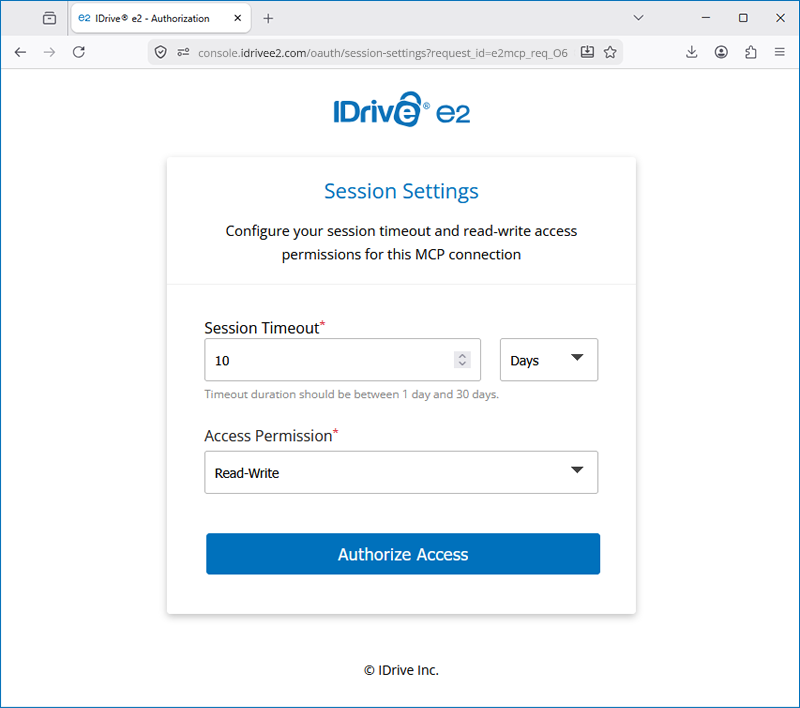
- Set session timeout duration and session access permission.
- You successfully connected your Claude account with the IDrive® e2 MCP service. You can test it by using the prompt—List all my buckets—and your buckets will be listed.

Configure Claude with IDrive® e2 MCP using the CLI
You can configure Claude to connect to IDrive® e2 MCP using the Claude CLI.
-
Add the MCP server
claude mcp add --transport http idrive-s3
https://mcp.idrivee2.com/s3 -
Sign in to IDrive® e2
claude mcp login idrive-s3 -
Authorize the connection
A browser window opens to the IDrive® e2 sign-in page. Sign in using your IDrive® e2 credentials or choose Google Sign In. Complete MFA if configured for your IDrive® e2 account. Set session timeout duration and access permission. -
Complete authentication
After authorization, you'll be redirected back to the Claude CLI automatically. If the redirect doesn't complete, copy the callback URL from your browser and paste it into the terminal when prompted. -
Start using IDrive® e2 MCP
Once authentication is successful, you'll see the message "Authenticated with idrive-s3". The IDrive® e2 MCP tools are now available in Claude.