IDrive® e2 integration with Adobe Premiere Pro
How do I use Adobe Premiere Pro with IDrive® e2?
Adobe Premiere Pro is the leading video editing software for film, television, and online content. While Adobe Premiere Pro does not natively support cloud storage solutions like IDrive® e2, we have partnered with LucidLink to enable smooth, high-performance integration. This allows Adobe users to easily access and edit media stored on IDrive® e2's cost-effective and reliable cloud storage, directly within their workflow.
Note: Data restoration is managed by your individual backup software application. Because every environment is different and may involve various configurations, we strongly recommend reaching out to your backup software's technical support team for assistance with troubleshooting or application-specific questions.
Reference Architecture
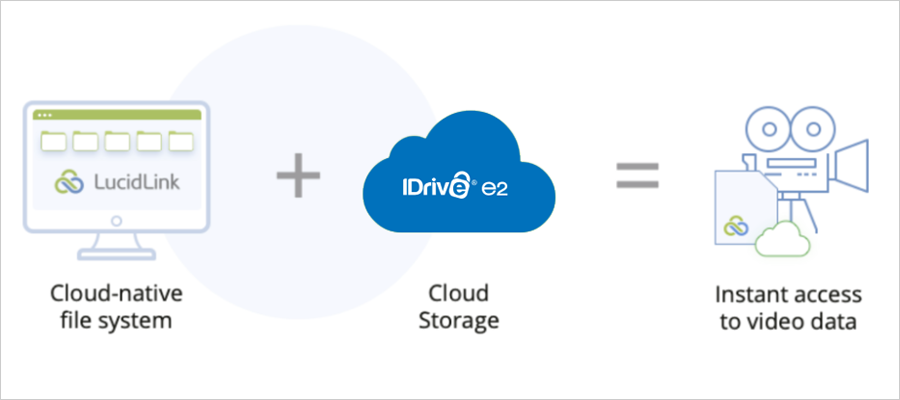
Table of Contents
- Prerequisites
- LucidLink configuration
- Using Adobe Premiere Pro with LucidLink filespace
- Joint use cases for IDrive® e2 - LucidLink - Adobe Premiere Pro solution
- Troubleshooting
- Appendix
- LucidLink filespace settings
Prerequisites
- An active IDrive® e2 account. Sign up here if you do not have one.
- A bucket in IDrive® e2. See how to create a bucket.
- Valid Access Key ID and Secret Access Key. Learn how to create an access key.
LucidLink configuration
Creating a LucidLink filespace
- Log in to your LucidLink web portal account at
https://www.lucidlink.com/webportal/login
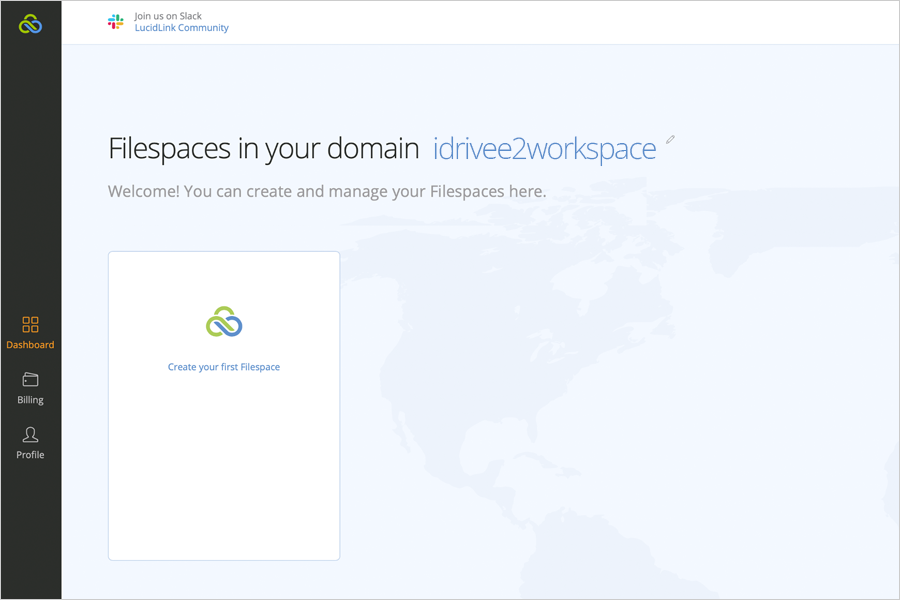
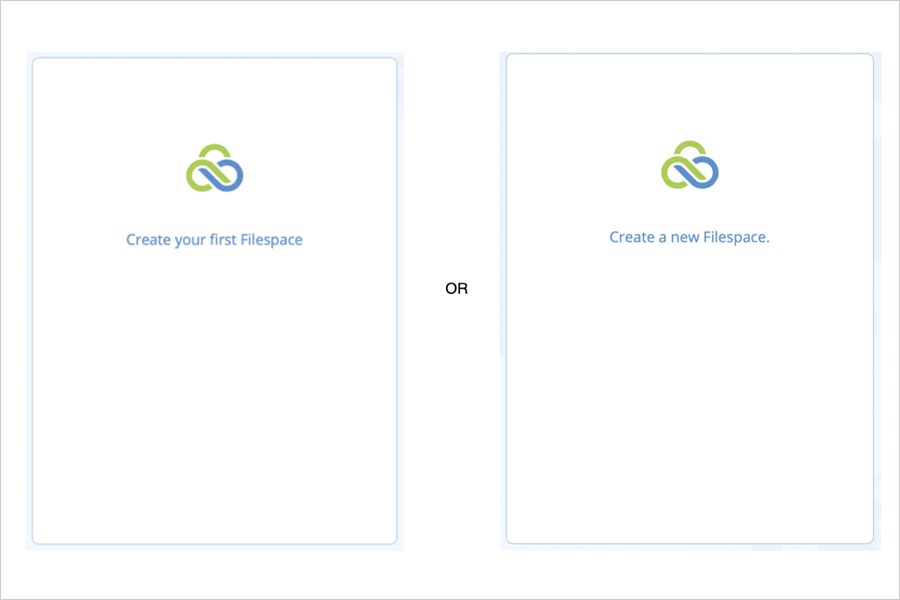
- Click on Create your first Filespace or Create a new Filespace (depending on the options presented in your account)
- To use IDrive® e2 with LucidLink, select either Basic or Custom Filespace. If you don't have an IDrive® e2 storage account, you can sign up for IDrive® e2 storage via LucidLink or directly via IDrive® e2.
If you already have an IDrive® e2 account choose Custom Filespace. If you choose to sign up via LucidLink, click on Basic Filespace. Click Next. In this example, we will proceed to create a Custom Filespace.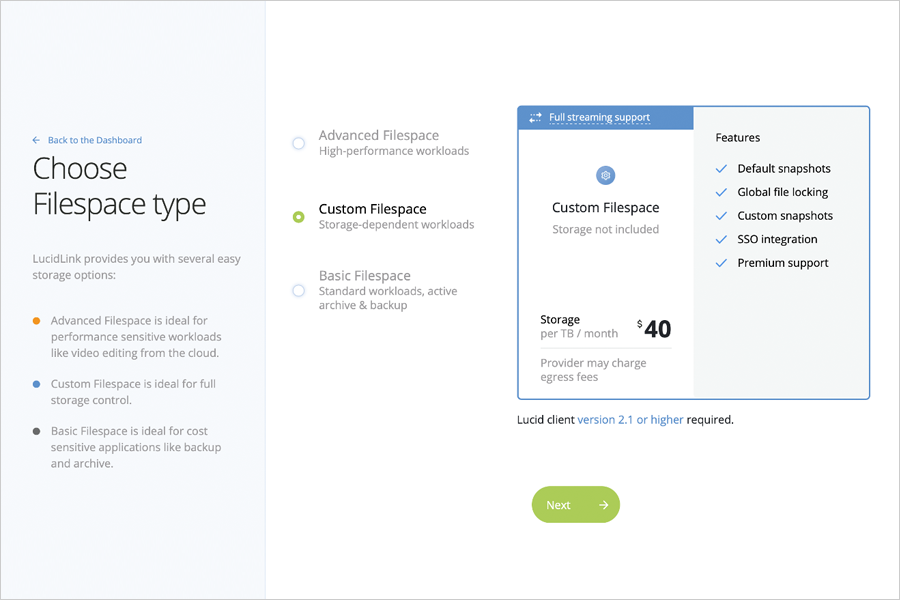
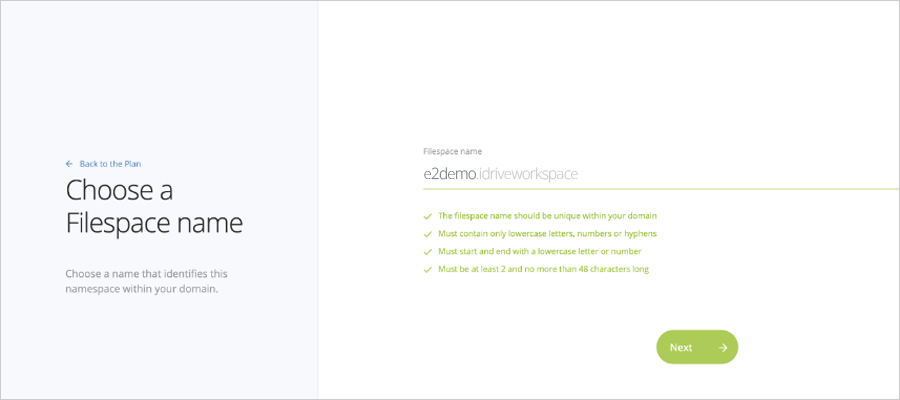
- Enter a filespace name and click Next.
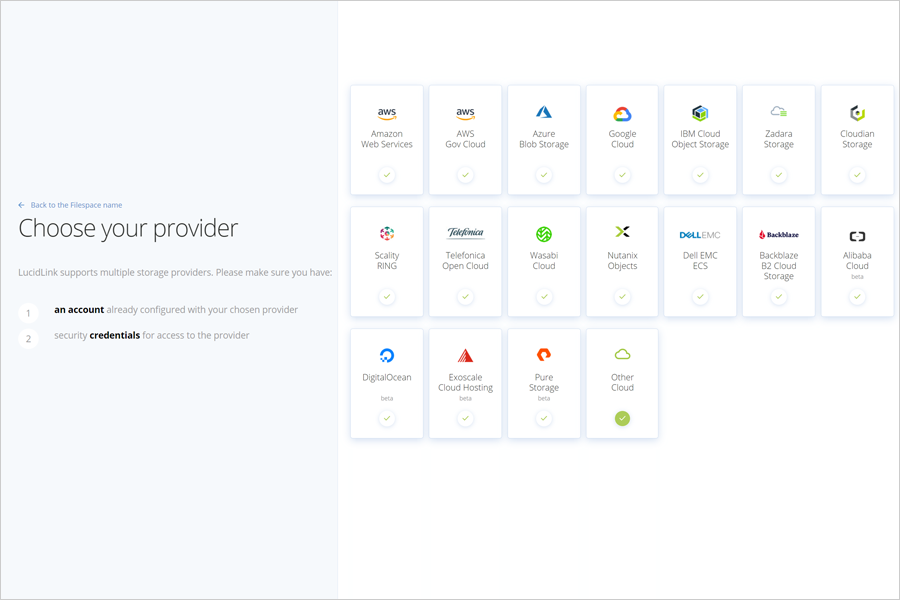
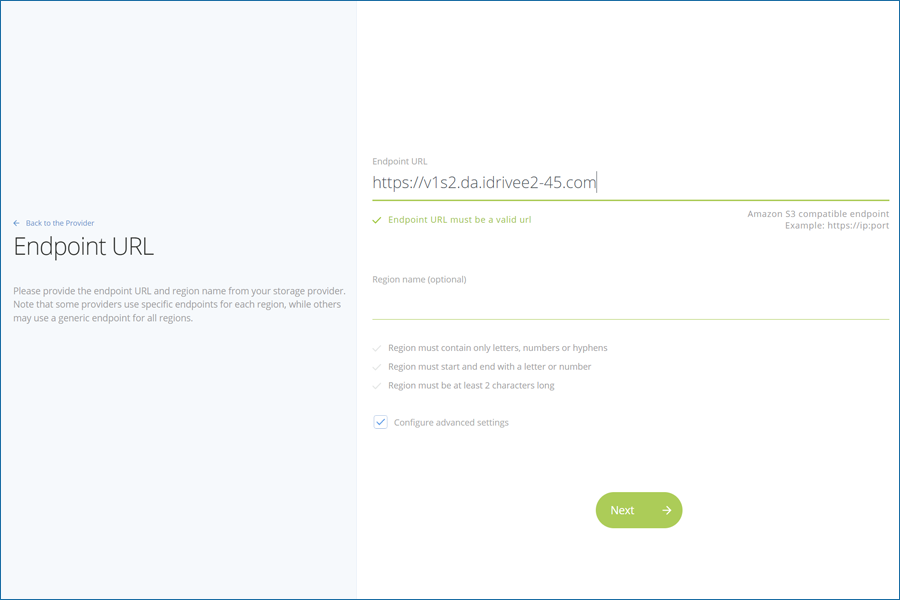
- Choose Other Cloud.
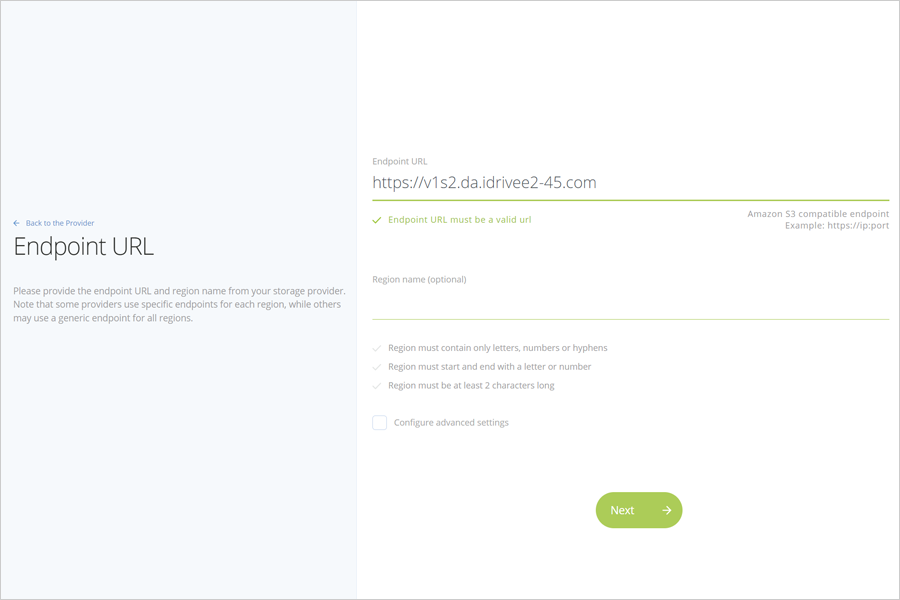
- Enter the storage endpoint that you enabled in IDrive® e2 dashboard and click Next. Click Create.
- Once the filespace is created, download and install the Lucidlink client.
- Click Initialize and click Launch the desktop client.
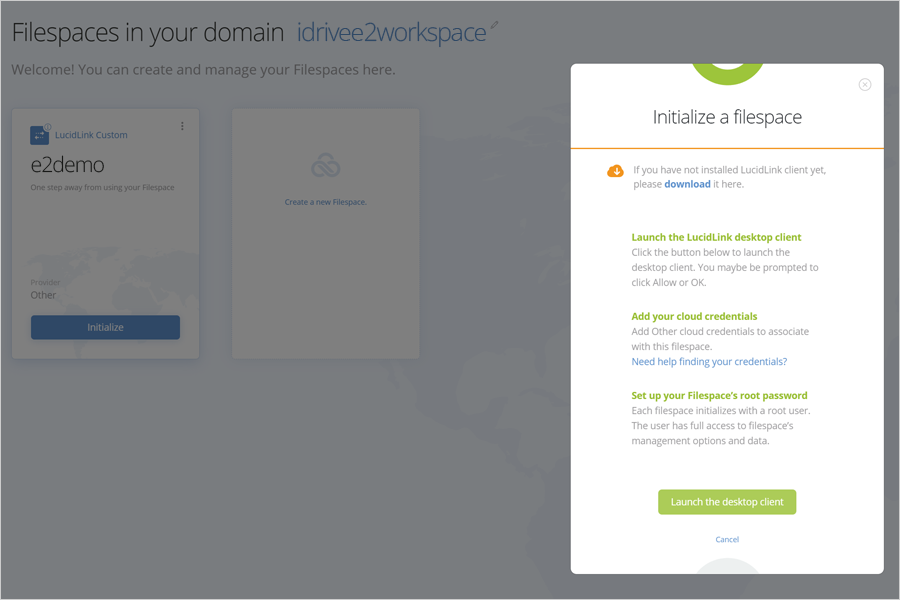
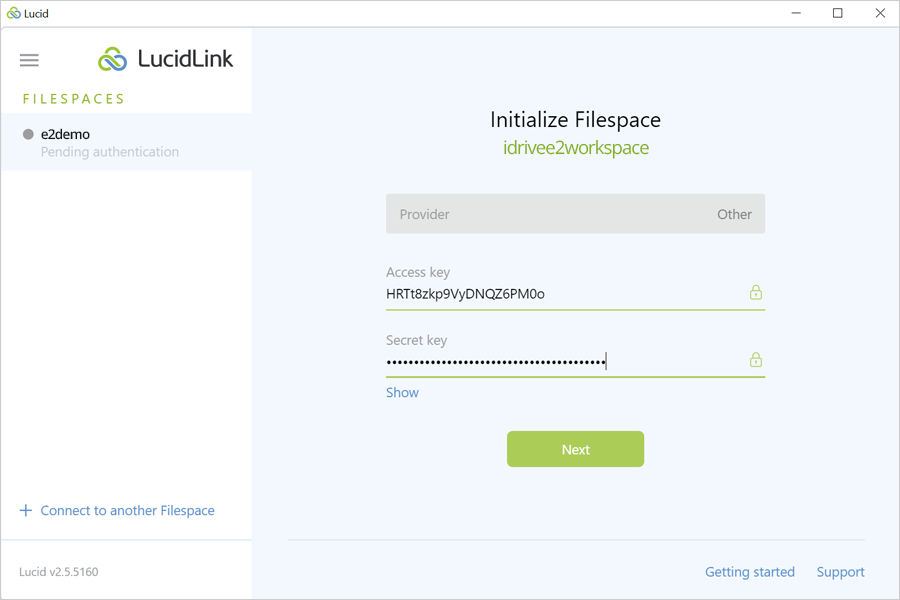
- Input the Access key and Secret key from IDrive® e2 and click Next. Learn how to create an access key.
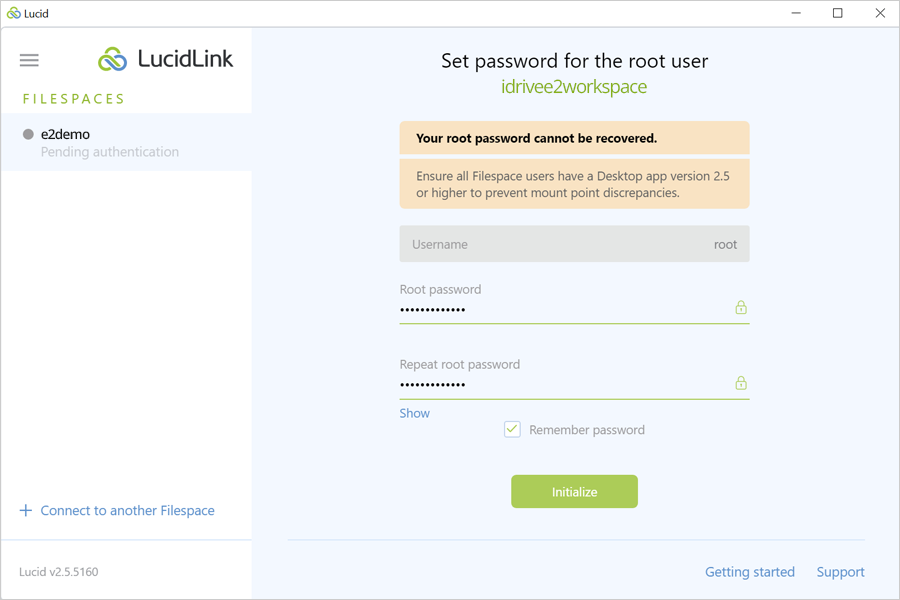
- Create a root password and click Initialize.
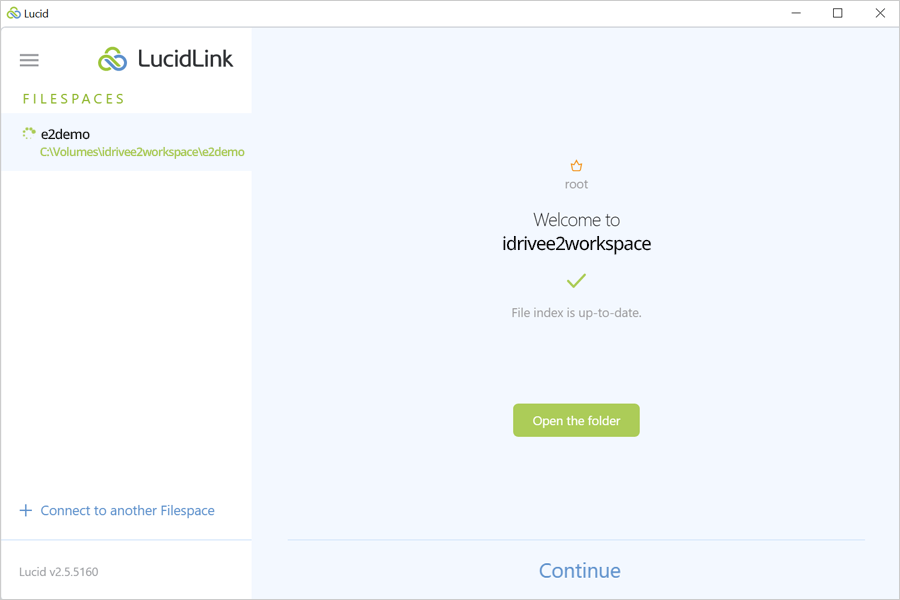
- Once the initialization is successful you can open the LucidLink Filespace folder and start working on your project.
- Adobe Premiere Pro application installed
- LucidLink application installed on the same workstation
- IDrive® e2 cloud storage configured in LucidLink application as a storage target.
- Launch Adobe Premiere Pro and start a new project (or open an existing project)

- Provide the project a name.
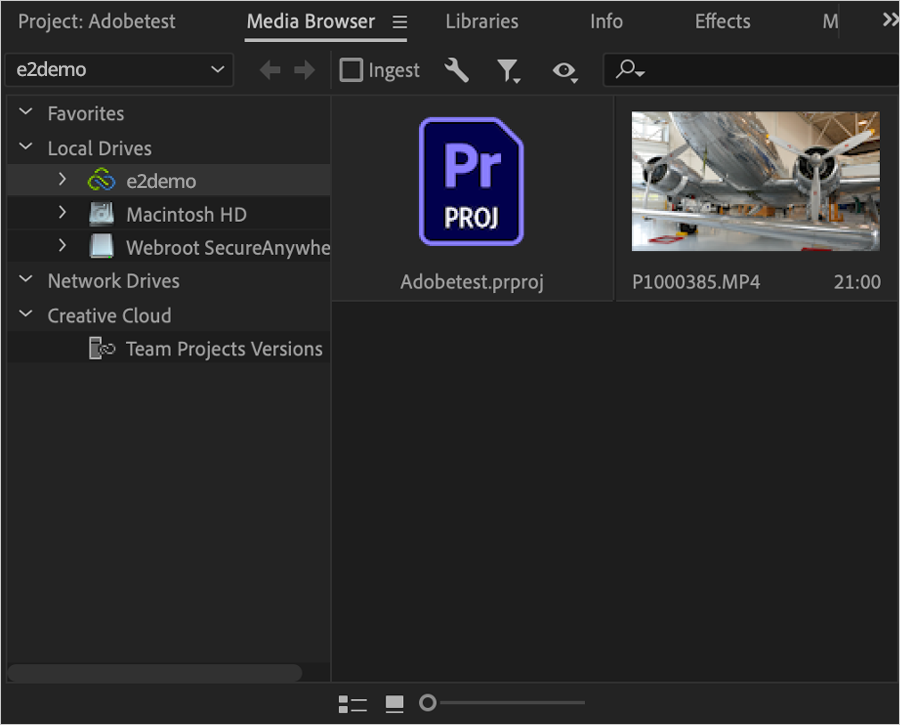
To configure the location for your project to be saved, click Browse. Choose e2demo, the filespace we created earlier and click OK on the New Project window.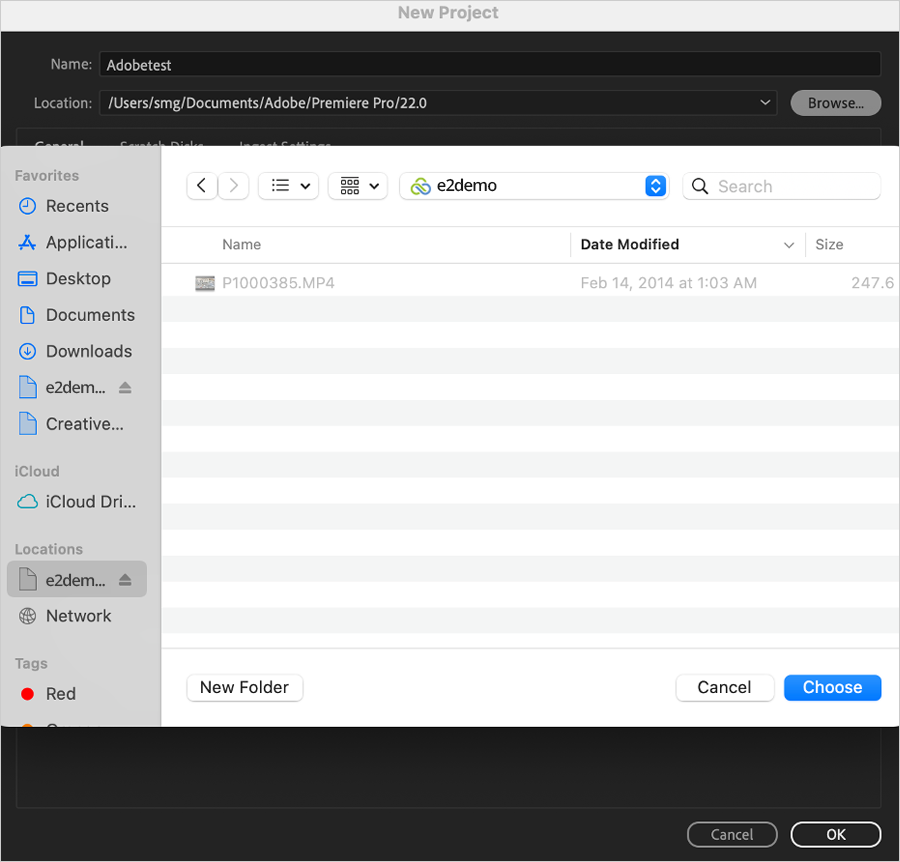
- Adobe Premiere Pro's media asset pane shows all available assets for use in this project.
At this point, all of Adobe Premiere Pro's feature set is available at your disposal.
- Collaborative video editing
- Quick access to video segments
- Active archive of video assets
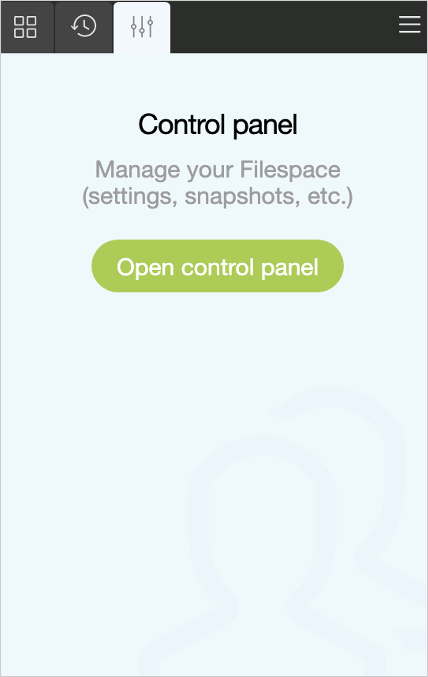
- Log in to your filespace using the root user account. Click Open control panel to manage the filespace and create users.
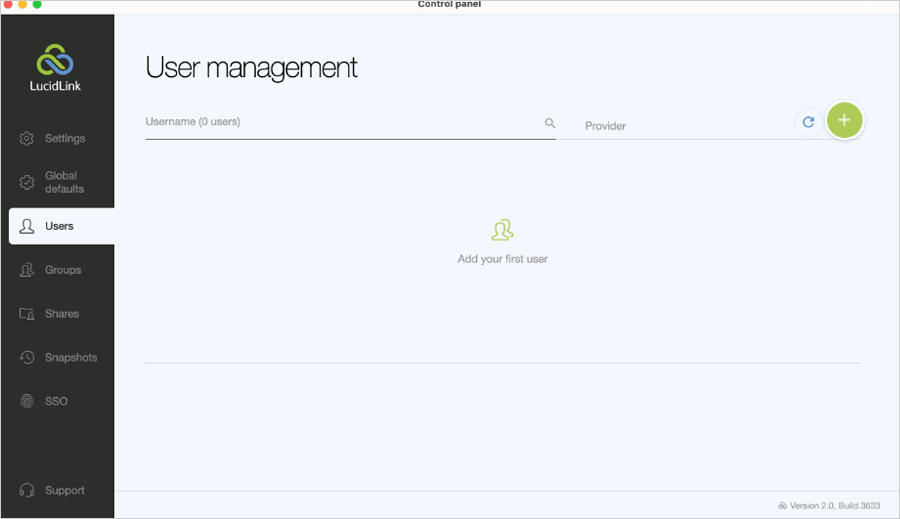
- In the Control panel, navigate to the Users tab.
- Click on + to add user.
- Provide a username and password and click Add user.
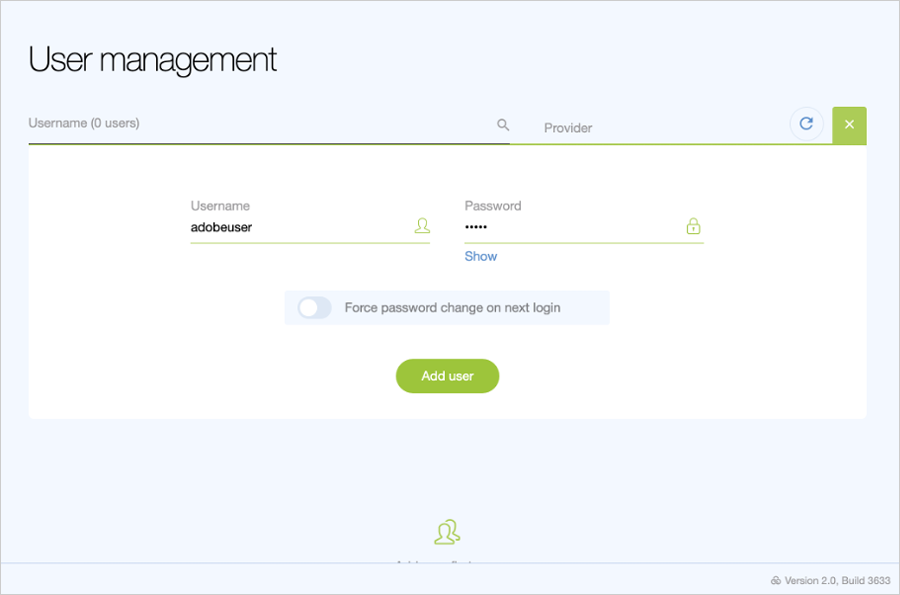
- The user will be listed under the users. To provide the user access to the required folder, expand add share. Select the desired path under Share path. Check the desired access level - Read or Read and Write and click on the + .
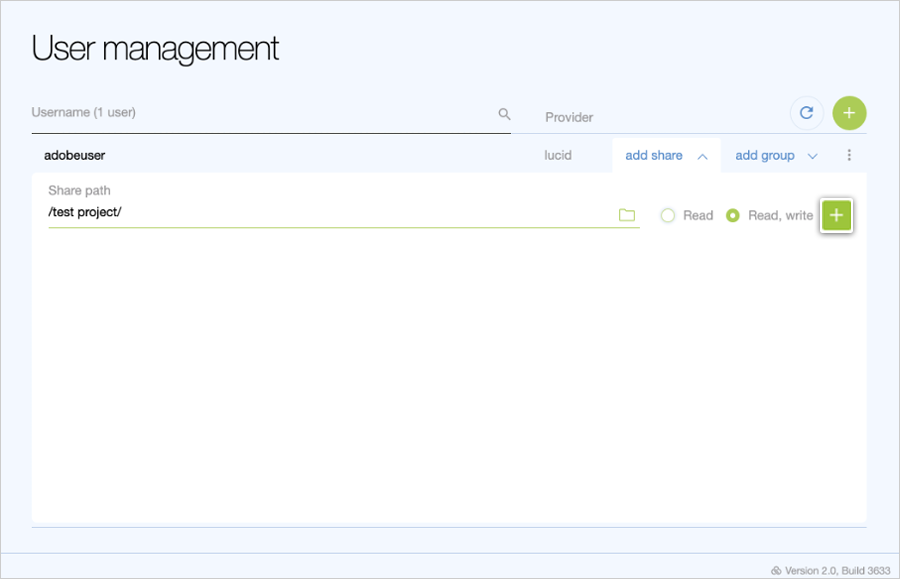
You can follow the above steps to create multiple users.
- Users can log in to the Lucid application using their accounts as shown below.

With multiple users created and entitled to use the same share - metadata of the video assets will be made available to all users simultaneous video editing.
Quick access to video segments
Uploading data to IDrive® e2 account via the LucidLink application has several benefits:
- LucidLink application chunks up the data into 256KB objects before uploading data to IDrive® e2
- LucidLink is a distributed file system that splits the data and the metadata layers allowing simultaneous user access.
- LucidLink streams, prefetches data, and offers caching support.
- IDrive® e2 re-encrypts once the data makes its IDrive® e2 storage.
With this flow in mind, when a video asset is being altered, the LucidLink application only downloads the segments that require alteration - this behavior makes accessing the asset to be altered and re-uploading much quicker than traditional methods.
Active archive of data
IDrive® e2 cloud storage services are 100% hot. With no tiers in service and complications of lifecycle policy, all of your video assets are available 100% of the time. With traditional designs, video assets are aged out to low-cost storage via lifecycle policies and have a long retrieval time. With our joint offering, customers will benefit from active archiving ability with instant data availability.
Troubleshooting
To troubleshoot any performance or connectivity-related issues with your IDrive® e2 - LucidLink filespace you will need to know the following:
- Your IDrive® e2 Account ID or email address associated with your IDrive® e2 account
- Your IDrive® e2 Bucket name
- The IDrive® e2 region in which your bucket is located.
If you are using the Basic LucidLink filespace and have signed up for an IDrive® e2 account through LucidLink, you may not be aware of the above details. You can retrieve the IDrive® e2 bucket and region information using the lucid status command.
To get this information, follow these steps:
Open a command prompt window or Terminal from your machine connected to the LucidLink filespace and run the command lucid status.
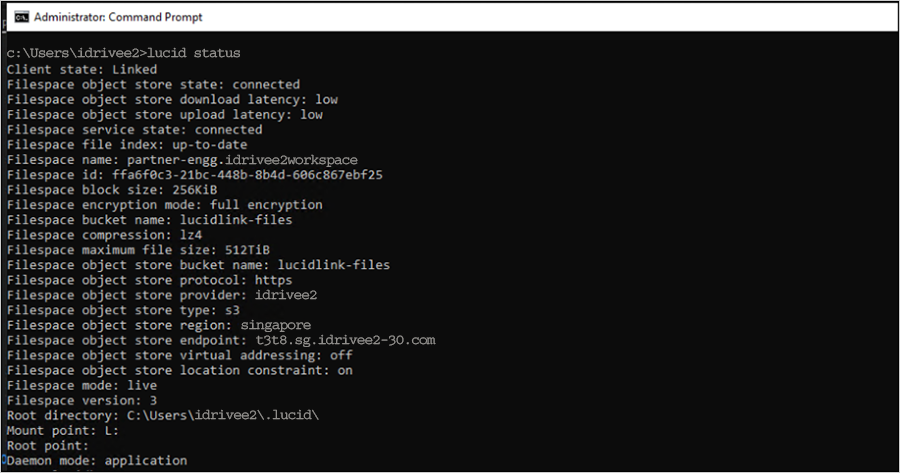
The command provides the information about the filespace including the details about the Cloud storage provider, bucket name, region, and endpoint URL.
C:\Users\IDrive e2>lucid status
Client state: Linked
Filespace object store state: connected
Filespace object store download latency: low
Filespace object store upload latency: low
Filespace service state: connected
Filespace file index: up-to-date
Filespace name: partner-engg.IDrivee2lucidlink
Filespace id: ffa6f0c3-21bc-448b-8b4d-606c867ebf25
Filespace block size: 256KiB
Filespace encryption mode: full encryption
Filespace bucket name: lucidlink-files
Filespace compression: lz4
Filespace maximum file size: 512TiB
Filespace object store bucket name: lucidlink-files
Filespace object store protocol: https
Filespace object store provider: IDrive e2
Filespace object store type: s3
Filespace object store region: Singapore
Filespace object store endpoint: t3t8.sg.idrivee2-30.com
Filespace object store virtual addressing: off
Filespace object store location constraint: on
Filespace mode: live
Filespace version: 3
Root directory: C:\Users\IDrive e2\.lucid\
Mount point: L:
Root point:Now that you know this information, you can check to see if you can reach that region and bucket.
If you are still unable to resolve your issues and there are no specific error logs that the Lucid Link team has identified, please have the following information ready when you reach out to IDrive® e2 support -
- Account ID or email address associated with your IDrive® e2 account
- Bucket name
- IDrive® e2 region in which your bucket is located.
Appendix
Adobe Premiere Pro settings
It is recommended to use the proxy workflow when editing video files using Adobe Premiere Pro - LucidLink - IDrive® e2 joint solution.
For more information on working with proxies in Adobe Premiere Pro, please click here.
For more information on working with proxies in Adobe Premiere Pro, please click here.
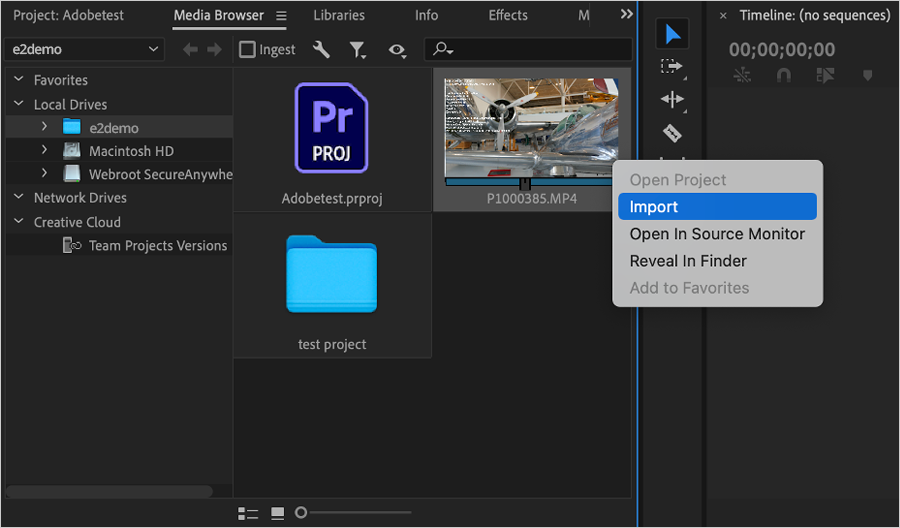
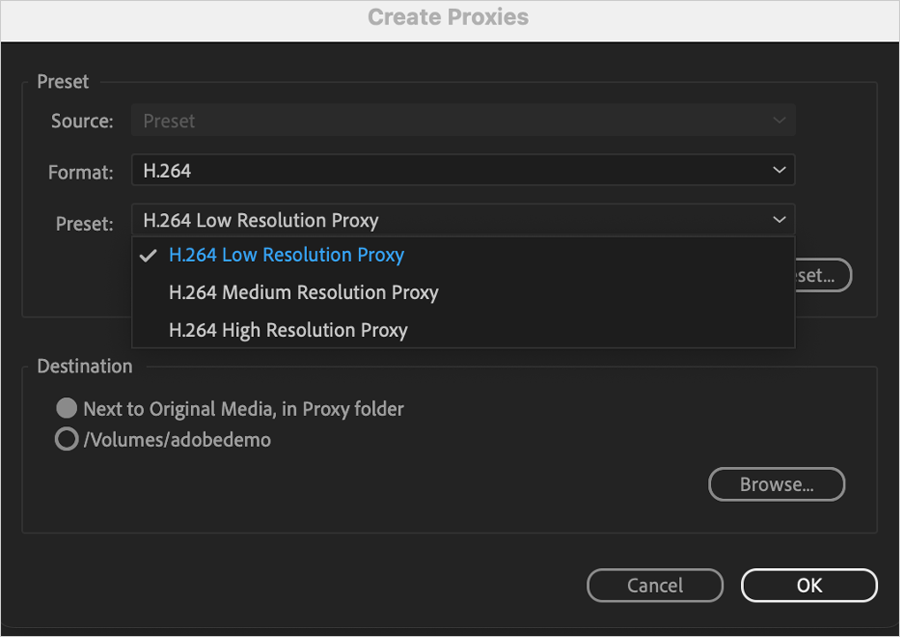
- To create a proxy file, right-click on the video file in the Media Browser and select Import.
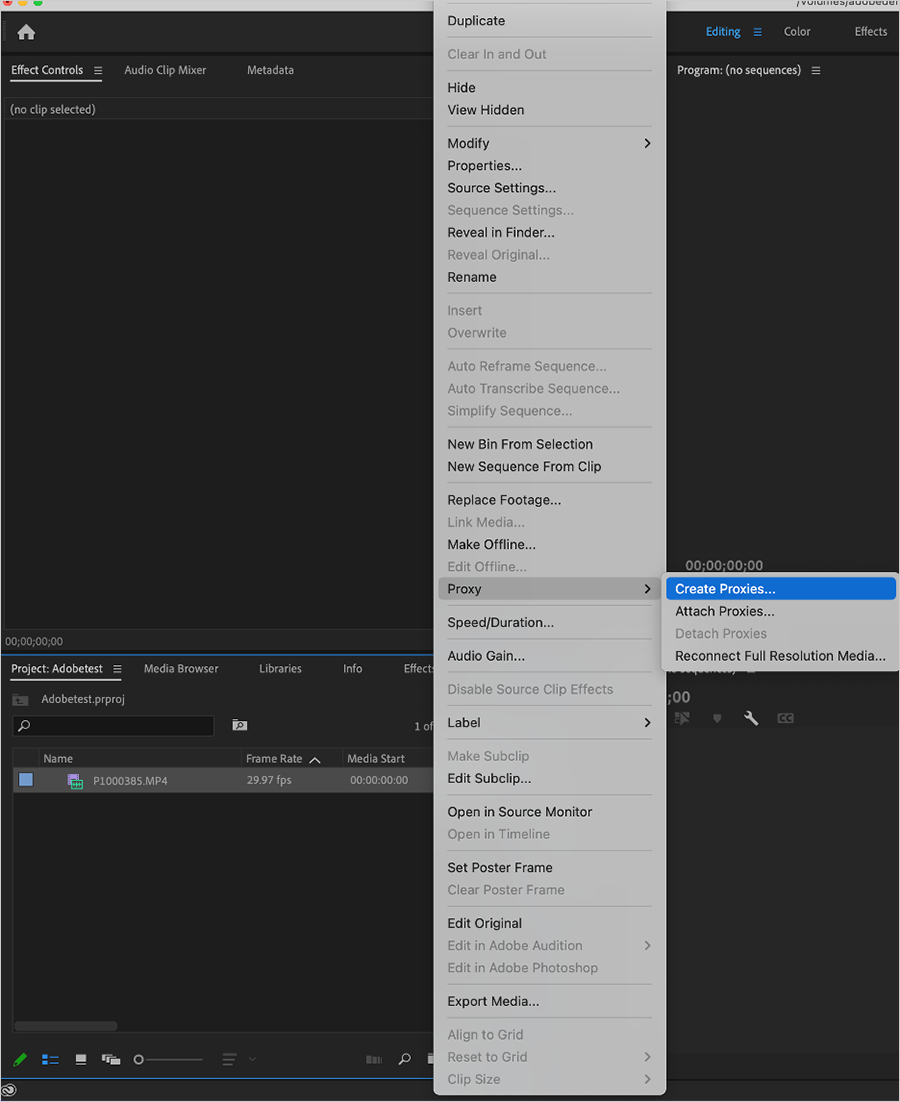
- The video file is imported into your project. Right-click on the file and select Proxy → Create proxy.
- Select the desired resolution preset for the proxy file. Select the desired destination and click OK.
- LucidLink recommends disabling the Automatic audio waveform generation in Adobe Premiere Pro to take utilize the streaming capabilities built into LucidLink. For more information, please click here.
- During the LucidLink filespace creation process at Step 15, select the Configure advanced settings checkbox and click Next.
- Select the block size as 512 KB and click Next.
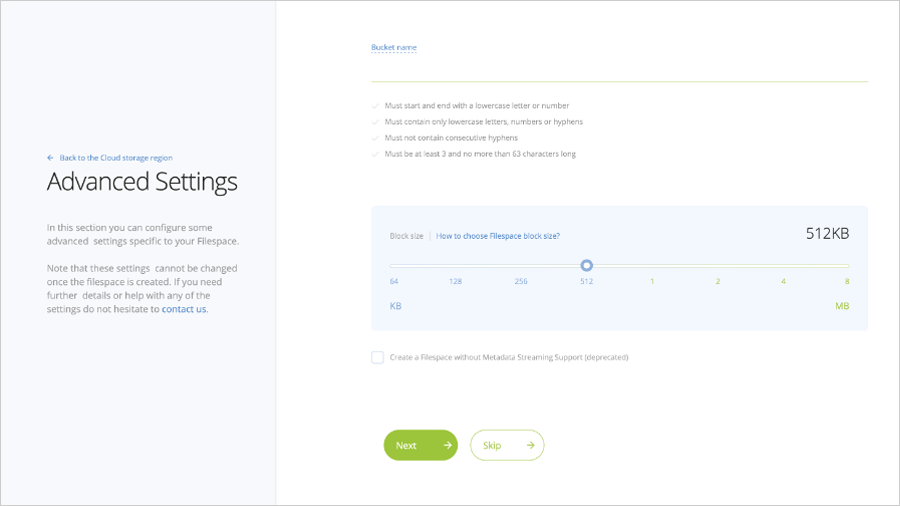
Review the filespace configuration summary and click Create.
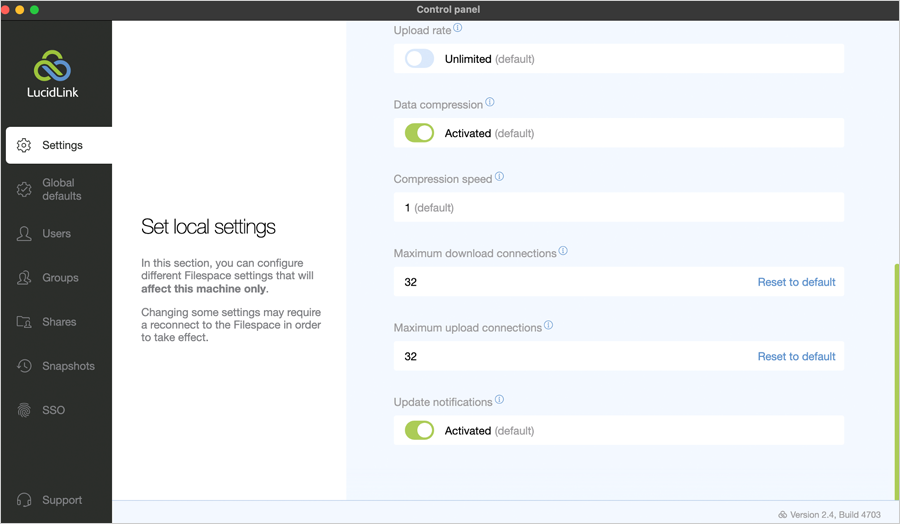
- Administrators should also change the default Max Upload Connections and Max Download Connections to 32 connections up/down from 64. Login to the Lucid control panel following step 15. Navigate to Settings and change the Maximum upload and download connections to 32.
Using Adobe Premiere Pro with LucidLink filespace
In order to access the LucidLink filespace from Adobe Premiere Pro, you will need the following -
Joint use cases for IDrive® e2 - LucidLink - Adobe Premiere Pro solution
Below are some of the joint use cases validated for the IDrive® e2 - LucidLink - Adobe Premiere Pro solution
Collaborative Video editing
This use case allows for multiple users to work simultaneously on copies of the same video project. Providing instantaneous access to the media assets, allows for multiple users to work on & finalize the project, instead of having multiple users work on copies of assets within different locations that require large swaths of data to be uploaded and re-downloaded, which is ineffective.
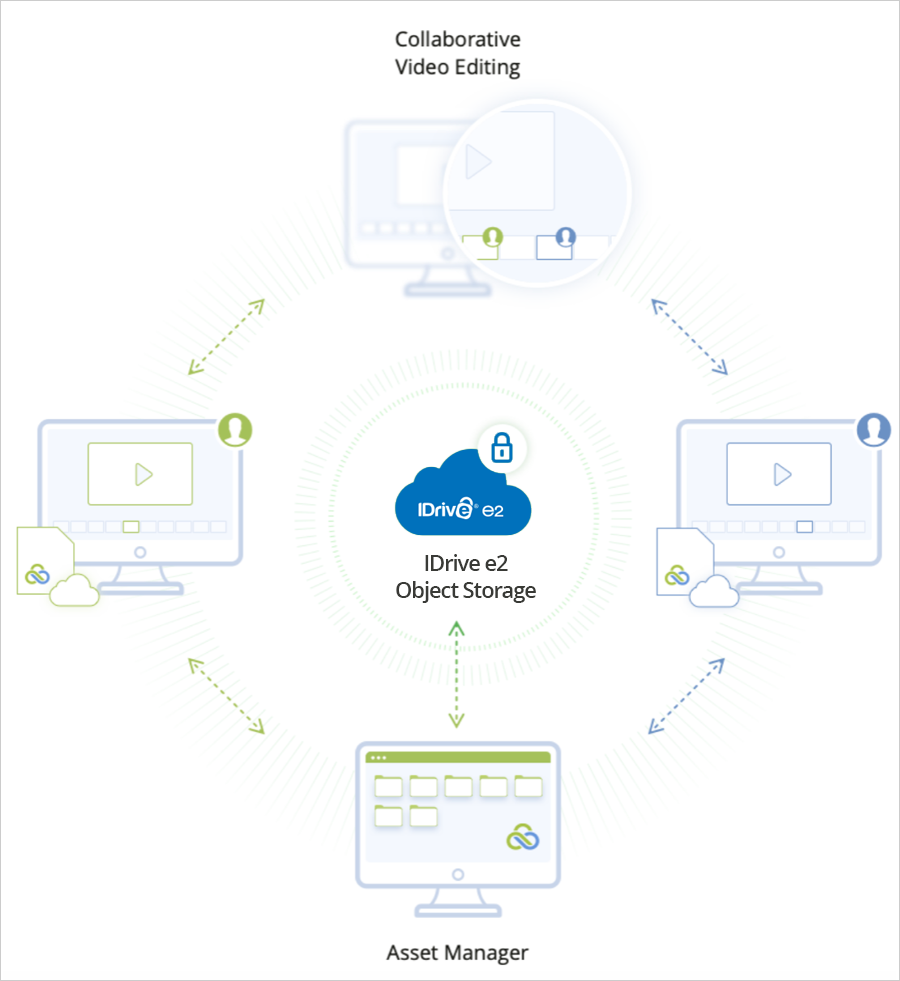
Here is how it's achieved:
LucidLink filespace settings
LucidLink writes the files to IDrive® e2 in 256 KB block sizes. This is the default setting when creating a filespace. We have noticed that increasing the block size to 512 KB provides improved performance.
Note: The block size is set during the filespace creation process. It cannot be changed once a filespace is created.
To change the block size of your filespace, follow these steps: