Seamless QNAP HBS 3 to S3 – Native, Ransomware-Proof, and Effortless
- Holistic NAS defense: Files, system configs, apps, LUNs, and volumes
- Disaster recovery ready: One-click restores with bare-metal options
- QNAP-native perks: QuDedup for space savings, snapshots, RTRR sync, and hybrid cloud workflows
No middleman PCs. No feature gaps. Just pure NAS-to-IDrive Storage efficiency.
HBS 3 operates 100% on the QNAP NAS. Set it and forget it—automated backups hum along 24/7, even with your desktop powered down.
Smart Versioning & Ransomware-Resistant Rotation
Retain control without excess:
- Multi-version archiving for granular point-in-time restores
- Intelligent rotation rules, including Auto-purge by age, count, or custom logic
- Ransomware shield with S3 Object Lock for immutable backups (WORM compliance)
- Optimized storage with QuDedup compression to slash costs
Why IDrive + QNAP-HBS 3 Outshines Mapped Drives
Secure your QNAP NAS Data with IDrive®
How to Connect QNAP HBS 3 to IDrive®
Follow these steps to set up IDrive® as your backup storage in HBS 3 – Hybrid Backup Sync:
- Enable QNAP Backup in IDrive
- Install HBS 3 – Hybrid Backup Sync
- Set Up Storage Space
- Connect IDrive
- Configure Backup
- Enable QNAP Backup in IDrive
- Sign in to your IDrive account.
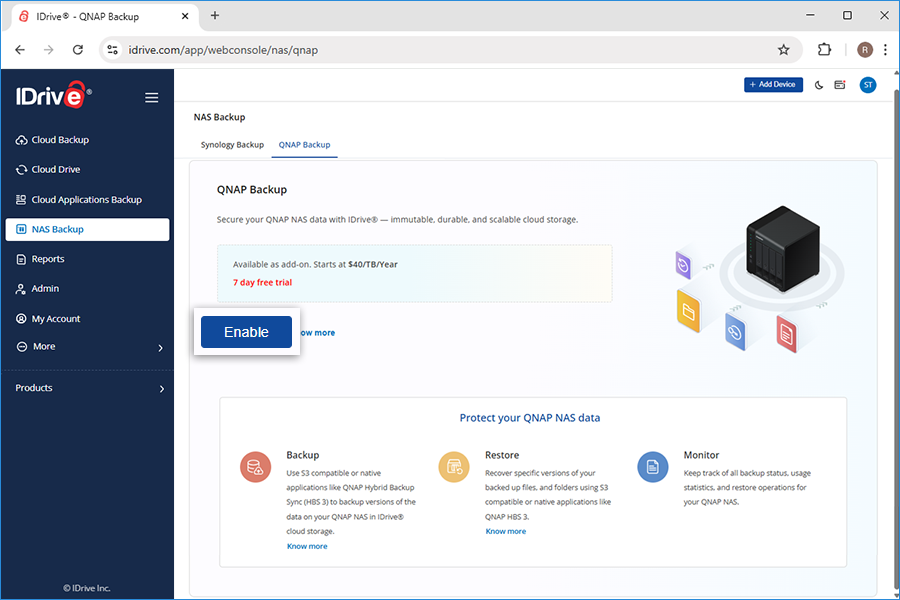
- Navigate to NAS Backup > QNAP Backup.
- Click Enable.
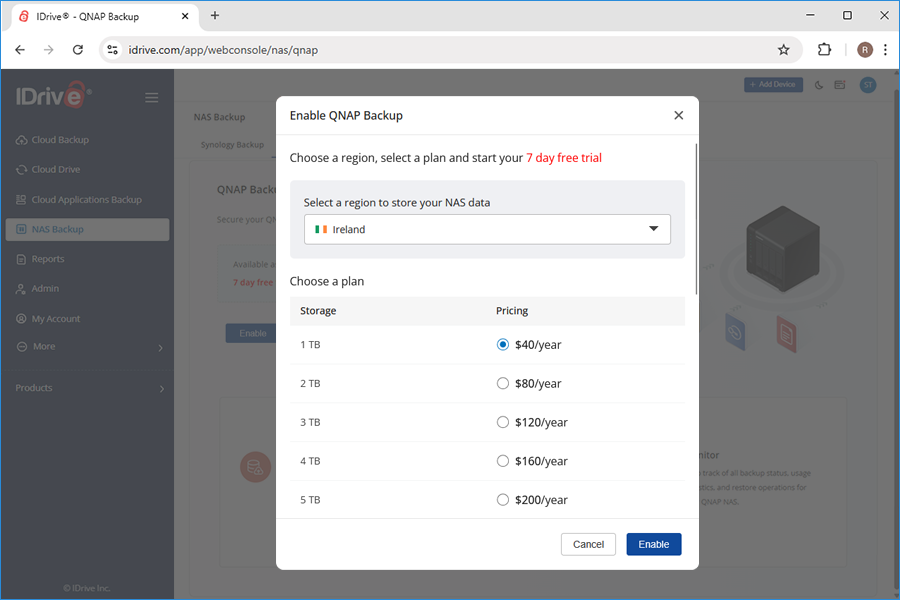
- Select a region and a plan and click Enable.
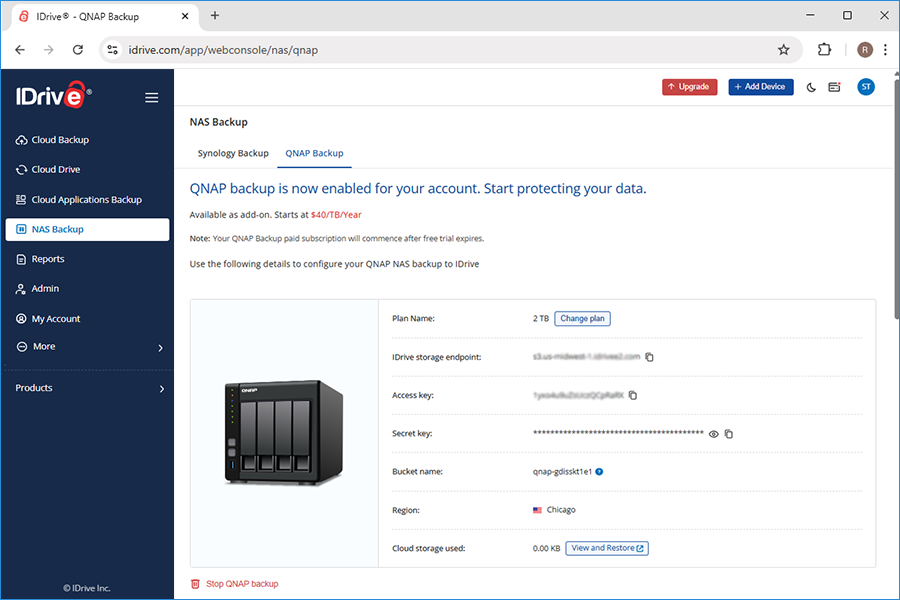
- Use the generated IDrive storage endpoint, secret and access keys for adding IDrive storage as destination in HBS 3 – Hybrid Backup Sync, as shown in the below steps.
- Install HBS 3 – Hybrid Backup Sync
- Log in to your QNAP NAS as an administrator
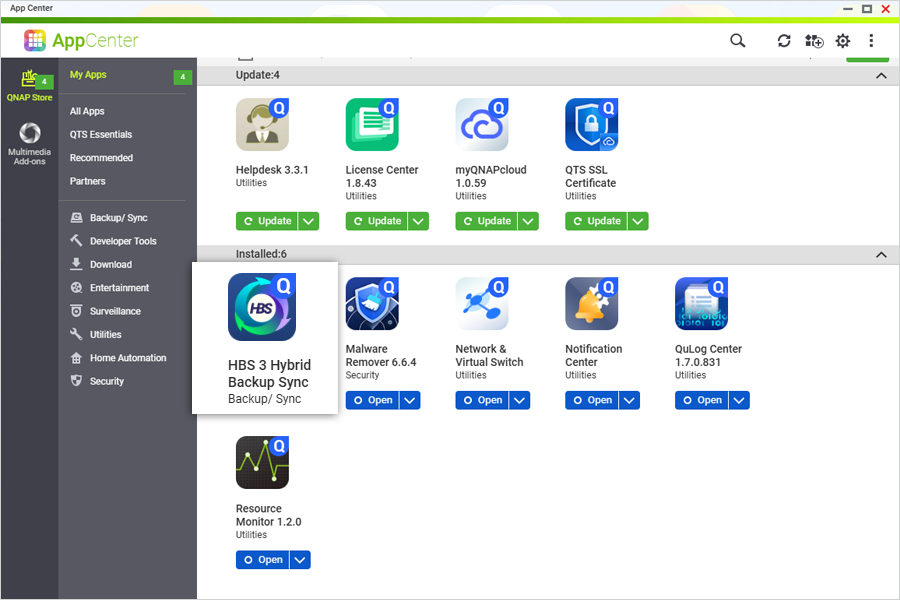
- Open the QNAP App Center and install HBS 3 – Hybrid Backup Sync.
- Set Up Storage Space
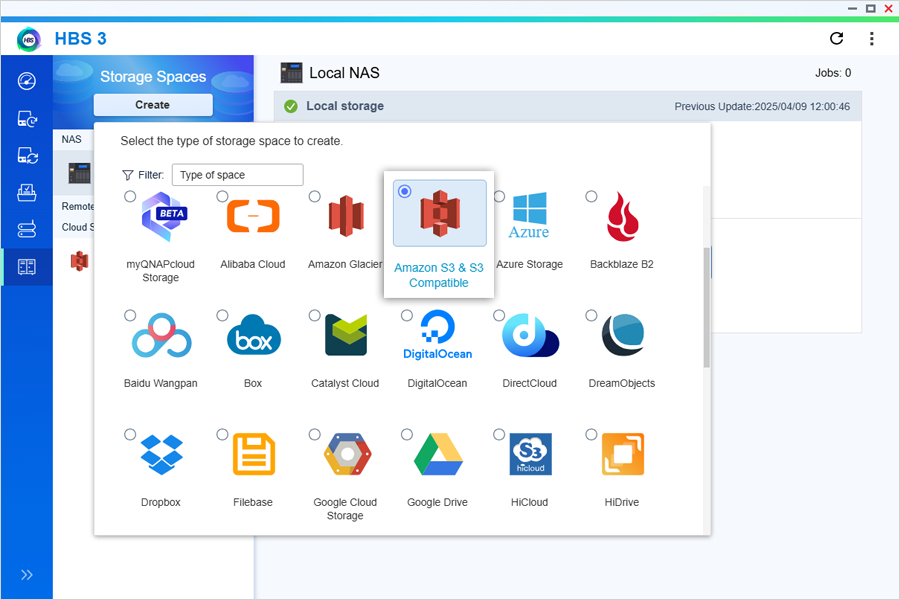
- Launch HBS 3 and navigate to the Storage Spaces tab.
- Click Create, then select Amazon S3 & S3 Compatible.
- Configure IDrive Storage
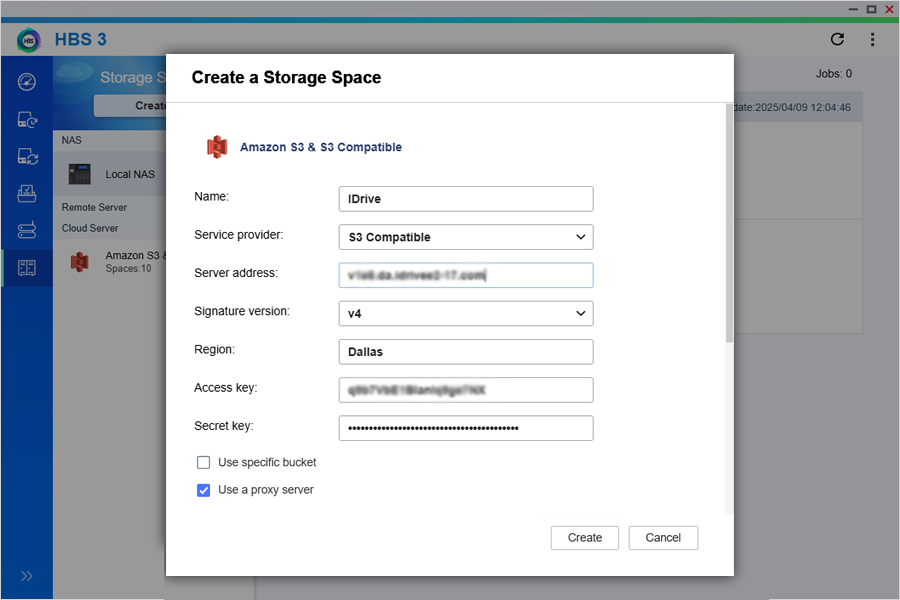
- Enter the following details:
- Name: Enter a name for the IDrive storage destination
- Service provider: Select S3 Compatible
- Server address: Enter the IDrive storage endpoint
- Signature version: Select v4
- Region: Enter a name for the region. E.g. us-east
- Access key: Enter the IDrive access key
- Secret key: Enter the IDrive secret key
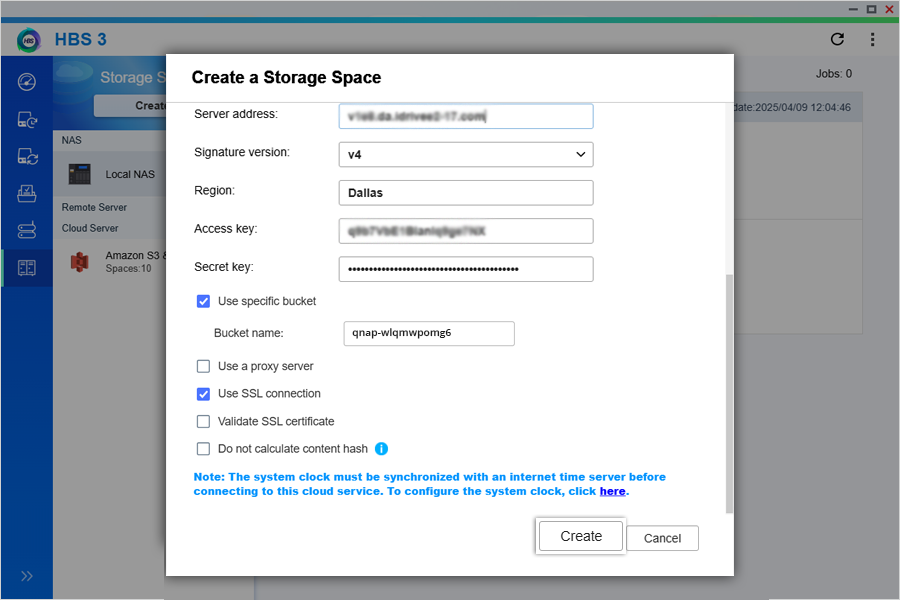
- Use specific bucket: Select the checkbox and enter the bucket name from IDrive
- Use SSL connection: Ensure this checkbox is selected
- Click Create to add the storage space.
- Enter the following details:
- Configure Backup
- Go to the Backup & Restore tab and select New backup job from the Create dropdown.
- Select files or folders for backup and click Next.
- Select the source NAS type — Local or Remote, based on your device location.
- Under Cloud Server, select Amazon S3 & S3 Compatible.
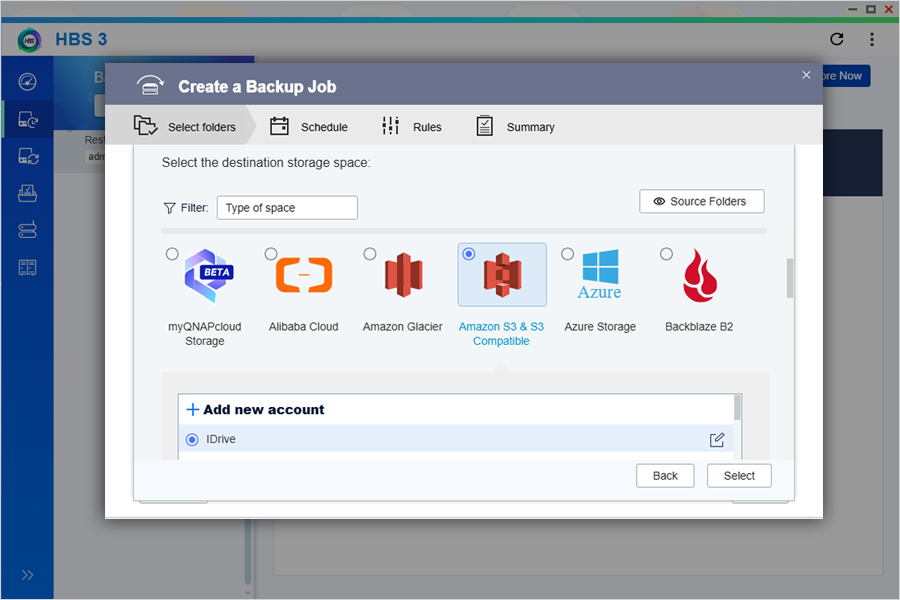
- Choose the newly created storage space – IDrive – as your backup destination.
- Select the IDrive bucket from the dropdown and set default values for Multipart size.
- Select the destination folder. You can either:
- Select the bucket name as root folder for your backups
- Or enter a folder name to add a new folder
- Click OK.
- Set up a schedule to automate backups and rules for exclusions, if required.
- Configure a job policy if required.
- Verify the details in the summary and click Create.
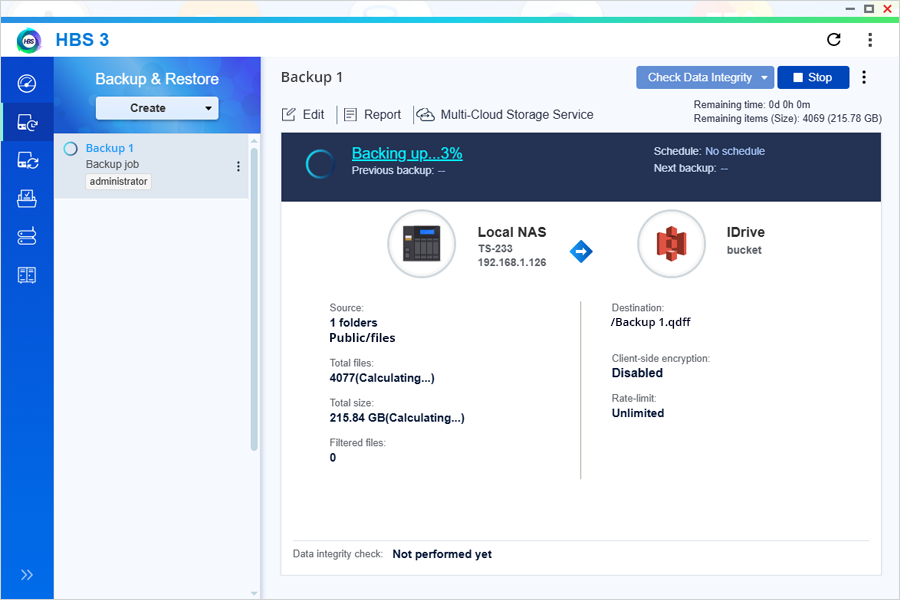
- You have now created the backup job. You can backup your data from the NAS device to IDrive immediately by clicking Backup Now or let the job run as per the set schedule.
Once set up, your QNAP NAS backups will be securely stored in IDrive®, ensuring redundancy, reliability, and quick data recovery when needed.
If you receive an error while configuring IDrive cloud storage in QNAP HBS 3, specify the server address in the format <endpoint>:443 (for example, s3.us-east-1.idrivee2.com:443). This is currently required due to a known issue in QNAP HBS 3, which requires the HTTPS port (443) to be explicitly specified. Due to this issue, using Signature Version 4 (v4) may result in an "Authentication error. Cannot connect to cloud service."
As a temporary workaround, configure the connection using Signature Version 2 (v2). If the issue persists, verify the same IDrive cloud storage credentials using another S3-compatible client (such as AWS CLI or S3 Browser). If the credentials work successfully, please contact QNAP Support for further assistance with the Signature Version 4 compatibility issue.