Integrate Veeam with IDrive® e2 and Configure Proxmox VM Backup
Veeam delivers enterprise-grade backup, replication, and recovery for virtual, physical, and cloud workloads, while Proxmox Backup Server enables efficient, deduplicated backups of VMs and containers within Proxmox VE environments. Configuring Proxmox VM backup alongside Veeam extends protection across hybrid infrastructures with streamlined restore capabilities. Integrating Veeam with IDrive® e2 provides a capable, scalable cloud object storage solution that supports reliable backup, recovery, and long-term data resilience.
Prerequisites:
Before you begin, ensure the following:
- An active IDrive® e2 account. Sign up here if you do not have one.
- A bucket in IDrive® e2. Learn how to create a bucket
- Valid Access Key ID and Secret Access Key. Learn how to create an access key.
- ProxMox Server access with multiple VMs.
- Install the Veeam Backup & Replication application on a supported OS on your machine.
The following steps can help you integrate Veeam with IDrive® e2 and configure Proxmox VM Backup.
Configure Proxmox Server as Inventory
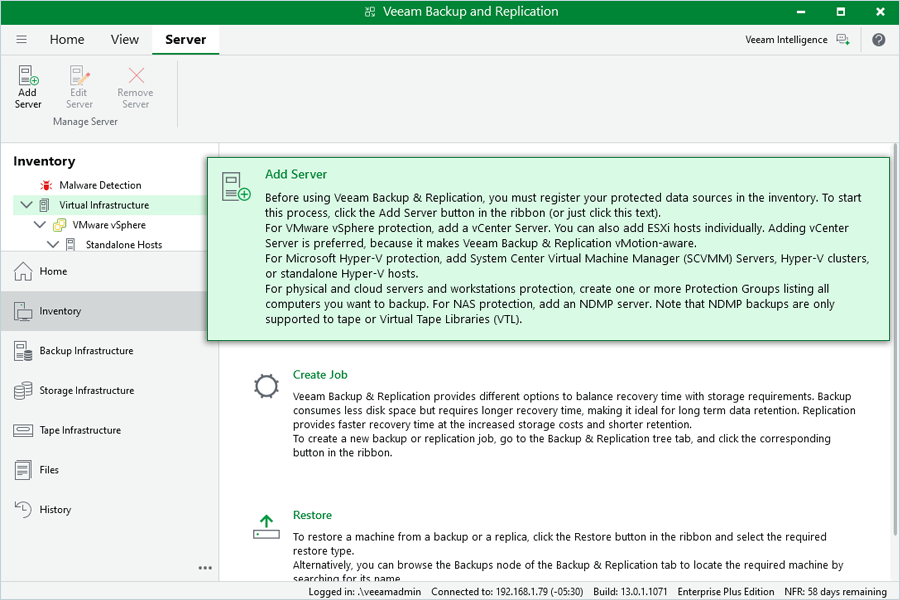
- Launch the Veeam Backup and Replication application.
- Under Home, click Inventory.
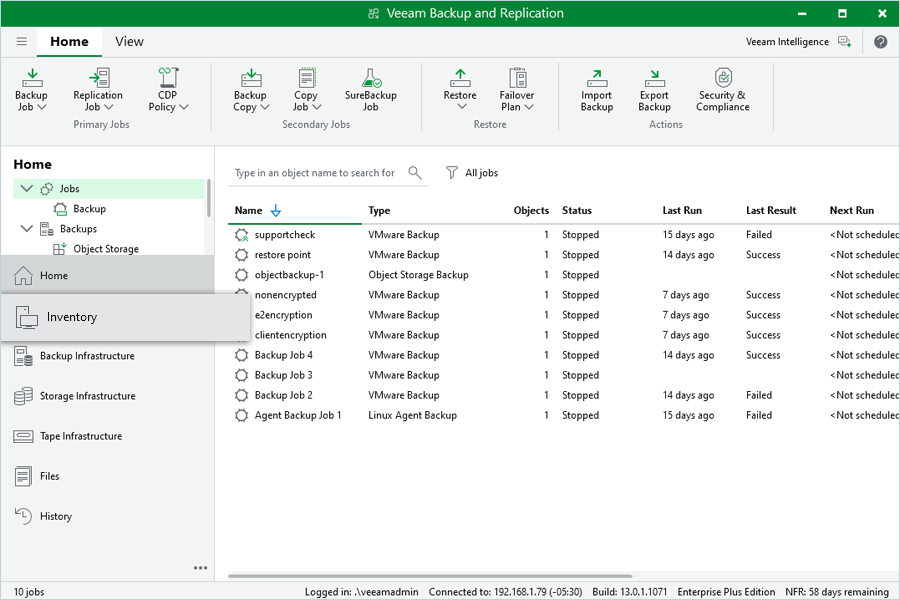
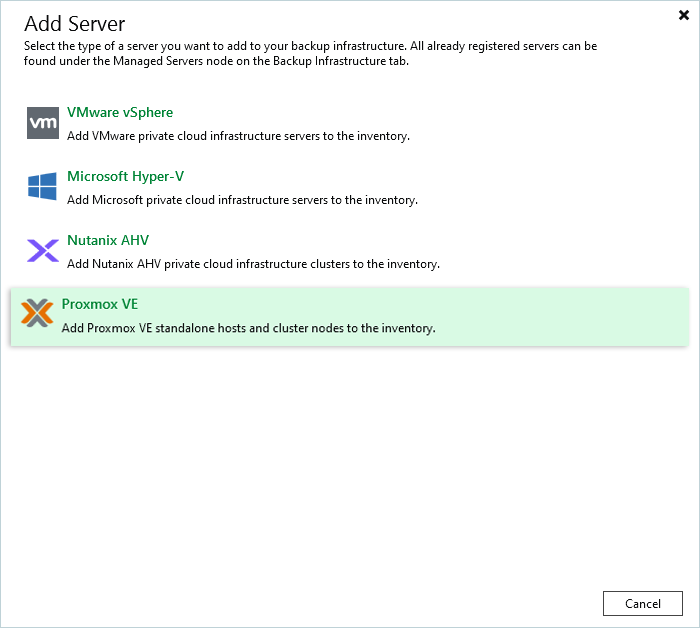
- Select Inventory and click Add Server.
- Select Proxmox VE as the server type.
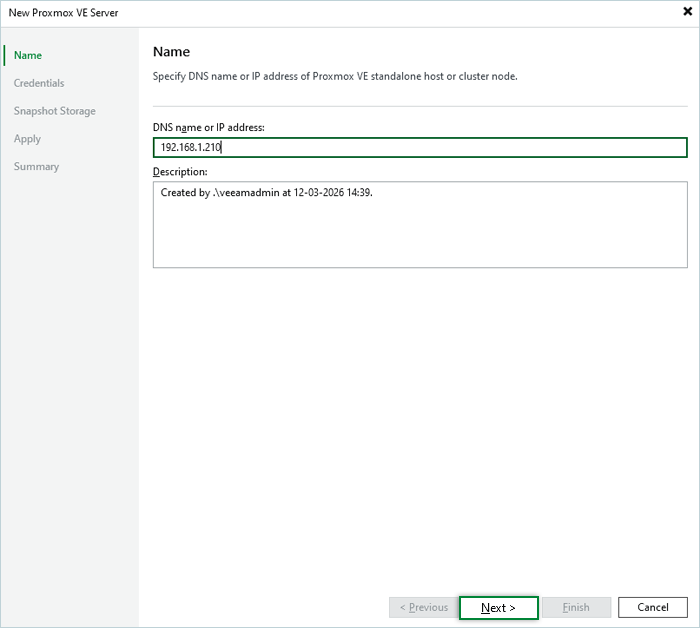
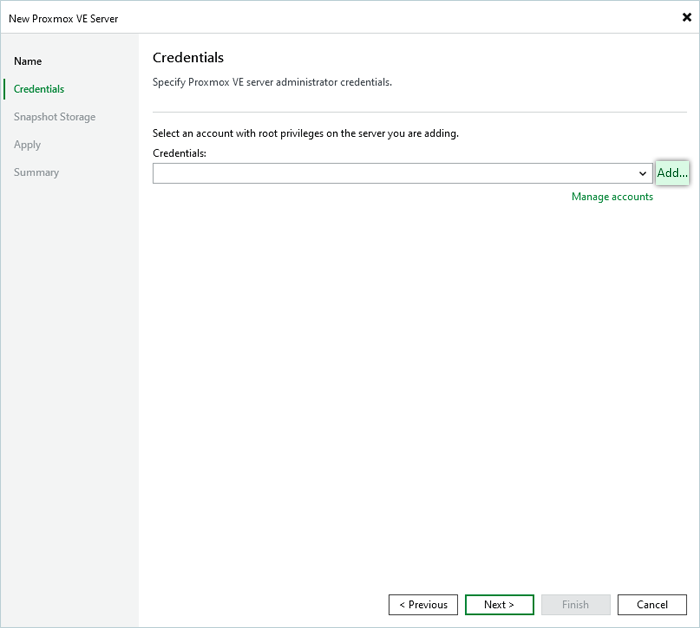
- In the New Proxmox VE Server window, enter the DNS Name or IP Address of the server. Click Next.
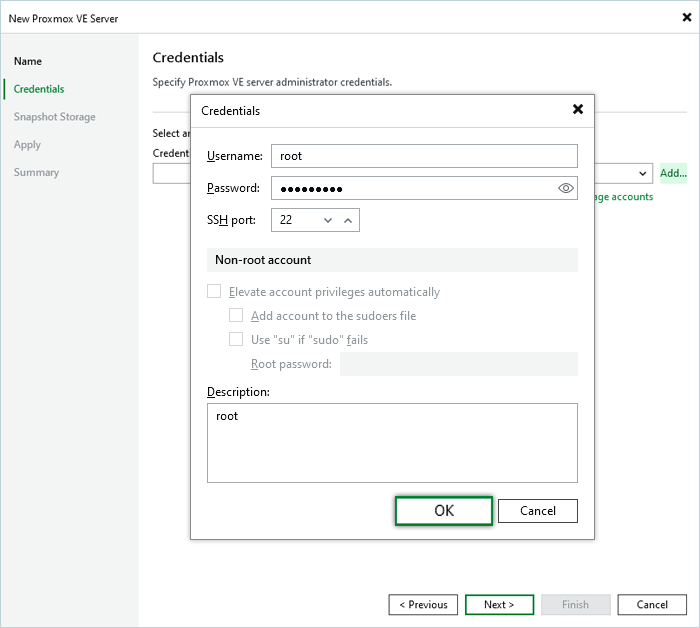
- Under Credentials, click Add to add your ProxMox Credentials.
- Enter your ProxMox Credentials as Username and Password.
- Keep 22 as SSH Port.
- Click OK.
- Click Yes in the SSH Key confirmation pop-up, then click Next.

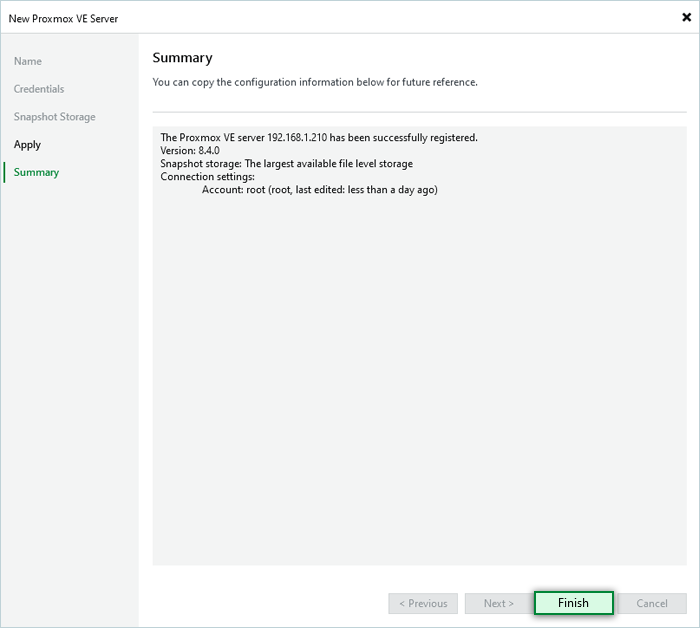
- Select Snapshot Storage and click Apply.
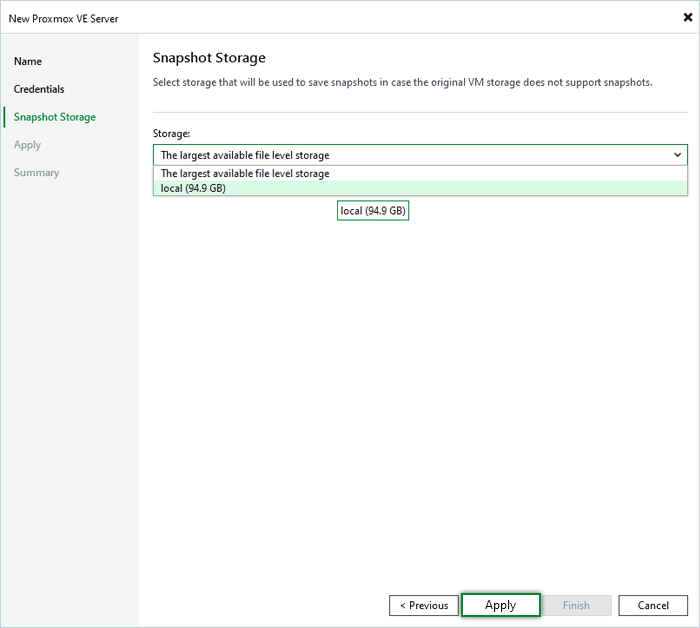
- In the Apply window, click Next.
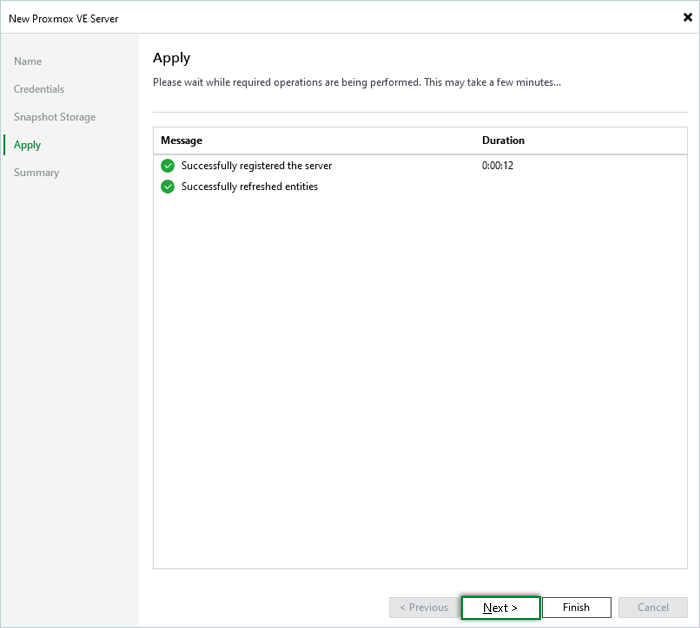
- Click Finish.
Add your IDrive® e2 Bucket as Backup Repository
To configure IDrive® e2 as an object storage repository, follow the steps below:
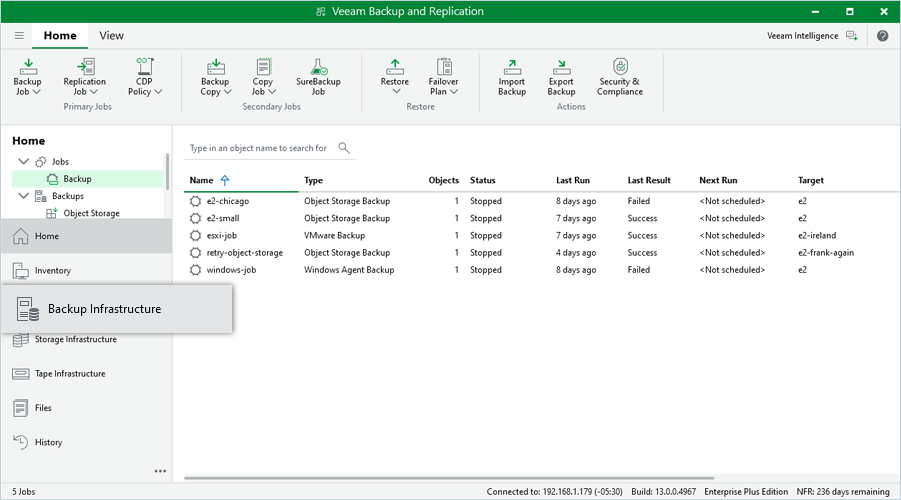
- Launch the Veeam® Backup and Replication application.
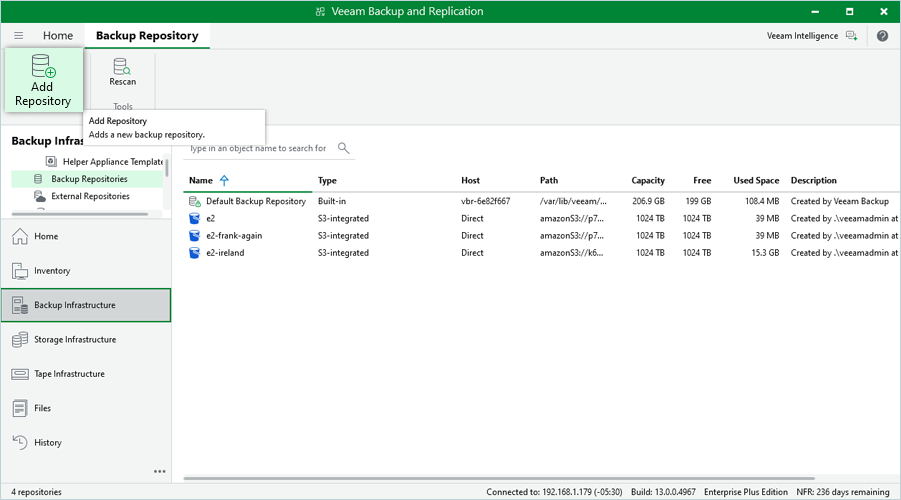
- Navigate to Backup Infrastructure > Backup Repositories.
Click Add Repository.
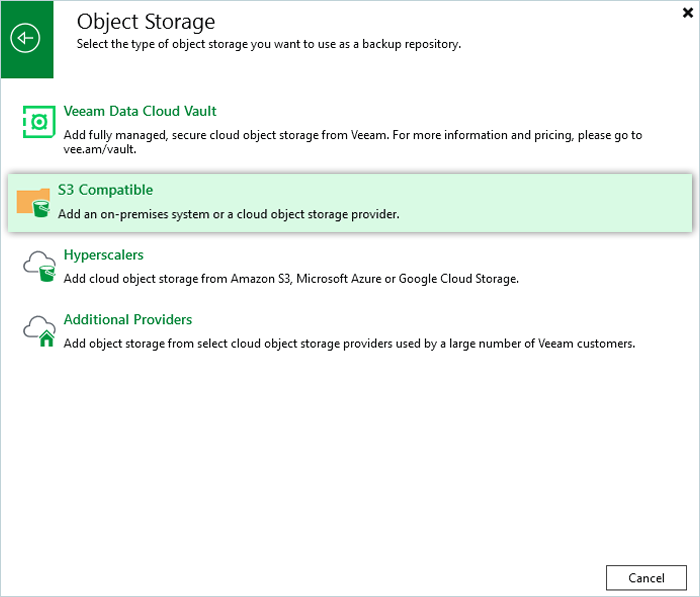
- Select Object Storage.
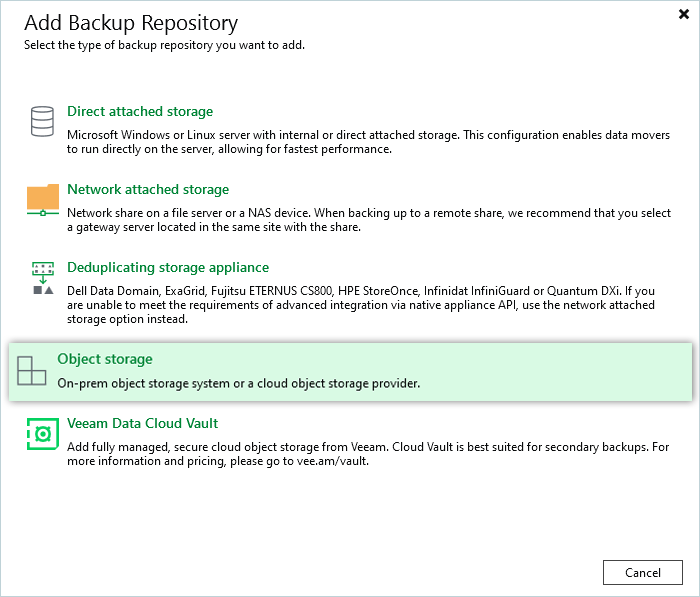
- Select S3 Compatible.
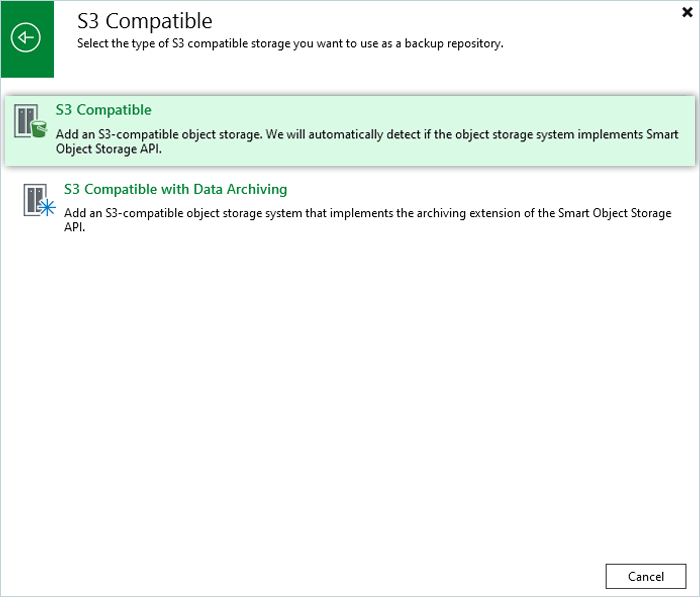
- Select S3 Compatible.
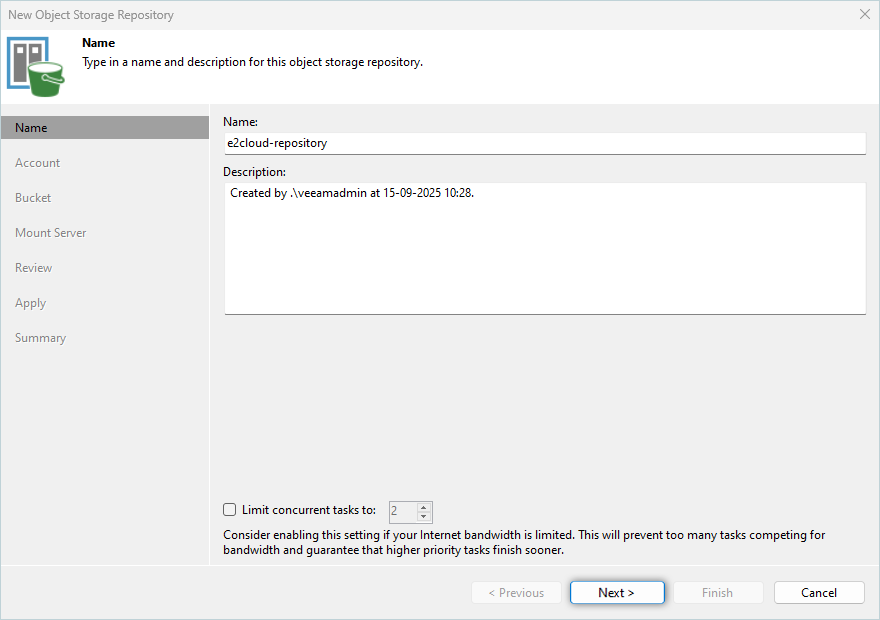
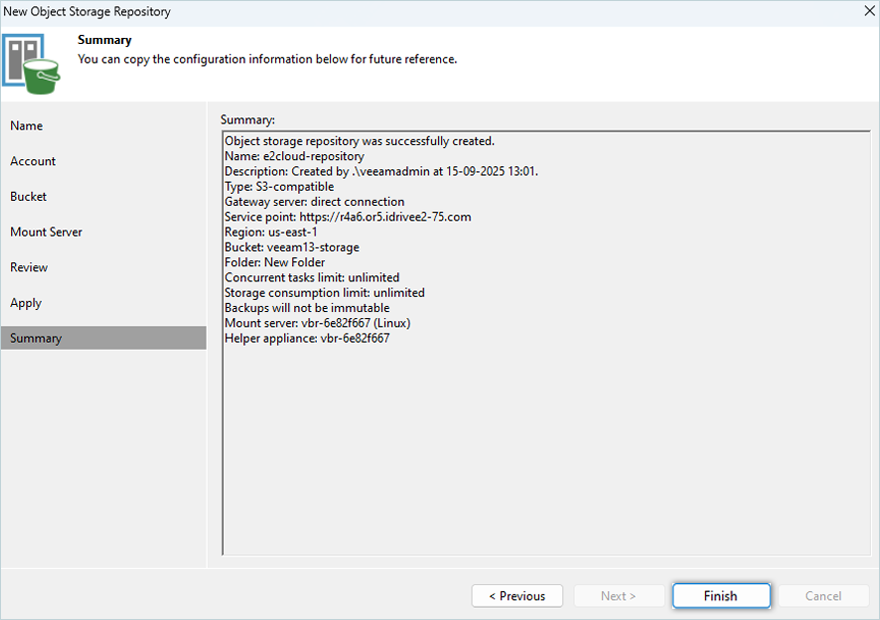
- Enter a Name and Description for the repository. Click Next.
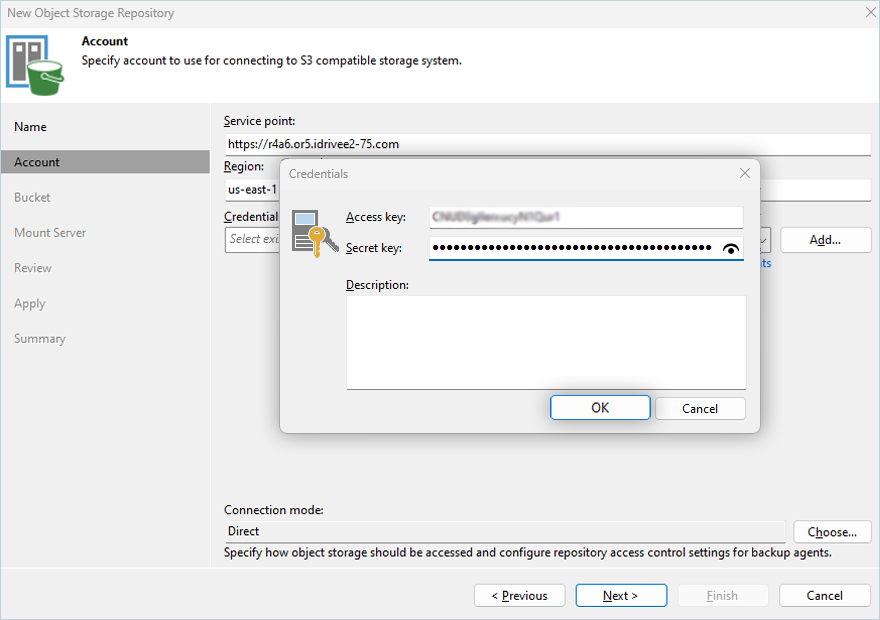
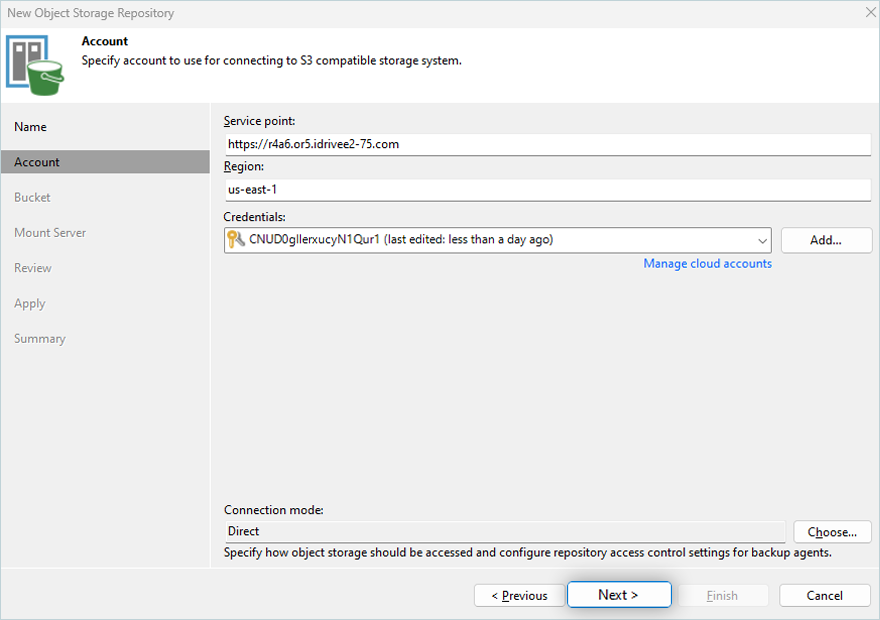
- Input the IDrive® e2 Endpoint URL under Service Point, Region, and click Add.
Learn more about regions and endpoints.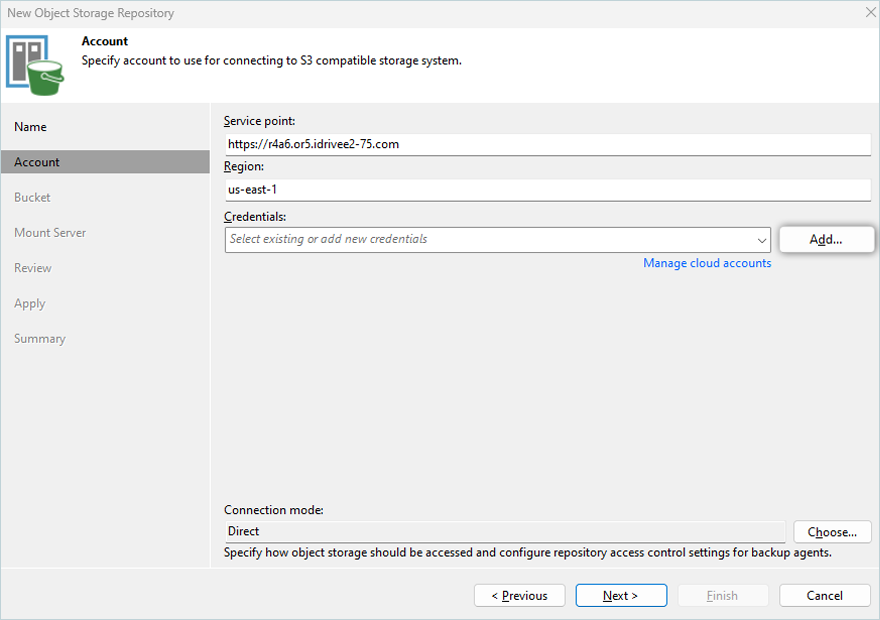
- Enter the IDrive® e2 Access Key and Secret Key, then click OK. Learn more about Access Keys.
- Click Next.
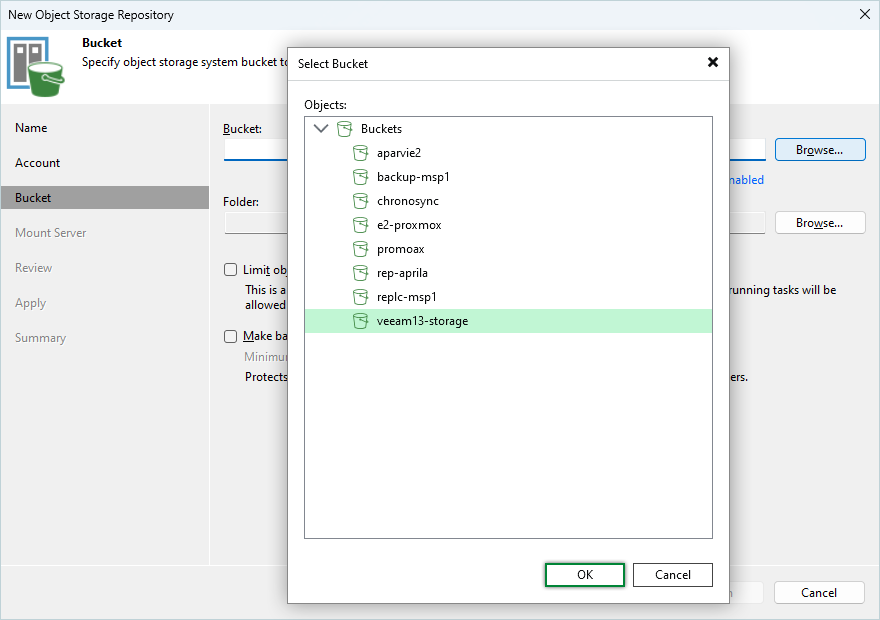
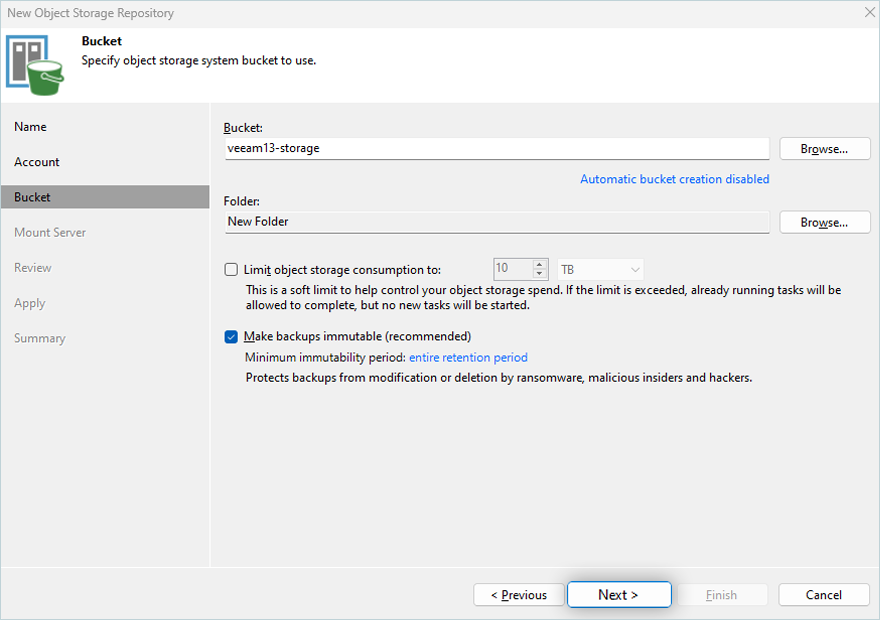
- Click Browse and select the Bucket.
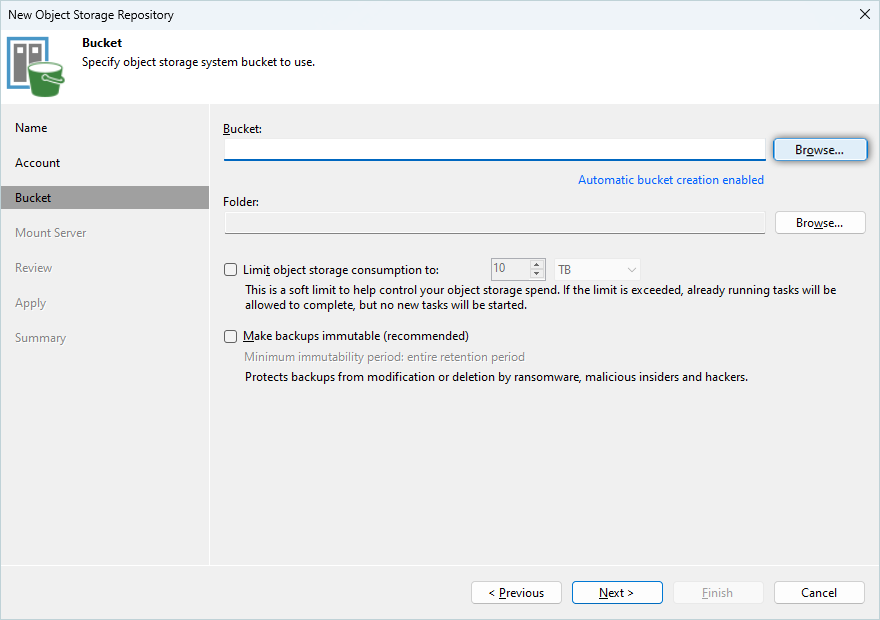
Click OK.
Note: Disable Automatic bucket creation enabled by clicking the link and clearing the Create new buckets automatically (recommended) checkbox.
- Click Browse > New Folder.
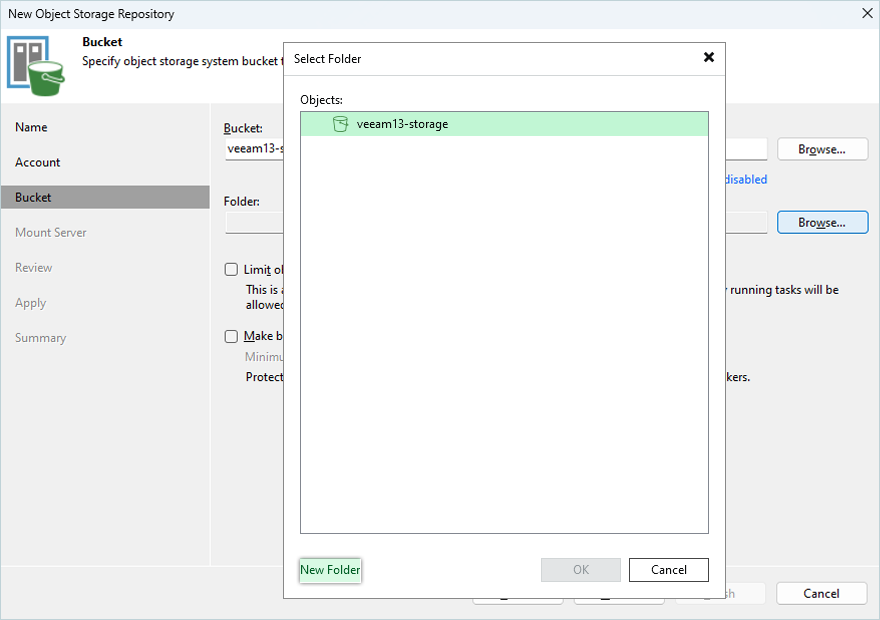
Enter a folder name, press the Enter key to confirm the name, and click OK.

- Select the Make recent backups immutable for x days checkbox to make recent backups immutable.
Note:
- We recommend enabling this feature to protect your data from ransomware.
- Automatic bucket creation should be disabled if you select an existing bucket from your IDrive® e2 account.
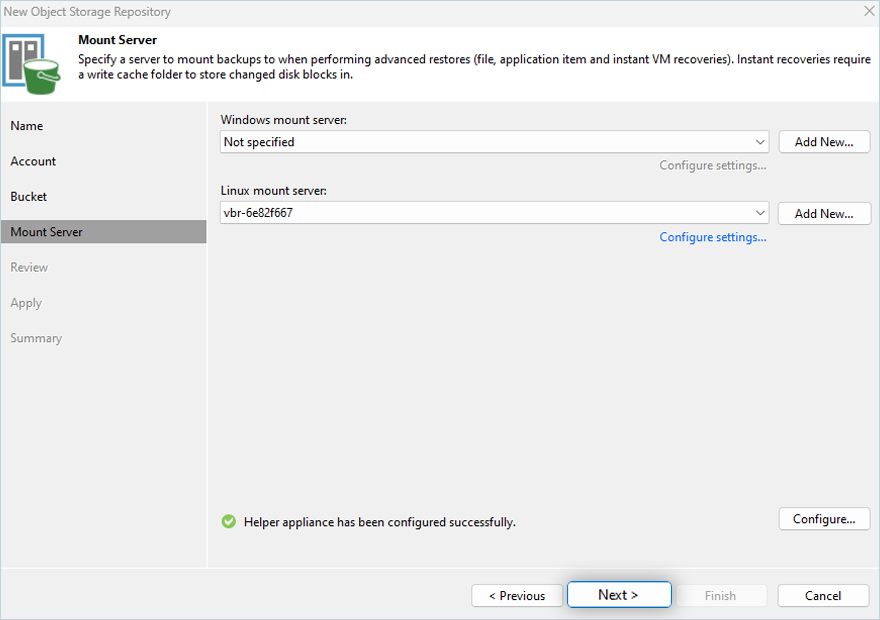
- To mount the server, click Next.
- Review the configuration and click Apply.
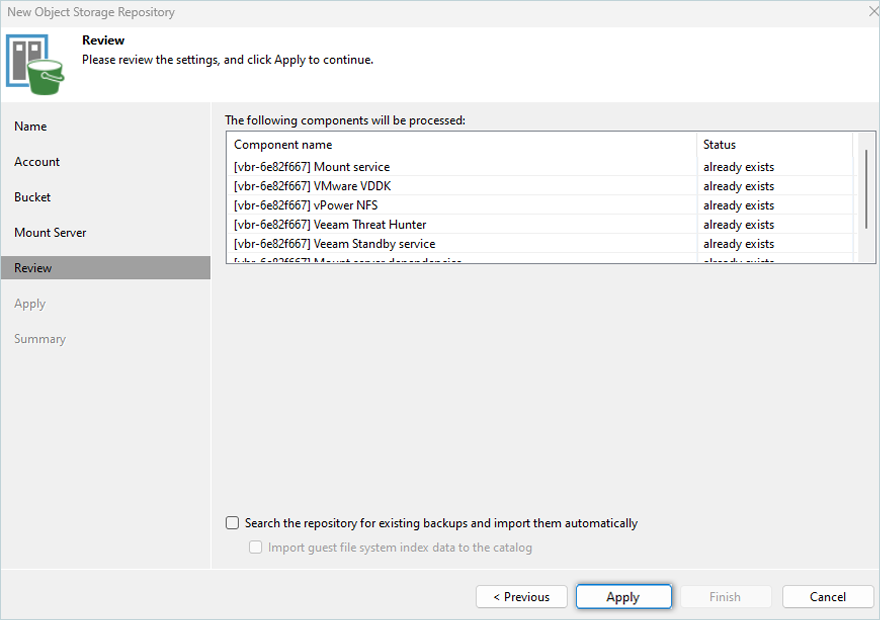
- Click Next.
- In the Summary tab, review the settings, then click Finish.
For detailed step-by-step instructions from Veeam® on how to add a Scale-Out Repository, refer here.
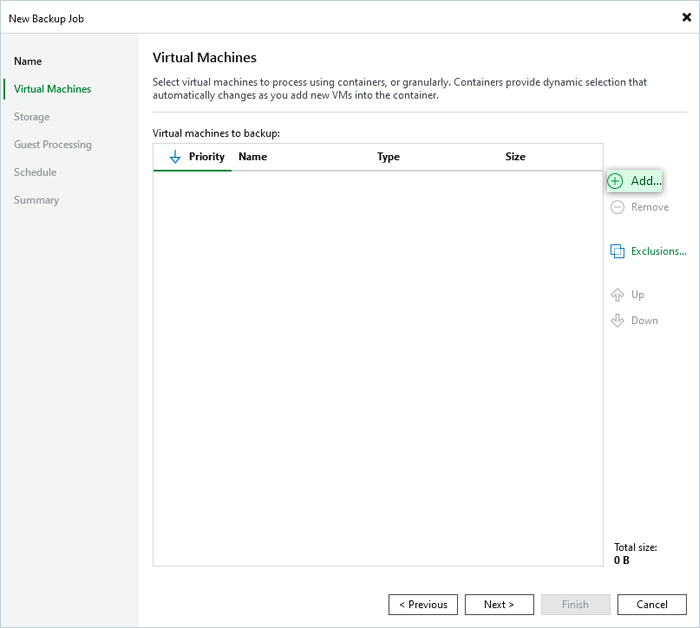
Create a Backup for Proxmox VE
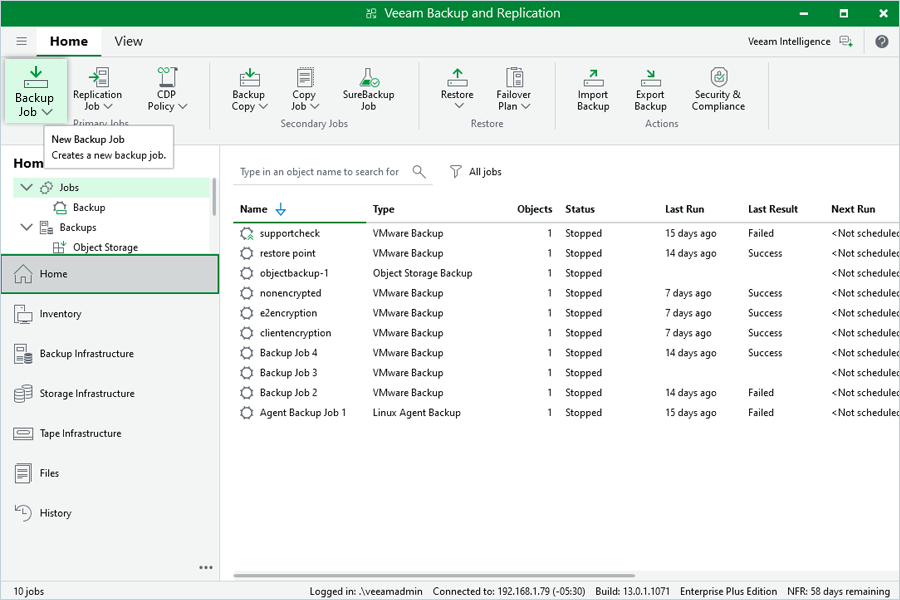
- In the Home window, click on Backup Job.
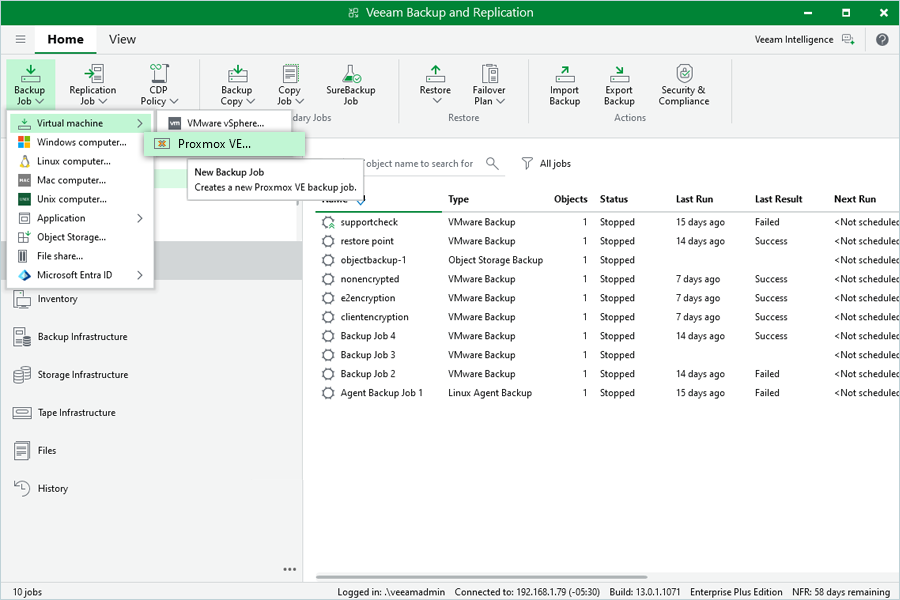
- In the New Backup Job window, click Virtual Machine, then select Proxmox VE.
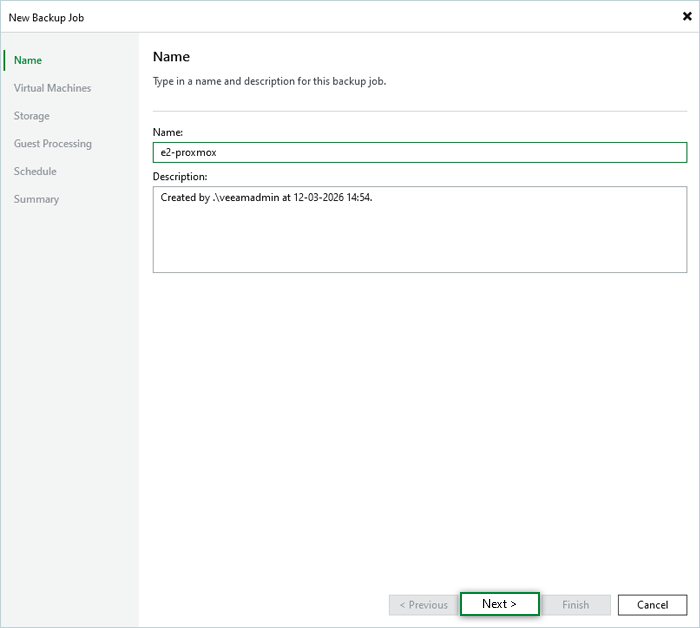
- In the New Backup Job window, enter a name for your Backup Job and click Next.
- Click the Add in Virtual Machines tab to select the Proxmox virtual machine for backup.
- Select the machine from the list, then click OK.
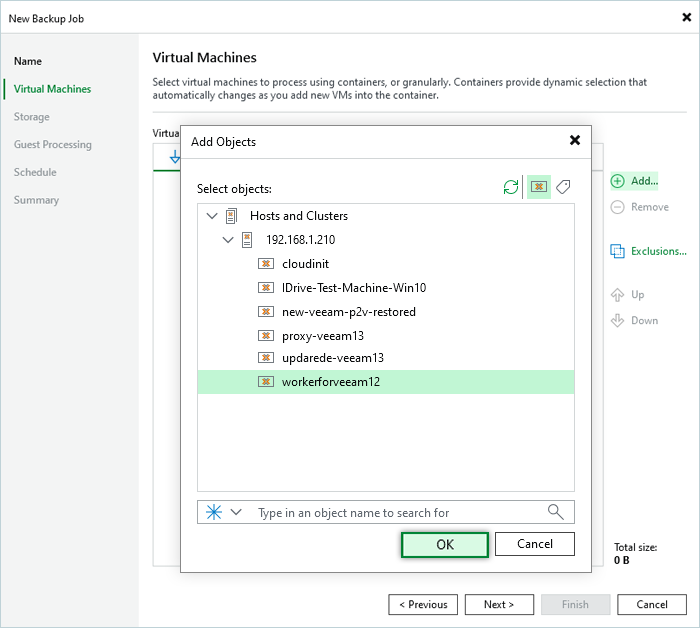
- Click Next to add the VM for backup.
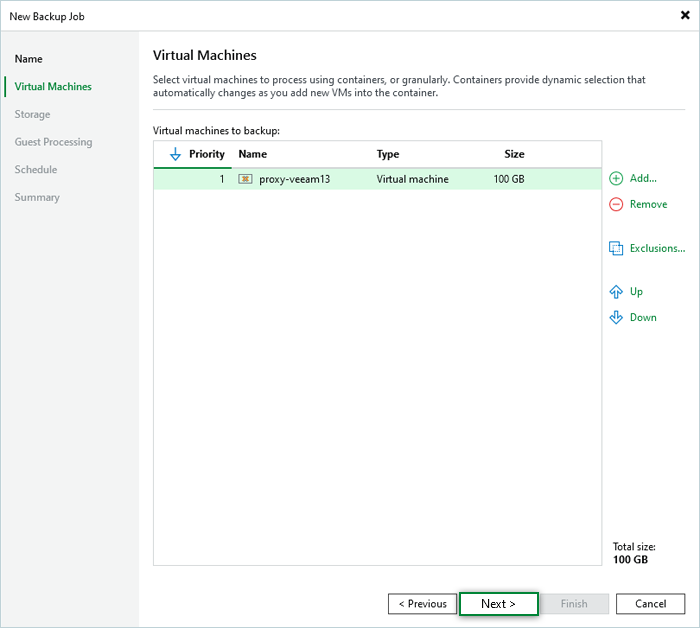
- Select the machine from the list, then click OK.
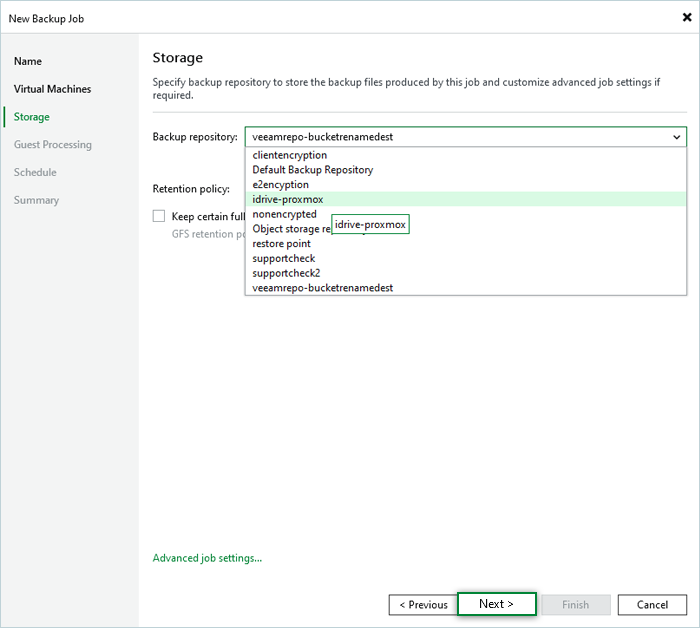
- In the Storage tab, click the Backup Repository list, select the repository added in the previous step, and click Next.
- Continue to the Schedule Page without any modifications in the Guest Processing window.

- Schedule a backup job as required, then click Apply.

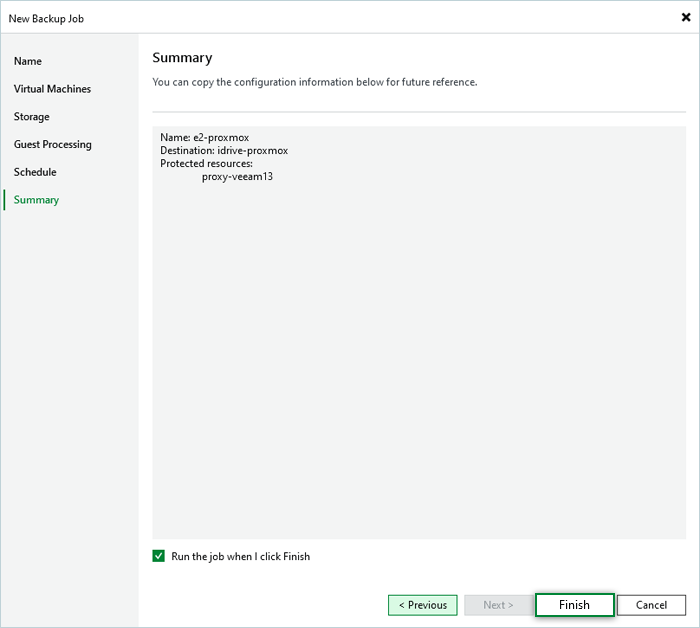
- Optionally, select the Run the job when I click Finish checkbox.
- In the Summary tab, click Finish.
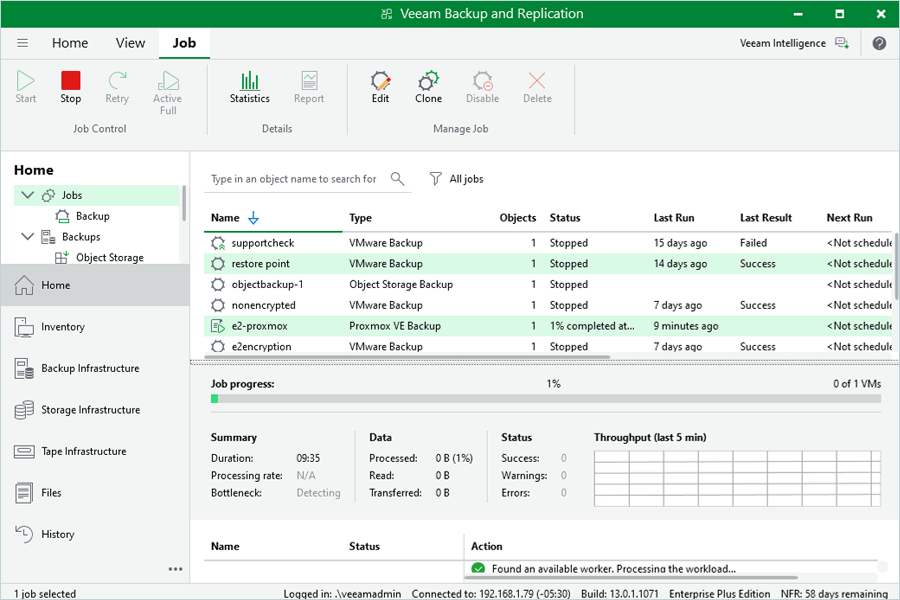
You can now verify your job status and progress on the job details screen.
Note: The data restoration process is managed by your backup software, which helps recover lost or compromised data. Each computing environment is unique, and factors such as data type, software settings, and system performance can impact the restoration process. If you encounter issues or have application-specific questions, please contact the technical support team for your backup software for expert assistance.