Integrate Storware Backup and Recovery with IDrive® e2
Storware Backup and Recovery is an enterprise-grade, agent-less data protection solution that backs up, manages snapshots, and restores data across virtual machines, containers, applications, and storage environments on-premises or in the cloud. It delivers centralized management, broad hypervisor support, and secure backup capabilities, including immutable storage and ransomware protection. Integrating Storware with IDrive® e2 provides a capable, scalable cloud object storage solution that supports secure, efficient, and cost-effective backup storage and recovery workflows.
Prerequisites:
Before you begin, ensure the following:
- An active IDrive® e2 account. Sign up here if you do not have one.
- A bucket in IDrive® e2. Learn how to create a bucket
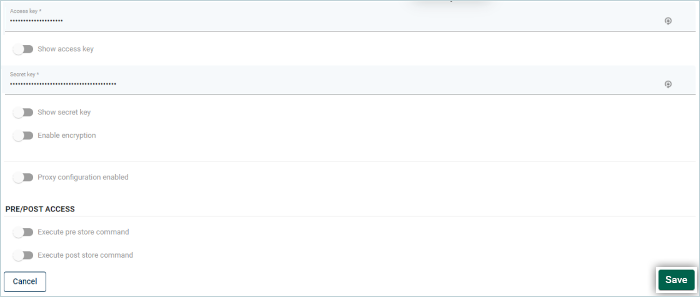
- Valid Access Key ID and Secret Access Key. Learn how to create an access key.
- A valid Storware account and Storware version 5.0 web application.
Configure Storware Backup and Recovery with IDrive® e2
The following steps can help you successfully configure and integrate Storware Backup and Recovery with IDrive® e2.
- Log in to the Storware Backup and Recovery WebUI.
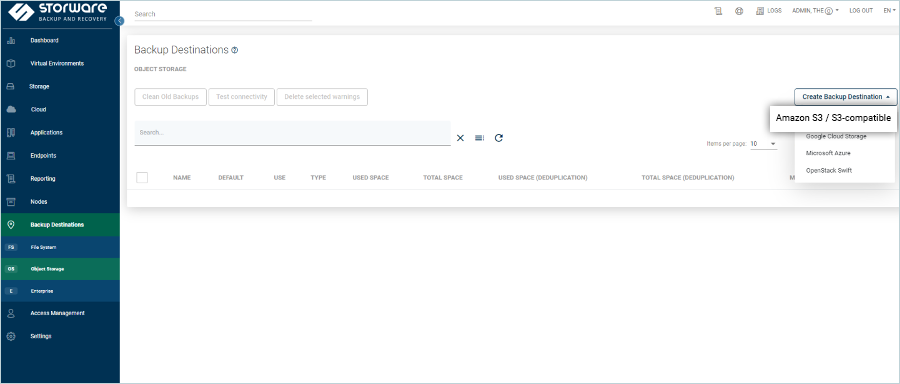
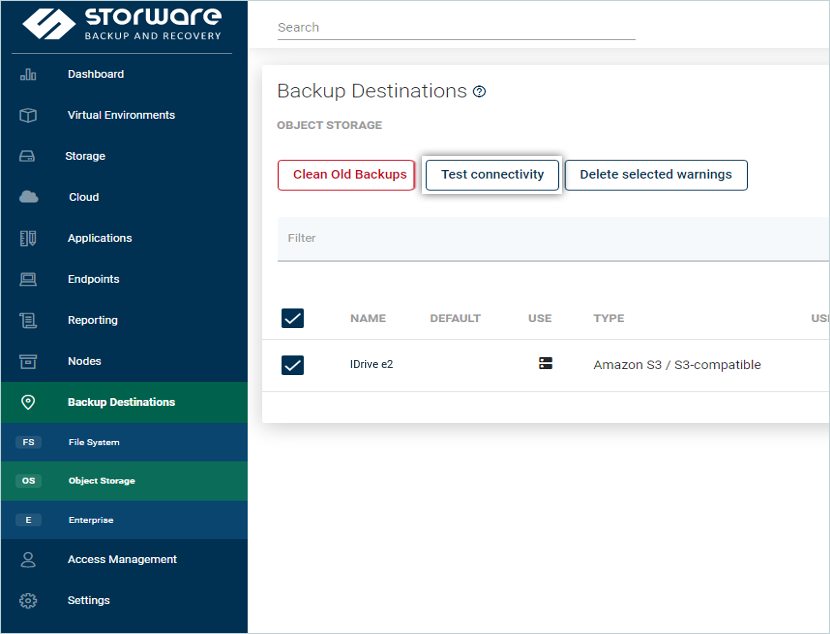
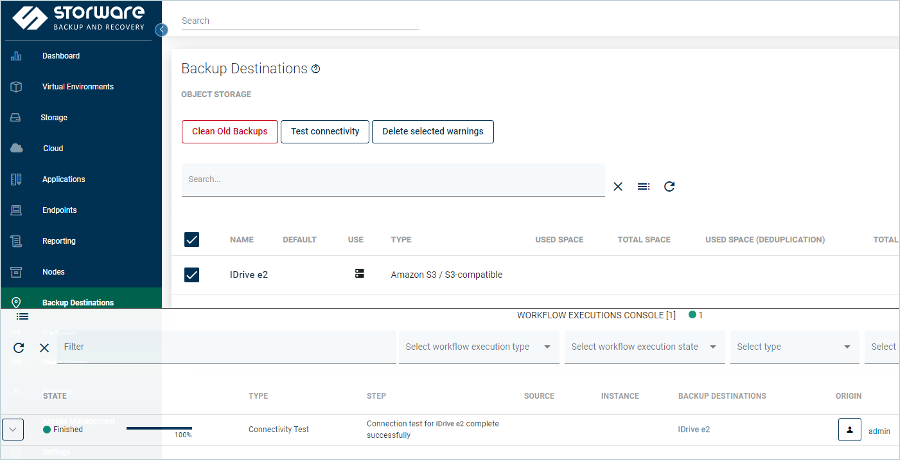
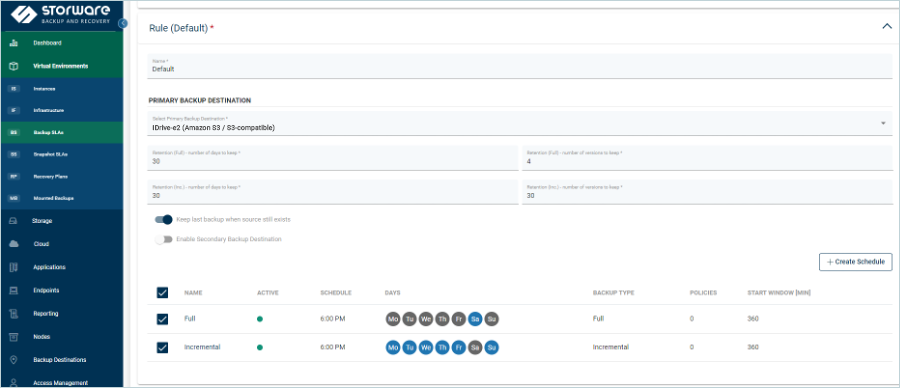
- Navigate to Backup destination > Object Storage. Click the Create Backup Destination dropdown and select Amazon S3 / S3-compatible.
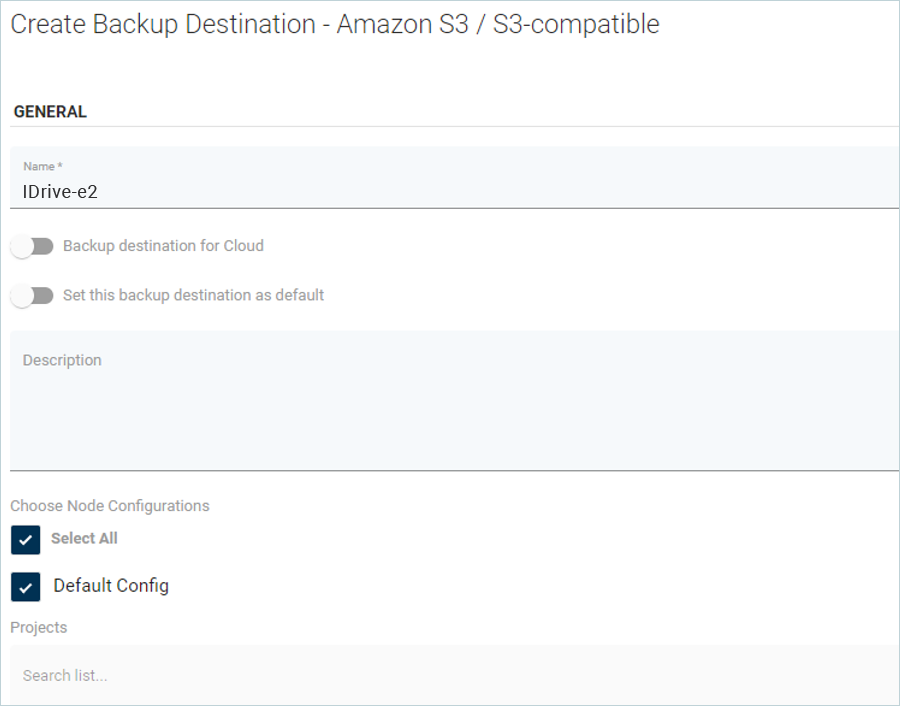
- In the Create Backup Destination - Amazon S3 / S3-compatible window, enter a Name for your backup destination, and select the node configurations checkboxes as needed.
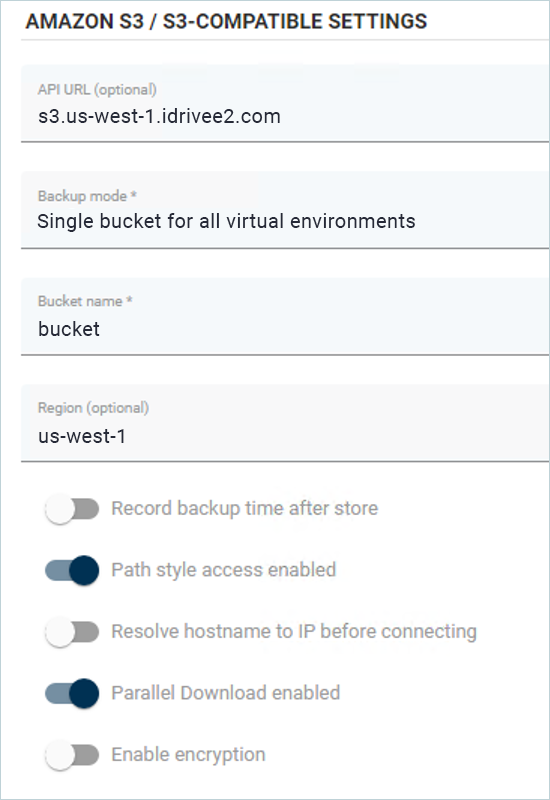
- In AMAZON S3 / S3-COMPATIBLE SETTINGS, provide the information about your bucket.
- API URL (optional): Enter IDrive® e2 region endpoint. Please refer to service URLs for various IDrive® e2 regions.
- Backup mode: Single bucket for all virtual environments.
- Bucket name: Enter your IDrive® e2 bucket name.
- Region (optional): Select the region under which the bucket is created.
Make sure the Path style access enabled and Parallel Download enabled toggle buttons are enabled.
Note: The data restoration process is managed by your backup software, which helps recover lost or compromised data. Each computing environment is unique, and factors such as data type, software settings, and system performance can impact the restoration process. If you encounter issues or have application-specific questions, please contact the technical support team for your backup software for expert assistance.