Integrate Longhorn Backup with IDrive® e2
Longhorn Backup is a cloud-native backup solution built into Longhorn, the distributed block storage system for Kubernetes. It enables users to back up and restore persistent volumes to external object storage for disaster recovery and data protection. Longhorn supports automated backups, volume snapshots, and cross-cluster recovery for Kubernetes workloads. When integrated with IDrive® e2 S3-compatible object storage, it delivers secure, scalable, and cost-effective backup storage with high durability—ensuring reliable data protection and simplified disaster recovery for Kubernetes environments.
Prerequisites:
Before you begin, ensure the following:
- An active IDrive® e2 account. Sign up here if you do not have one.
- A bucket in IDrive® e2. See how to create a bucket
- Valid Access Key ID and Secret Access Key. Learn how to create an access key.
- Longhorn is installed and running the latest version with backup support configured.
Configuring Longhorn Backup with IDrive® e2
- Configure your IDrive® e2 credentials by running the following command:
kubectl -n longhorn-system create secret generic backup-s3-secret \ --from-literal=AWS_ACCESS_KEY_ID=<iDrive-e2-Access-Key> \ --from-literal=AWS_SECRET_ACCESS_KEY=<iDrive-e2-Secret-Key> \ --from-literal=AWS_ENDPOINTS=https://<iDrive-end-point> \ --from-literal=AWS_REGION=<region> \ --from-literal=AWS_S3_FORCE_PATH_STYLE=trueNote: Replace the placeholders in the command with your valid IDrive® e2 credentials.
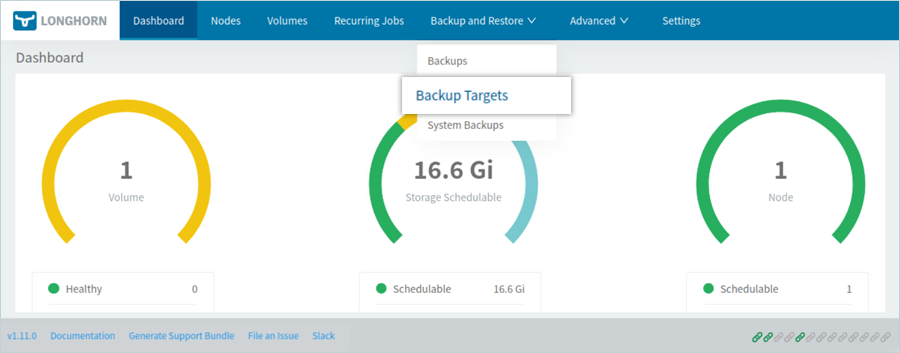
- Open the Longhorn console using the appropriate console URL.
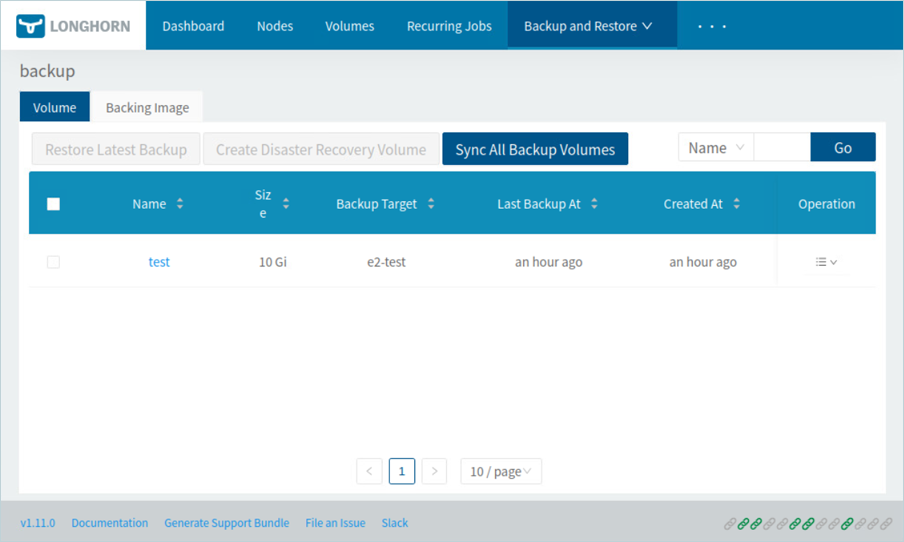
- From the top menu, select Backup & Restore.
- Click Backup Targets
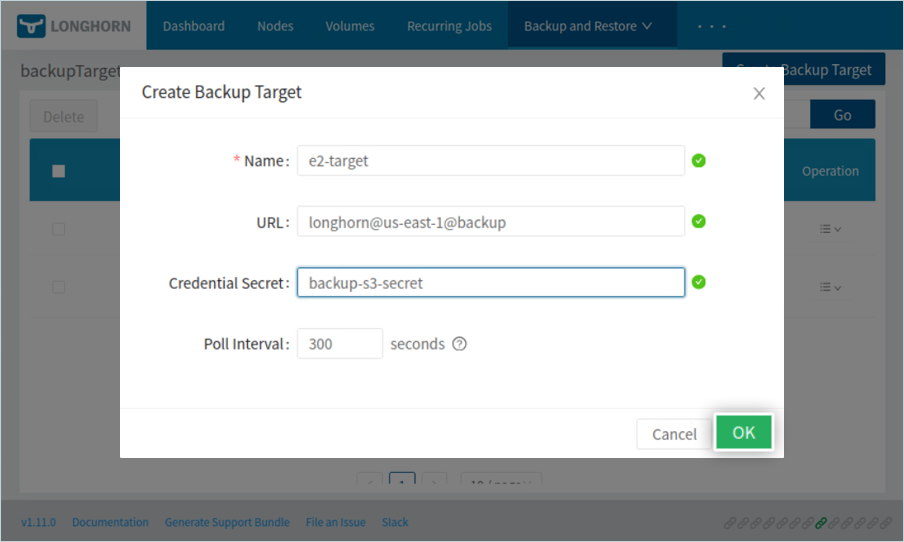
- Select Create Backup Target.
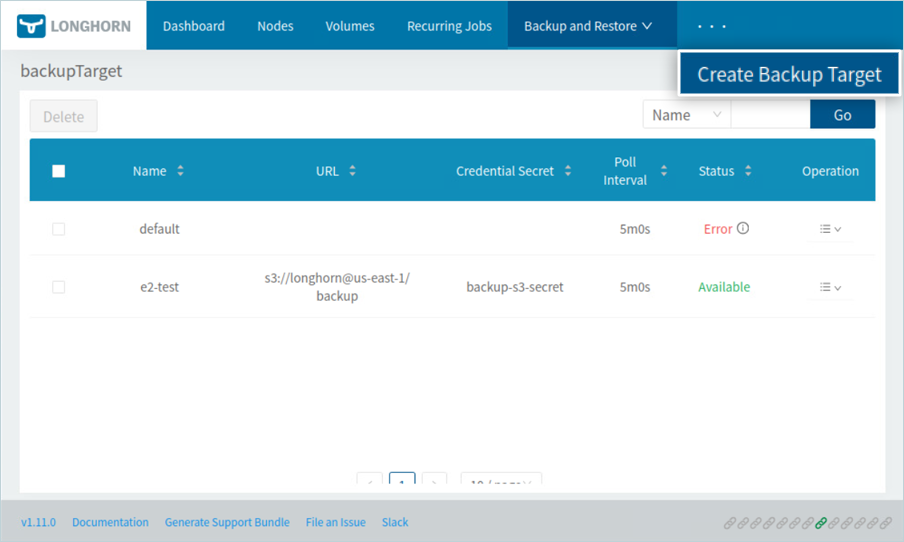
- In the Create Backup Target window:
- Enter a name for the backup target.
- Specify the bucket URL in the format: s3://bucketname@region/path.
- Provide the name of the credentials created in Step 1.
- Click OK.
- Enter a name for the backup target.
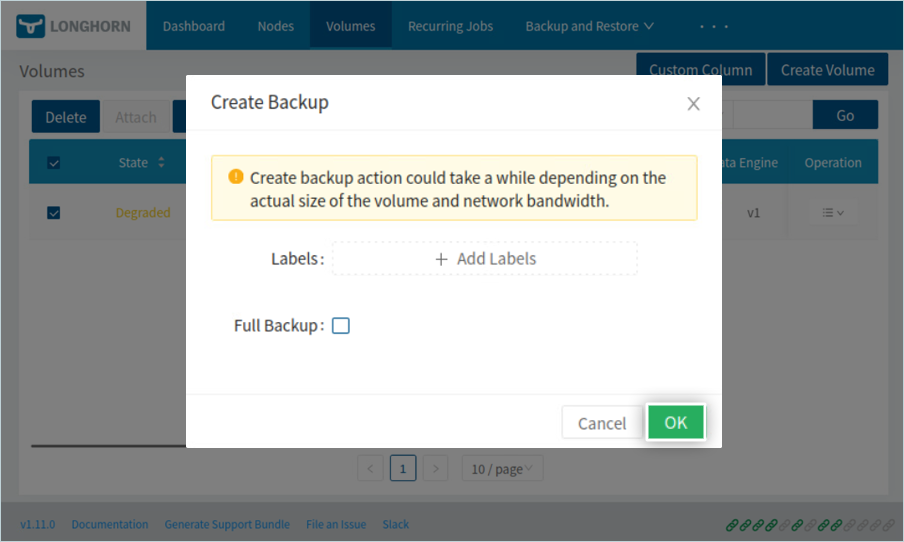
- From the top menu, select Volumes.
- Choose the required volume and click Create Backup in the Volume tab.
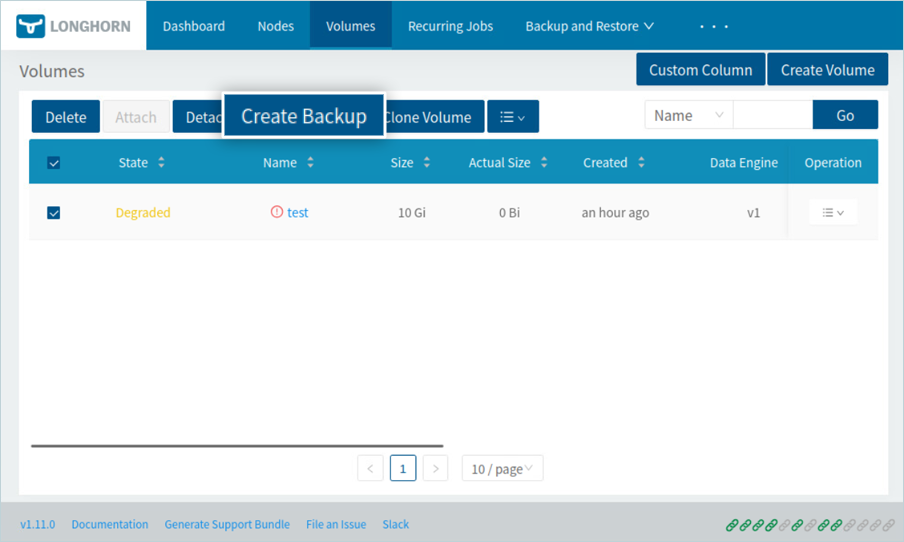
- After the backup is initiated, navigate to Backup & Restore to monitor and review the running backups.
Note: Data restoration is handled by your specific backup solution provider and is affected by multiple variables that are unique to your environment. For application-related enquiries/support, it is strongly recommended that you seek guidance from the technical team of your backup solution provider