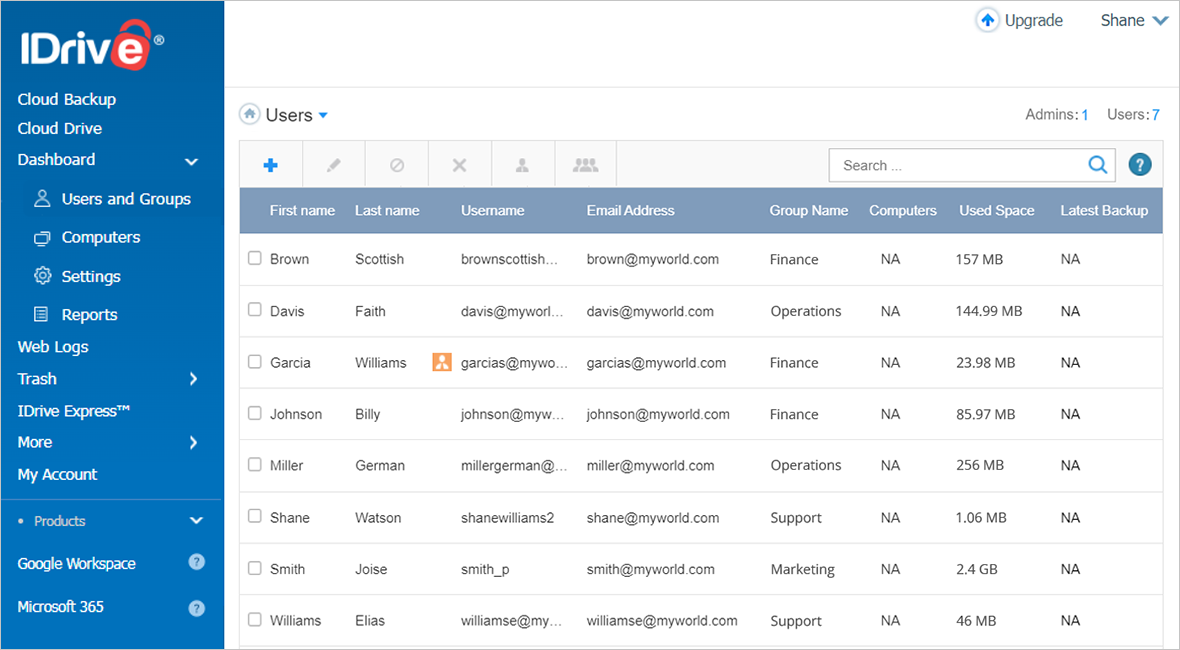
1. Right-click the IDrive tray icon and enable Web Management (by default, this option is enabled).
2. Login to your IDrive account via any web browser.
3. Click the Manage Backup Set icon.

Follow the steps given below to add content (files/folders) to your existing Backup Set:
1. Select the files/folders to be backed up using the selection items (check boxes) provided. The selected files/folders are displayed in the Contents of my Backup Set section.
2. Click on Update My Backup Set. Your Backup Set gets updated.

Follow the steps given below to delete contents from your Backup Set:
1. In the Contents of my Backup Set section, uncheck the files/folders that you want to remove from your
Backup Set.
2. Click Update Backup Set to update the Backup Set.
Follow the steps given below to schedule the backup of your files/folders for a particular date, time, and frequency:
1. Click the Schedule Manager icon. The scheduler web page is displayed.
2. Select the backup date, time, frequency, and notification type among other options.
3. Click the Update Scheduler. Your scheduled backup details are displayed.

You can view from among the following logs:
Session Log
This option lists the log files created for each of your backup, restore or delete sessions.
Follow the steps given below to view the Session log:
1. Click the View Session Log icon. The list of session logs is displayed.
2. Click the specific session log that you want to view. A ‘File download’ dialog box displays.
3. Click Open to view the log, Save to save the log file on a local directory on your computer or Cancel to cancel it.

Complete Log
This option allows you to view the complete log history of your backup, restore and delete functions performed online or during the use of the IDrive desktop application.
Follow the steps given below to view complete log:
1. Click the View Complete Log icon. A 'File download' dialog box appears.
2. Click Open to view the log, Save to save the log on a local directory on your computer or Cancel to cancel it.
|